How to Make a Whiteboard Video - A Guide for Engaging Content!
shreshtra - December 5, 2024 - Leave your thoughts.
Picture this - you’re gearing up to present your latest idea, and you’re just hoping everyone stays awake and doesn’t doze off.

But what if, instead of another forgettable slideshow or static visual, you had a whiteboard video that made people sit up, pay attention, and actually get excited about what you’re sharing?
It’s like upgrading from lukewarm coffee to double-shot espresso - suddenly, everyone’s wide awake and following along!
Whiteboard videos are the secret sauce for turning complicated ideas into visual stories that stick.
Imagine transforming dry facts into engaging illustrations or complex processes into straightforward animations that everyone can grasp.
With the magic of a whiteboard video, even the most intricate topics become exciting narratives people engage in.
Whether you’re a content creator building your next viral video, a product marketer explaining your latest offering, or a trainer looking to make learning more fun, a whiteboard video can make your message both clear and captivating.
And here’s the best part - creating a whiteboard video doesn’t have to be complicated or expensive.
What if I told you that you could create professional-looking videos without needing any prior experience or breaking the bank?
That’s possible with Animaker’s WhiteBoard Video Maker, an all-in-one animation video creation tool that makes video production a breeze.
Its drag-and-drop interface makes it easy for anyone to create professional-looking videos.
The platform comes loaded with everything you need, from a vast library of pre-made assets, animations, and soundtracks to features for adding AI voiceovers and creating custom characters.
Whether you're an educator wanting to make learning more engaging, a business owner explaining a product or service, or a content creator looking to add some flair to your storytelling, Animaker has you covered.
Let’s dive into how to make a whiteboard video with Animaker that’ll leave a lasting impression.
How to make a whiteboard video with Animaker?
Let’s get started by logging in or signing up to Animaker.
Here, in the dashboard, click on “Create”
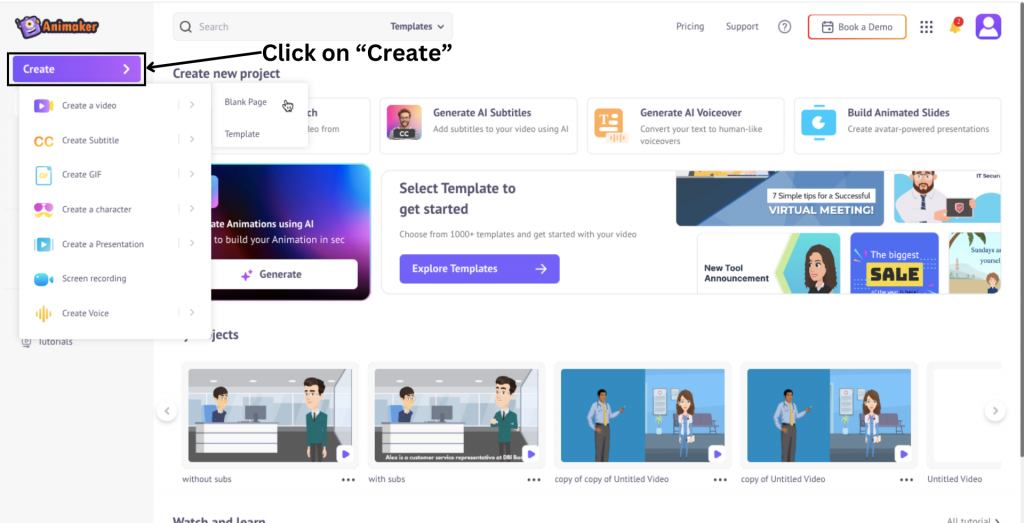
Then click on “Create a video” > “Blank Page”.
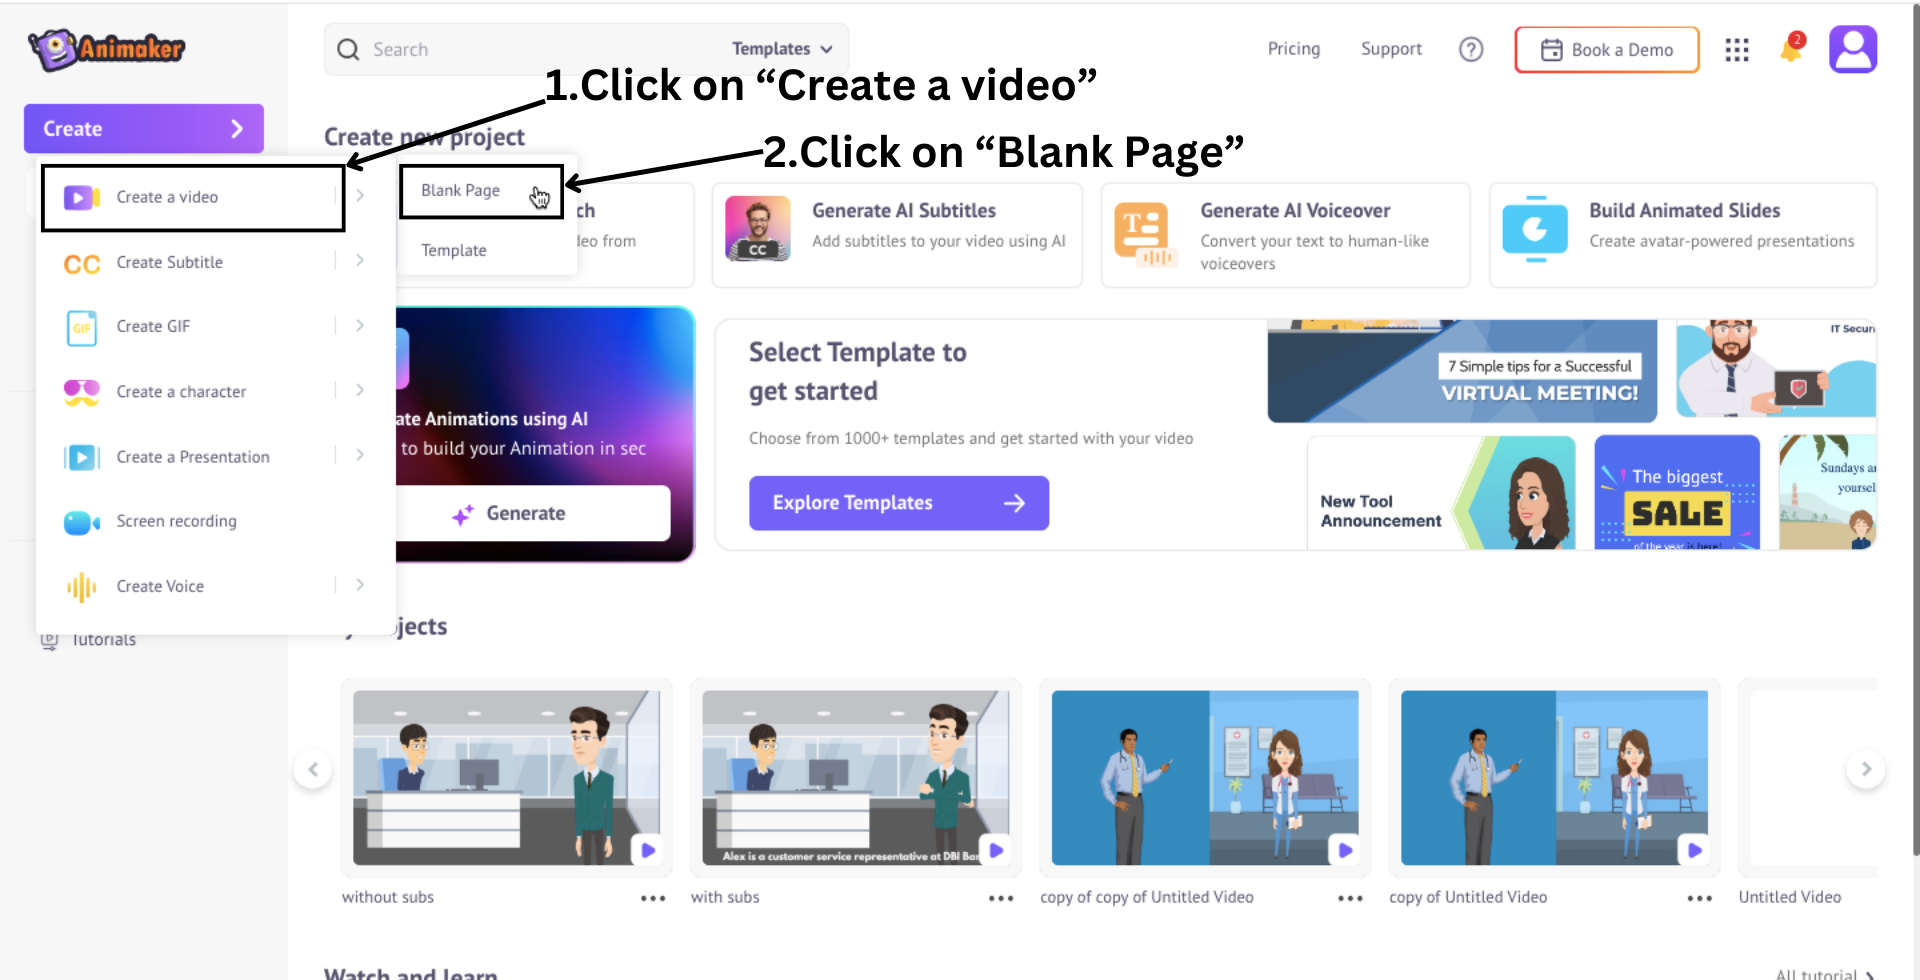
This will open a pop-up box with the two types of animation styles and the different aspect ratio sizes.
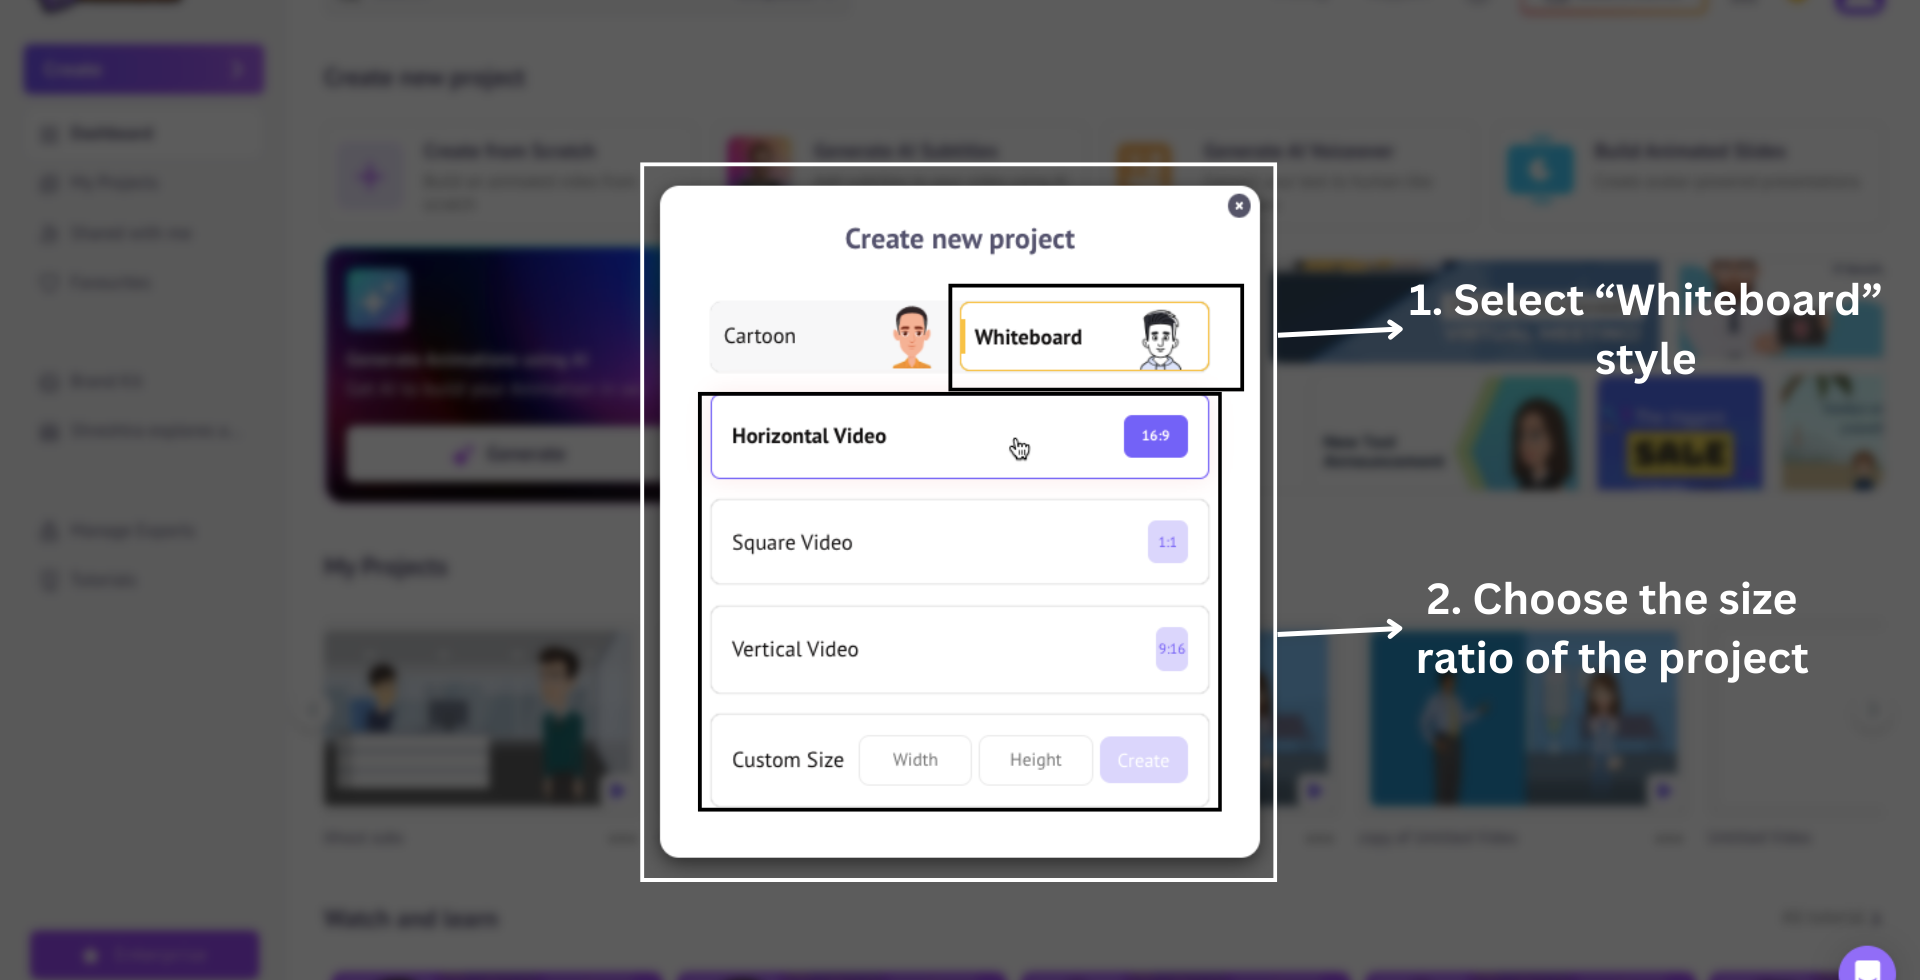
Click the whiteboard style and select the aspect ratio, which will open a blank project. Let me give you a quick tour of the project window.
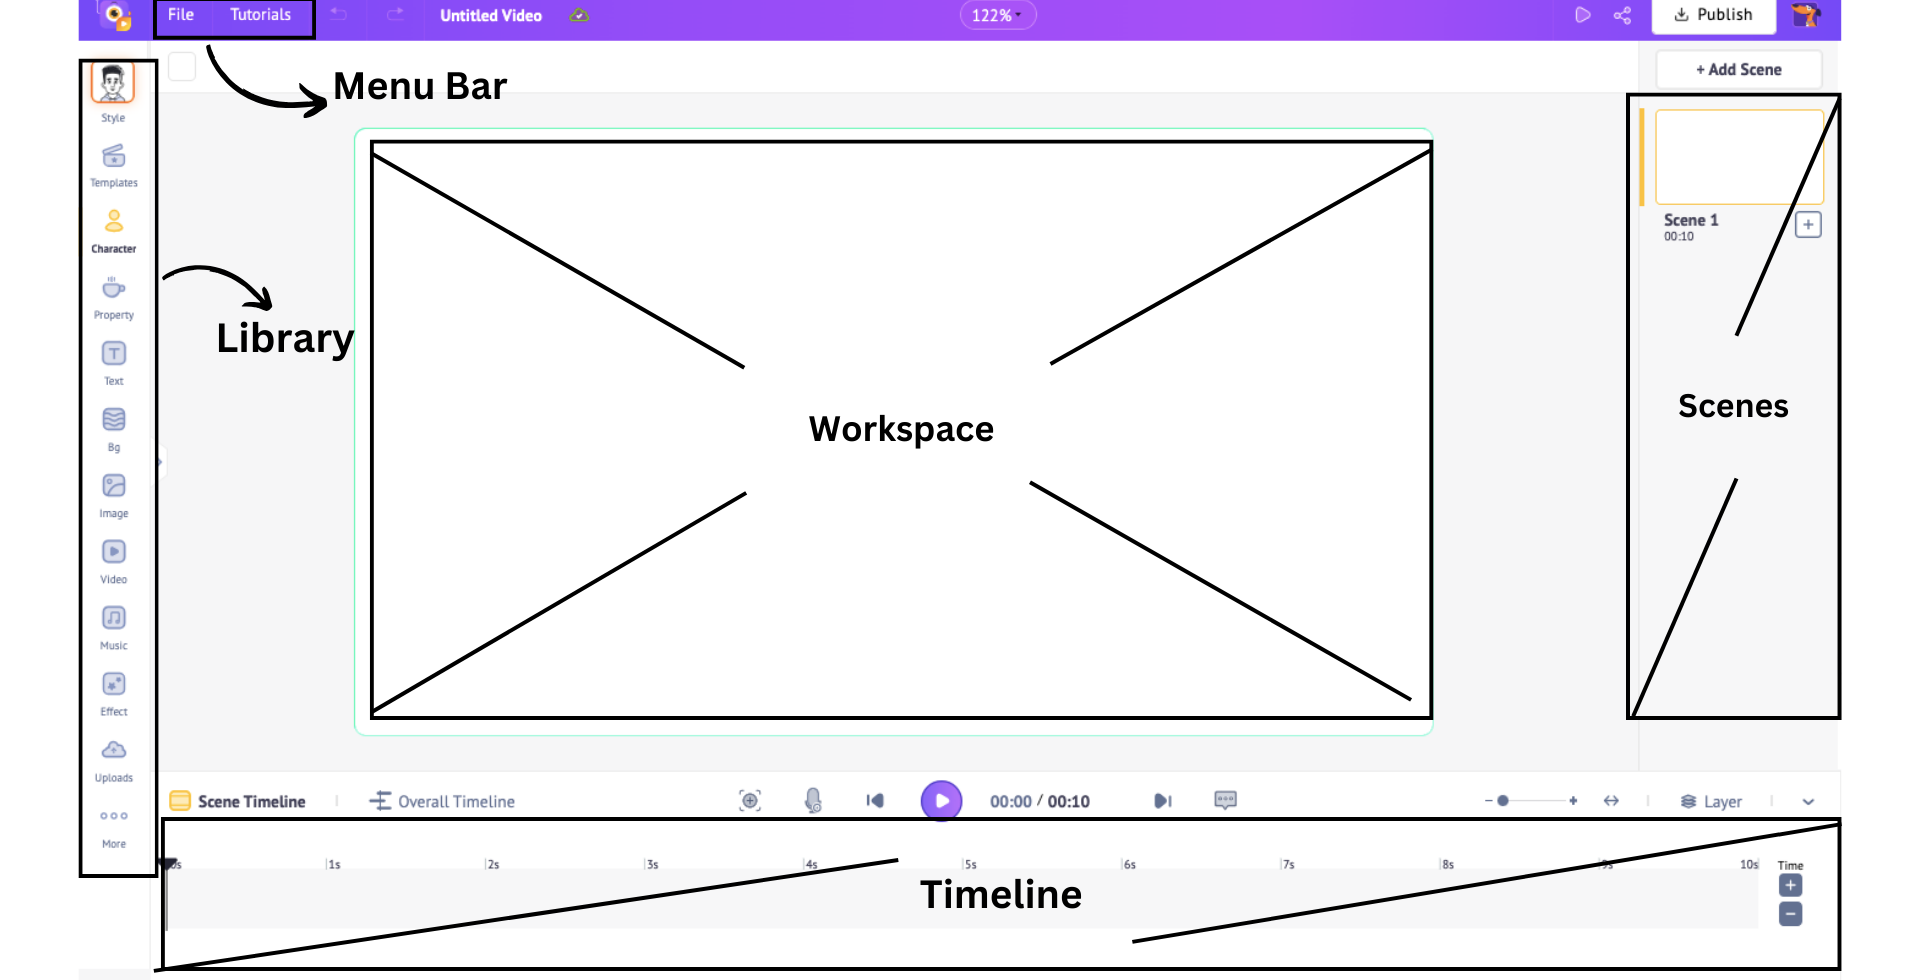
The workspace sits at the center of your screen for creating and editing your video with ease. To the left, you’ll find the extensive library with millions of assets, everything you need to bring your video to life. On the right, you’ll see the scenes section, where you can smoothly organize, arrange, and manage your scenes for a seamless flow.
Just above the workspace, there’s a menu bar that offers additional tools and options to refine your video. At the bottom, the timeline allows you to make precise adjustments to your video, ensuring that every asset is perfectly timed.
Now that you know the interface better, let’s see how to make a whiteboard video with Animaker.
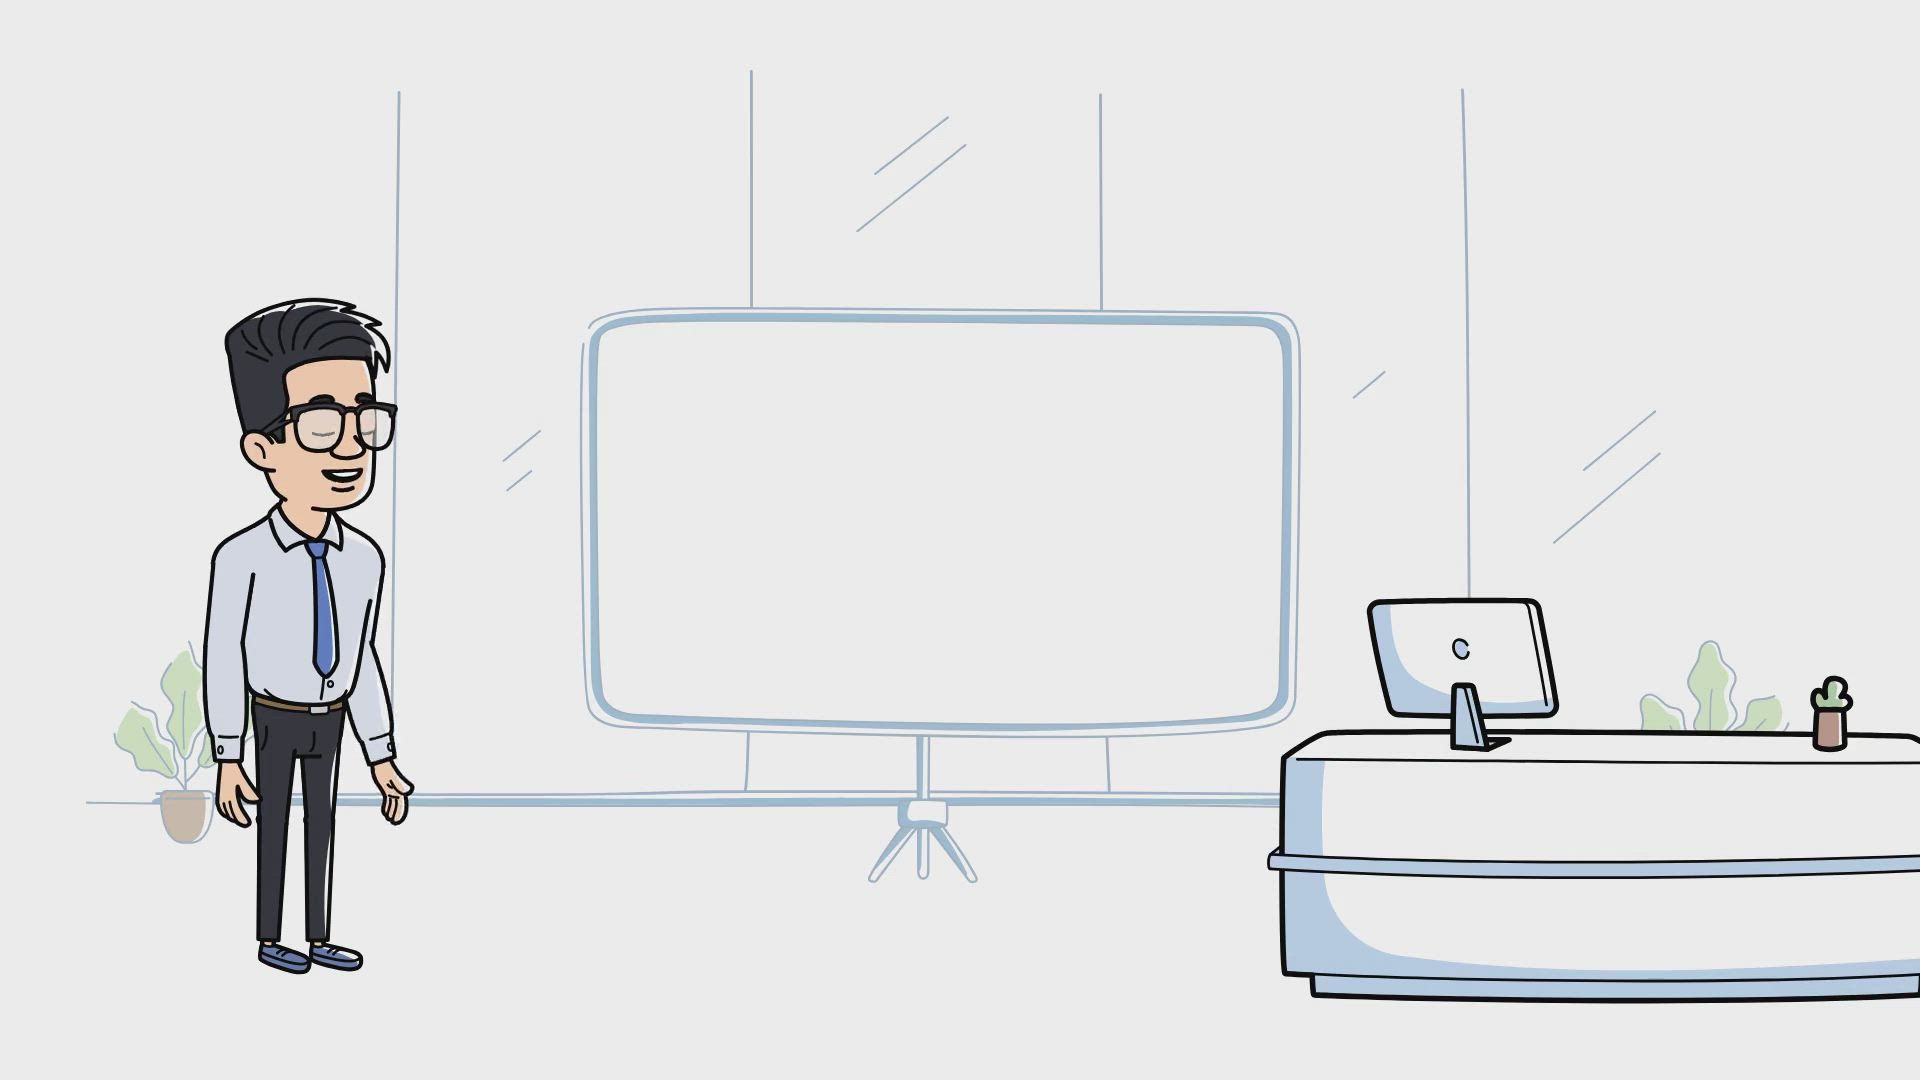
I’m going to make a whiteboard video on Essential Sales Techniques and Negotiation Tips to Win Every Deal.
We can use Animaker's library of 150M+ assets to enhance our whiteboard video by adding the following elements -
Without any further ado, let's begin with the background.
Background
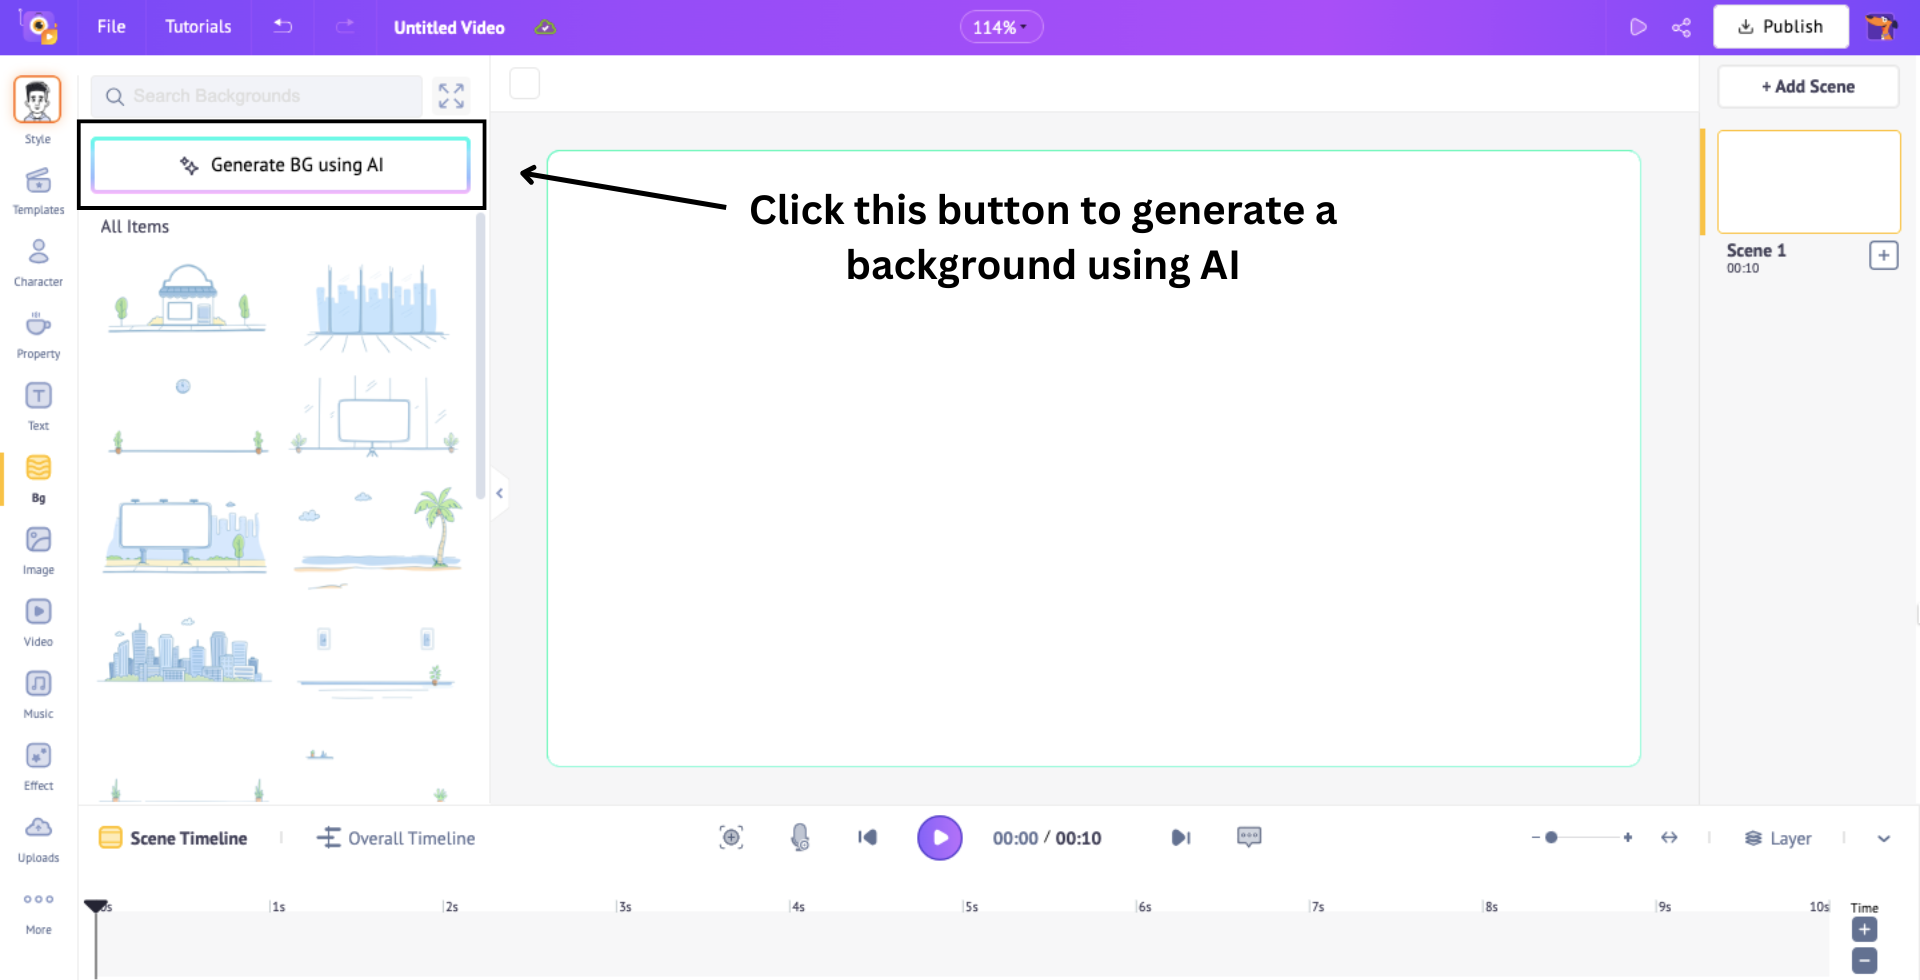
To begin, let's add a background to the scene. Click on the "Bg" option in the library.

Here, you will find 20 different whiteboard backgrounds from corporate settings to casual indoors.
You can either choose one from these options or generate a background using AI.
I, however, am going to select one from the library and add it to the scene.
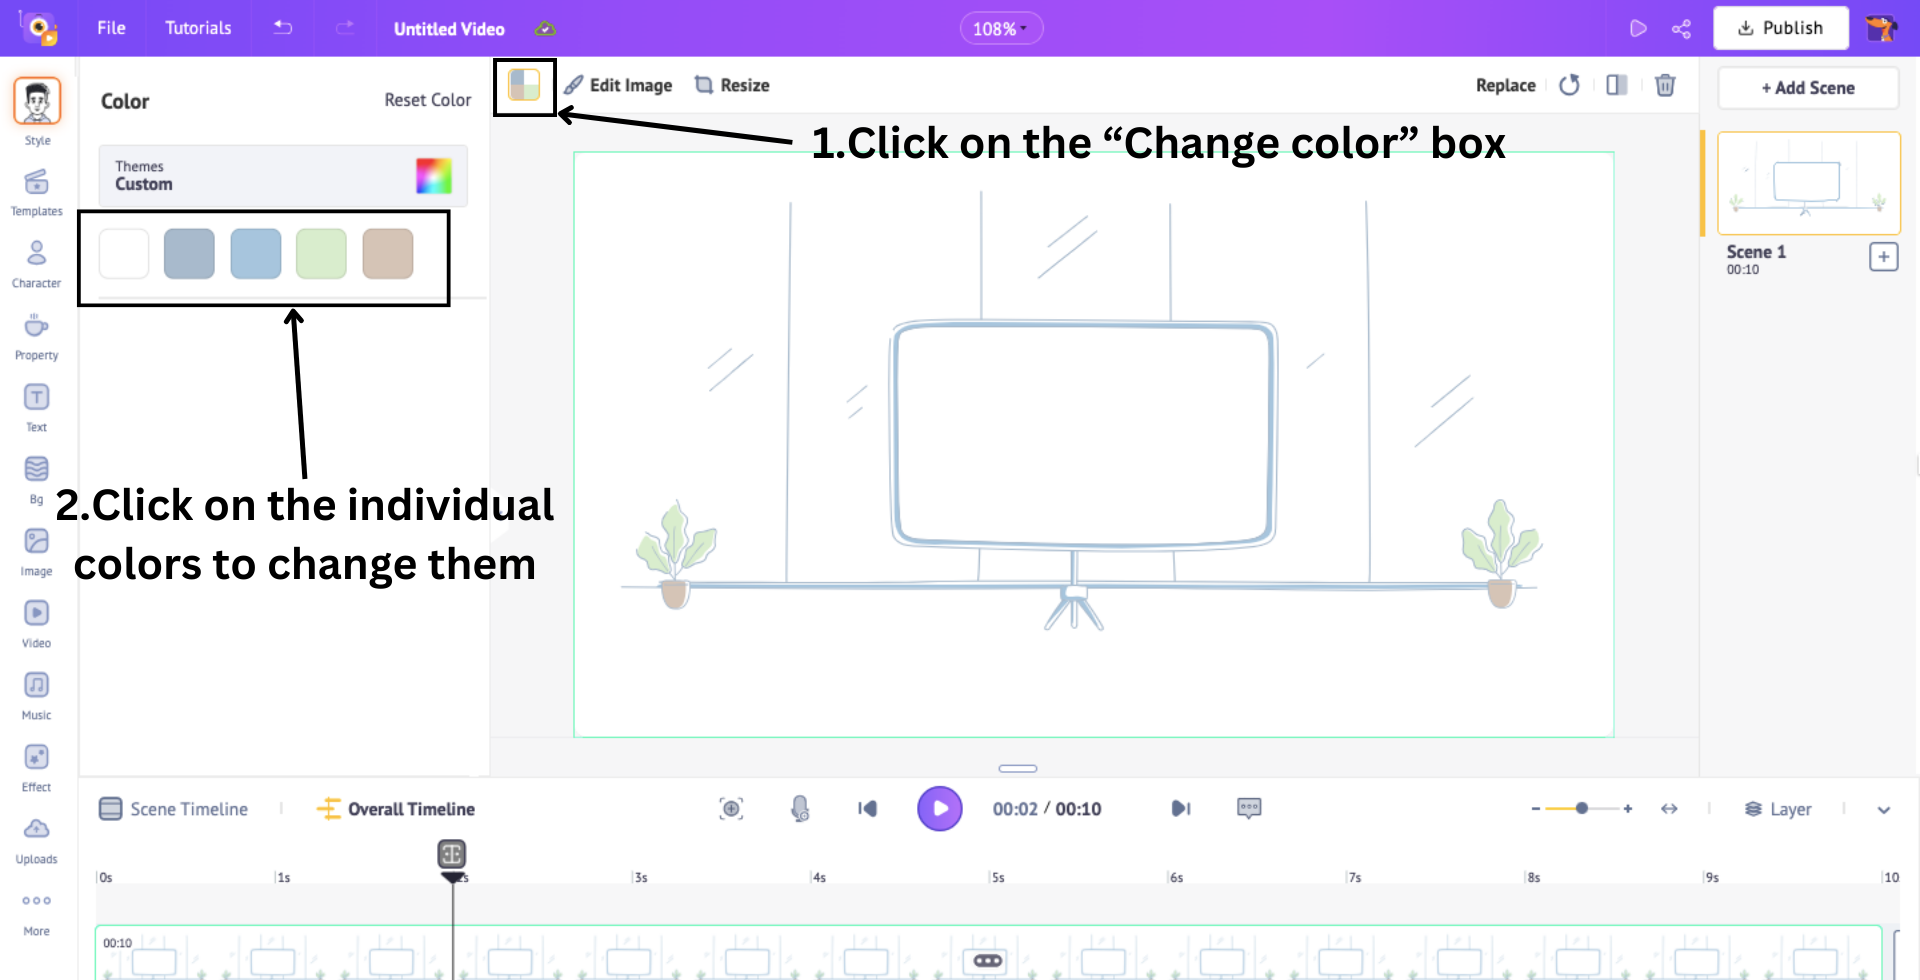
You can also change the colors of the elements in the background by clicking on the “Change Color” box above the workspace and clicking on the individual colors to change them.
That’s how we add backgrounds to our video! As easy as that!
Let’s move on to the next element.
Characters
Animaker’s whiteboard character library has nearly 20 characters with different ethnicities and clothing styles.
To add a character, simply click on the “Character” option in the library and choose your preferred character.
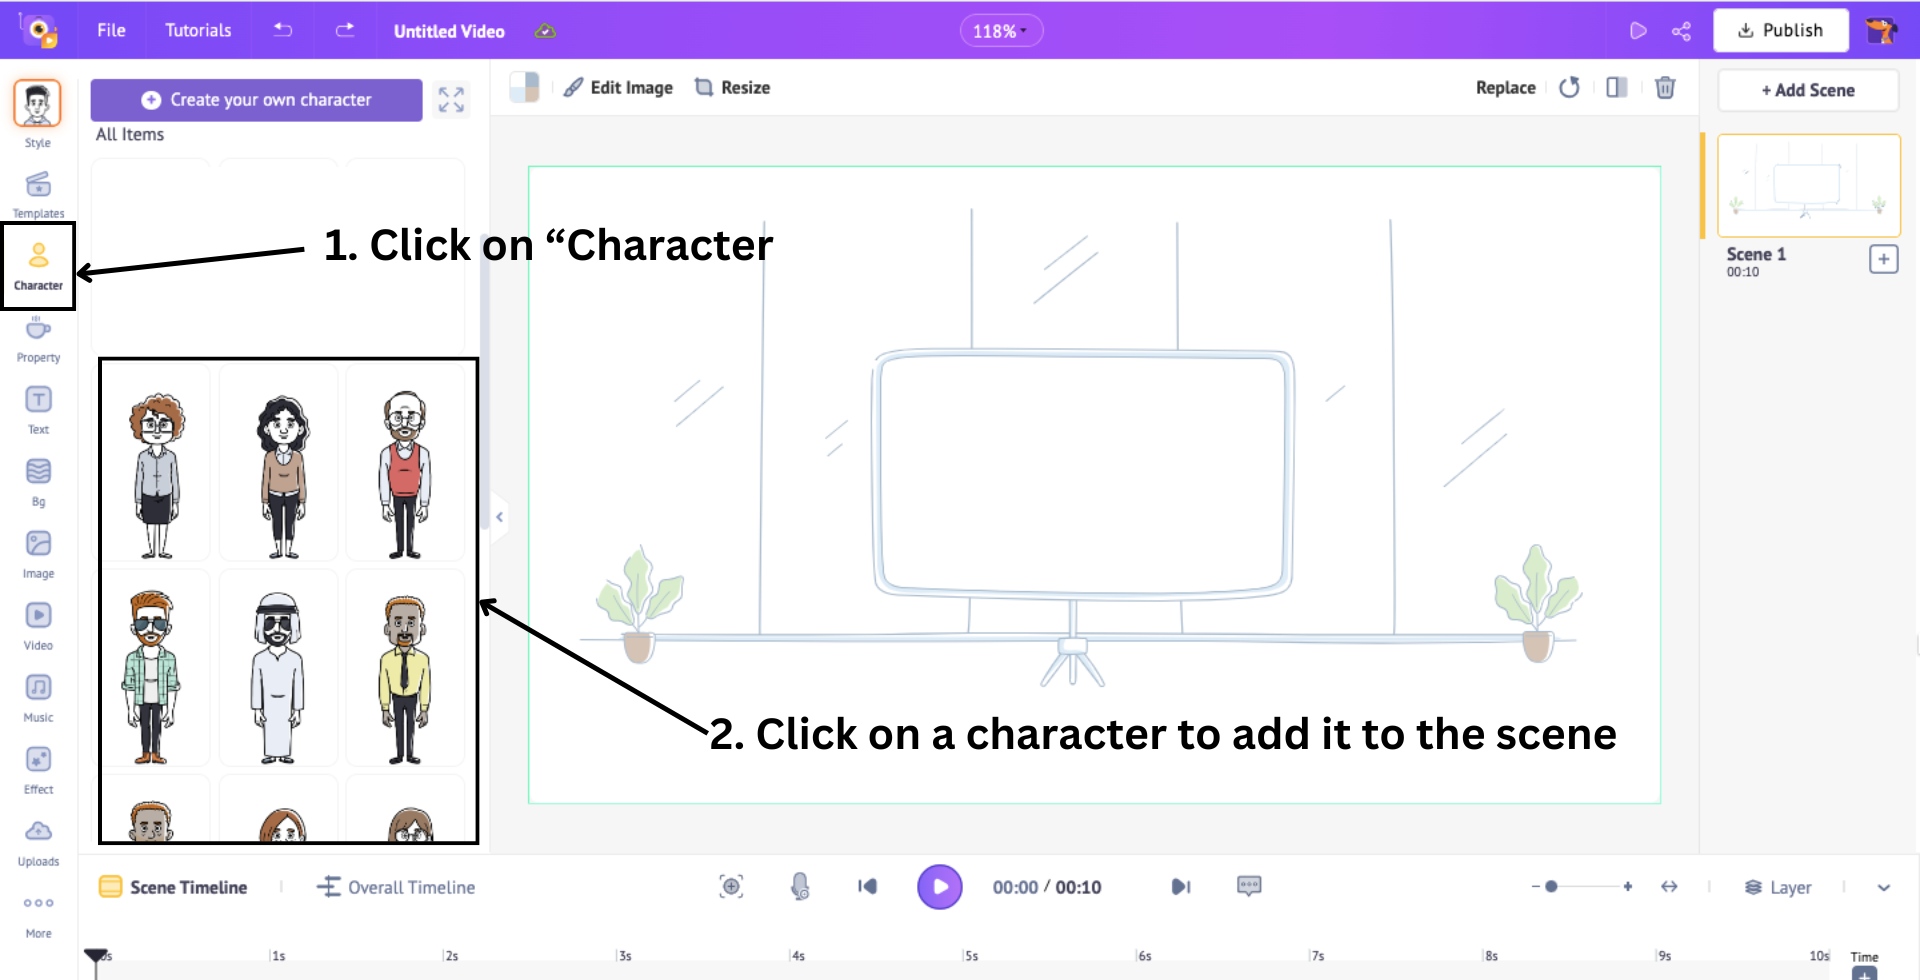
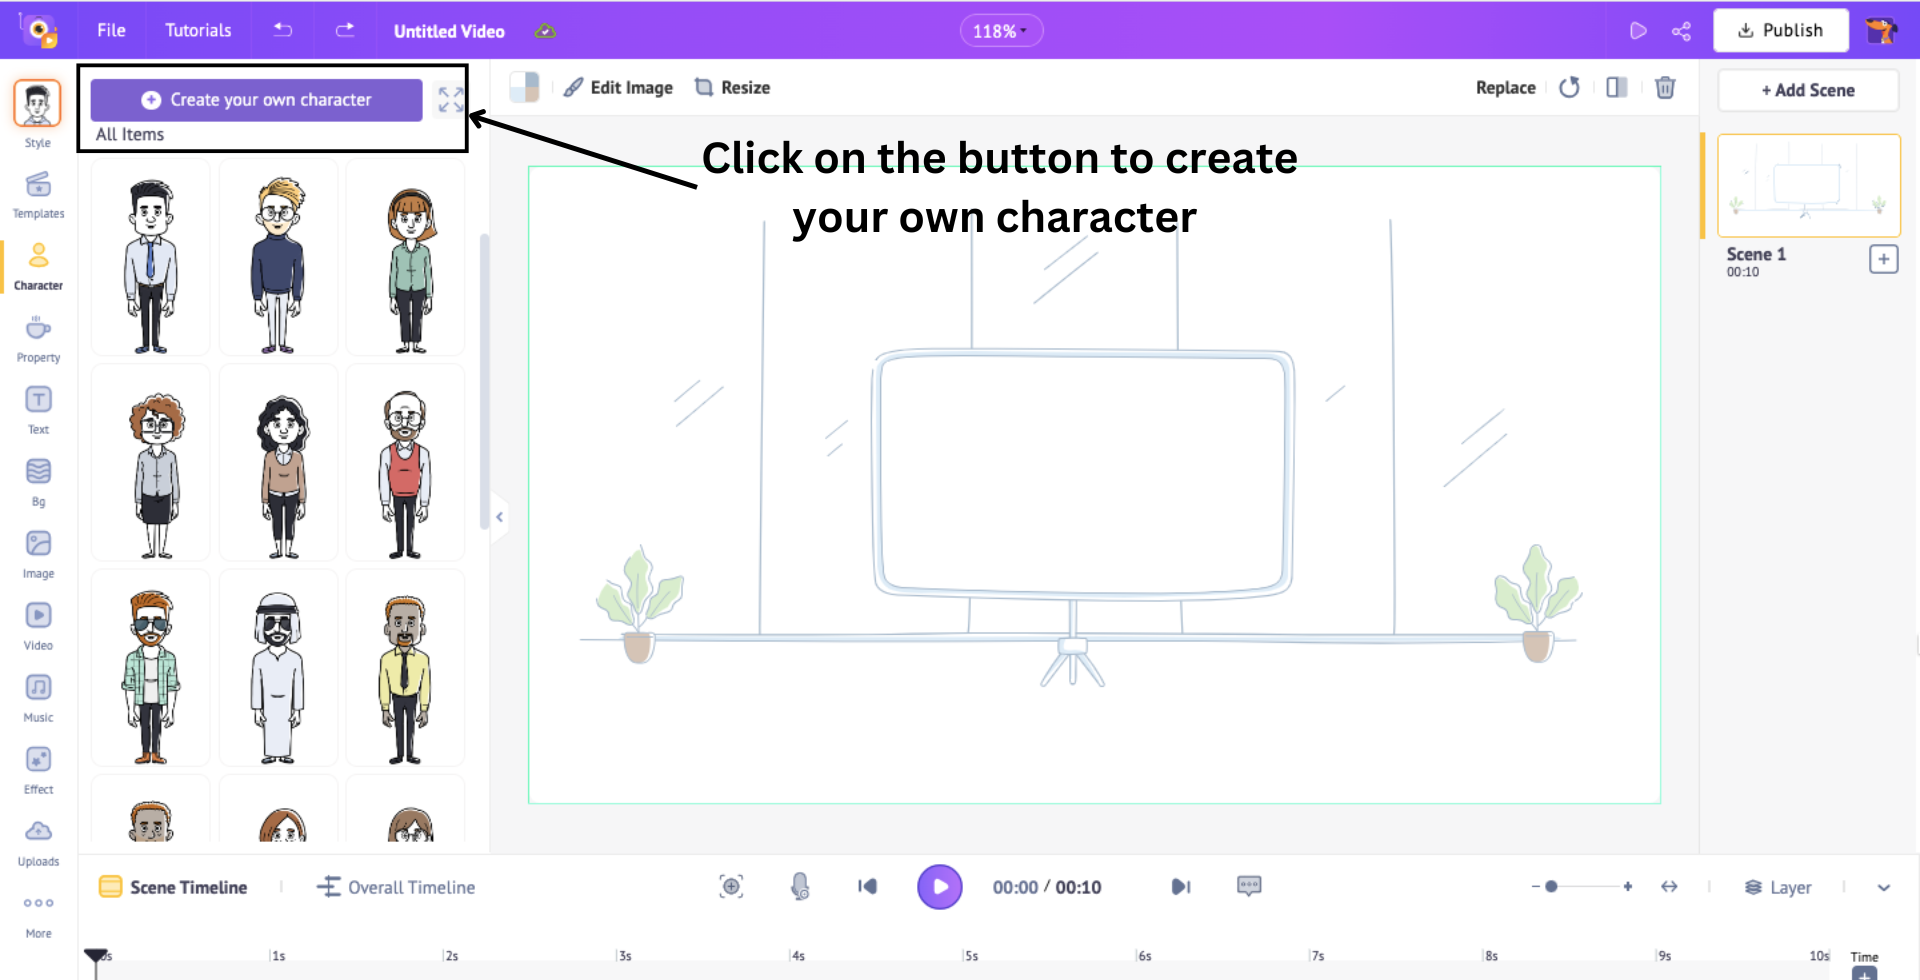
You can select from the available options or create a custom whiteboard character from scratch, allowing you full control to design a character that closely resembles anyone in your organization.
How exciting is that?! Now, to do that, click on the “Create a New Character” button.
This will open the character builder tool.
Here, choose the whiteboard style and select the gender. Then, select a base character to start with.
Now, start customizing every feature, from skin tones and hairstyles to outfits and accessories.
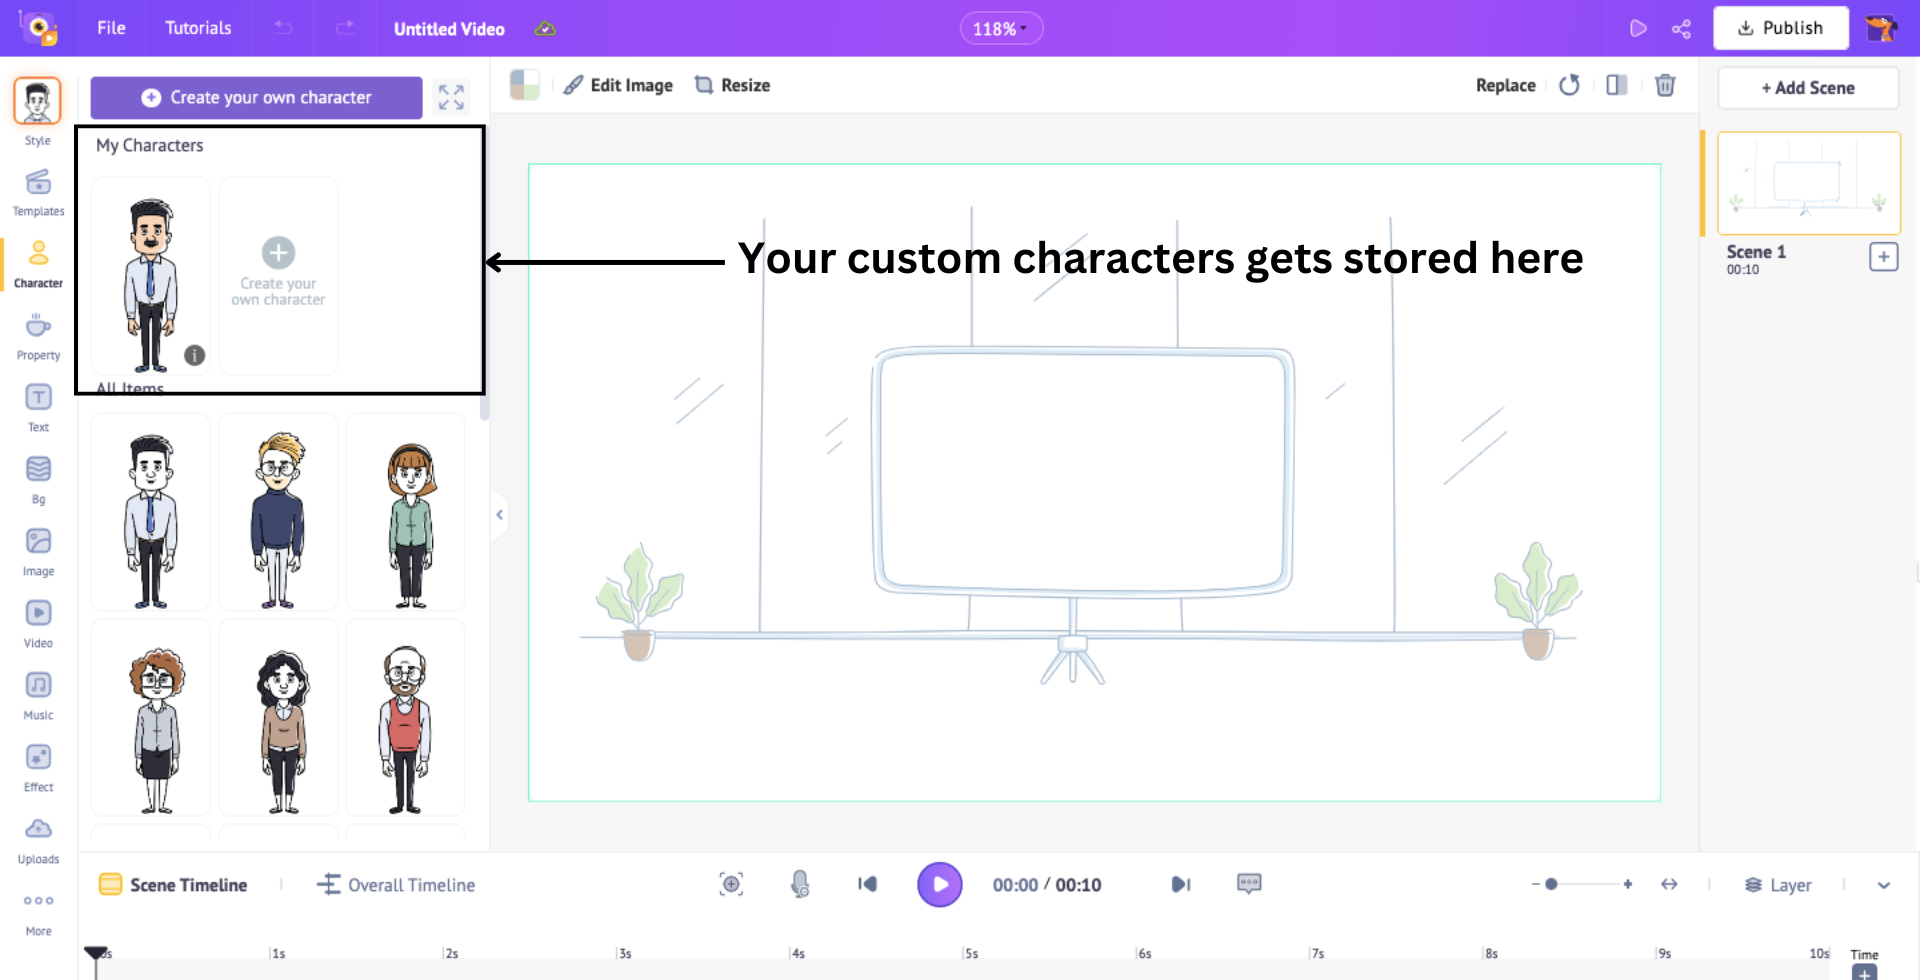
Once you finish customizing, click “Save” and then select the “Back to Project” button to go back to making the whiteboard video.
The custom character you create gets saved in the “My Characters” section above the prebuilt characters in the Character library.
Click on the character to add it to the video. When a character is added, you will notice a normal and a highlighted pink section appear in the scene timeline below.
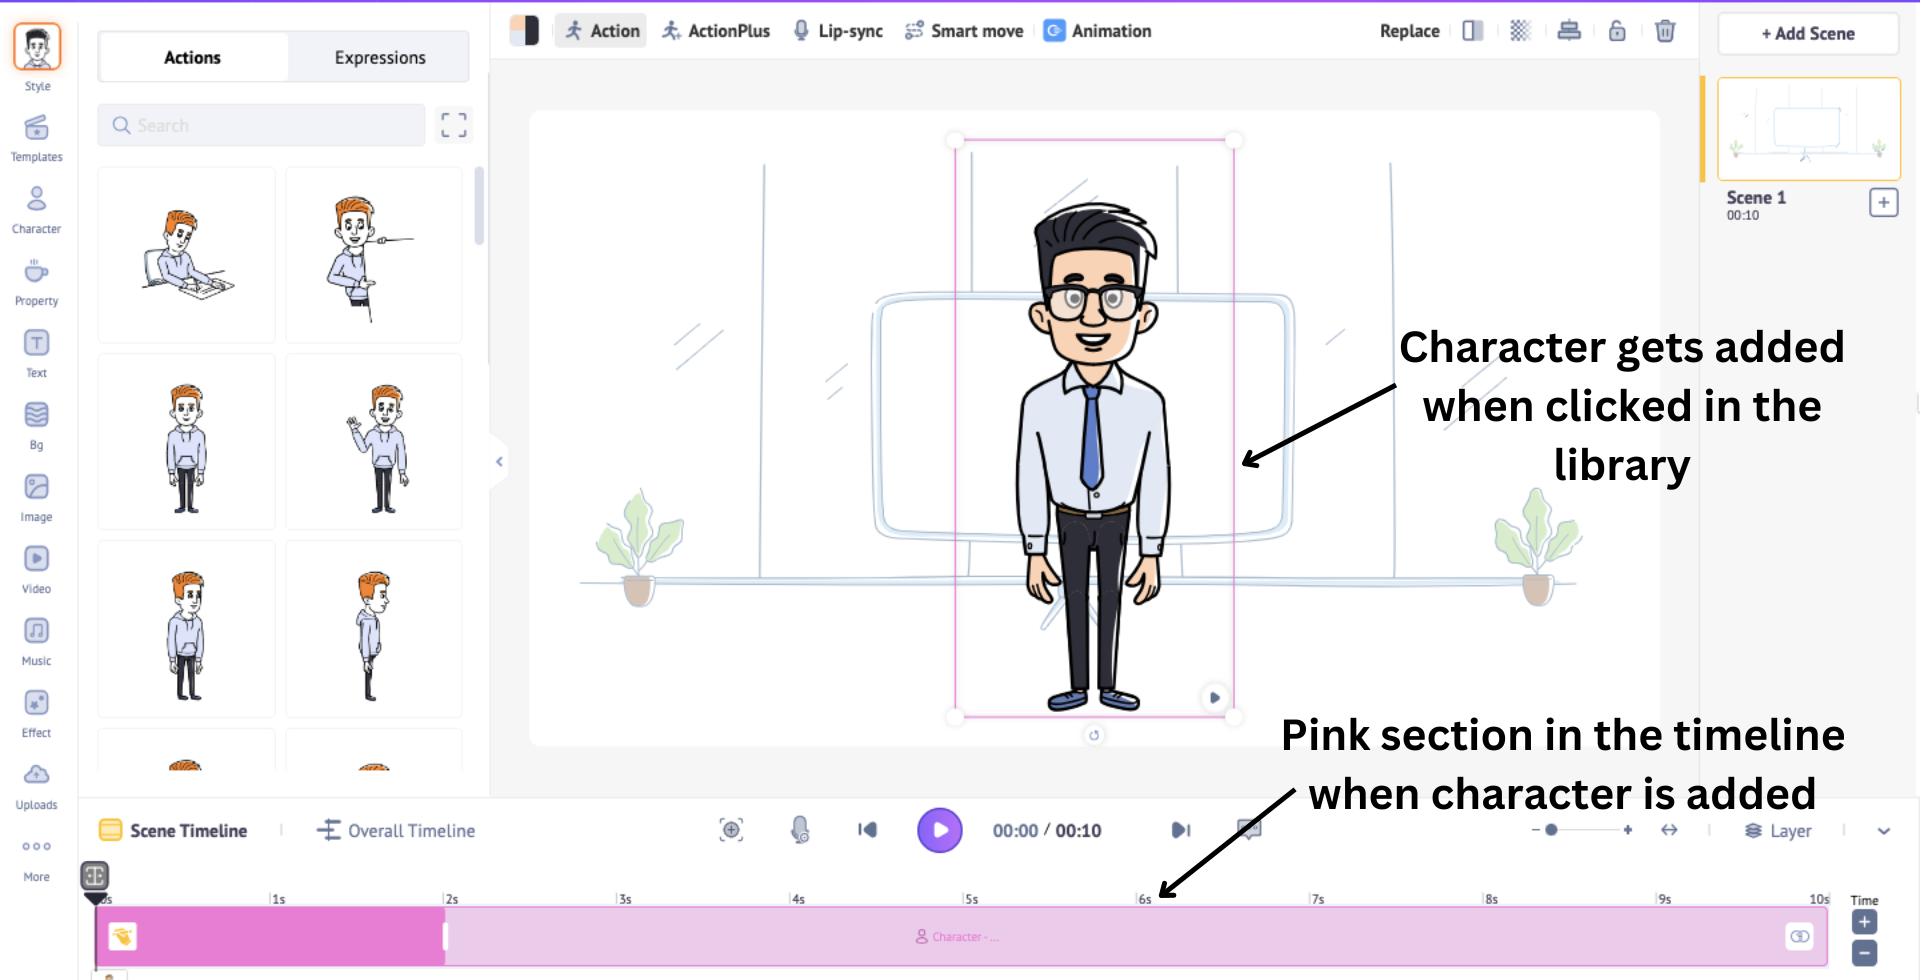
The normal pink section denotes the duration of the character's appearance in the scene.
You can control this by adjusting the ends of the pink section across the timeline. Since I want my character to appear throughout the scene, I’ll keep the pink section throughout the scene timeline.
That’s how you adjust the character’s appearance.
The highlighted pink section, on the other hand, is the hand-drawing animation duration of the element. Adjust it to control how quickly you want the hand-drawing animation.
This way, you can control how long the hand-drawing animation takes. Take a look at it below -
Now that we have adjusted the duration, the whiteboard character is simply standing. Let’s add some action to it.
Click on the character on the left, there is a panel with many animated actions and expressions. Scroll through the actions or search for them in the search bar.
Here, I’ve selected an explaining action paired with a smiling expression for my character. See how easy it is to add a character and actions to it?
Simple right?
Next, let’s see how to add voice to this character.
Voice
To add voice to the character, click on the character and select the Lip-sync option. This opens a panel on the side with three options.
- Record Voice - Record your voice directly.
- Text To Speech - Add AI-generated voiceovers to the character.
- Upload - Upload an existing audio file and sync it with the character.
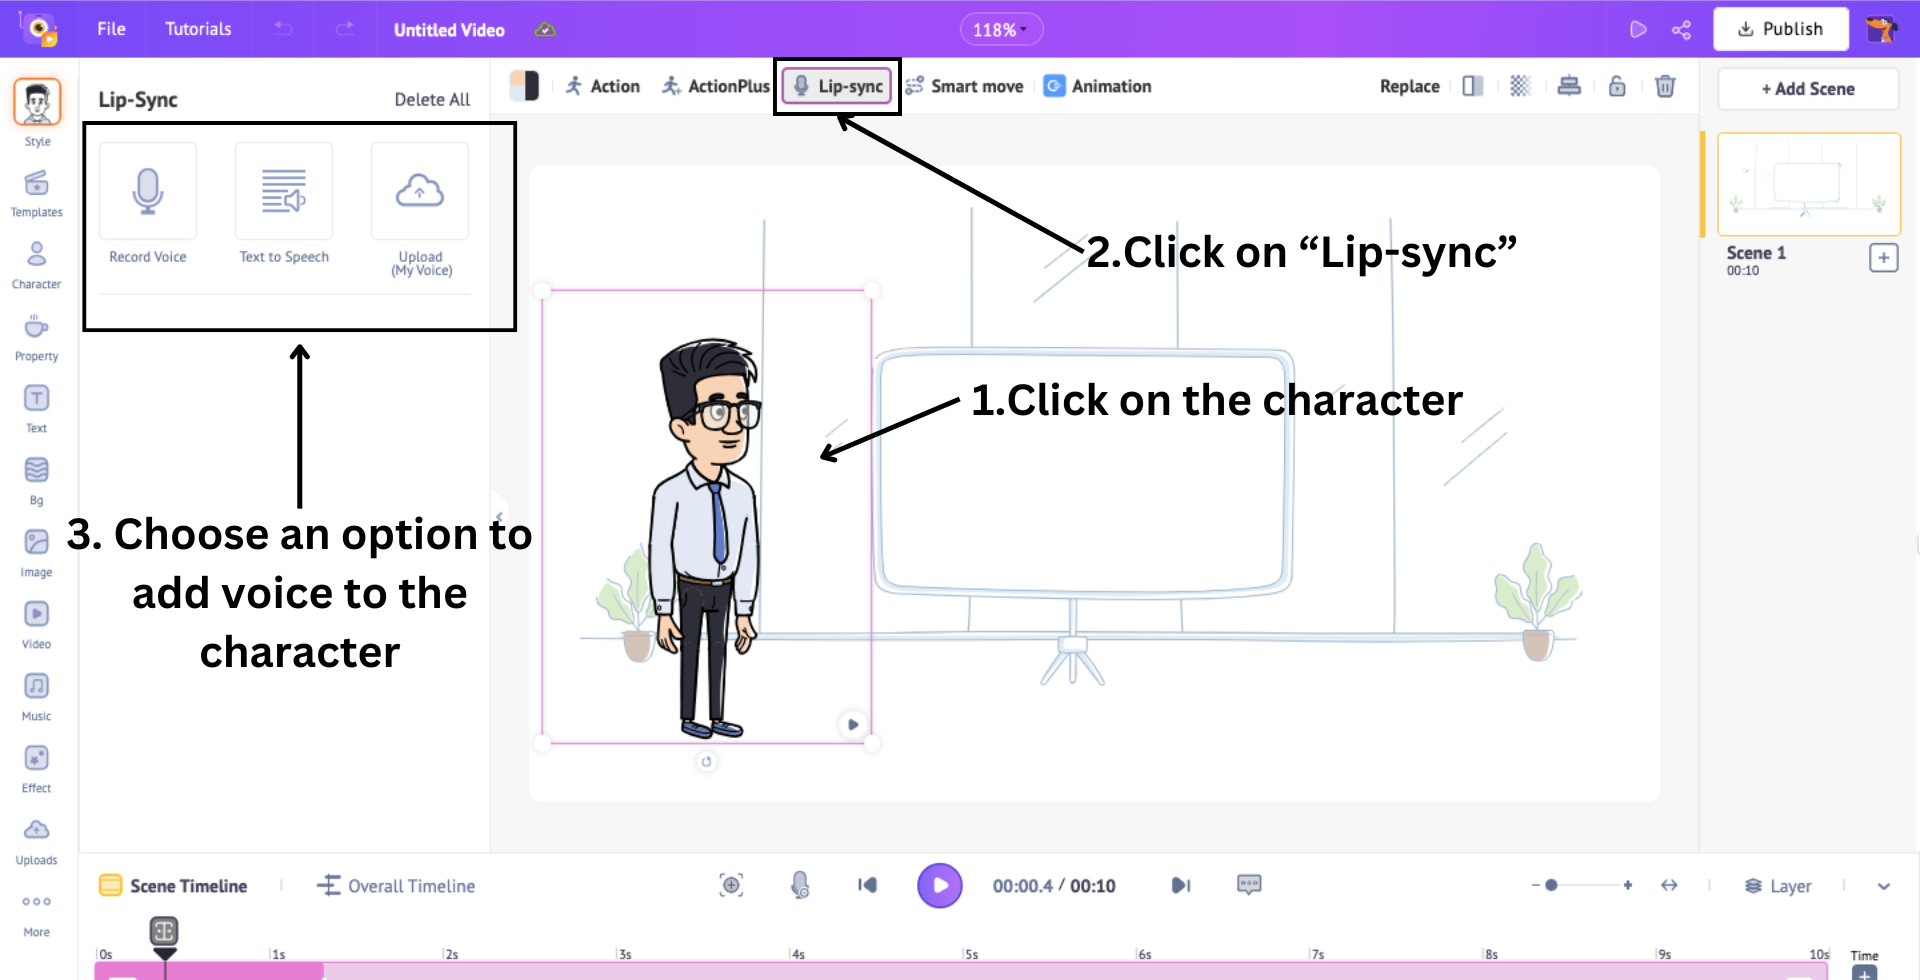
Here, I’m going to make use of the “Text to Speech” feature to add AI voices to the whiteboard character.
Animaker offers over 2,000 AI voices in 200+ languages, allowing you to add high-quality, realistic voiceovers in seconds.
To use this feature, click on the option, and you will see a pop-up window where you can type in the lines from your content.
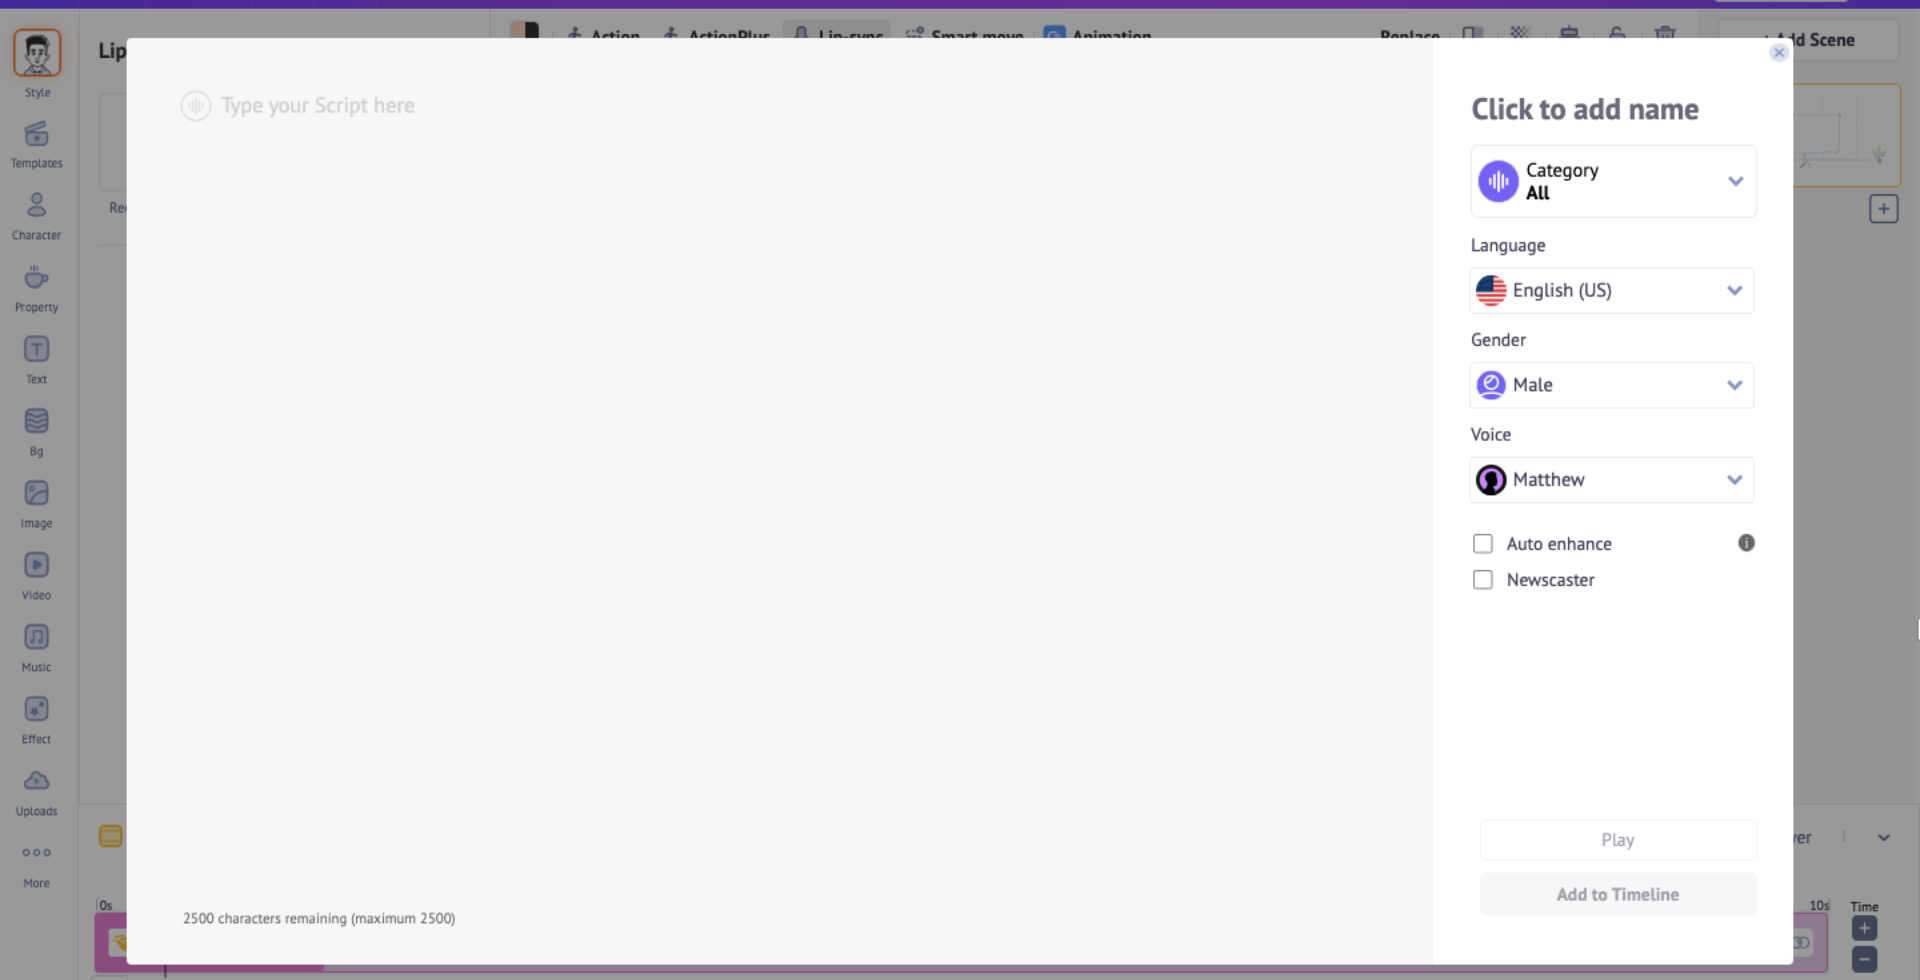
Once you type in the script, you can select options like category, language, gender, and voice to generate an AI voice.
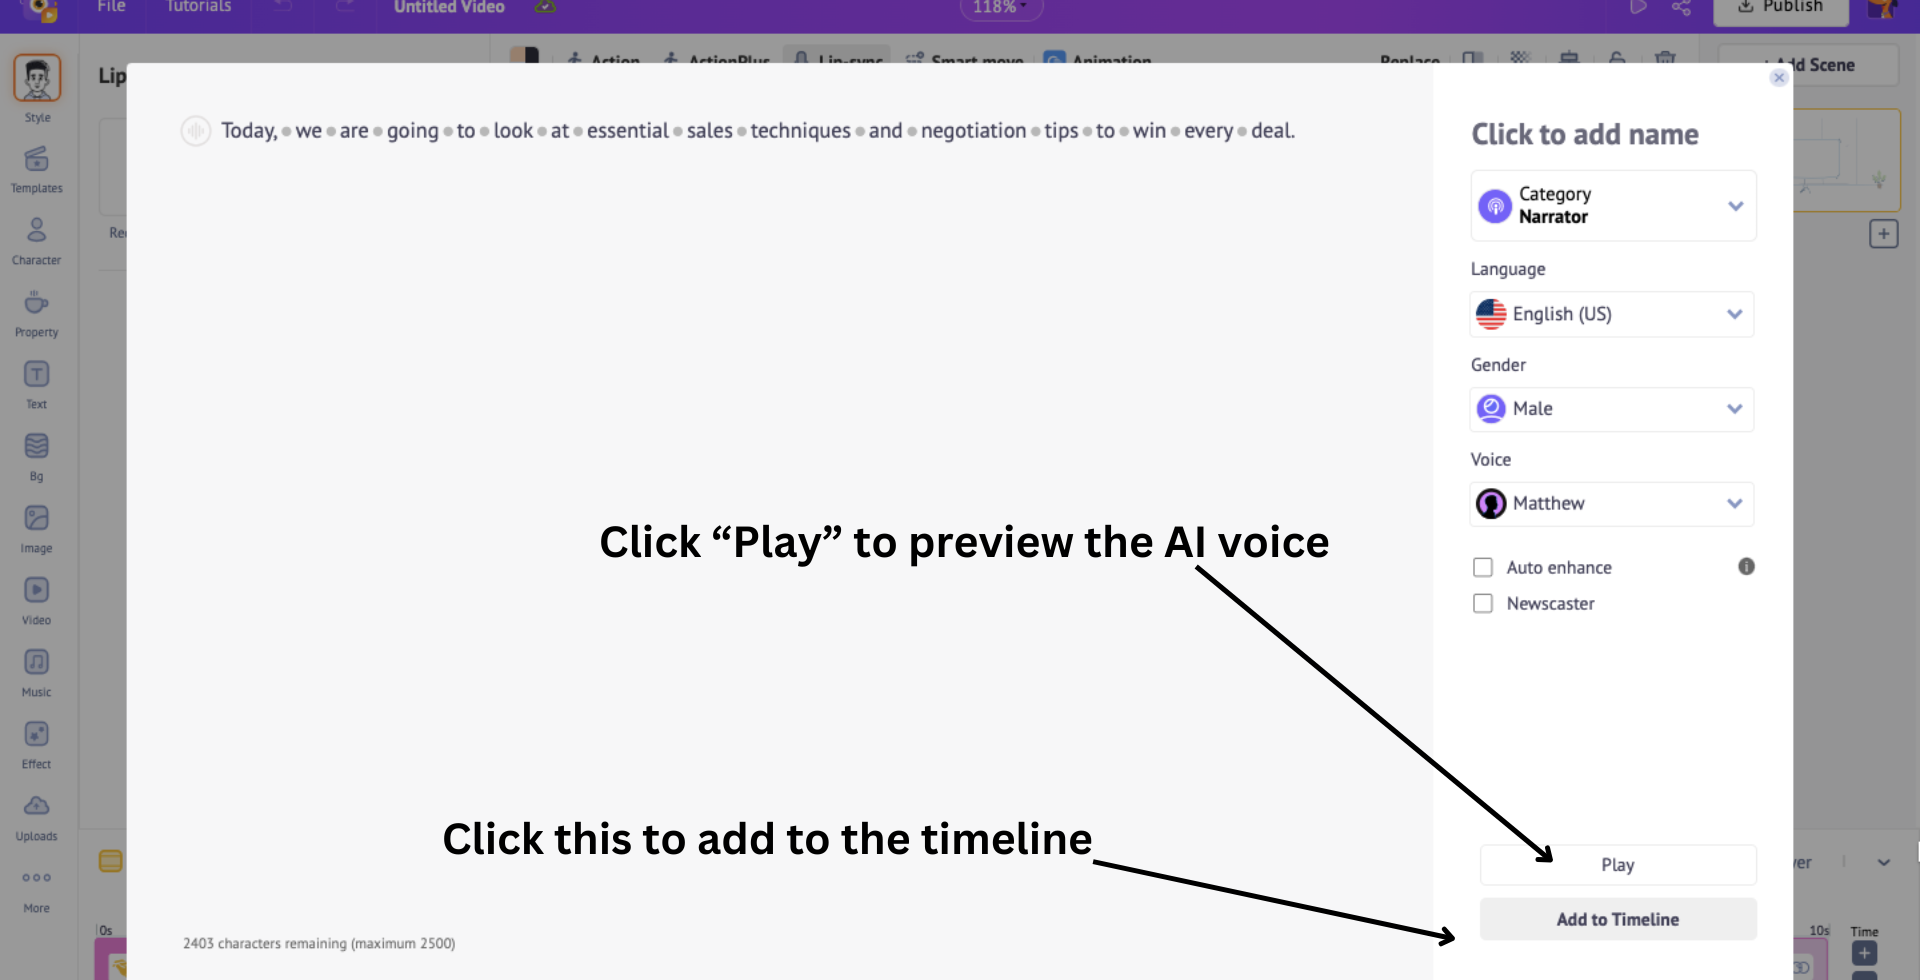
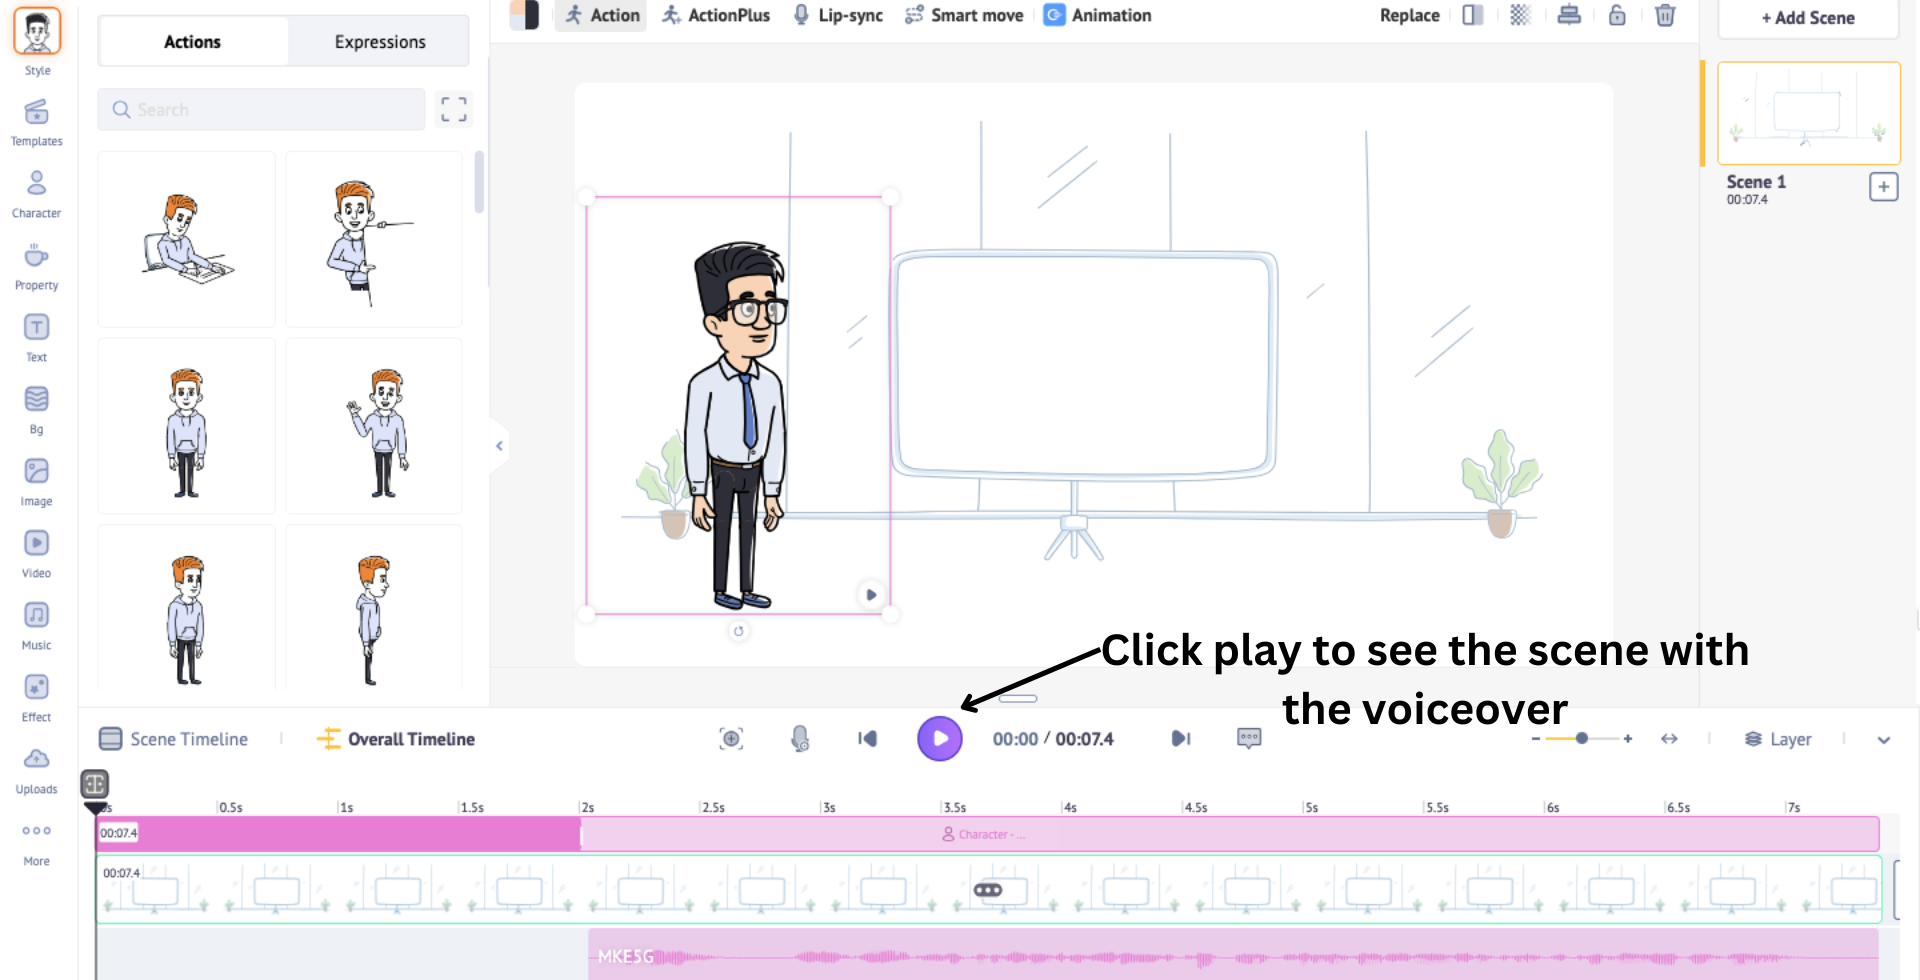
Click “Play” to preview the AI voice and “Add to Timeline” to add the voice to the character.
Once you add the voice to the timeline, you can adjust its position by dragging it to the desired spot. Here, I’m moving the voice to the end of the highlighted section, which marks the end of the drawing animation.
This ensures that the voice starts playing only after the drawing animation is complete.
This is how we easily add an AI voice to the character. Click play to see how it turned out!
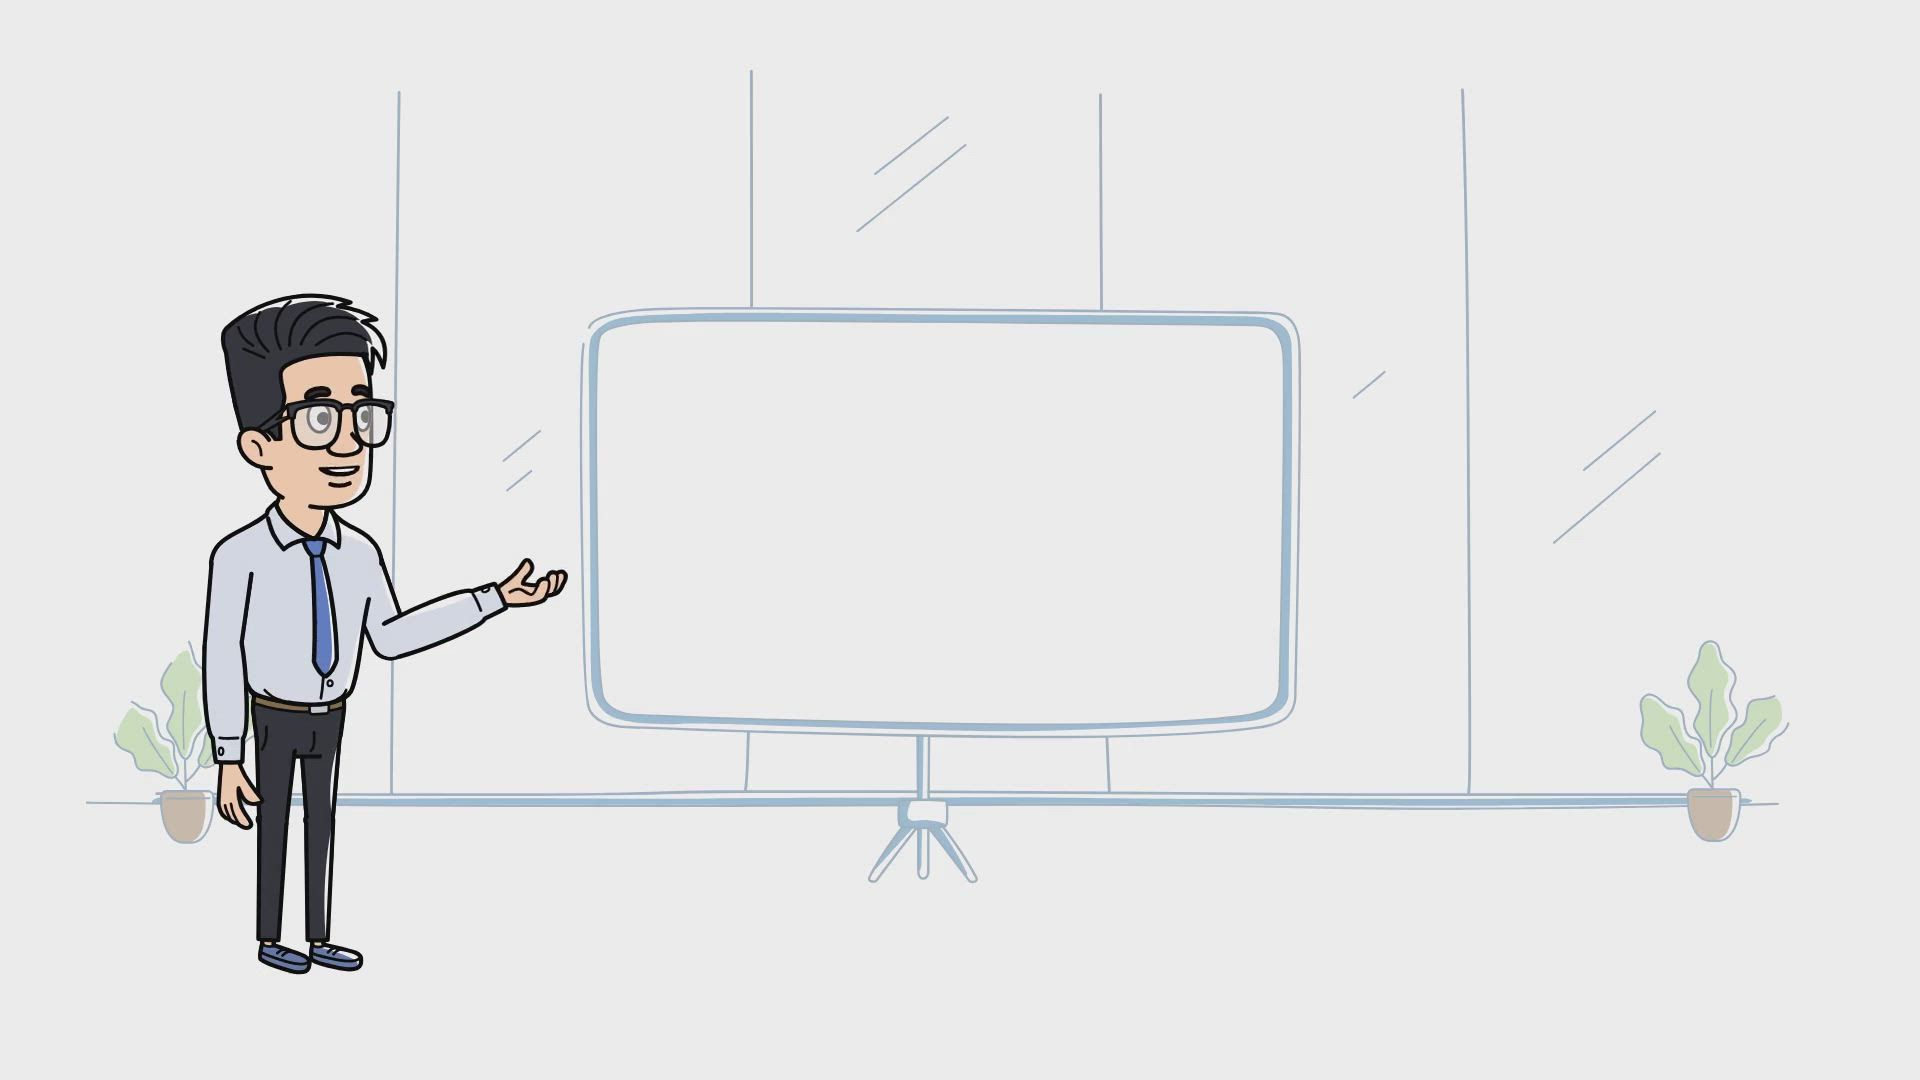
See how the character automatically lip-syncs to the voice, giving it a natural look? Looks great, right?
Now, let’s see how to add properties to this scene to make it even better!
Property
Properties are objects, shapes, and illustrations that enhance the scene by adding extra detail and visual interest.
Animaker has 1000s of properties ranging from office supplies to animated icons, which you can add to make your whiteboard video more detailed.
To add a property, click on the Property option in the library. Search for a particular property in the search box or scroll through until you find one.
I’m going to search for a desk to add to the scene. Once you’ve selected a property, you can easily resize and position it as needed.
Just like when a character is added, a colored section with a highlighted section appears in the timeline when the property is added.
You guessed it right—the colored section represents the duration of the property in the scene, while the highlighted section shows the duration of the hand-drawing animation.
Adjust these sections on the timeline as needed. For example, you can time the property’s hand-drawing animation to finish first, followed by the character’s hand-drawing animation.
This way, when the scene begins, the property is drawn first, then the character, and finally, the voiceover starts.
This is how you add a property to a scene. Let’s move on to the next element!
Text
In this introduction scene, there is a bare whiteboard in the background! Let’s add text to it.
To do that, click on the “Text” option from the library.

This will open two types of text boxes – Pre-builds and Plain.
Plain text boxes require designing from scratch, while Pre-builds have pre-added design, font, and animation effects.
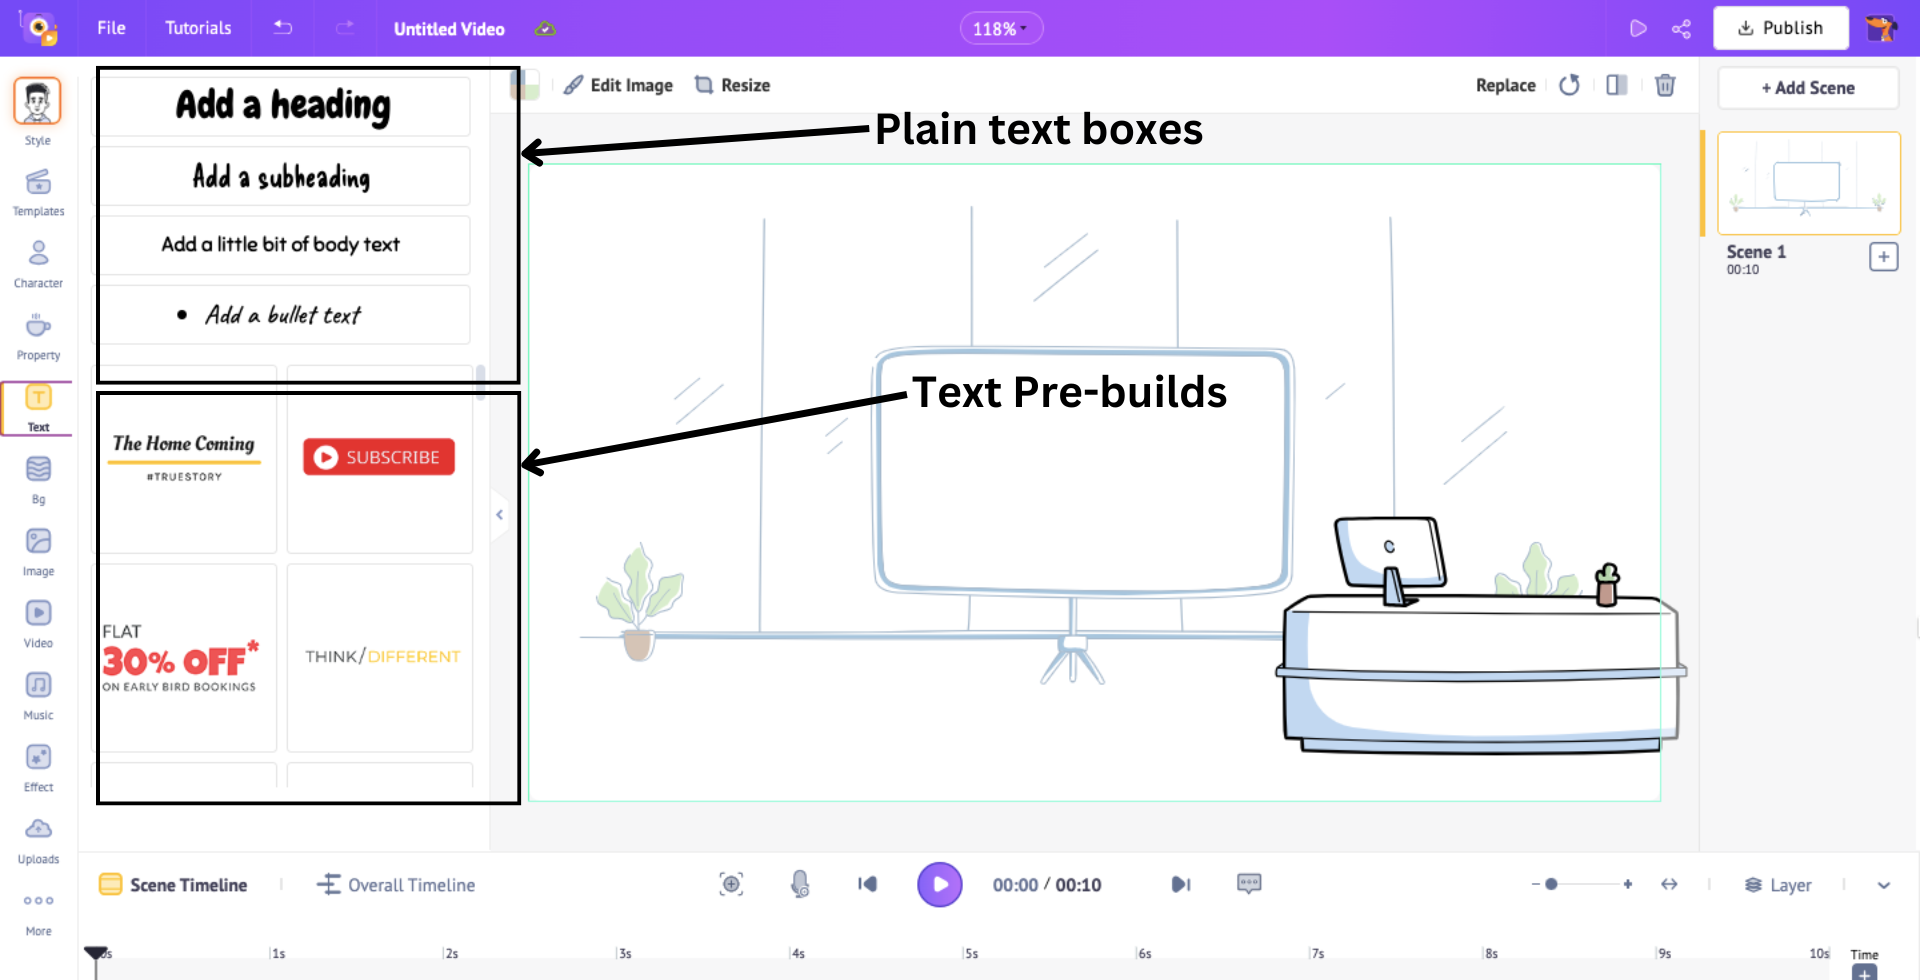
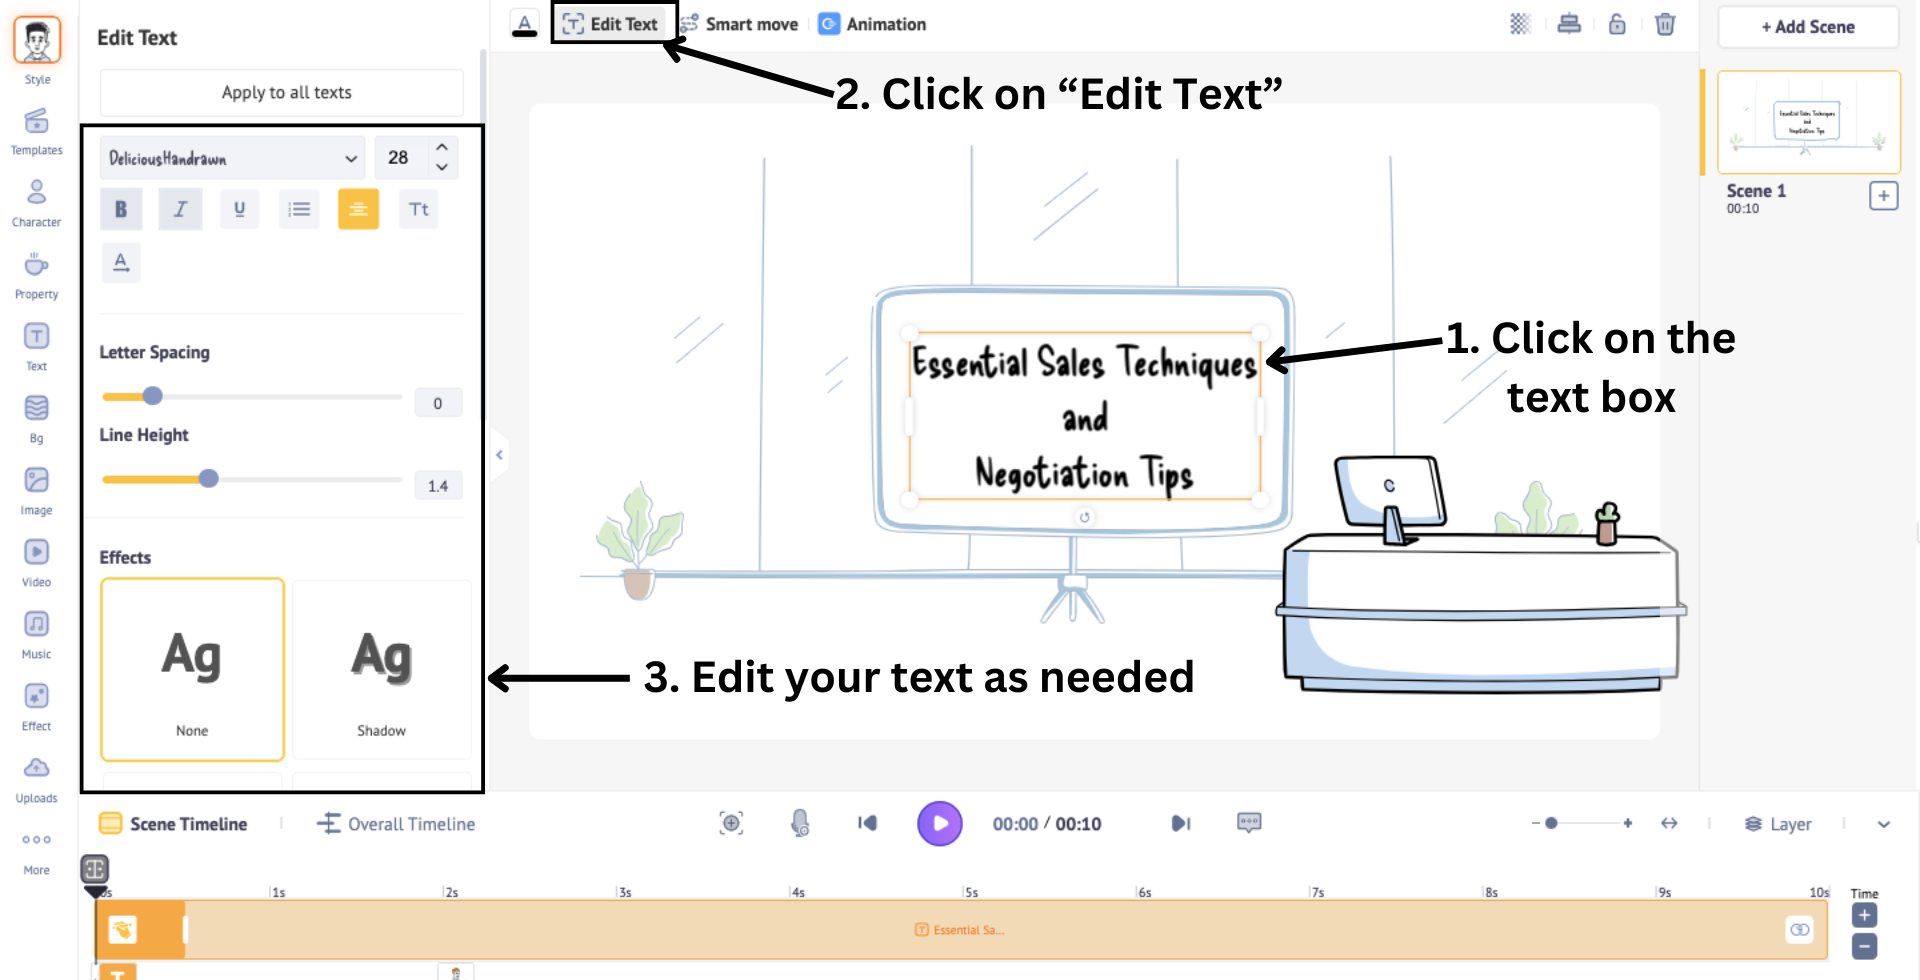
Choose a type and position it in the scene. Then, type in the title of your content. I’m choosing a plain text box.
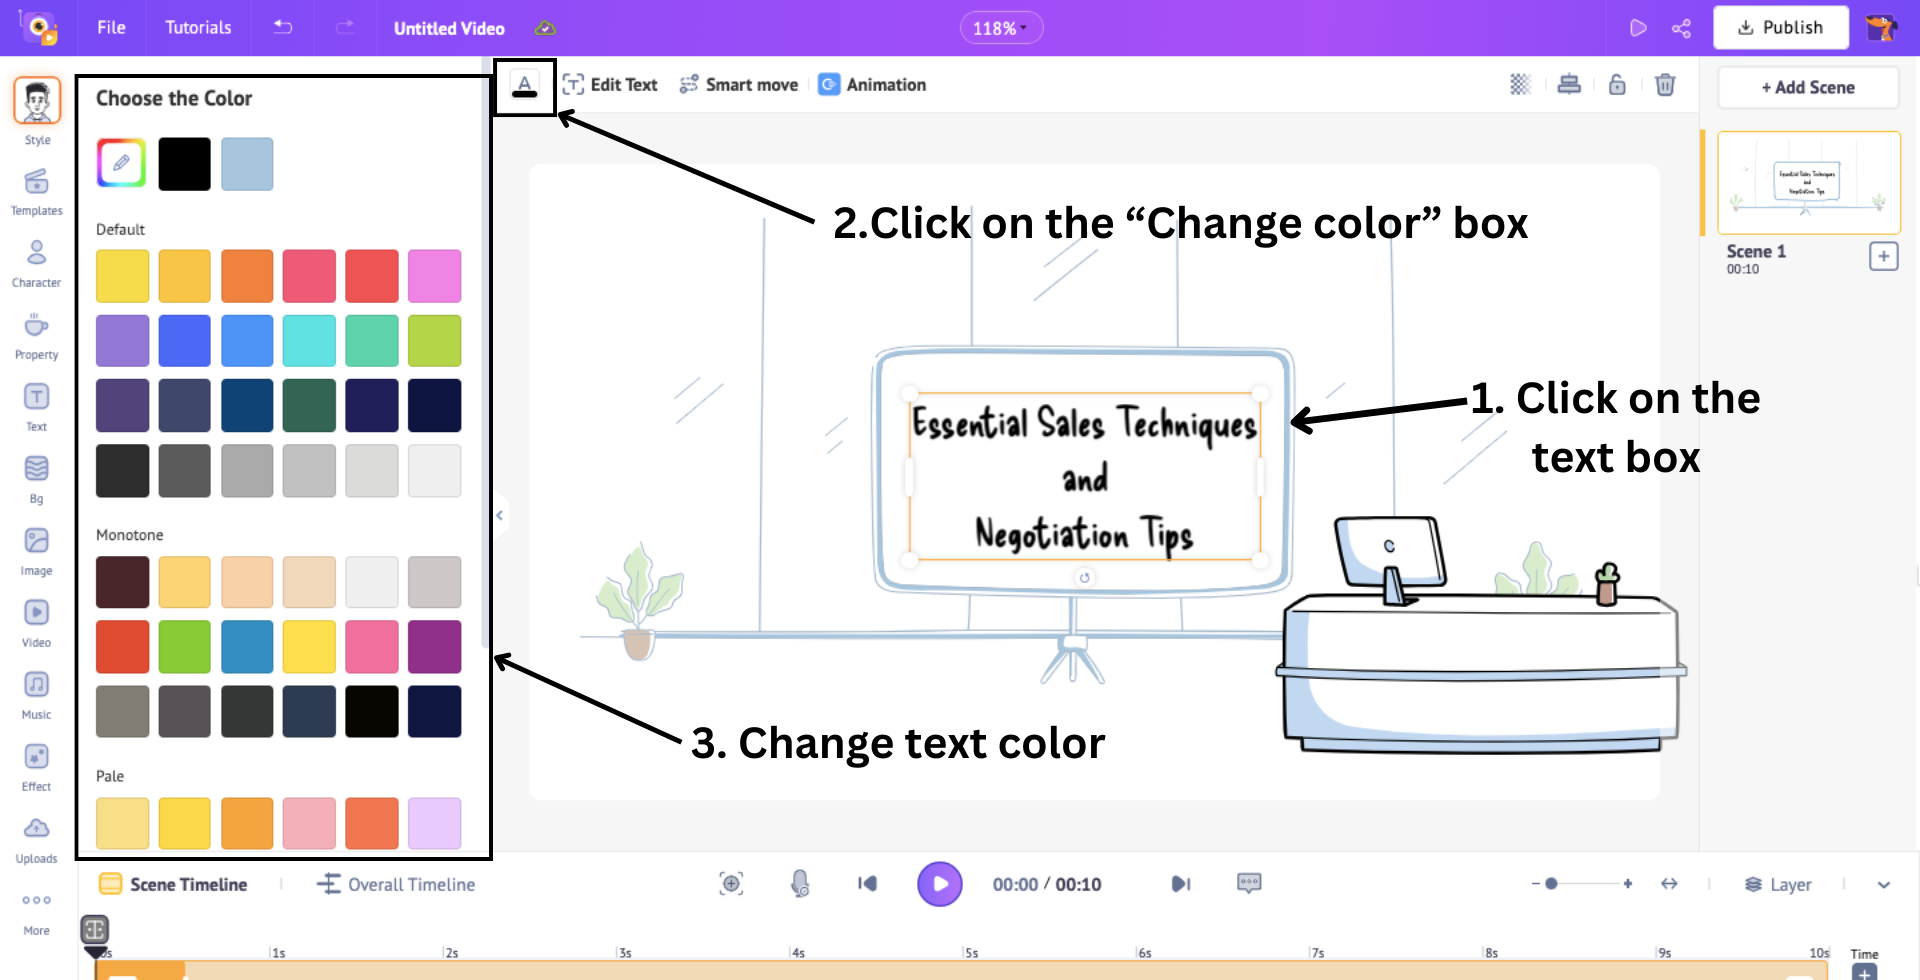
On the side, when you click on the text box, you'll find the Edit Text panel, which offers a variety of editing options. Here, you can customize the text by changing the font, size, and other attributes to suit your design needs.
You can also change the color of the text by clicking on the “Change Color” option above the workspace.
Just like with the previous elements, you can also adjust the duration of this text box. In the scene timeline, the orange section indicates the duration of the text in the scene.
You can modify the ends of this section to control when the text appears during the scene.
We have the highlighted section denoting the hand-drawing animation here as well. Adjust this section to control the duration of that animation.
But hey, what if you want some other animation instead of this same hand-drawing animation?!
We have options for that as well! Click on the text box and then click on the hand icon in the highlighted section in the timeline.
This will open the animation panel on the left with 35+ enter and exit animation effects to choose from and add to your text.
You can choose no effect or one of those many available options for both enter and exit.
If you select some other effects, you will notice two highlighted sections appear on either end of the orange section on the timeline. These sections indicate the duration of the effects.
Adjust the duration by simply dragging the inner corners of the highlighted sections.
This is how you add animated text to a scene!
So far, we have added a background, character, voice, property, and text to the introduction scene. This way, you can add multiple scenes to make a complete video.
To add a new scene, click on the three dots on the scene tab on the right. It will open two options: Add Scene and Duplicate.
Choose Add Scene if you want to create a new scene from scratch, or choose Duplicate if you want a new scene with all the previous elements in it.

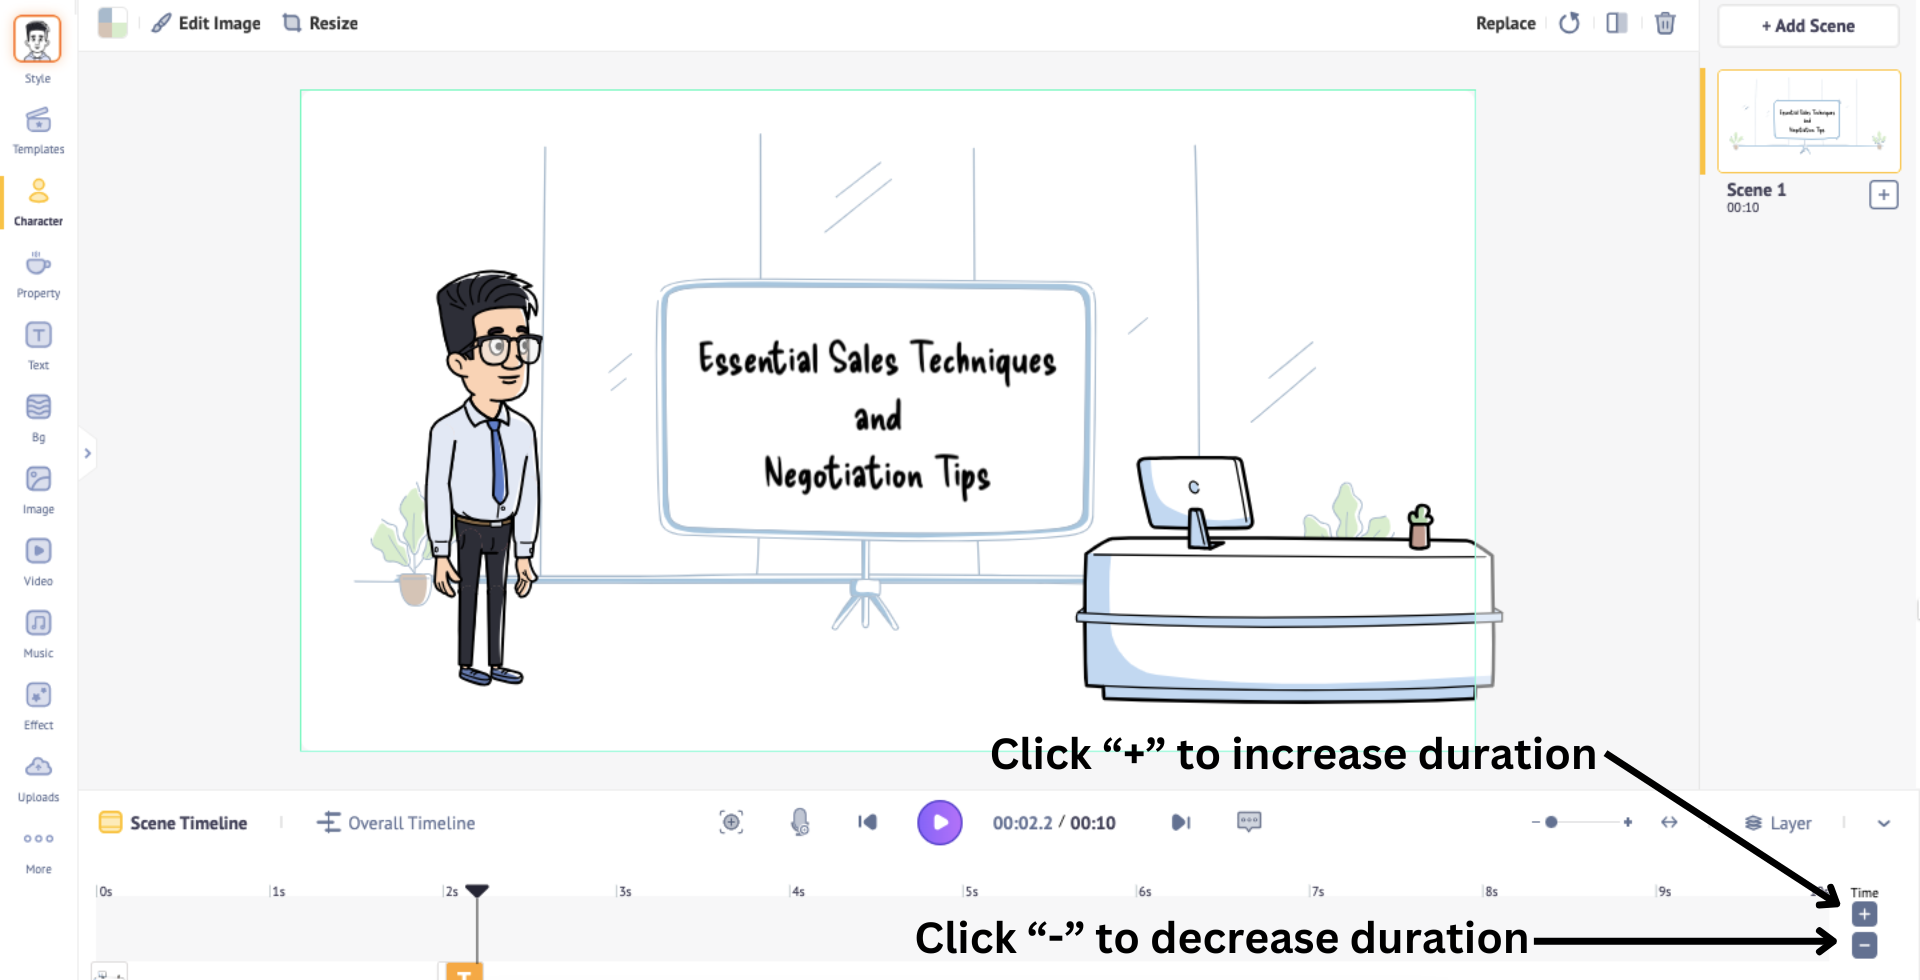
Note that every scene’s duration is 10 seconds by default. You can always adjust the scene’s duration by clicking on the “+” and the “-” signs in the bottom right corner to increase or decrease the duration.
This way, you can add multiple scenes to your whiteboard video!
Once you’re done making all the scenes, it is time to add one final element to the video, if needed.
Music
Music has the power to elevate your videos, setting the mood and enhancing the overall experience. It’s crucial to select music that aligns perfectly with the video’s theme and vibe.
To add music to your video, simply click on the “Music” option in the library, then select “Expand Library”.
This gives you access to over 30,000 tracks to explore. You can preview any track by hovering over it, and once you find the right one, just click to add it to your project.
If you have your own music track that you'd like to use, click on the “Upload” option in the library. Click on the uploaded track from the “Uploads” folder and the music gets added to the scene.
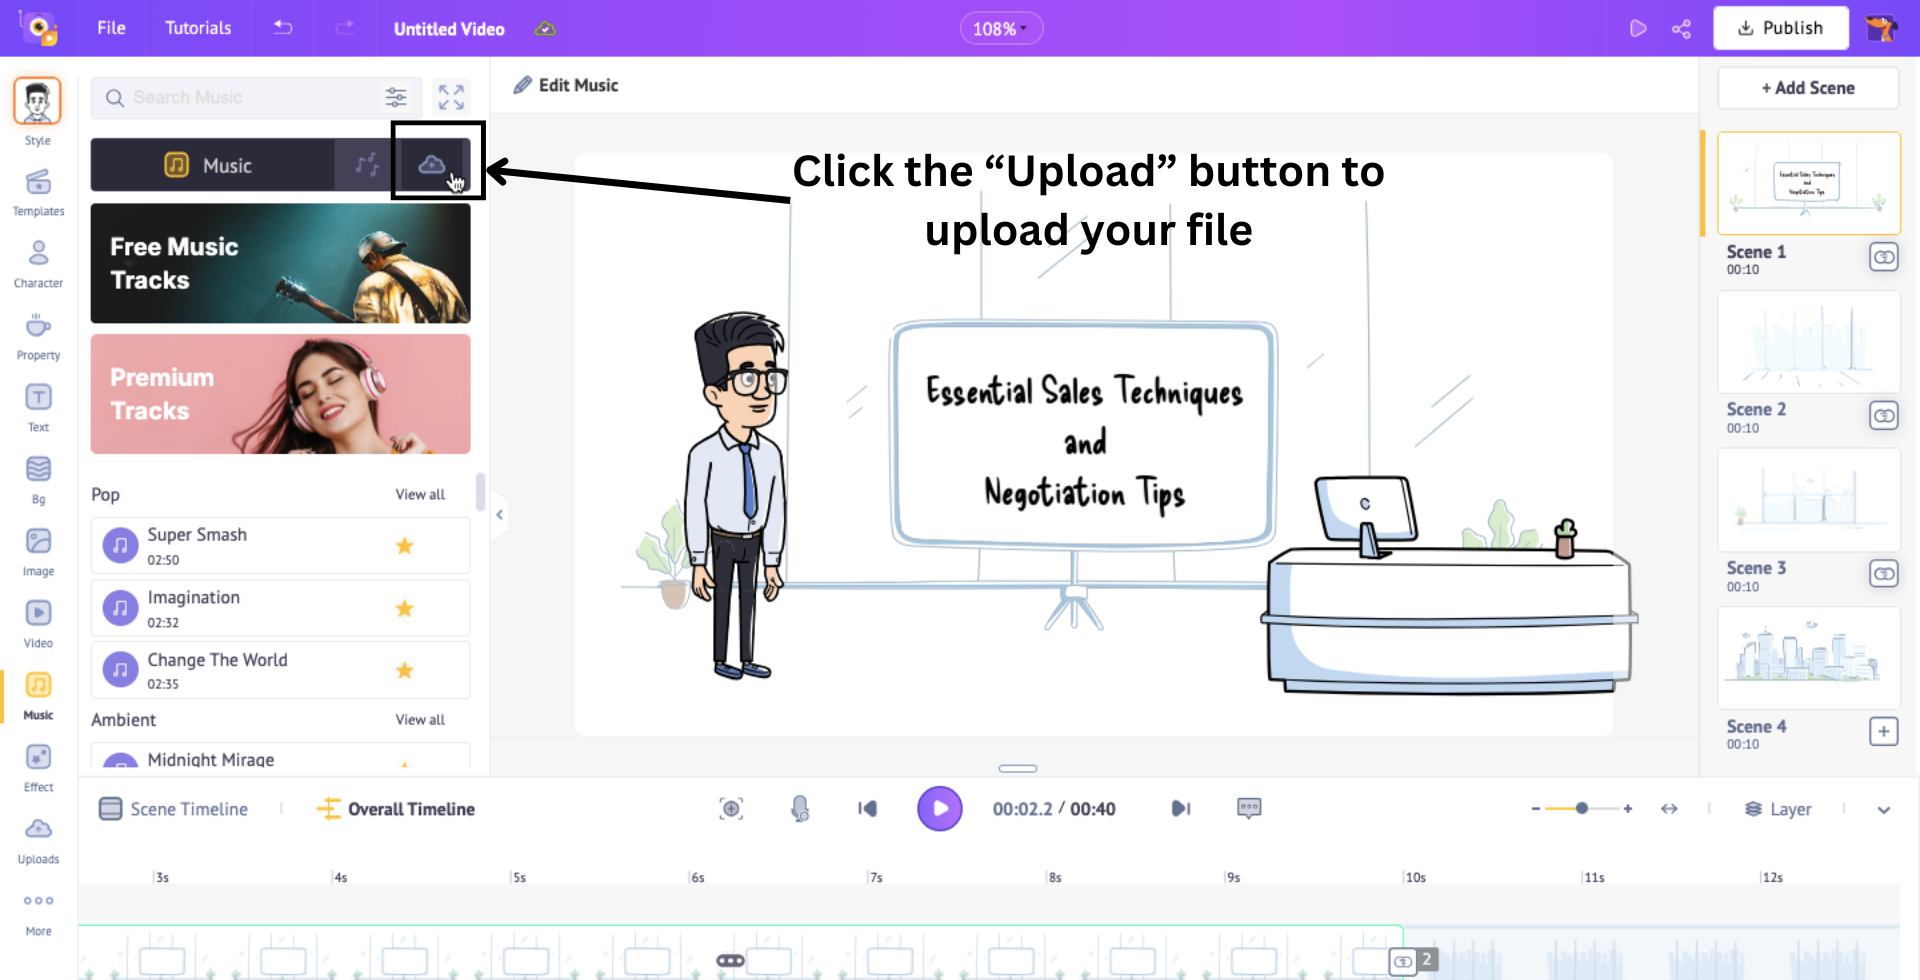
Note: The music will start playing from the position of the playhead on the timeline. To ensure the music begins at the start of your video, place the play head at the beginning before adding the track.

And that’s how easy it is to add music to your video!
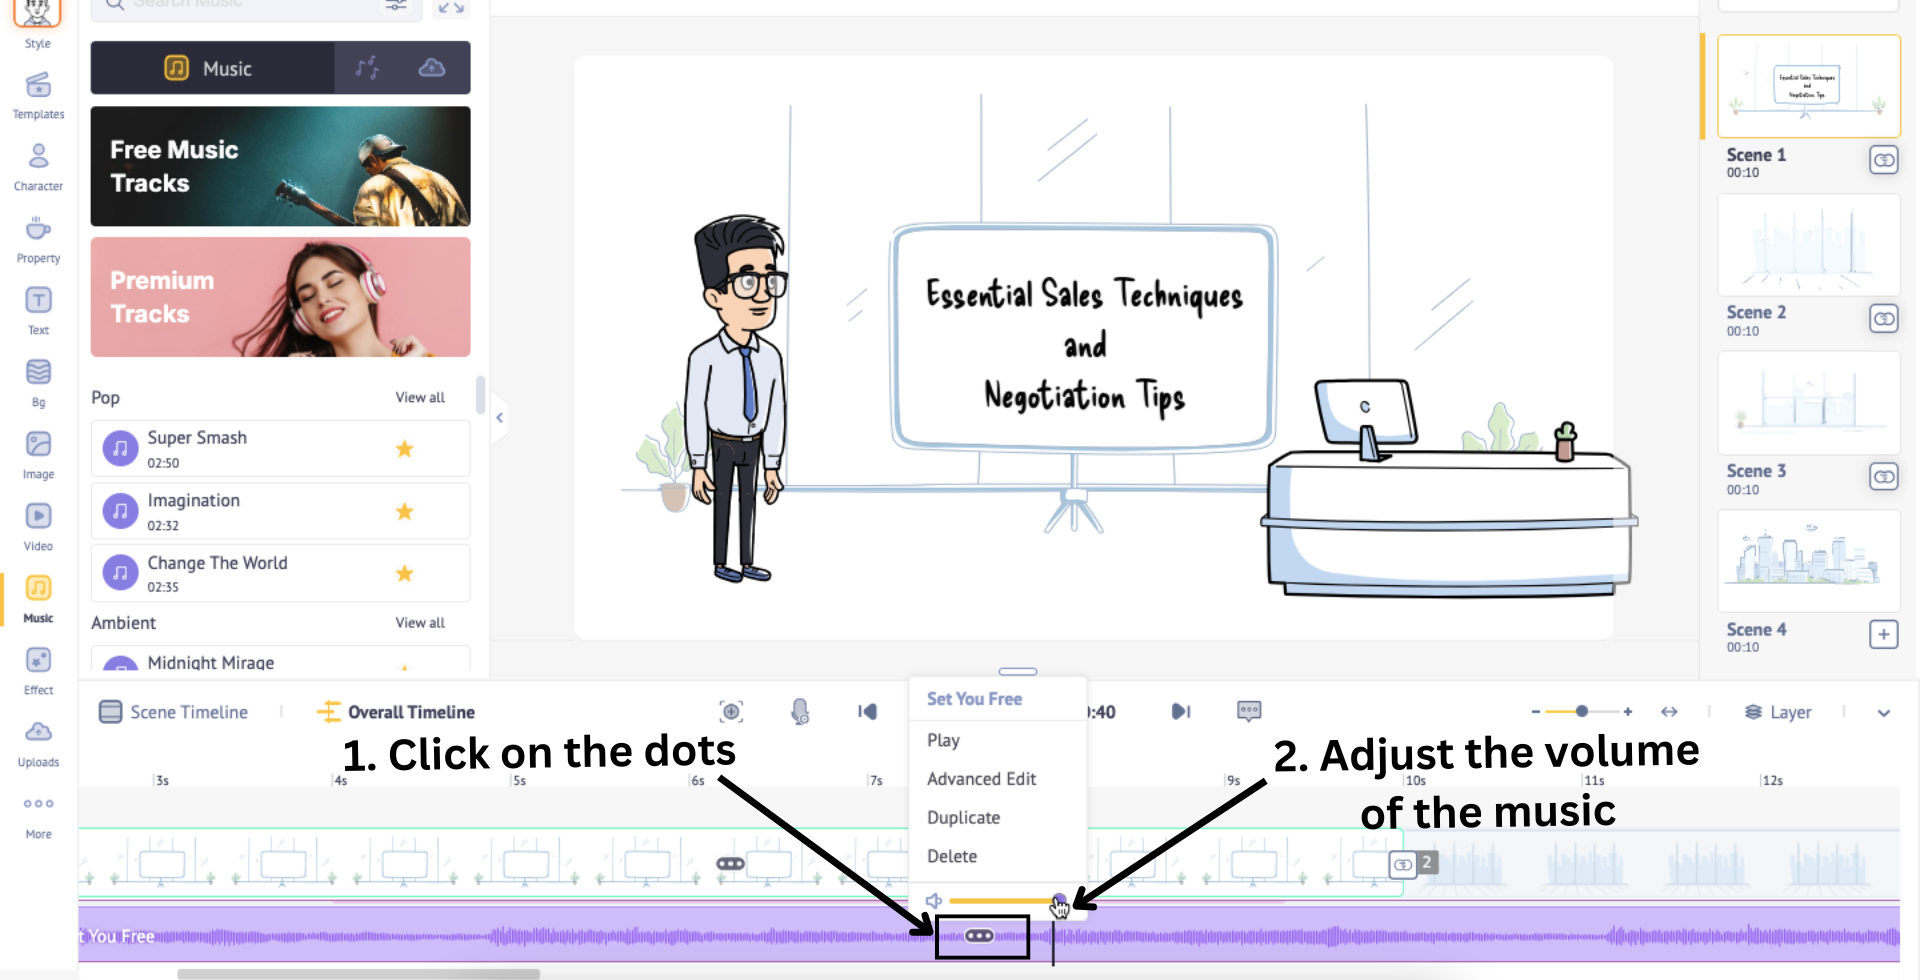
If you want to adjust the volume of the music, right-click on the three dots in the music section on the timeline. Then, slide the volume bar to your liking.
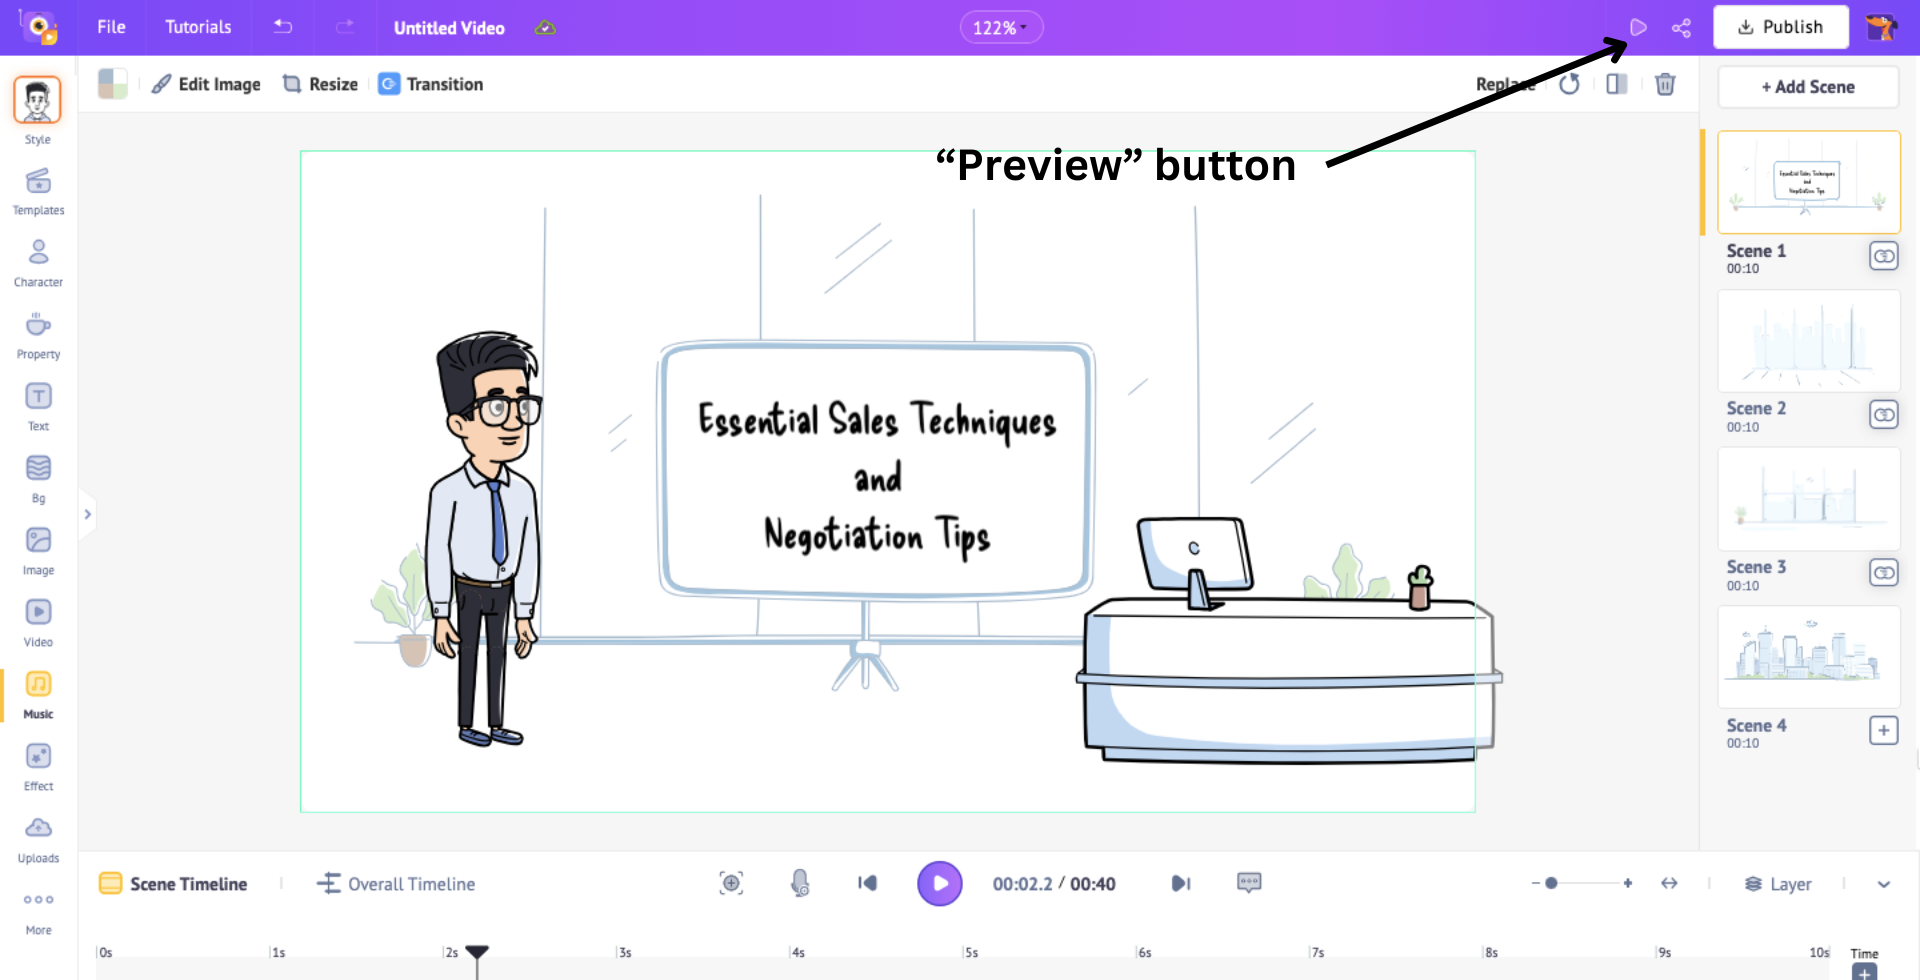
With all the scenes created, use the preview button to view the video from the beginning.
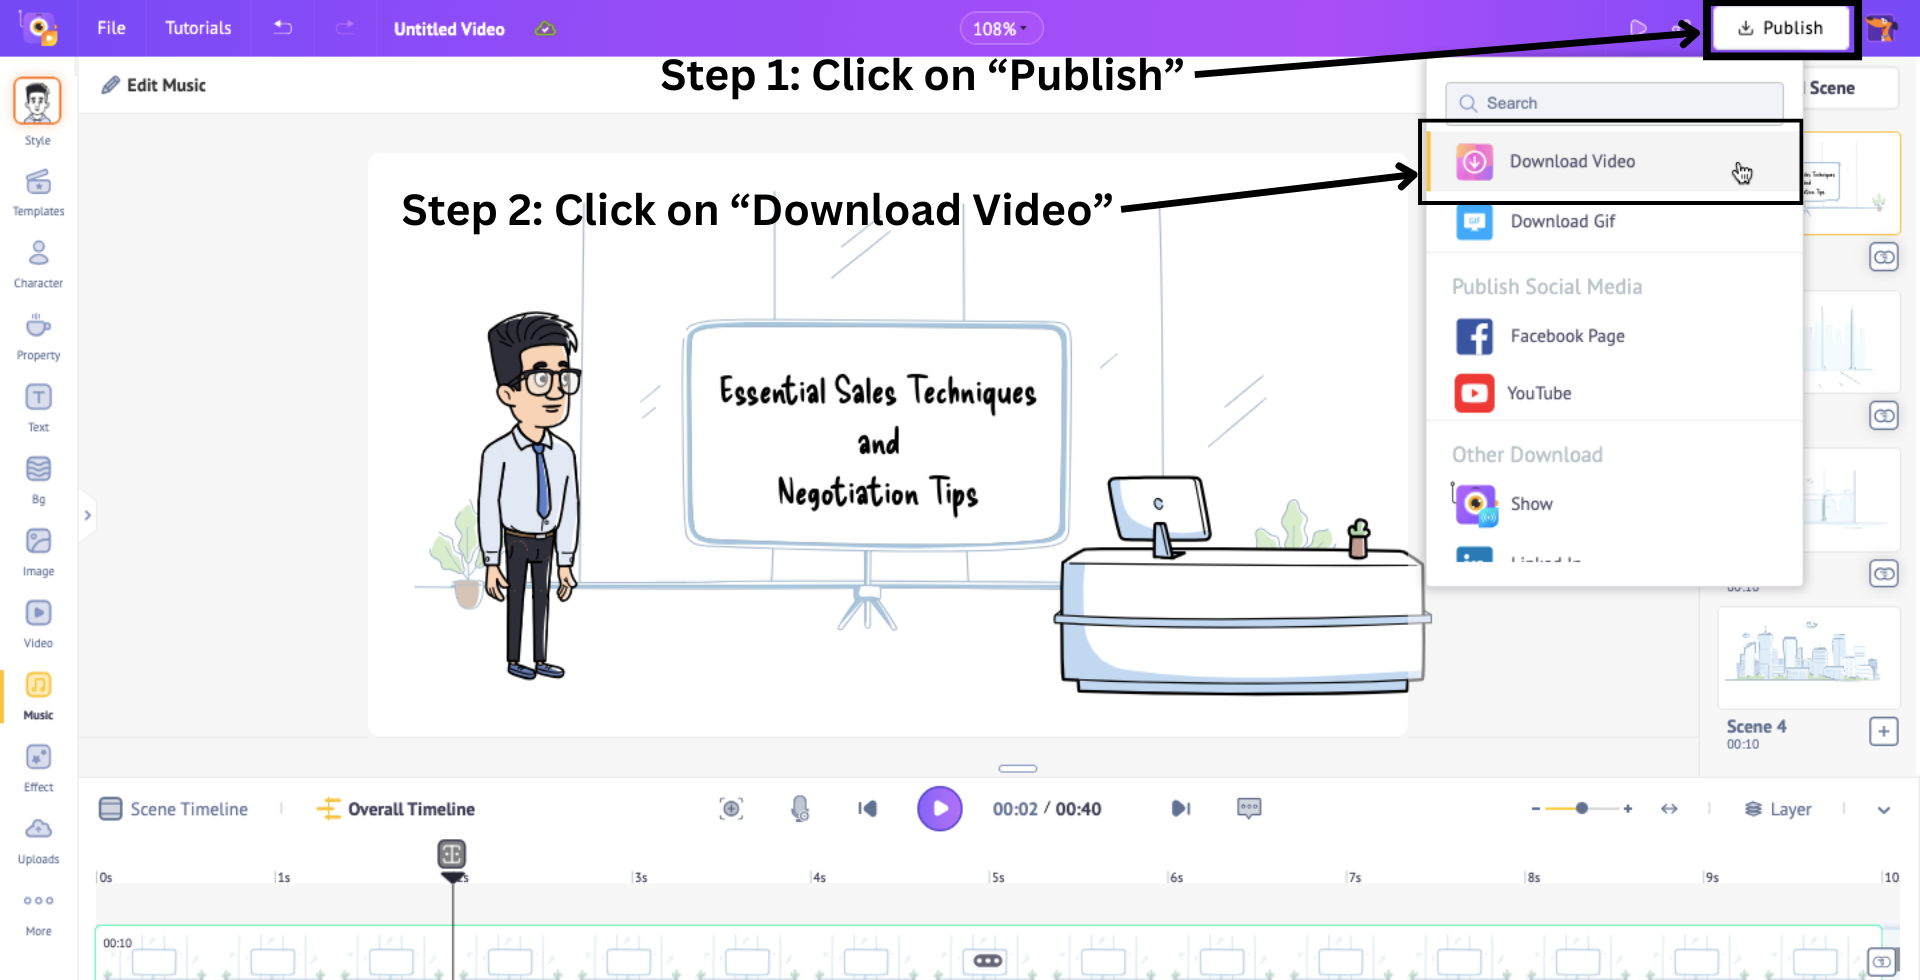
If you are satisfied with your video, then click on “Publish” > “Download Video”.
Here, choose the resolution and format of the video, and then click “Download”.
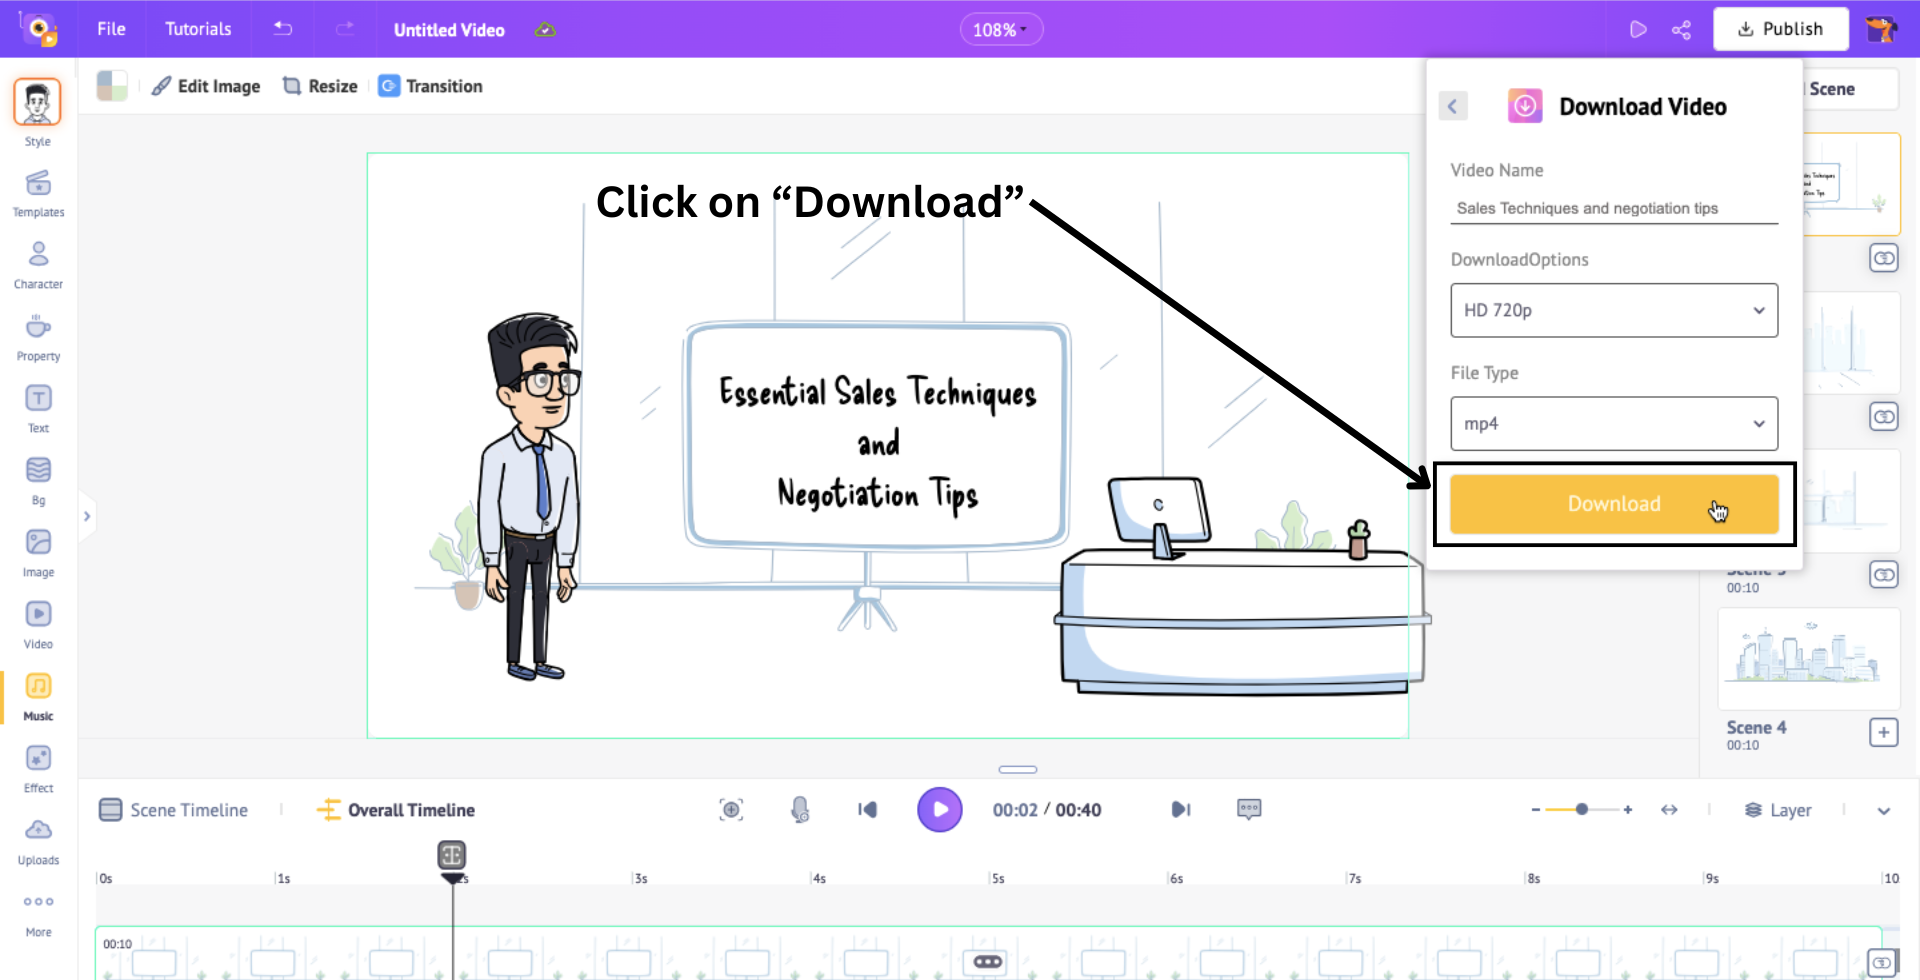
The video will begin to render, and you can download it from the “Exports” page.
This is how easy it is to make a whiteboard video using Animaker!
***
Creating a whiteboard video with Animaker is not only easy but also an incredibly effective way to share your message in a fun and engaging manner.
By following the steps outlined in this guide, you can produce professional-quality whiteboard videos that not only capture attention but also clearly communicate your ideas.
So, whether you're an educator, a business professional, or a content creator, dive into Animaker’s Whiteboard Video Maker, explore your creativity, and watch your concepts spring to life on a virtual whiteboard!
Get ready to transform your messages into dynamic visual stories that resonate with your audience and make a lasting impact!