How to make a book trailer video using Animaker?
Sruthi - December 26, 2015 - Leave your thoughts.
- With an existing Book trailer template
- Creating one from scratch
How to edit a Book trailer template?
Editing & improvising the existing book trailer templates is easier than you think. It won’t take more than 10 minutes if you follow the below steps to create your own book trailer.-
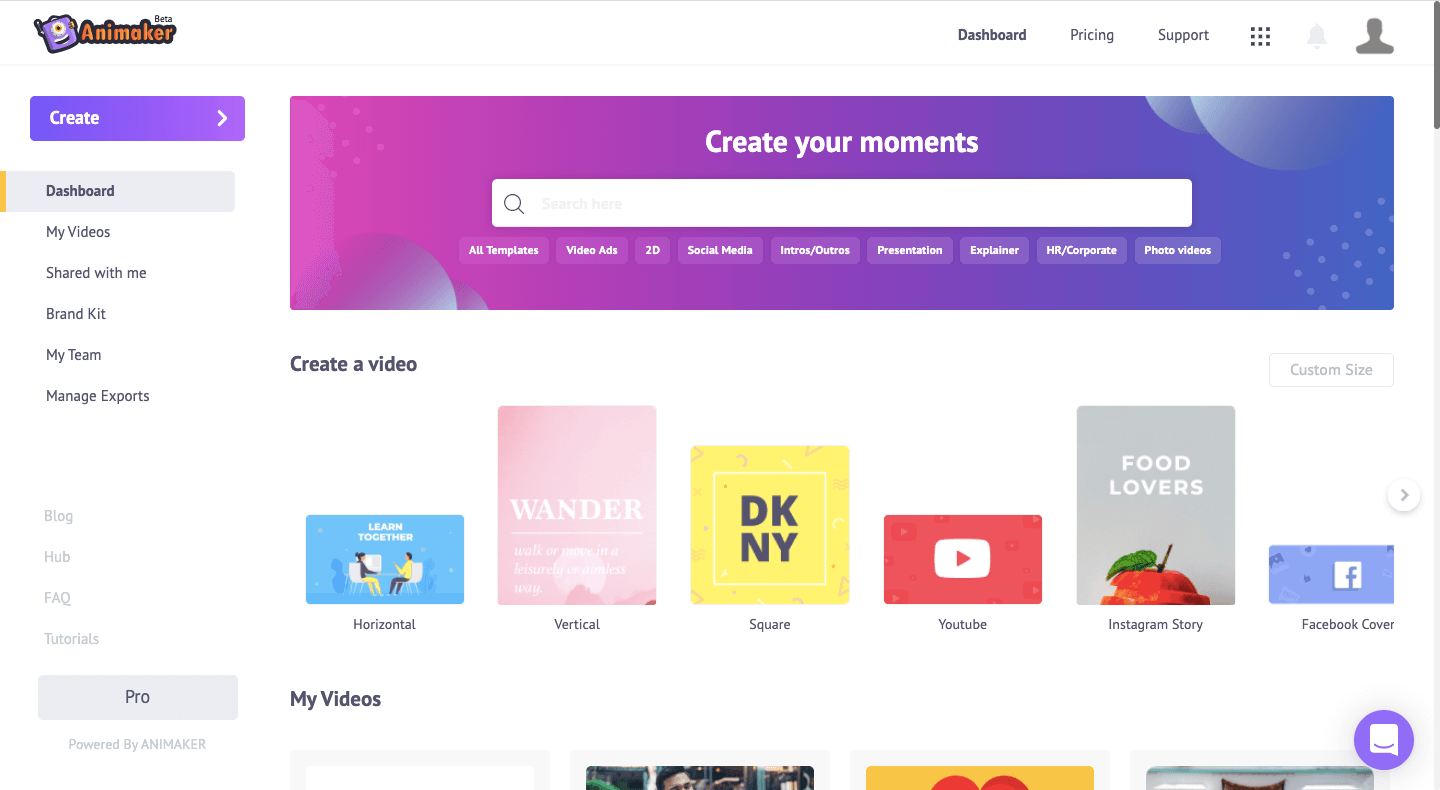
- Once you login to your account, you will land on the application dashboard. On the dashboard, you will see various templates categorized according to their use cases. If you want to find a specific use case, you can use the search bar. In our case, we will be searching for “Book Trailer.”
- Once you search, you will be taken to the moments’ page where you can find the available templates for the searched term. In our case, It is book trailers. You can preview each template by clicking on the ‘Preview’ button. If you wish to proceed with any template, click on ‘Use.’
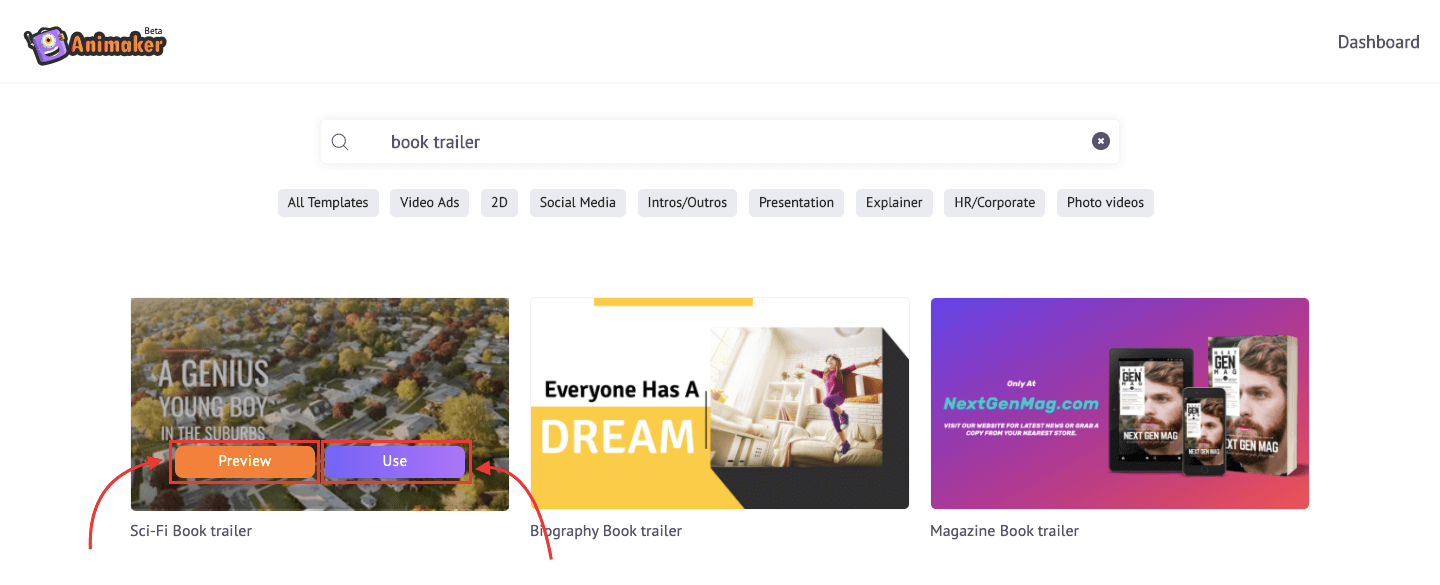
- When you click on the ‘Use’ button, a new tab will automatically open, and the template you chose will be created as a new project.
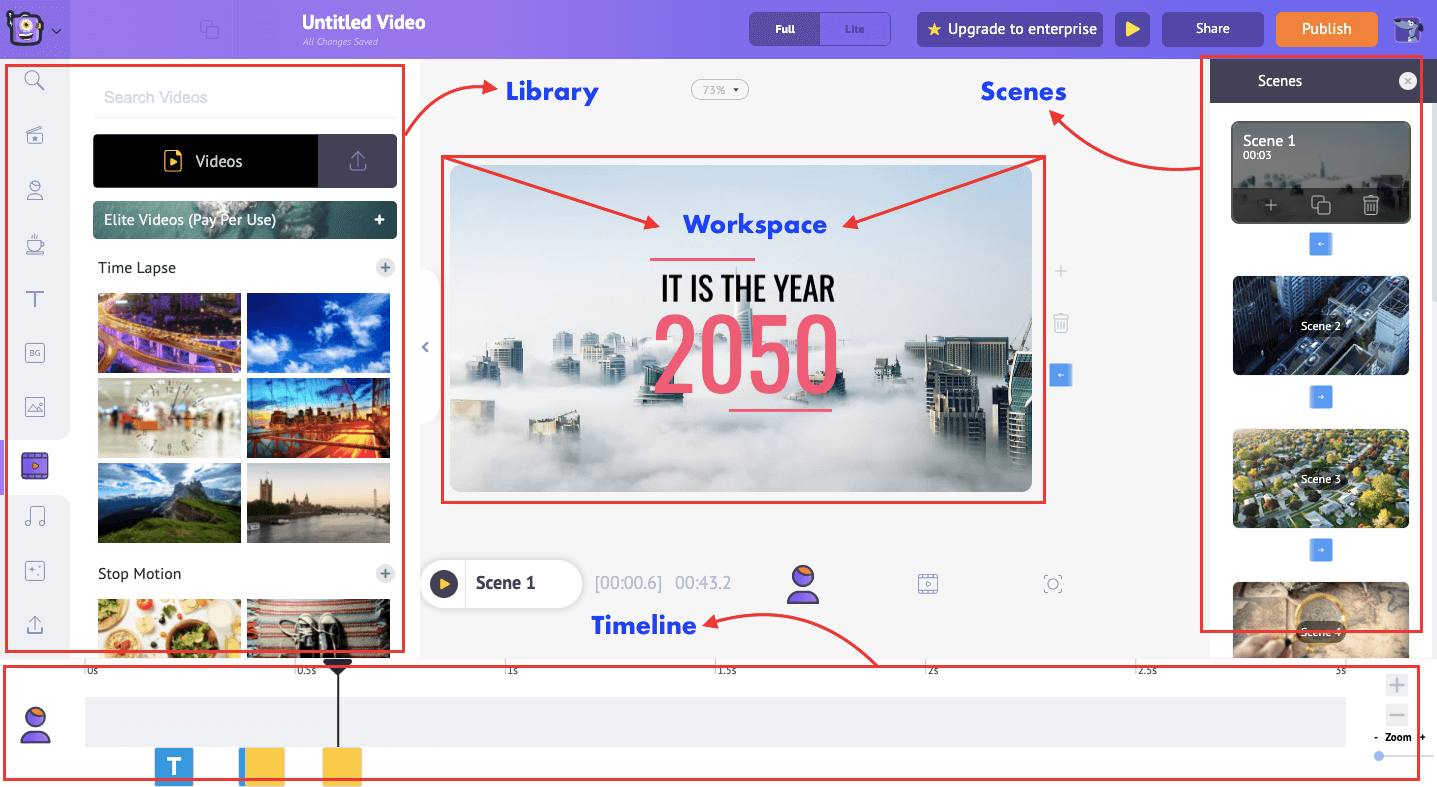 Here, you can see the main project is split up into different sections :
WorkSpace: The center space is the canvas where the different elements of the video like text, clips, images are assembled.
Library: The section on the left is where you can find every kind of asset you need right from stock videos, photos, music, text, and even animated effects. The library section also has the upload option, which allows you to upload your own files.
Scenes: The section you see on the right is the scenes section. You can use this to manage the different scenes in your project. You can also add, duplicate, or delete scenes in this section.
Timeline: The section on the bottom is the timeline section. Here you can adjust the duration of visibility for each element used in the video. There are three different timelines:
- Animation timeline - The specific timeline for the specific scene to manage and edit all elements & animations
- Video timeline - The overall timeline for the complete project
- Camera timeline - The timeline to manage camera effects
Here, you can see the main project is split up into different sections :
WorkSpace: The center space is the canvas where the different elements of the video like text, clips, images are assembled.
Library: The section on the left is where you can find every kind of asset you need right from stock videos, photos, music, text, and even animated effects. The library section also has the upload option, which allows you to upload your own files.
Scenes: The section you see on the right is the scenes section. You can use this to manage the different scenes in your project. You can also add, duplicate, or delete scenes in this section.
Timeline: The section on the bottom is the timeline section. Here you can adjust the duration of visibility for each element used in the video. There are three different timelines:
- Animation timeline - The specific timeline for the specific scene to manage and edit all elements & animations
- Video timeline - The overall timeline for the complete project
- Camera timeline - The timeline to manage camera effects
- Once you login to your account, you will land on the application dashboard. On the dashboard, you will see various templates categorized according to their use cases. If you want to find a specific use case, you can use the search bar. In our case, we will be searching for “Book Trailer.”
How to customize the Book trailer template?
Step 1: Upload and insert your media into the template. Step 2: Customize the text that’s in the template Step 3: Add background music Step 4: Download your book trailer Now Let’s dive a little deeper into the different steps involved in customizing the template! Step 1: Upload and insert your media into the template Upload all the media that you are planning to use in the book trailer in the ‘My Uploads’ section. And here’s how you can upload your media-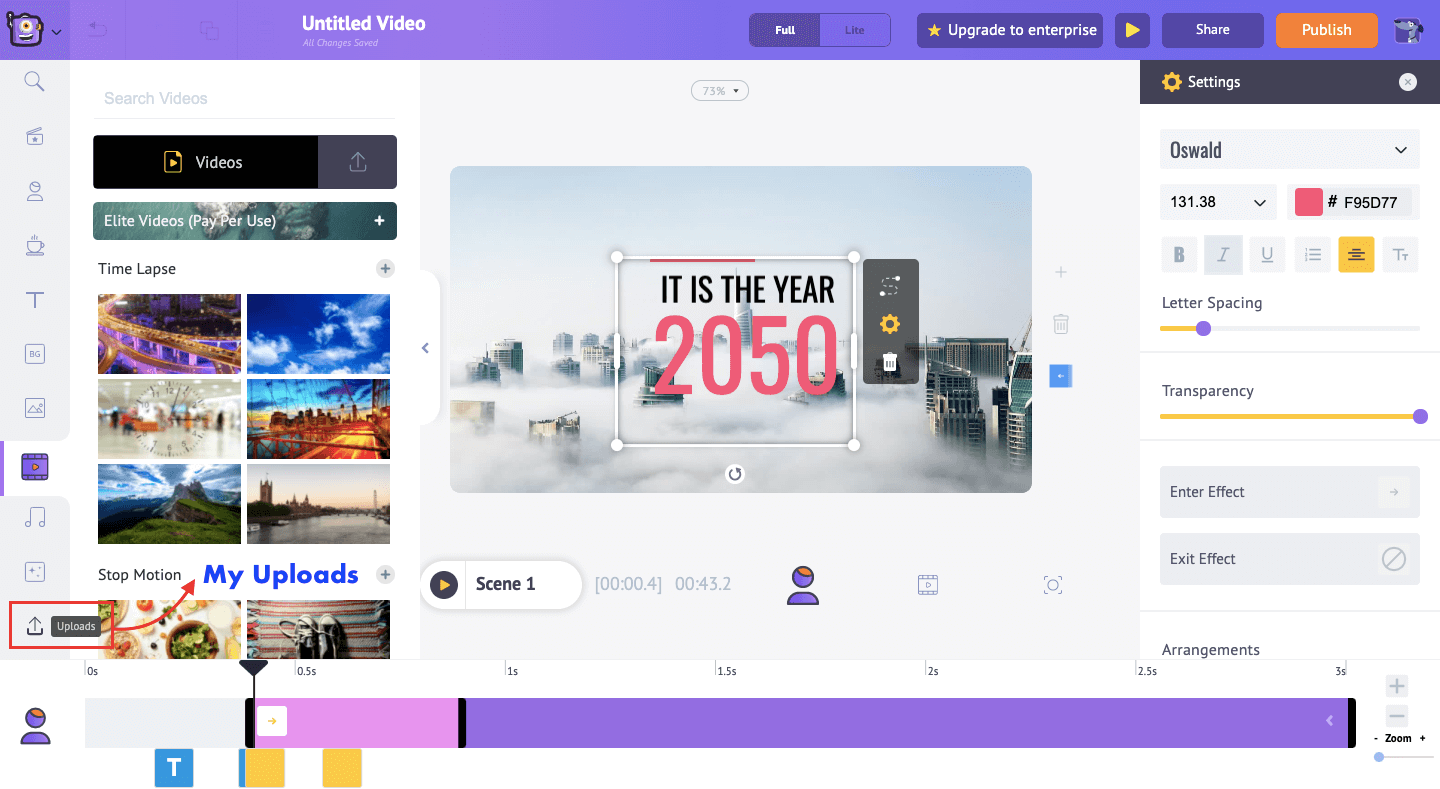 In the uploads section, click on upload and select the media files you want to add in your book trailer.
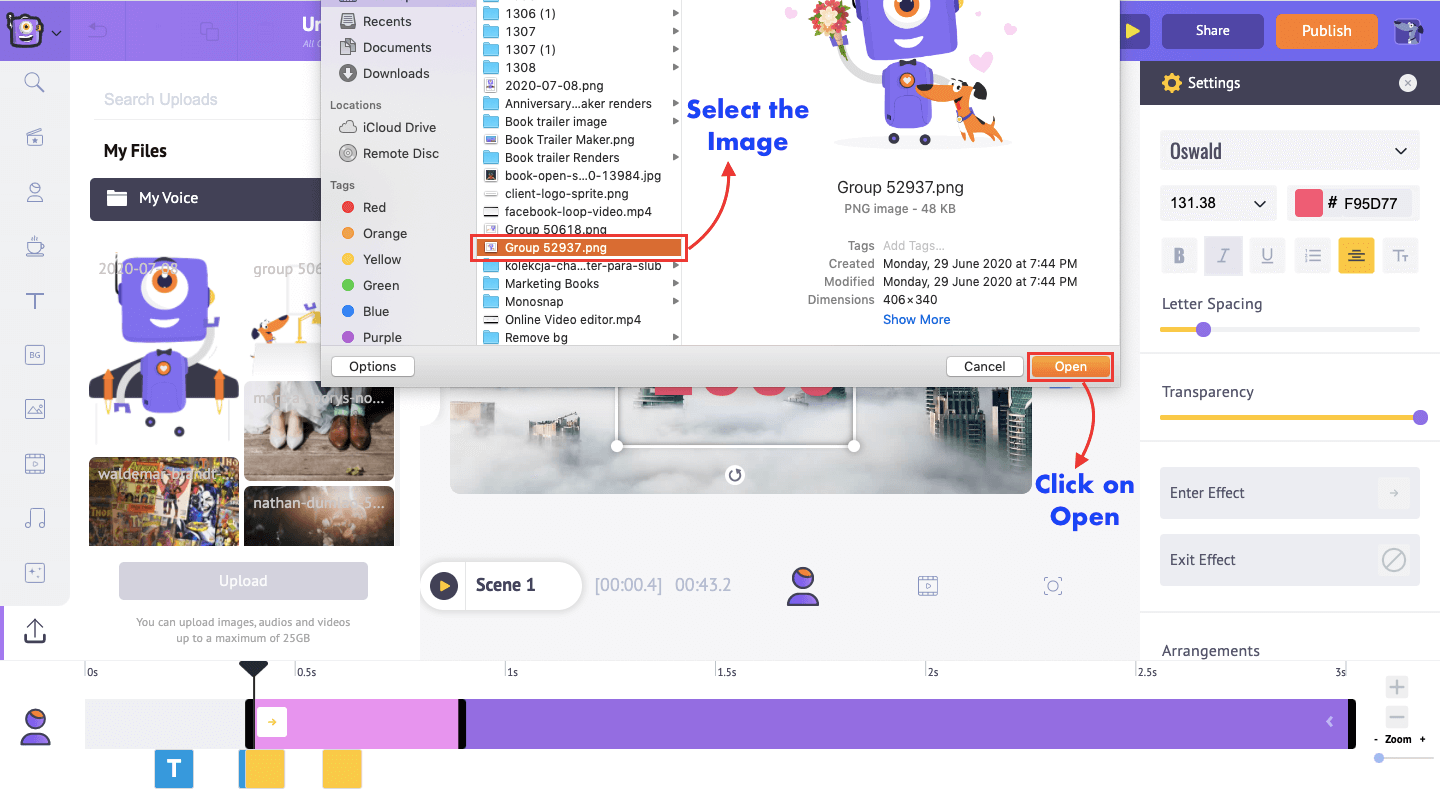
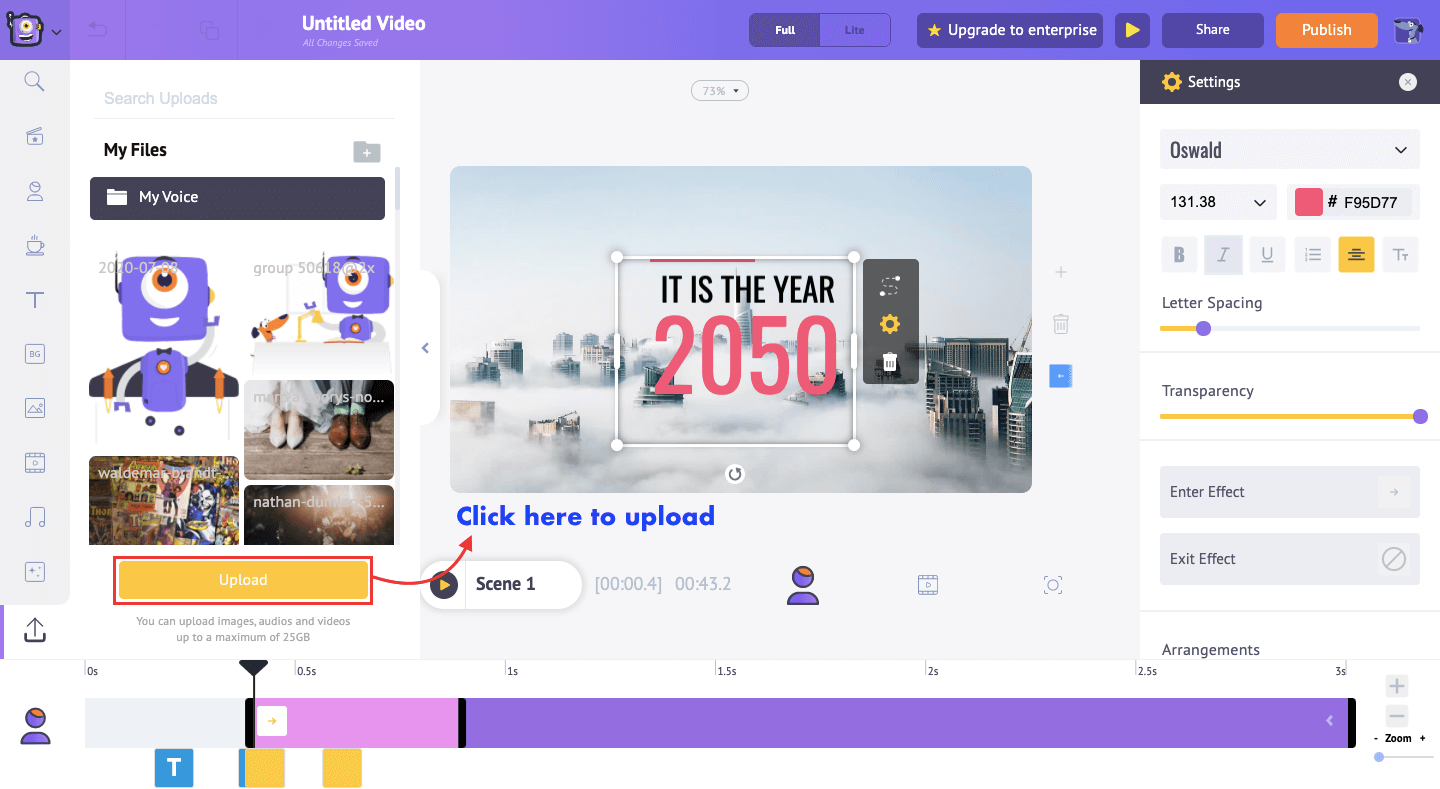 Once you click on the Upload button, a new window will open where you can select the images or videos to be uploaded.
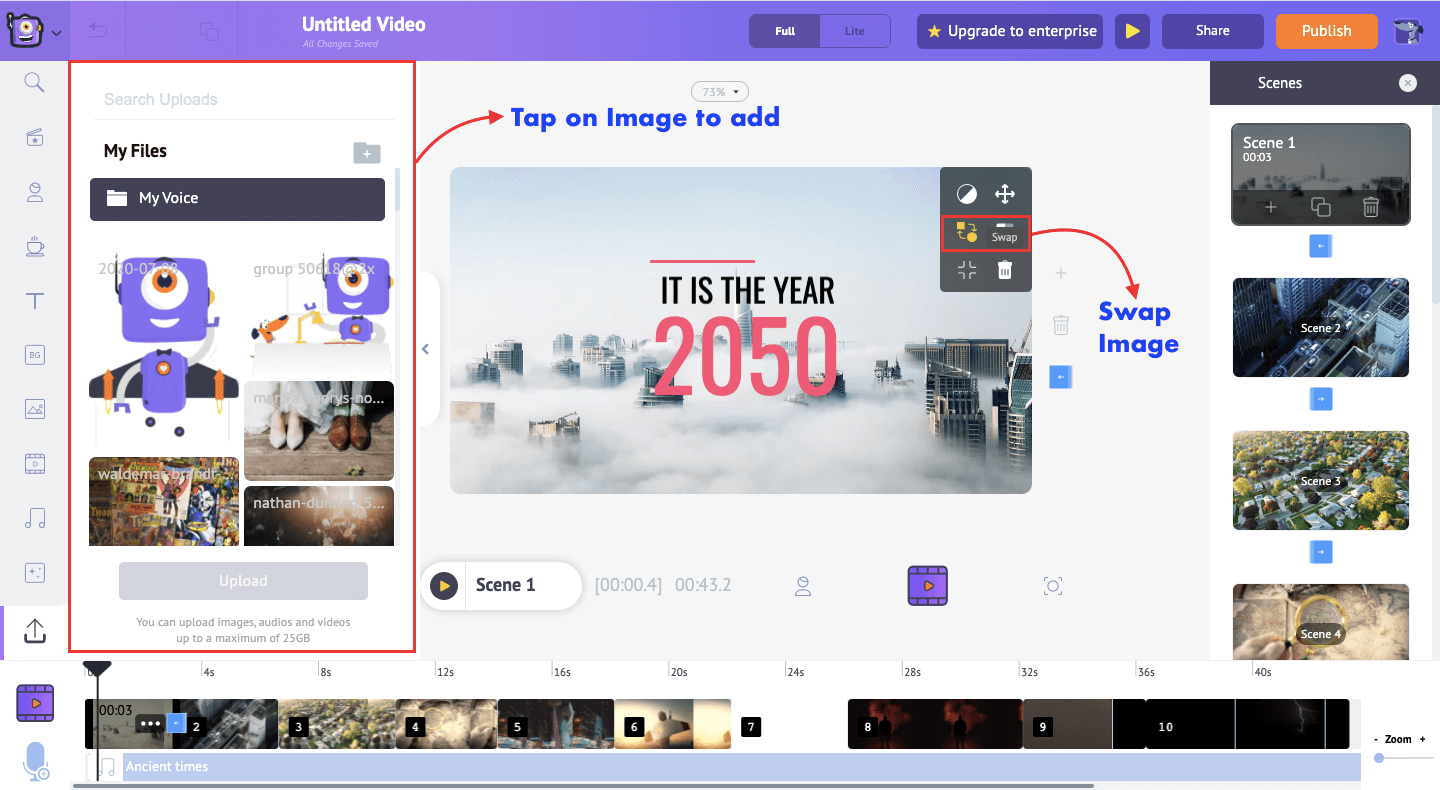
 Once uploaded, click on the background image that is already in the template. Once you do that, an item menu will open which has several options. Choose the swap option to swap the current background to the one you desire from the uploads section.
 Step 2: Customize the text that’s in the template
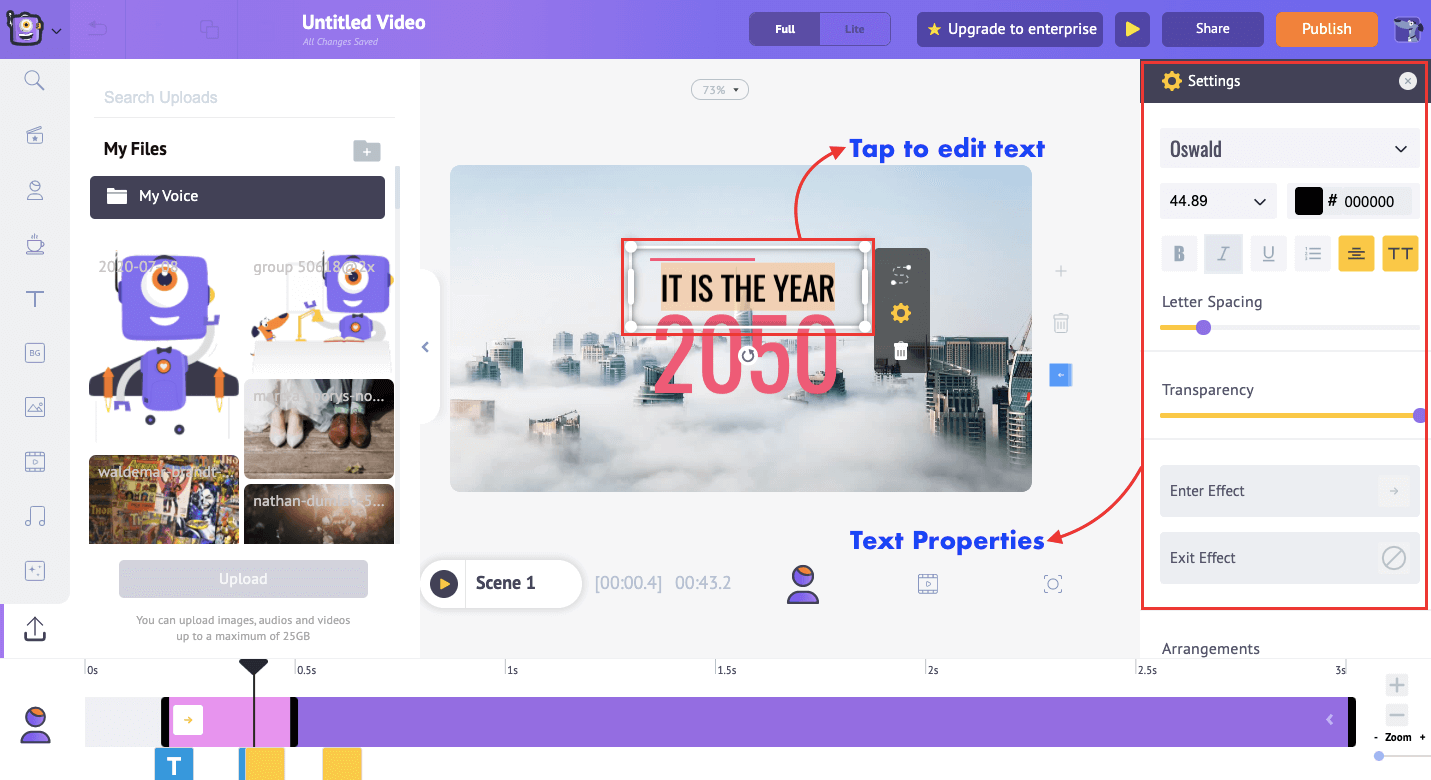
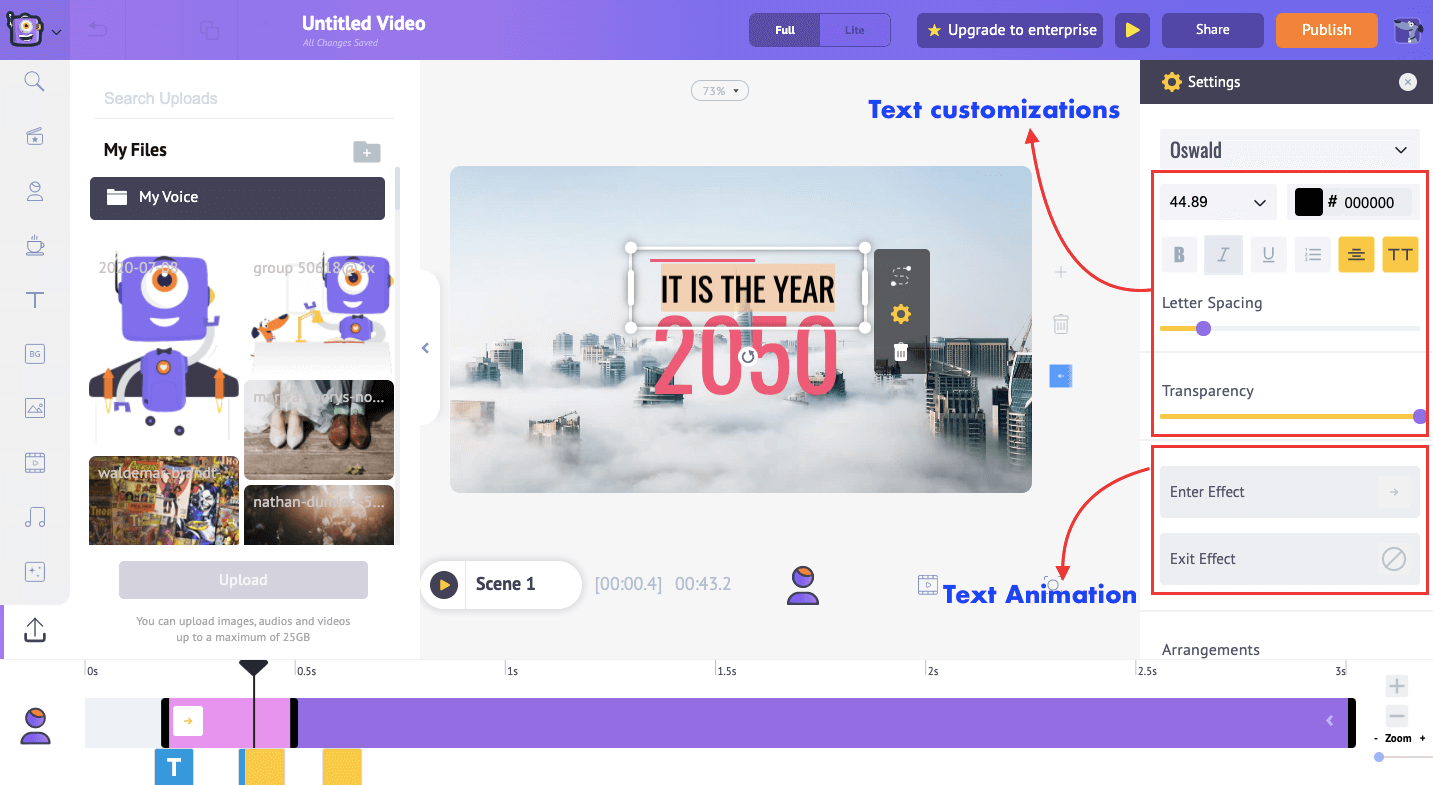
Now simply click on the text element to edit and customize the text according to your need. You can change the font size, font color, spacing, and more on the text using the text settings.
Step 2: Customize the text that’s in the template
Now simply click on the text element to edit and customize the text according to your need. You can change the font size, font color, spacing, and more on the text using the text settings.
 In the text settings tab on the right side, you can change to different fonts or even upload your font.
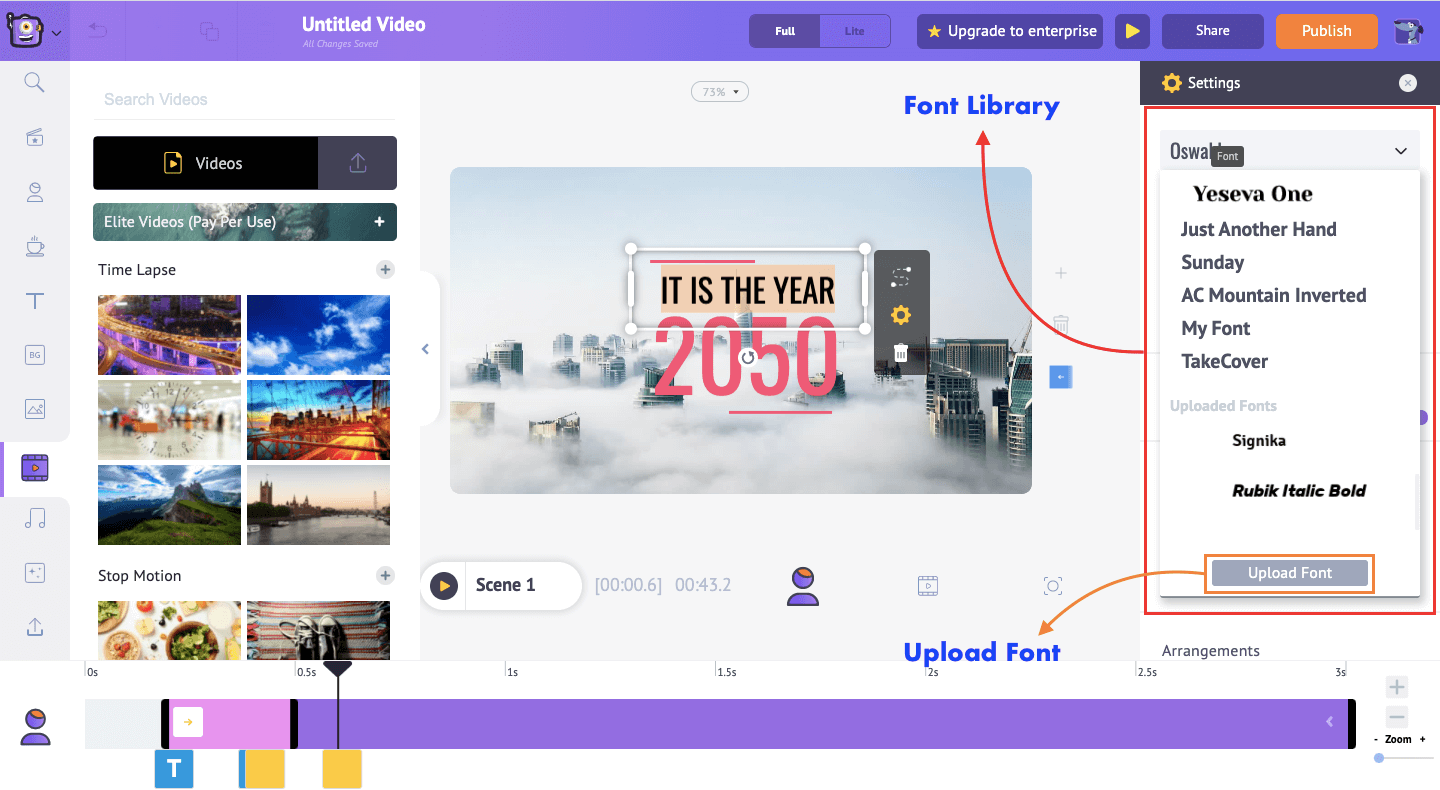 In the same tab, you can also change every aspect relating to the font, and even an entry & exit effect.
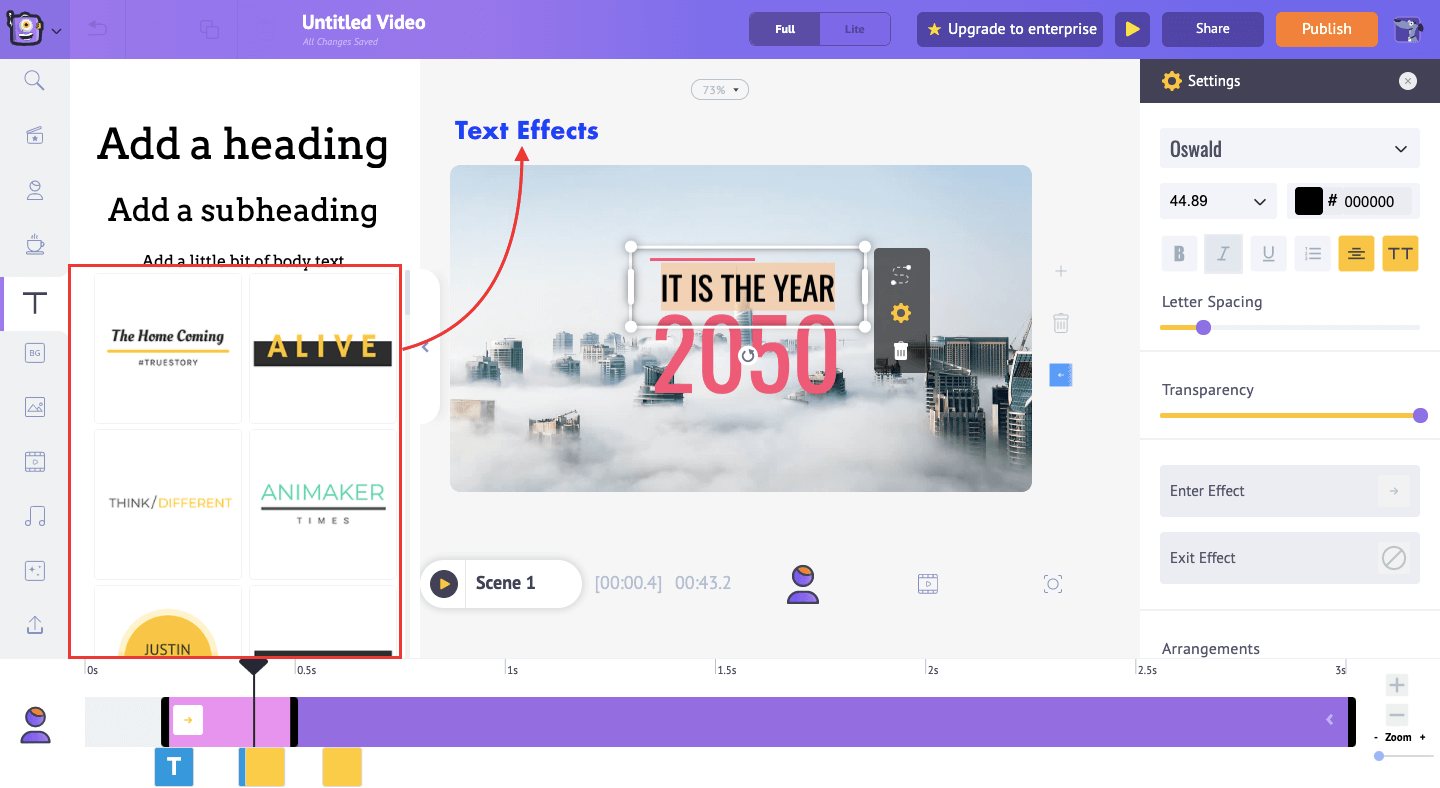
 Alternatively, if you decide to add your own text instead of editing the existing one, you can pick one among the tons of Pre-built text options or you can pick a blank text box and edit it to look the way you want.
 Step 3: Add background music
Once you have modified the text, the next step will be to finalize the music track for your book trailer.
The premade template comes with its own music to match the theme. If you want to change the default one, first delete the existing music track. To do that, head over to Video Timeline view and tap on the music track to open its item menu and click on delete.
Step 3: Add background music
Once you have modified the text, the next step will be to finalize the music track for your book trailer.
The premade template comes with its own music to match the theme. If you want to change the default one, first delete the existing music track. To do that, head over to Video Timeline view and tap on the music track to open its item menu and click on delete.
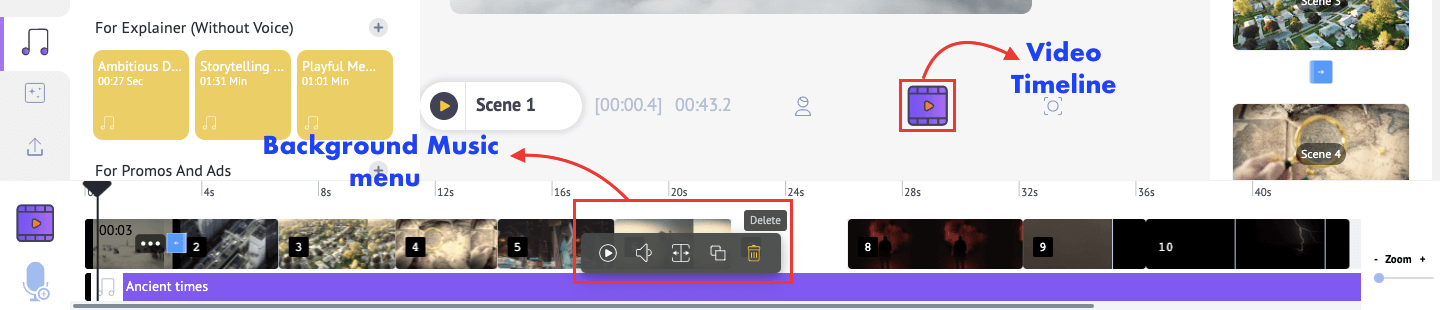 If you wish to change the music, you can head over to the music section where you can find a massive library of tracks to suit your mood.
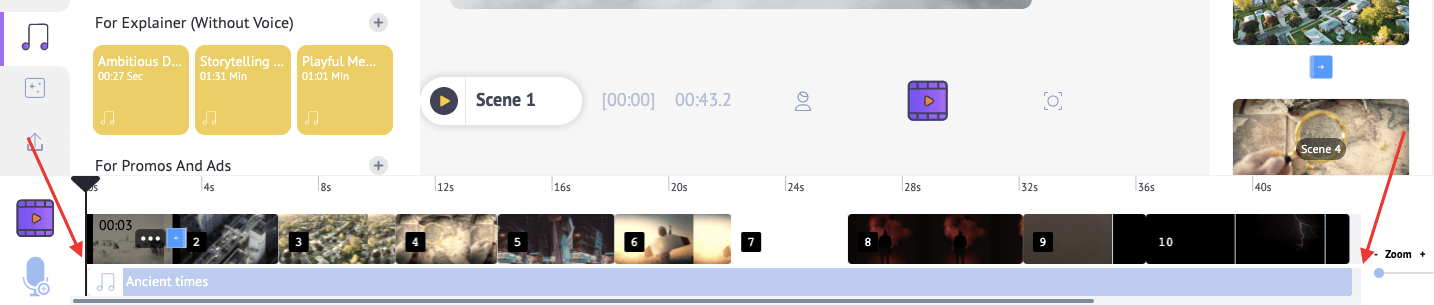
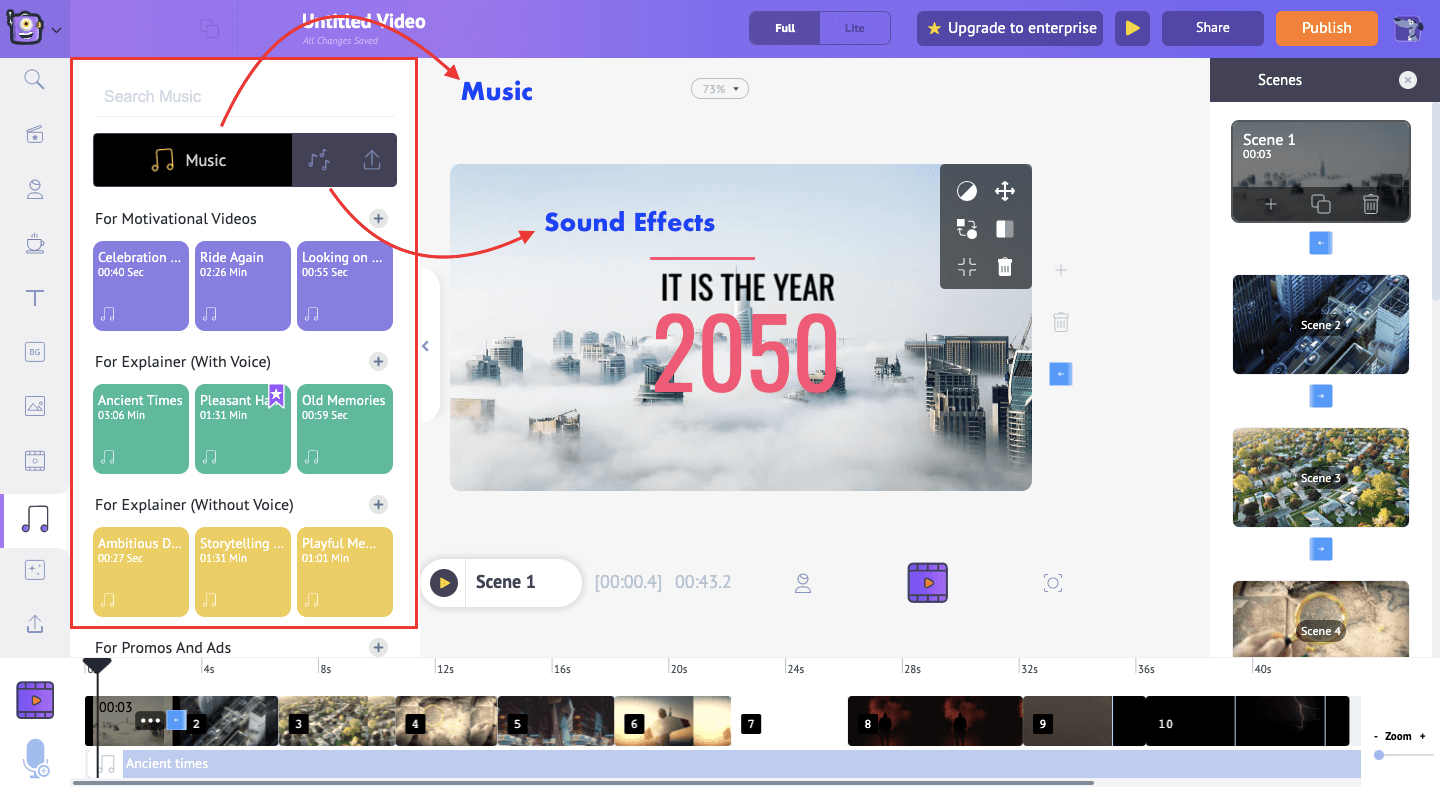 To ensure the music plays throughout your Book trailer, go to the first scene and add the music. Once you add the music to your timeline, drag both edges of your track from the beginning of the first scene to the end of your last scene.
 You can also upload your own music in the uploads section or in the music section.
Step 4: Download your book trailer
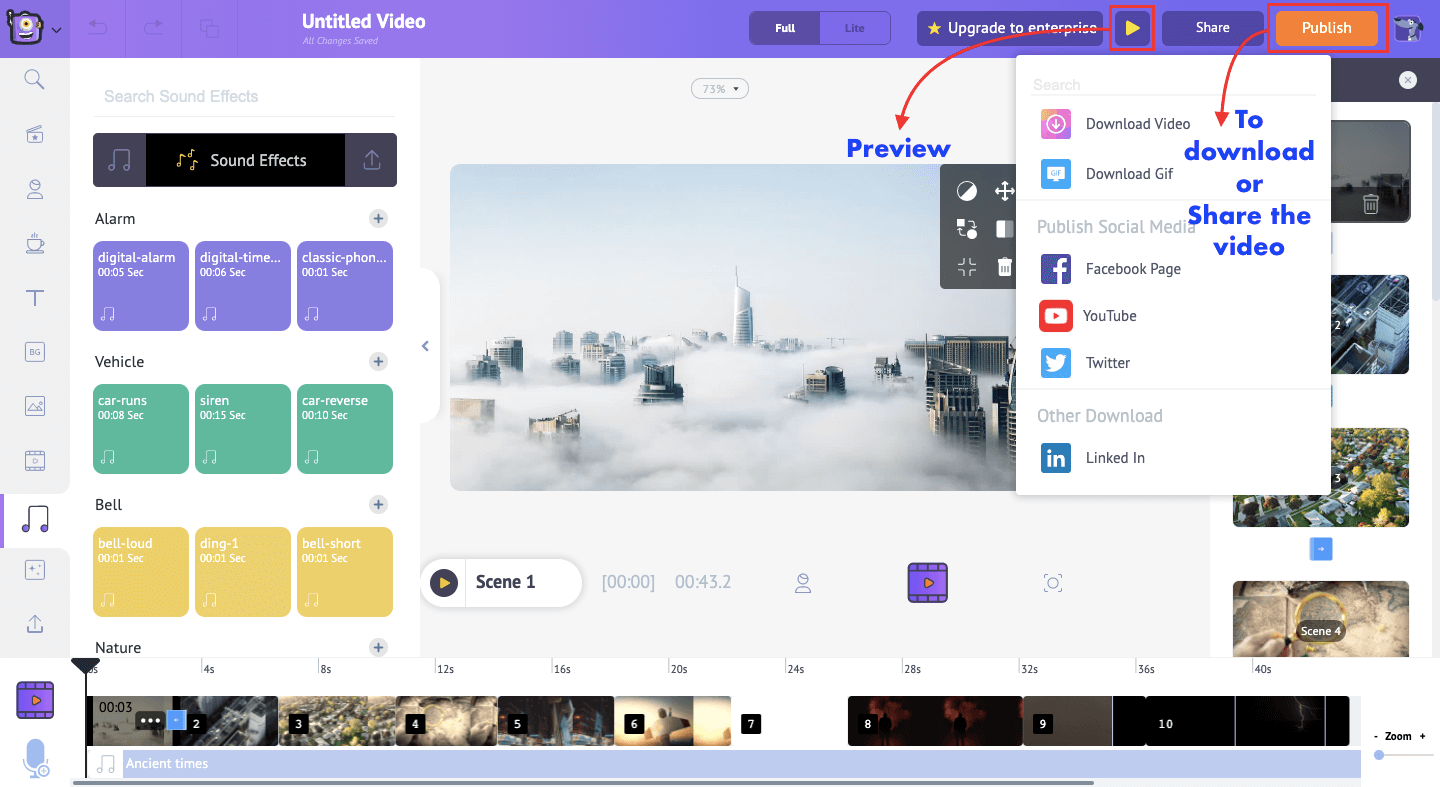
Now that you have created your beautiful book trailer, it’s time to download it to your computer. Before downloading, double-check for any mistakes or changes in the preview mode. You can preview the video by pressing on the small play button left to the share button. Once you are satisfied, you can download it/share it by clicking on the publish button.
You can also upload your own music in the uploads section or in the music section.
Step 4: Download your book trailer
Now that you have created your beautiful book trailer, it’s time to download it to your computer. Before downloading, double-check for any mistakes or changes in the preview mode. You can preview the video by pressing on the small play button left to the share button. Once you are satisfied, you can download it/share it by clicking on the publish button.
How to create a book trailer from scratch?
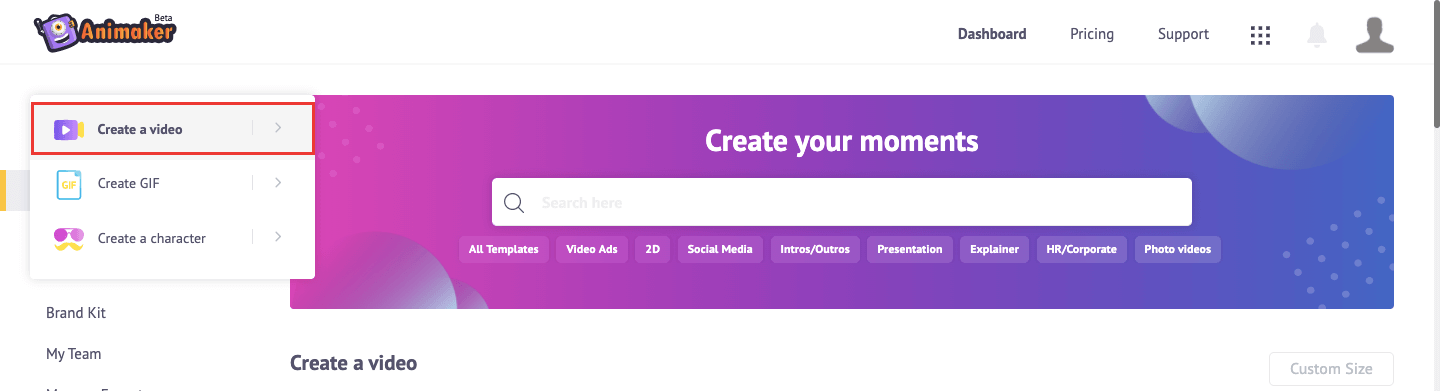
Now that you know how to edit the template, let’s try creating a book trailer from scratch. There are a few things that you should know & learn to make a book trailer from scratch. Are you ready to learn? Get started by creating a blank project on Animaker. You can do one by heading over to the dashboard, click on ‘Create,’ and click on ‘Create a new video.’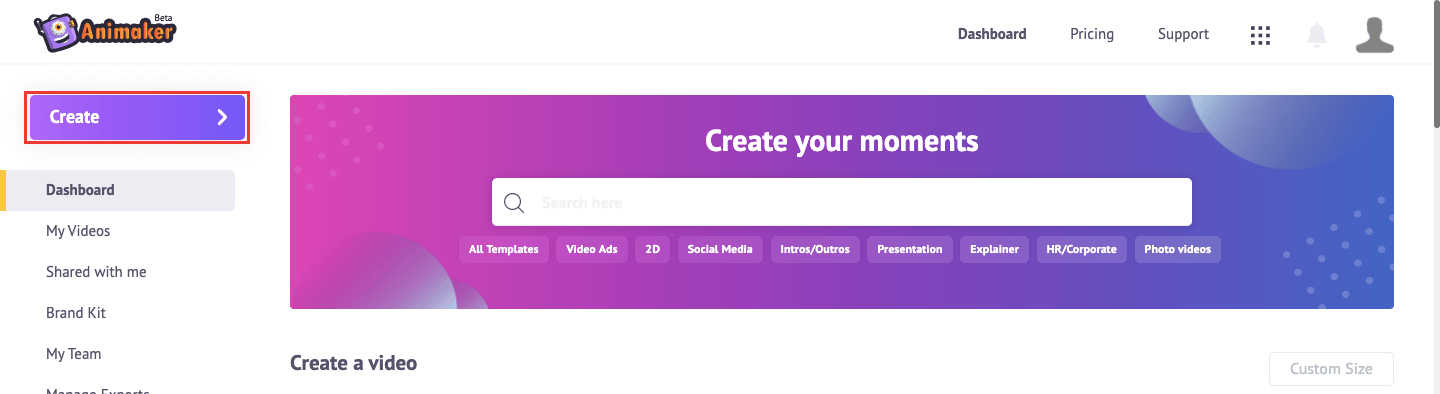
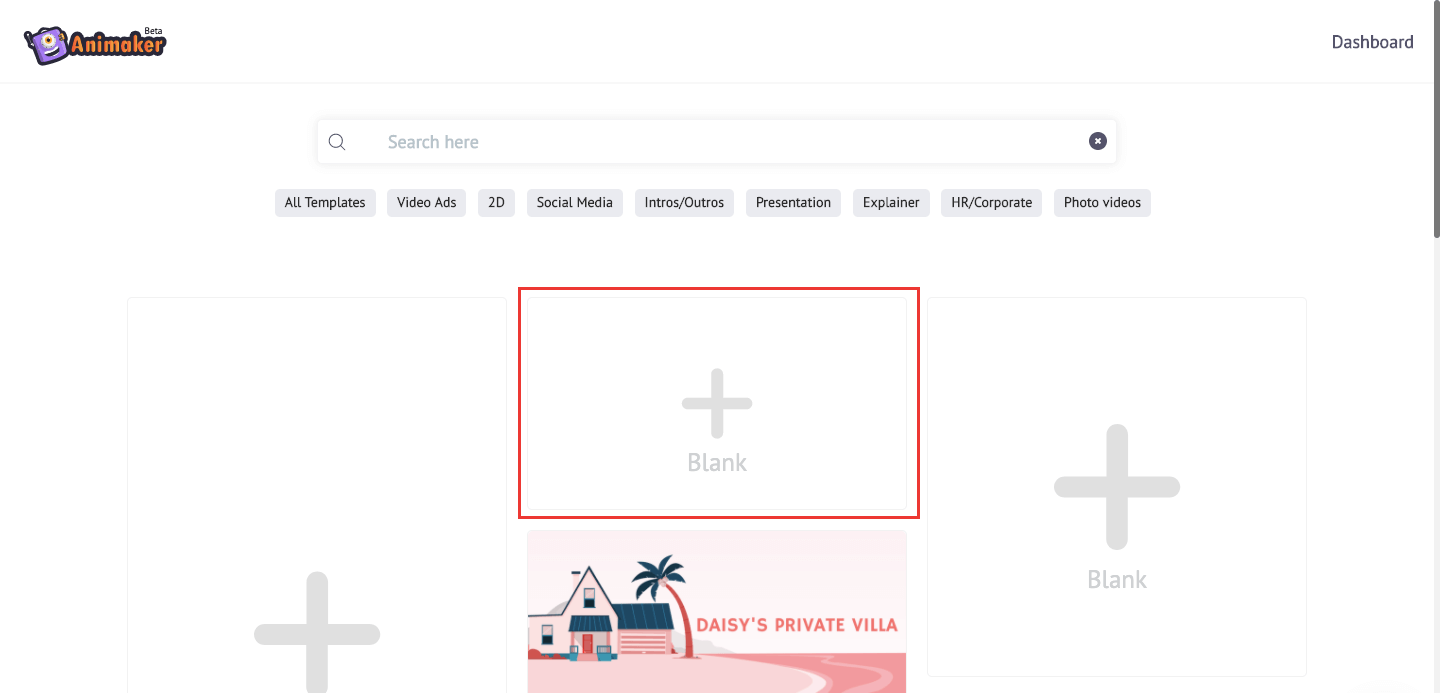
 You can find different aspect ratios (Vertical, Square & horizontal) blank canvas on the top. Choose the horizontal blank canvas as it is ideal for a book trailer.
 Once you create a new blank canvas, it's time to get creative.
Right from a fully animated book trailer with your characters to a Book trailer with your images & videos.
1. Object Effects - This is the basic level of effect where you can control how objects enter or exit your scene.
Once you create a new blank canvas, it's time to get creative.
Right from a fully animated book trailer with your characters to a Book trailer with your images & videos.
1. Object Effects - This is the basic level of effect where you can control how objects enter or exit your scene.
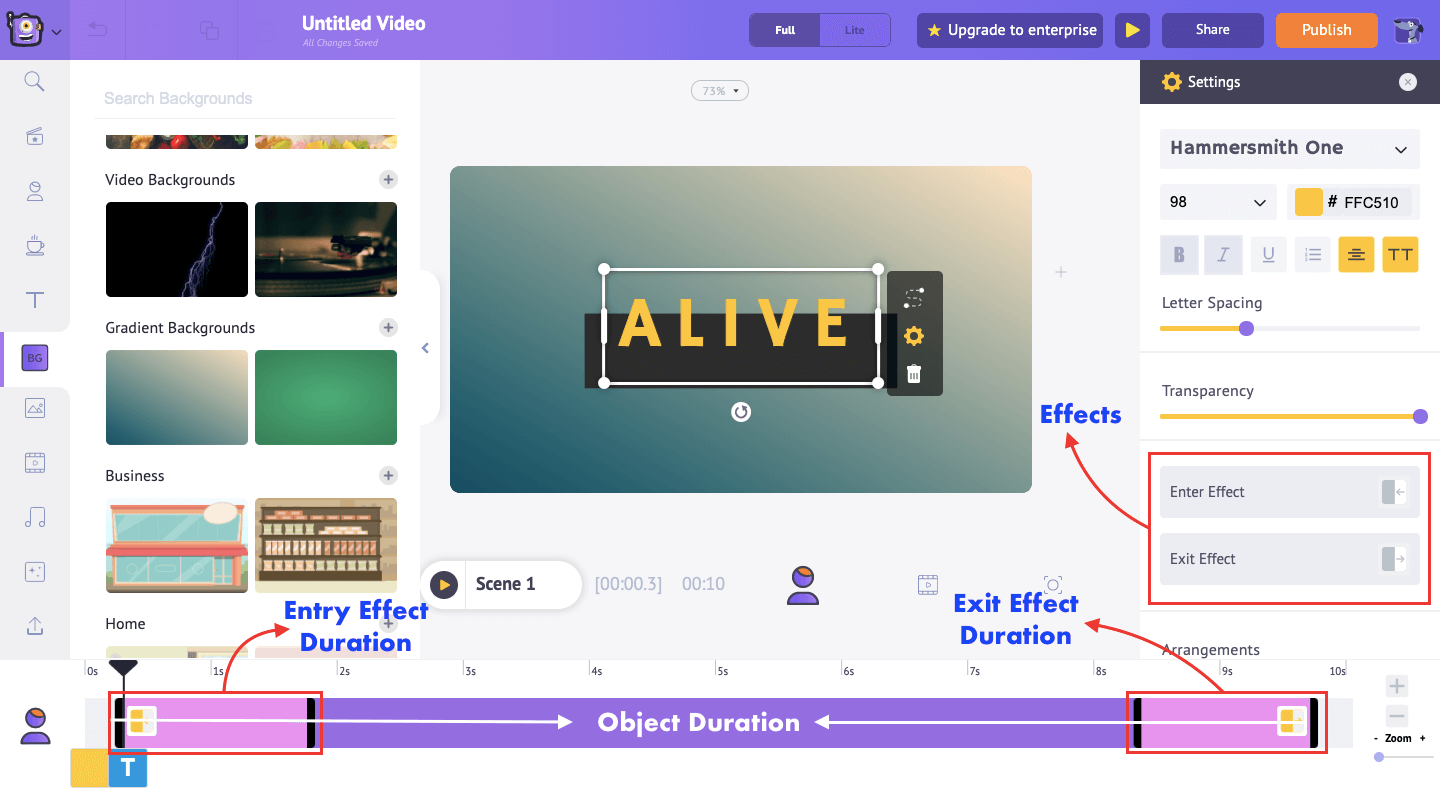 Here, the pink portion shows how long the effect will last and the purple part depicts how long the object will stay in your scene. You can adjust the duration by dragging the black bars.
2. Motion effects - You can even take it a bit further by animating the element using motion effects. Motion effects here can be as simple as moving the product from left to right to adding complex animations to the selected element. You can find two options to animate your element :
Here, the pink portion shows how long the effect will last and the purple part depicts how long the object will stay in your scene. You can adjust the duration by dragging the black bars.
2. Motion effects - You can even take it a bit further by animating the element using motion effects. Motion effects here can be as simple as moving the product from left to right to adding complex animations to the selected element. You can find two options to animate your element :
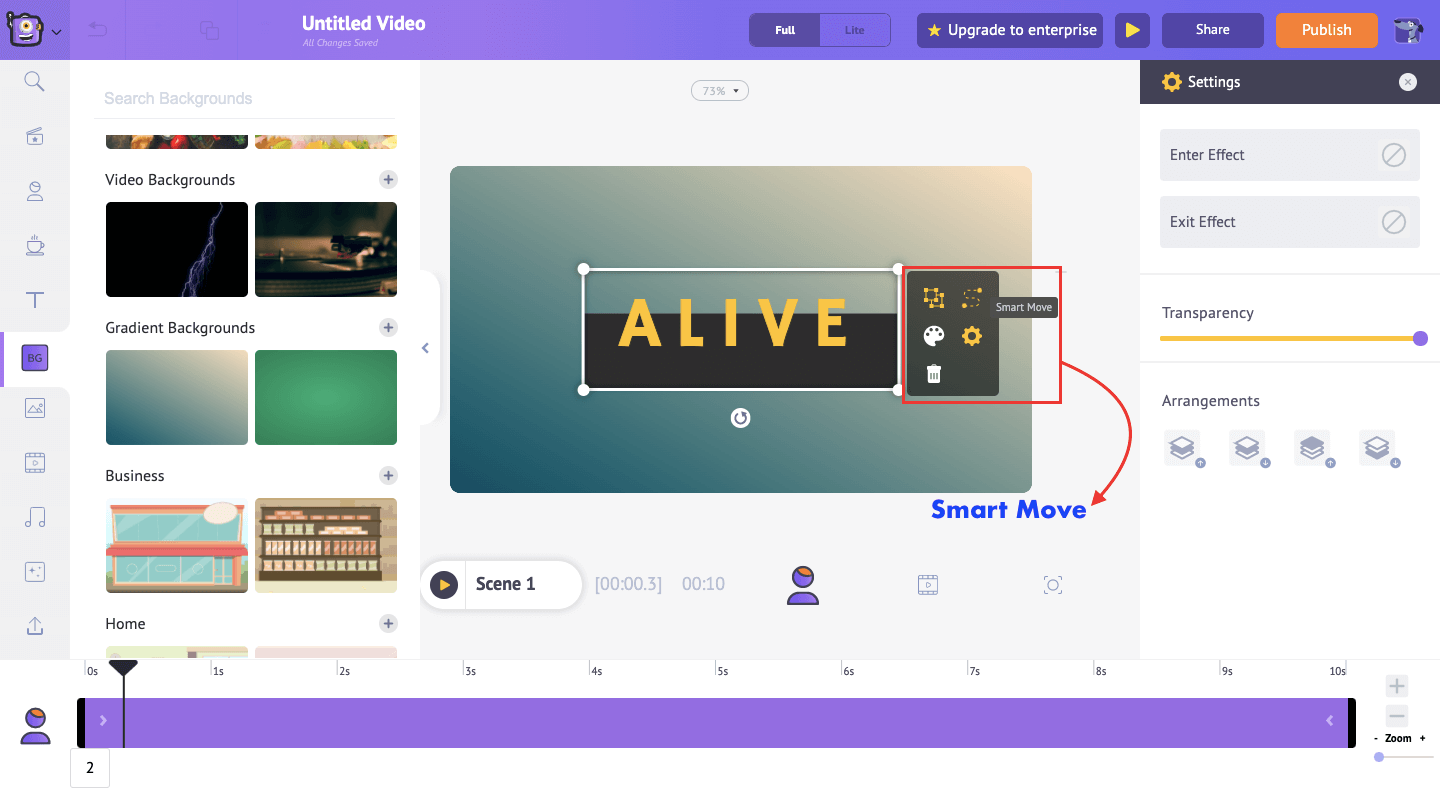
- Smart Move: It helps you add complex animations to your element quickly. Check out this video to know more.
- Action +: It helps you put together a bunch of animations/expressions of a character and make a perfect looking animation. Check out this video to know more.
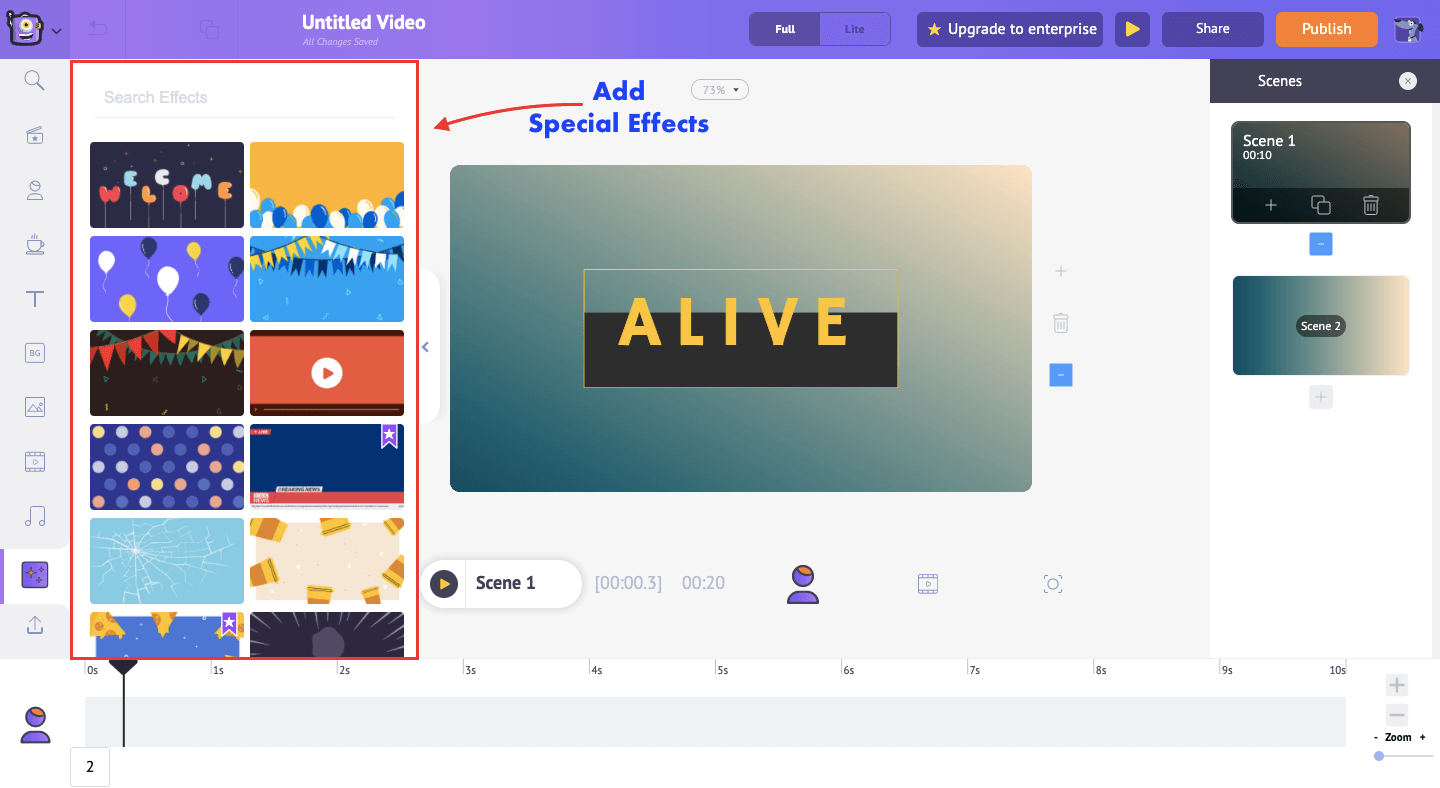
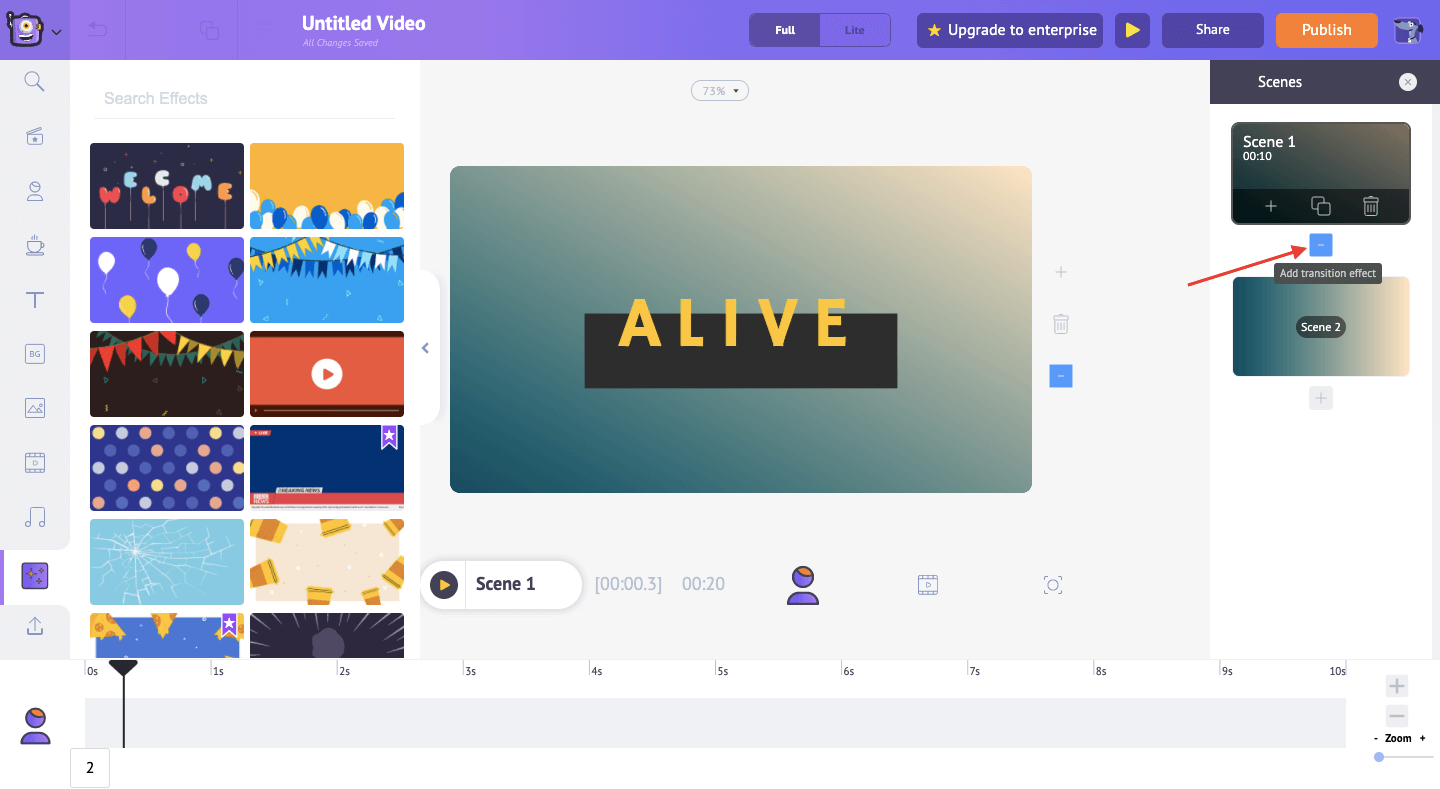 4. Special effects - To add animated special effects to your slides, head over to the special effects library. The Special Effect library is filled with various effects that can make your Book trailer look beautiful.
 We have explained the necessary & the basic features for you to make your beautiful Book trailer. The sky is the limit for the creativity, so get creative and make the bibliophiles turn their heads.
Got any doubts? Ask them in the comments sections below :)
We have explained the necessary & the basic features for you to make your beautiful Book trailer. The sky is the limit for the creativity, so get creative and make the bibliophiles turn their heads.
Got any doubts? Ask them in the comments sections below :)