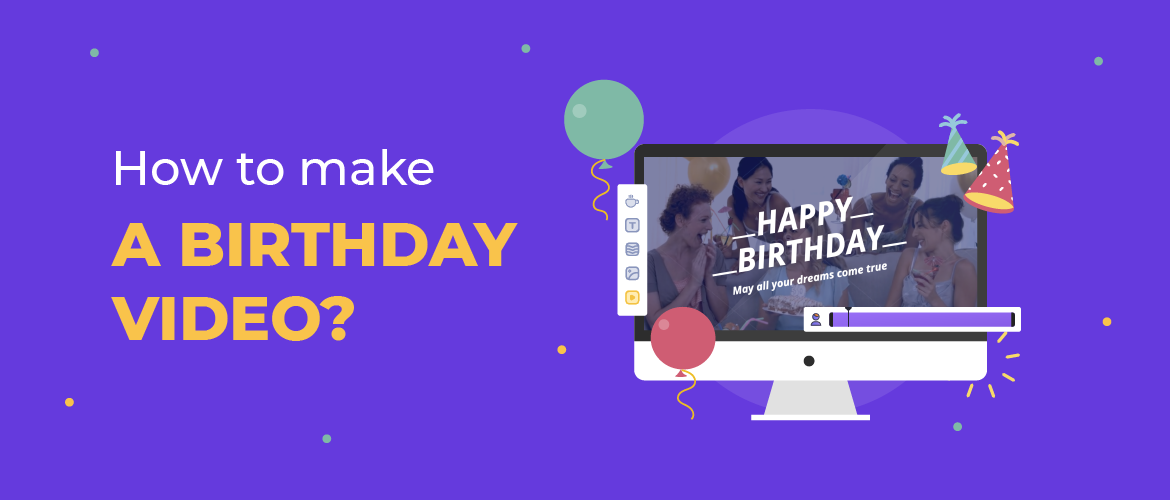
How to Make a Super Unique Birthday Video in under 15 mins?
Guru - November 29, 2021 - Leave your thoughts.
 Planning on giving a birthday themed greeting card along with some flowers? They are probably gonna get the same from 10 others on the same day! You just aren’t going to make them feel special that easily!
Unless! You do something radically different. Something so unique that it’s the first time they are gonna experience it in life!
Wondering what to do now? No worries! Here’s an idea!
What if you could create a birthday wishes video that featured an animated version of your friend? Now that would be something won’t it?
Now you are thinking if that is even possible right? Well, I am here to tell you that it is. And it’s just going to take around 15 to 20 mins of your time.
Planning on giving a birthday themed greeting card along with some flowers? They are probably gonna get the same from 10 others on the same day! You just aren’t going to make them feel special that easily!
Unless! You do something radically different. Something so unique that it’s the first time they are gonna experience it in life!
Wondering what to do now? No worries! Here’s an idea!
What if you could create a birthday wishes video that featured an animated version of your friend? Now that would be something won’t it?
Now you are thinking if that is even possible right? Well, I am here to tell you that it is. And it’s just going to take around 15 to 20 mins of your time.
 This article will guide you through the steps needed to create that special birthday video featuring an animated version of your friend. Let’s jump right in.
Let’s have a look at the steps one by one.
Step 1: Create a character just like your friend Step 2: Edit the text the way you want Step 3: Customize the tone of the video to your friend’s favorite colour Step 4: Add your own twist Step 5: Change the music track Step 6: Preview Step 7: Publish and Download Start by visiting the birthday video maker page from Animaker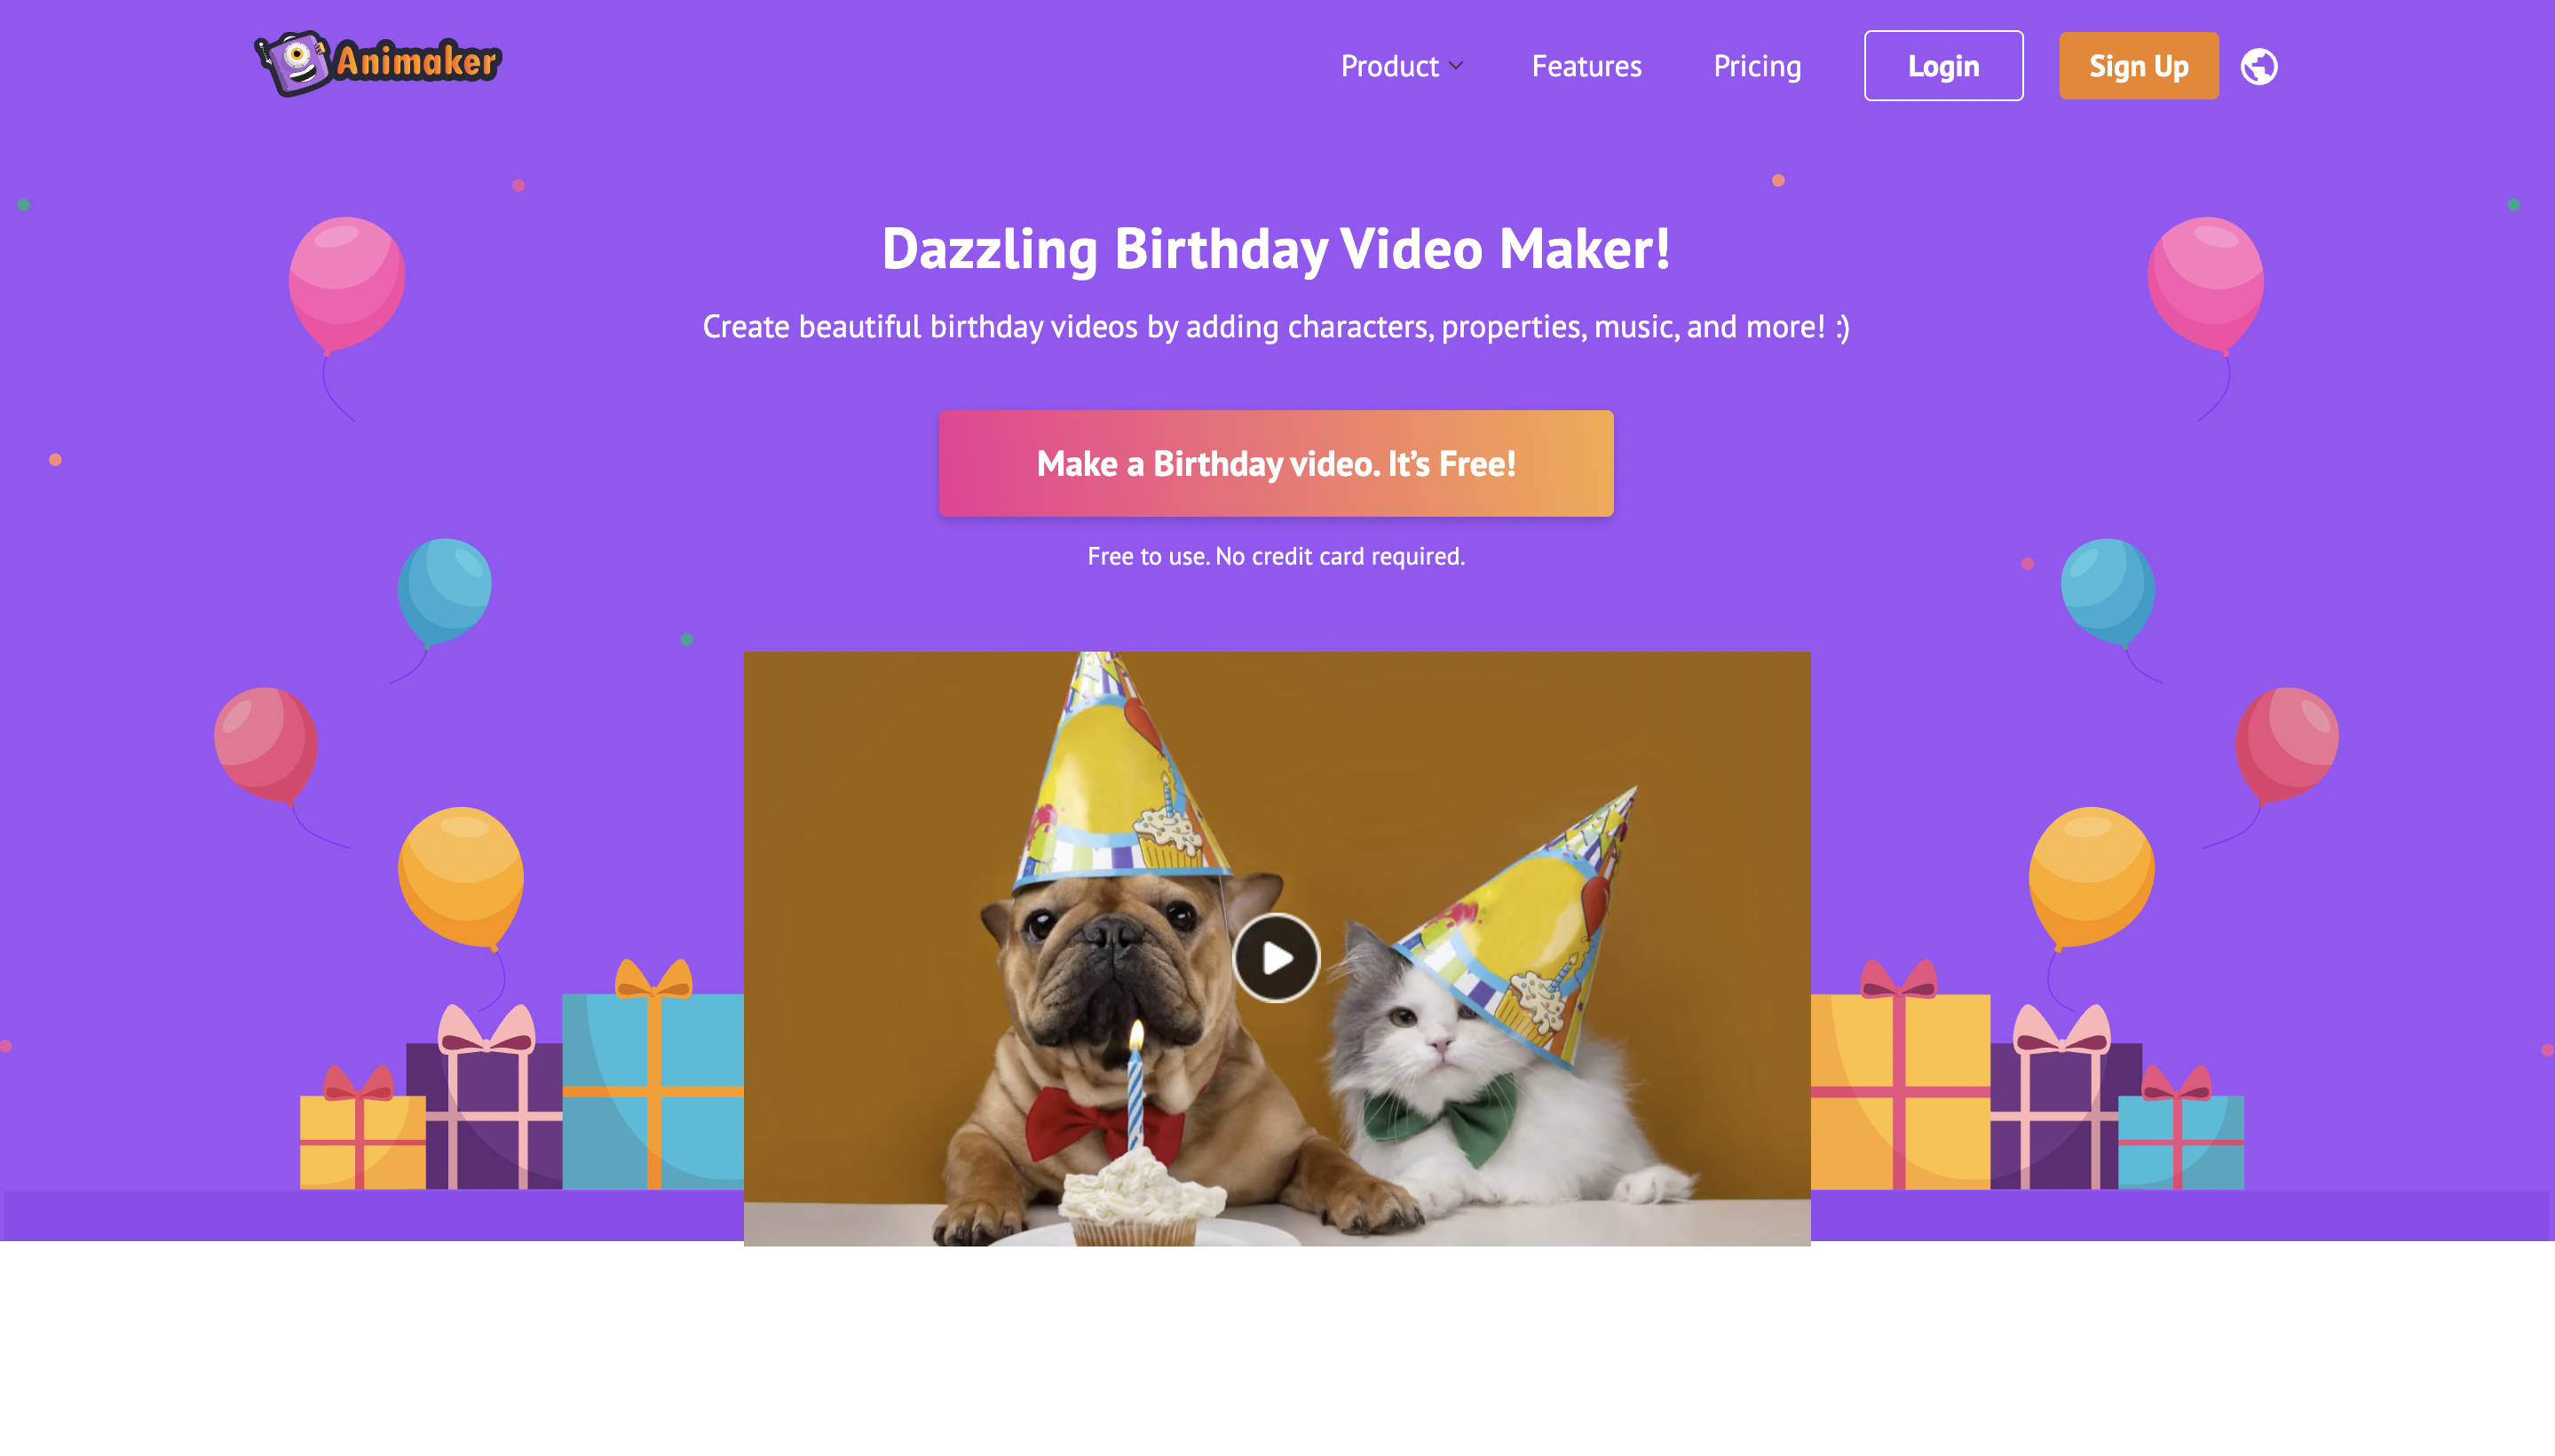 Click on the Sign Up button to create a new account with Animaker. If you already have an account, log in using your credentials. You will be redirected to the Animaker dashboard.
 Animaker gives you an option to choose from any pre-built video templates or create a video entirely from scratch. In this instance, we will guide you with the pre-built video templates.
After logging into the account, you will find the Create your moments search bar in the dashboard.
Animaker gives you an option to choose from any pre-built video templates or create a video entirely from scratch. In this instance, we will guide you with the pre-built video templates.
After logging into the account, you will find the Create your moments search bar in the dashboard.
 Type “Birthday”, in the search bar and press enter. You will be presented with a fine collection of birthday video templates.
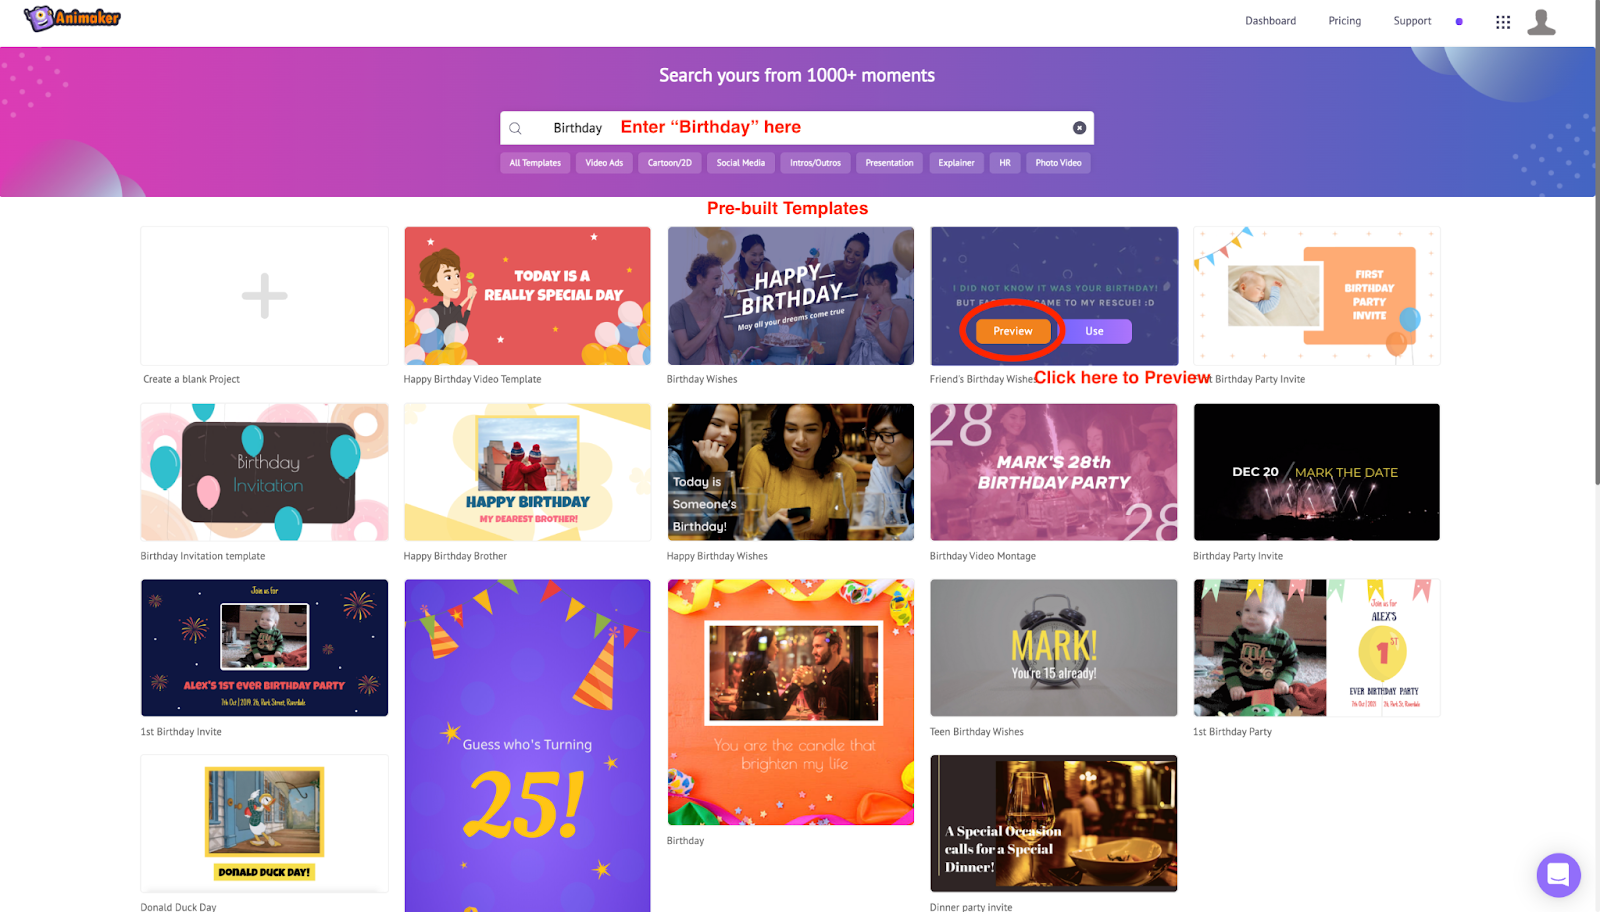 Use the preview button to get a sense of what these templates are about and pick one that suits your scenario.
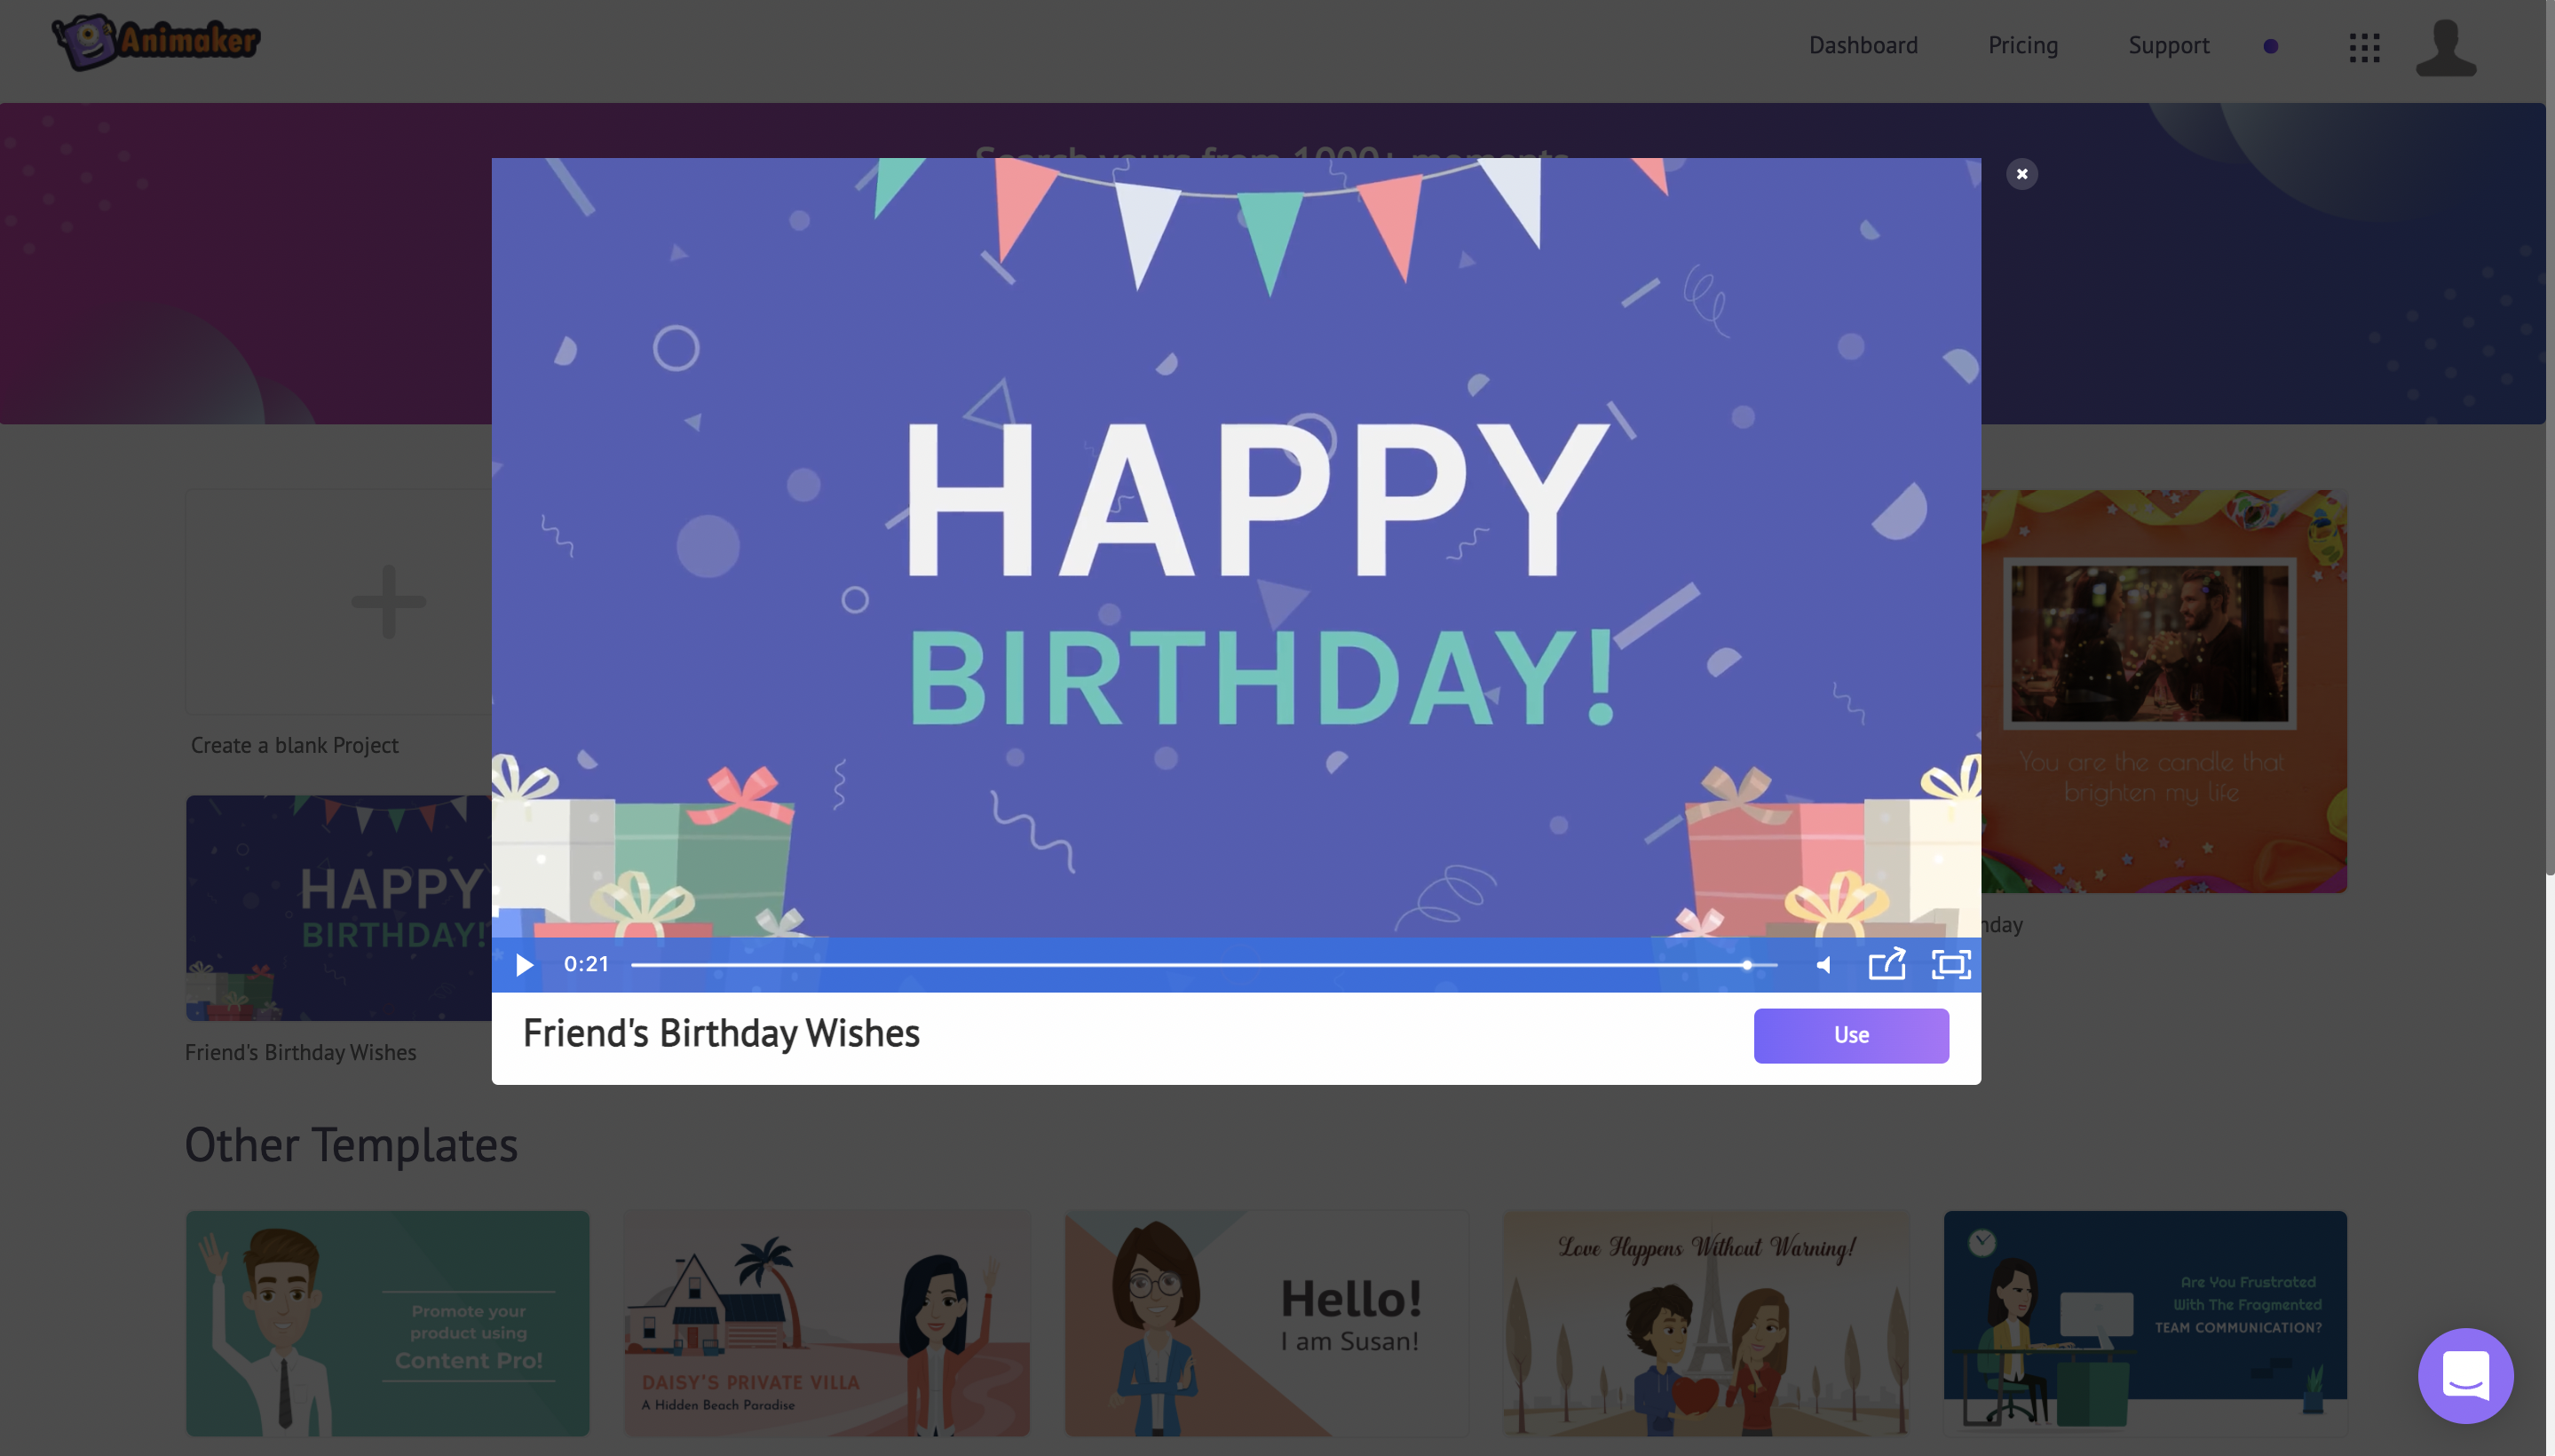
Then you can click on the Use button to start customizing it.
Once you click Use, the pre-built template will open as a new project in the application. This window is the interface of the Animaker app, where you can edit the template and customize it.
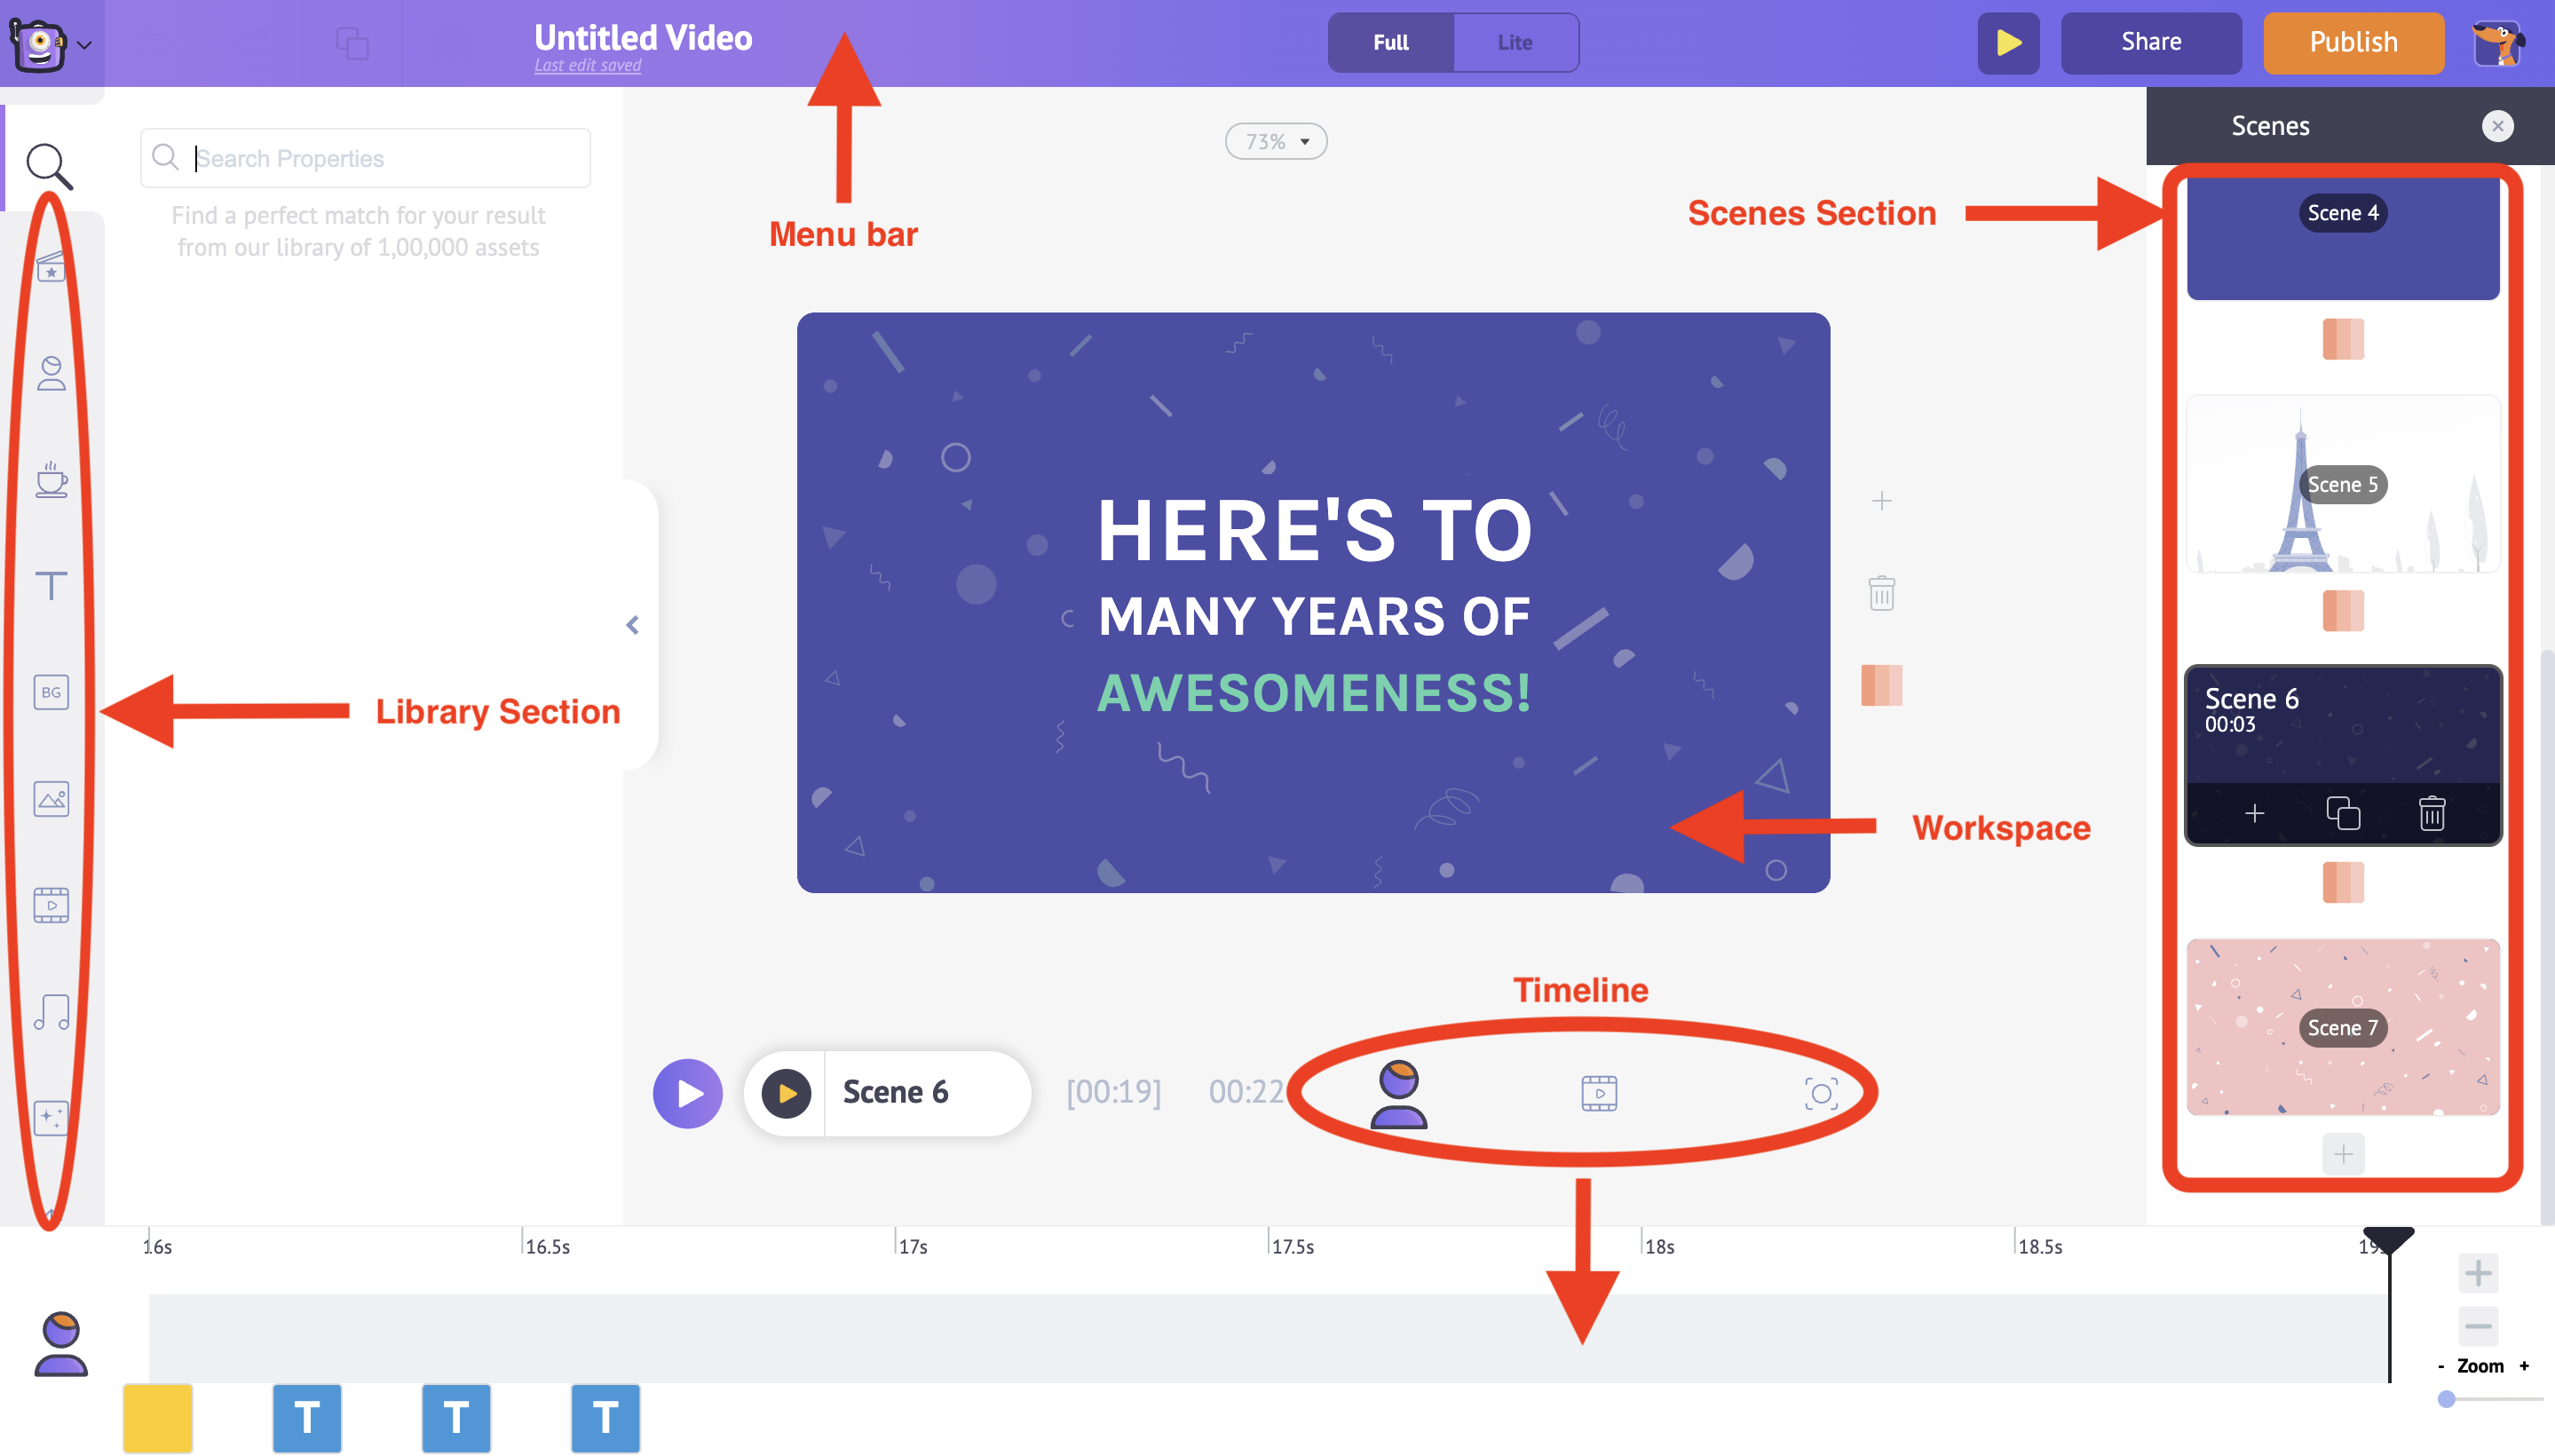
Before customizing the template, let us get you acquainted with the different sections of the Animaker application.
There are five sections in Animaker:
Library: The Library of the Animaker app is where you will find all the assets needed for your video, including characters, props, icons, stock assets, music files, and more.
Workspace: The whitespace at the center is called the workspace. This canvas is where your videos will come to life.
Scenes: The scenes section houses all the different scenes that are part of a video. They are similar to the slides section in presentation tools.
Timeline: At the bottom of the screen is the timeline. There are three different timelines:
- Animation timeline: This lets you adjust the entry and exit timings of all the edits to any elements like characters, props, text, logos, images, etc., that are present in the video.
- Video timeline: This lets you trim and adjust the music and video files used to edit the video and the music track.
- Camera timeline: This lets you add and adjust the timings of the camera effects.
Now that you're familiar with the application's interface, let's start with the steps to customize the template.
Step 1 - Create a character just like your friend
Animaker app allows you to create a new character to be introduced in the video.
Through Animakers’s Character Builder feature, you can easily create an animated version of your friend.
Have a look at the below images where we have created an animated version of this young girl.

Mind Blowing! Right? Now let’s see in detail how you could also achieve this with your friend.
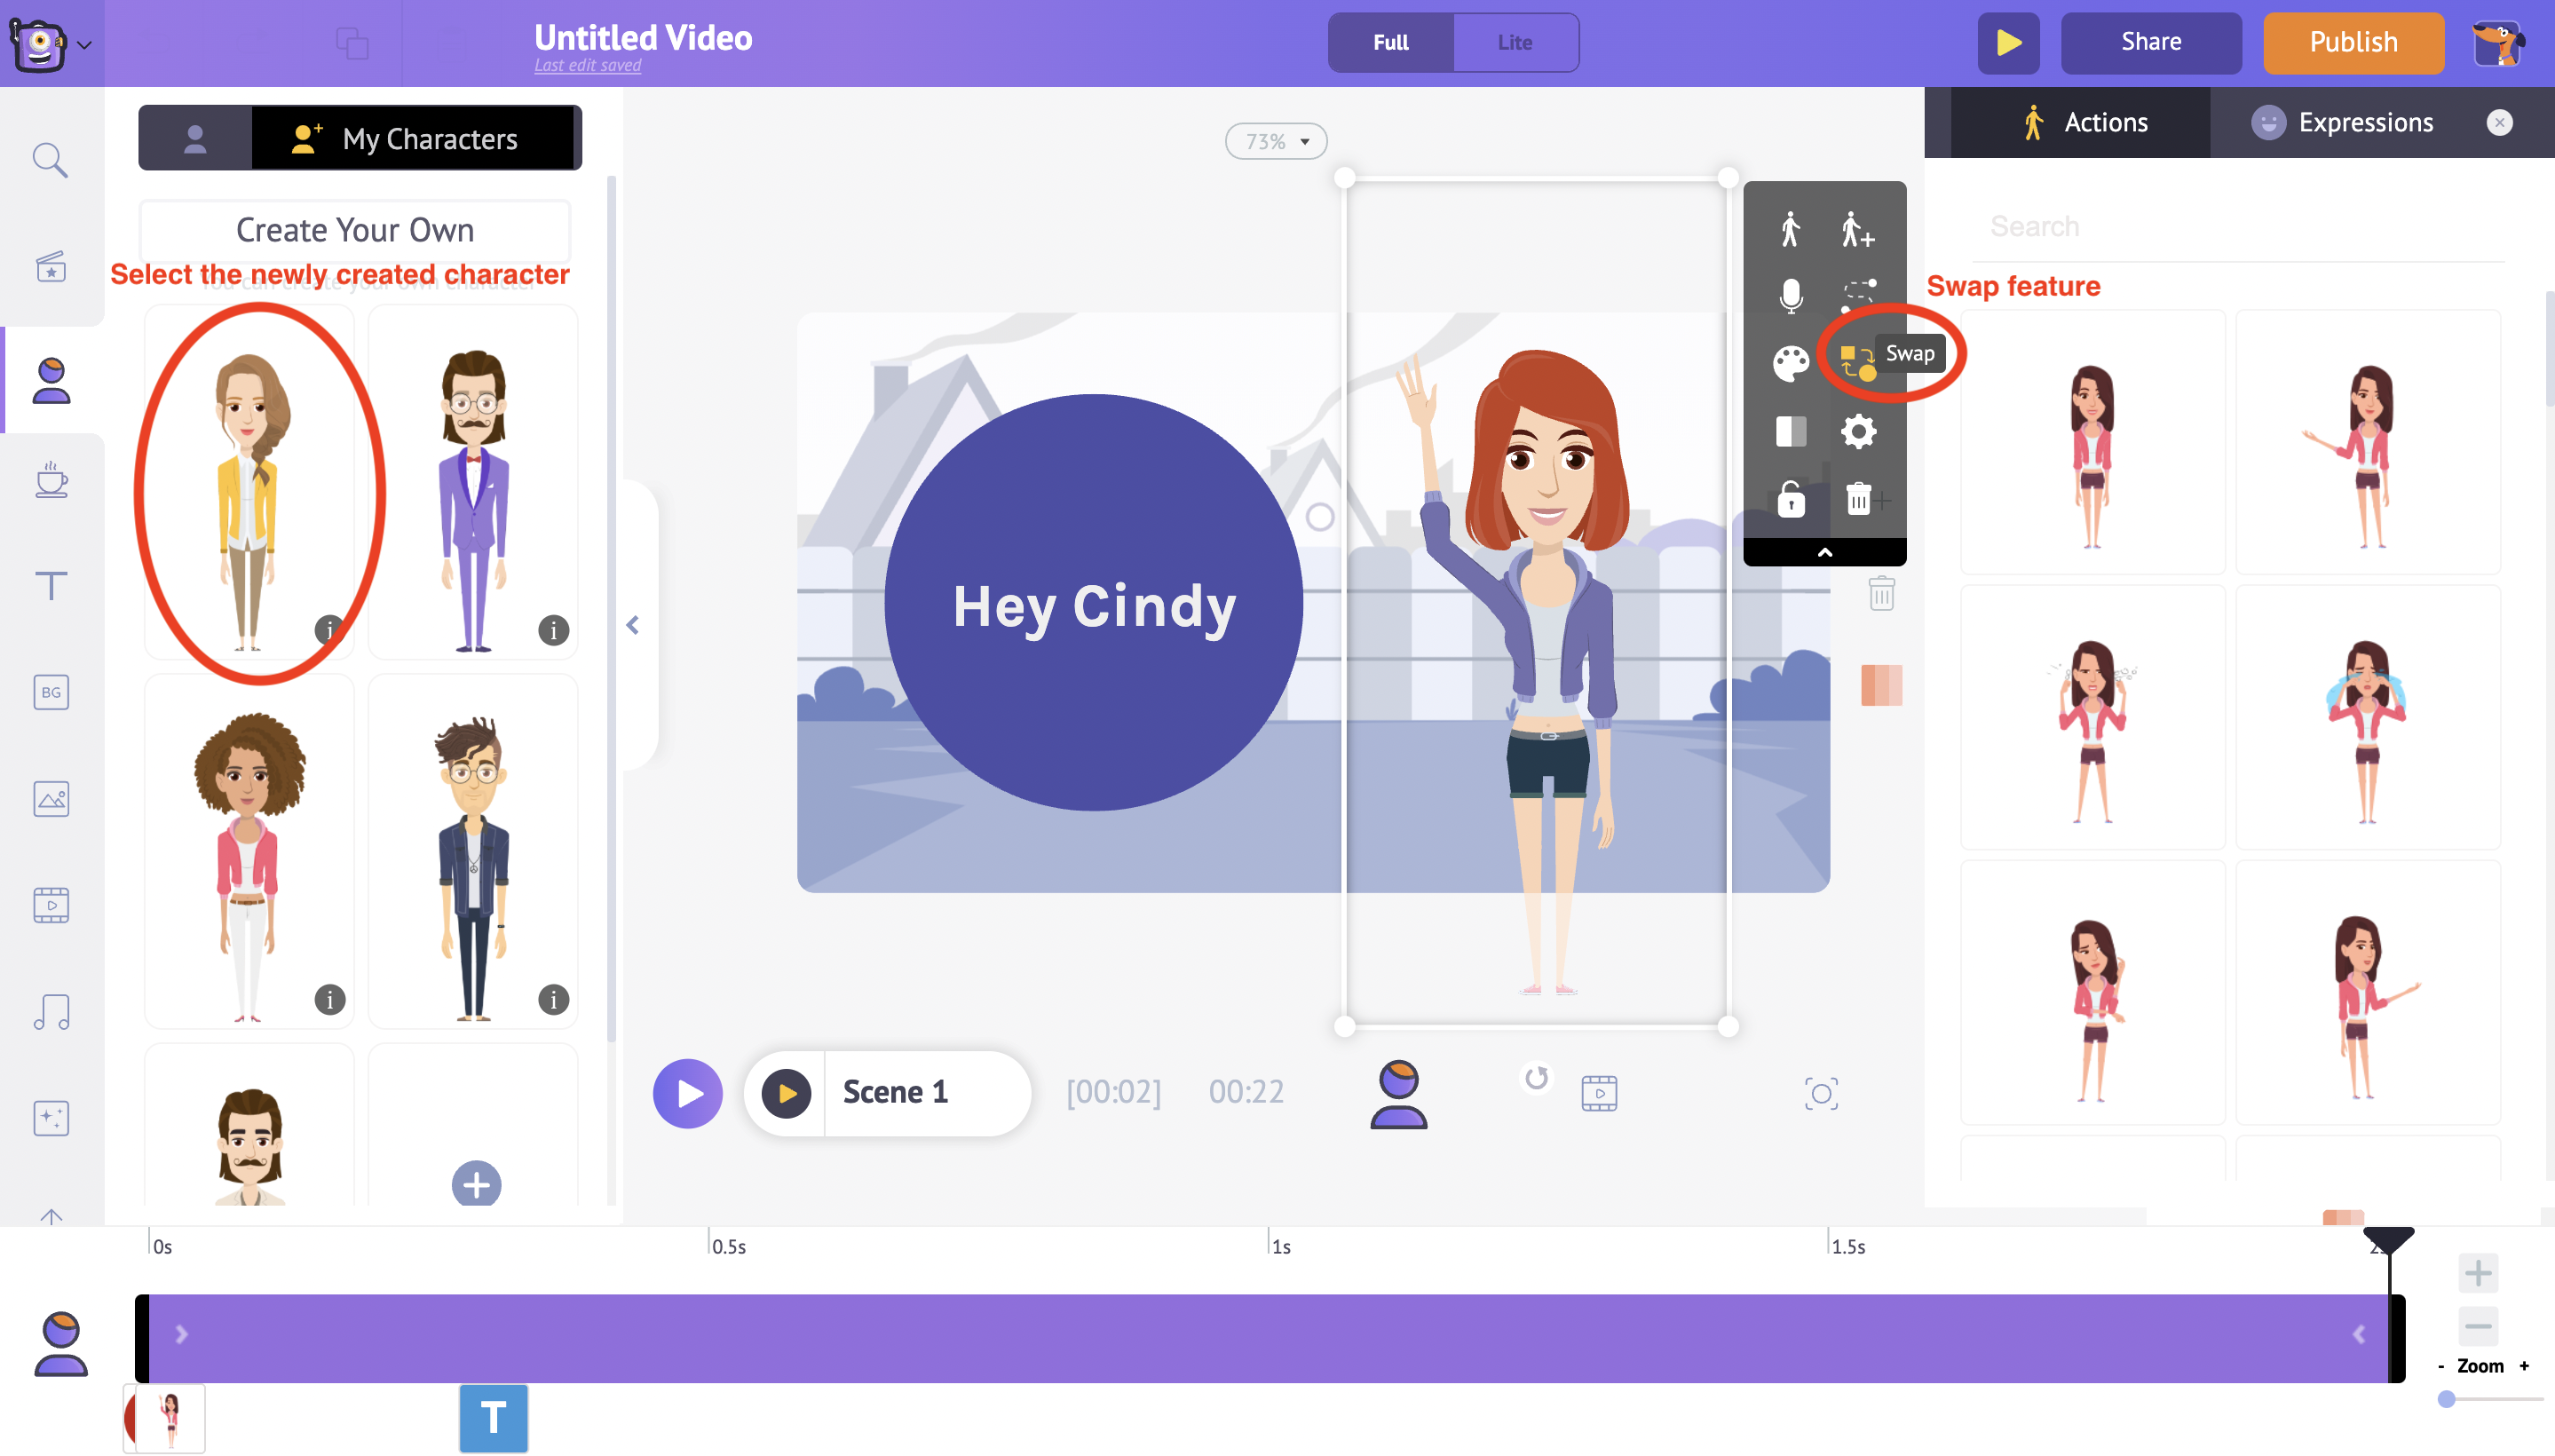
Switch to the My Characters tab under the Characters feature in the Library.
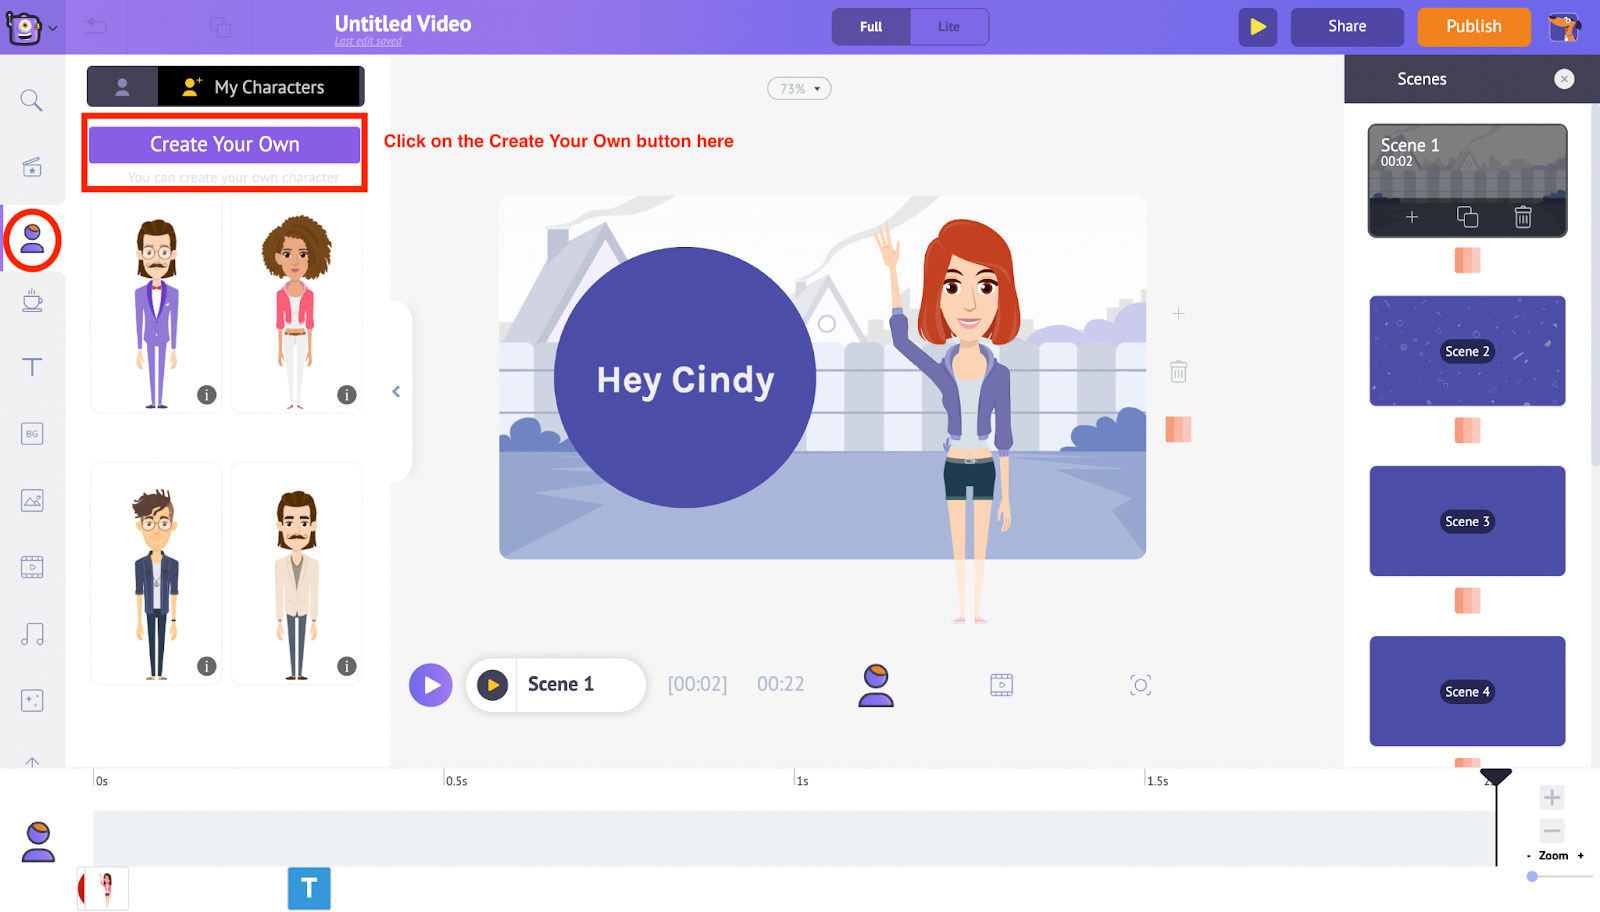
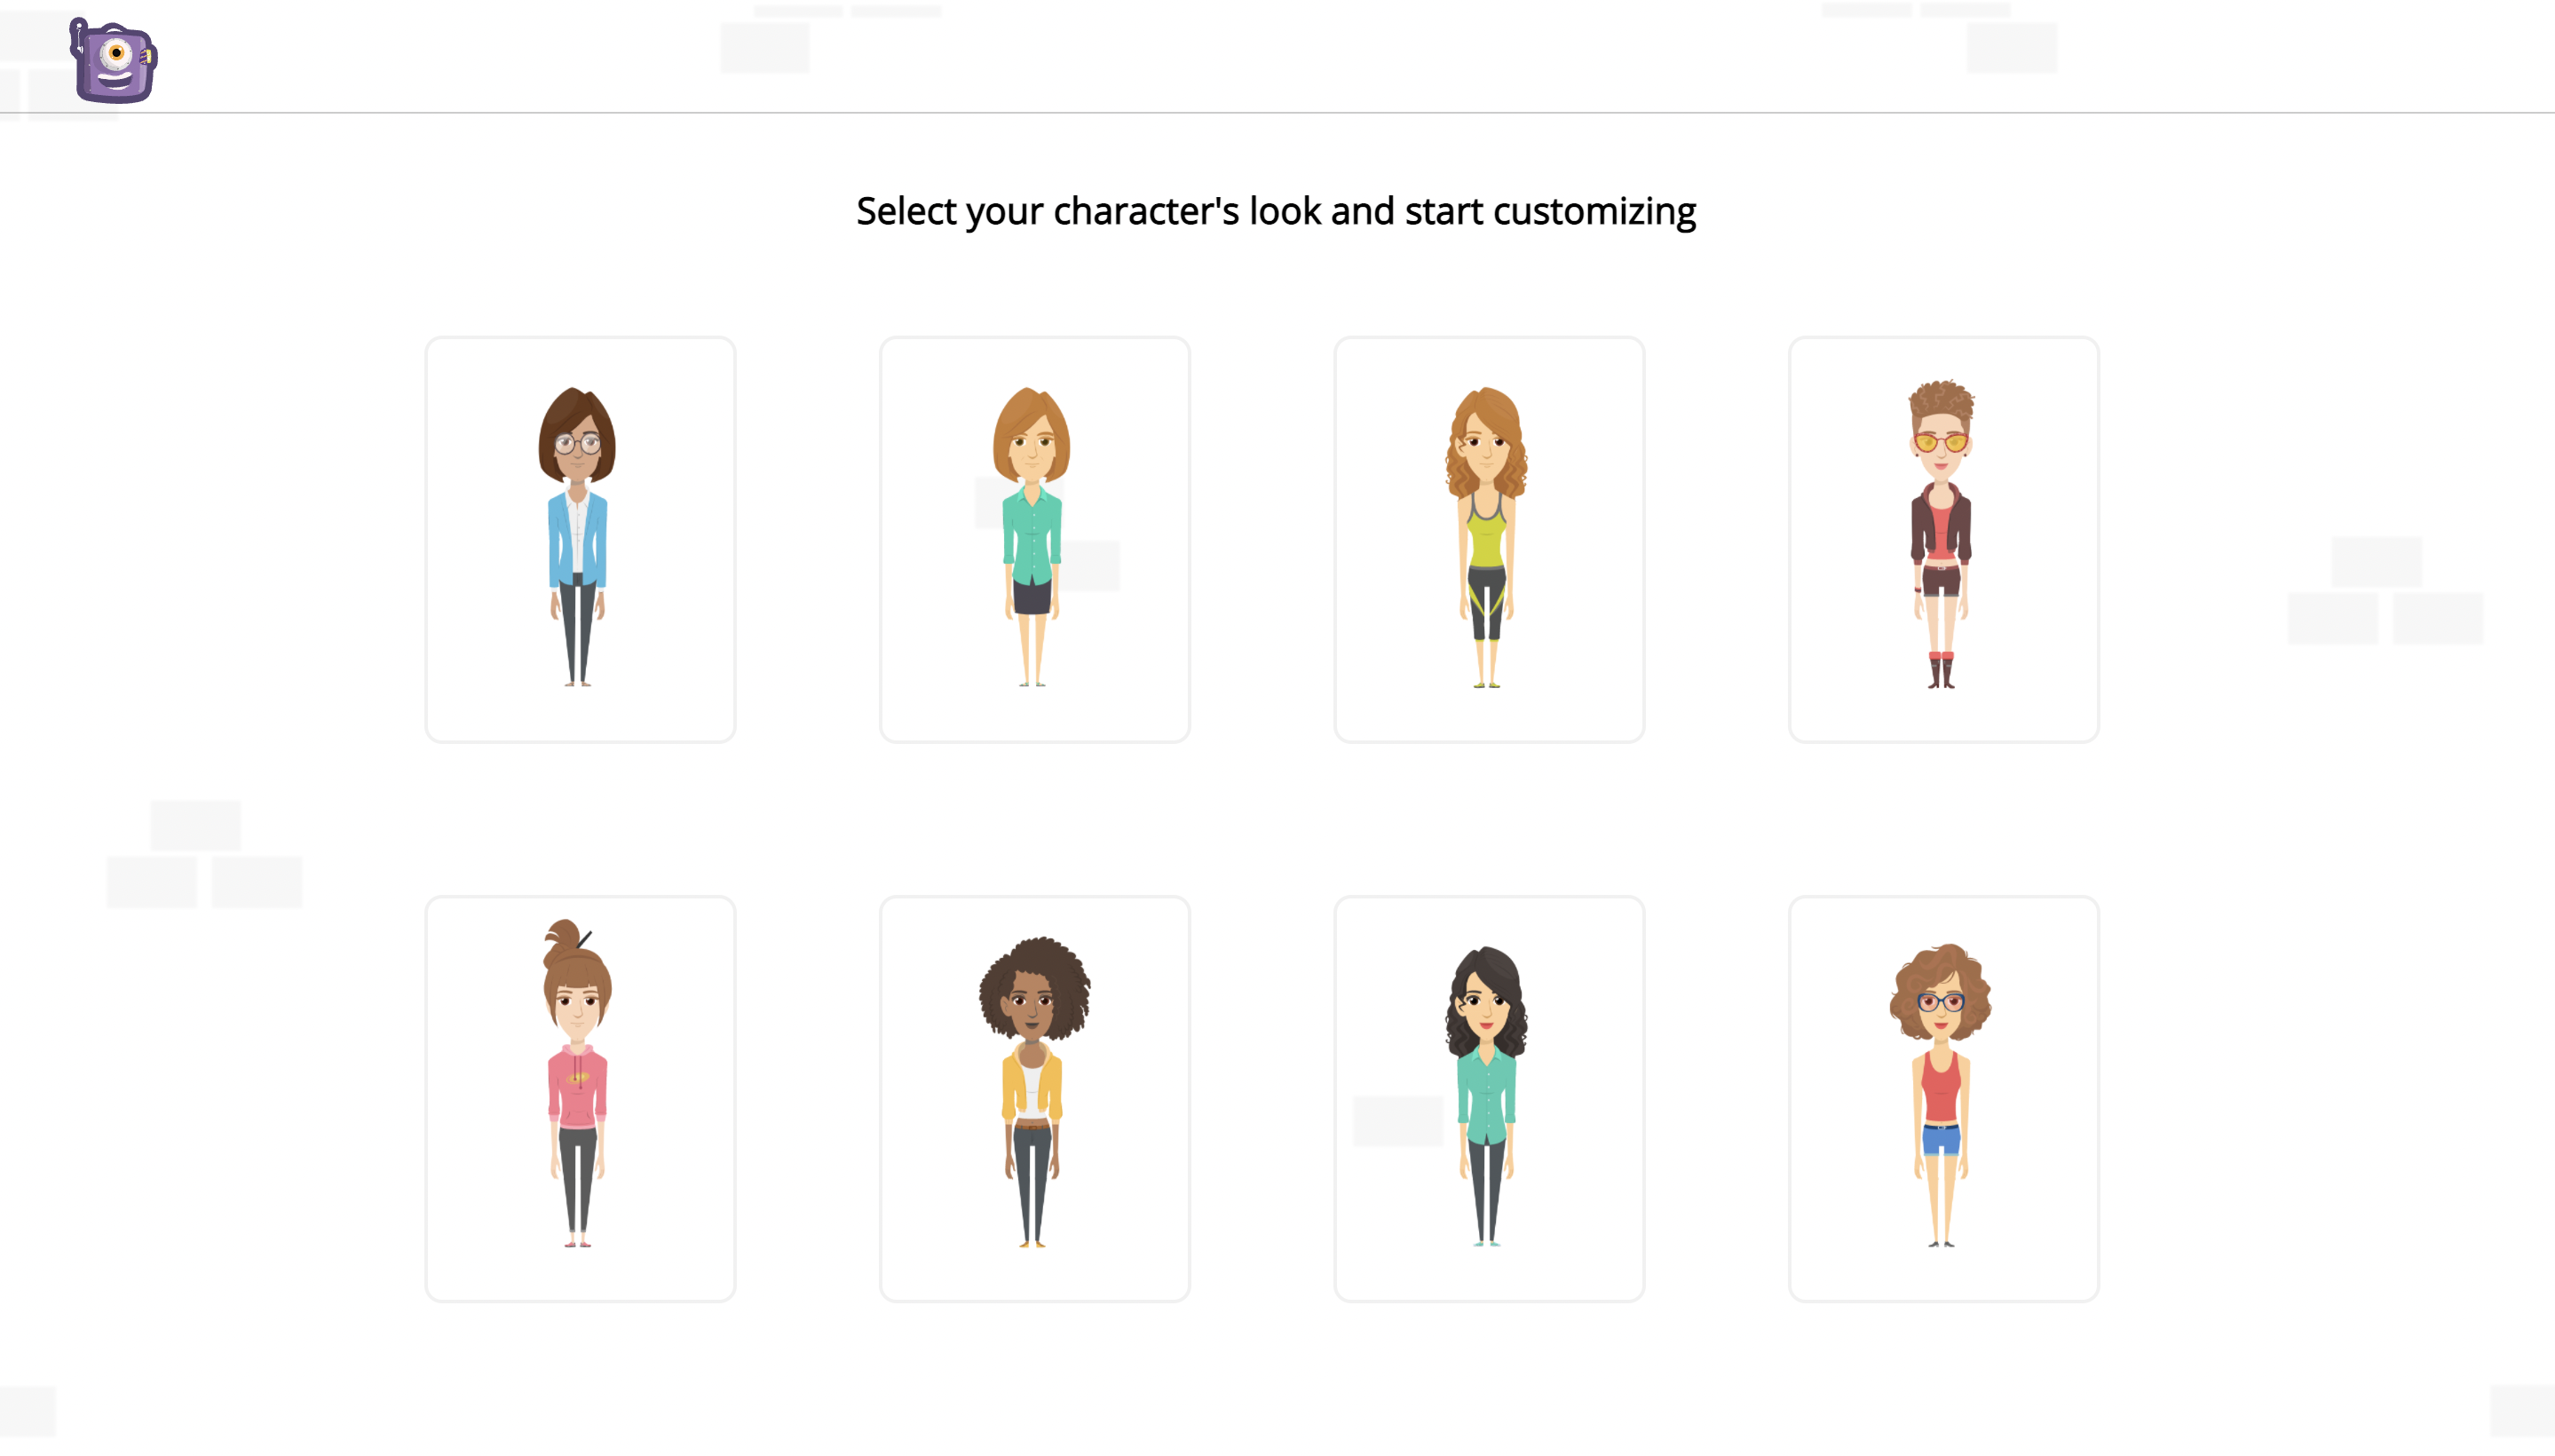
Now click on Create your own button, which will take you to the Character Builder. You will be taken to the Character Builder page. Here you will have to pick a gender based on your scenario
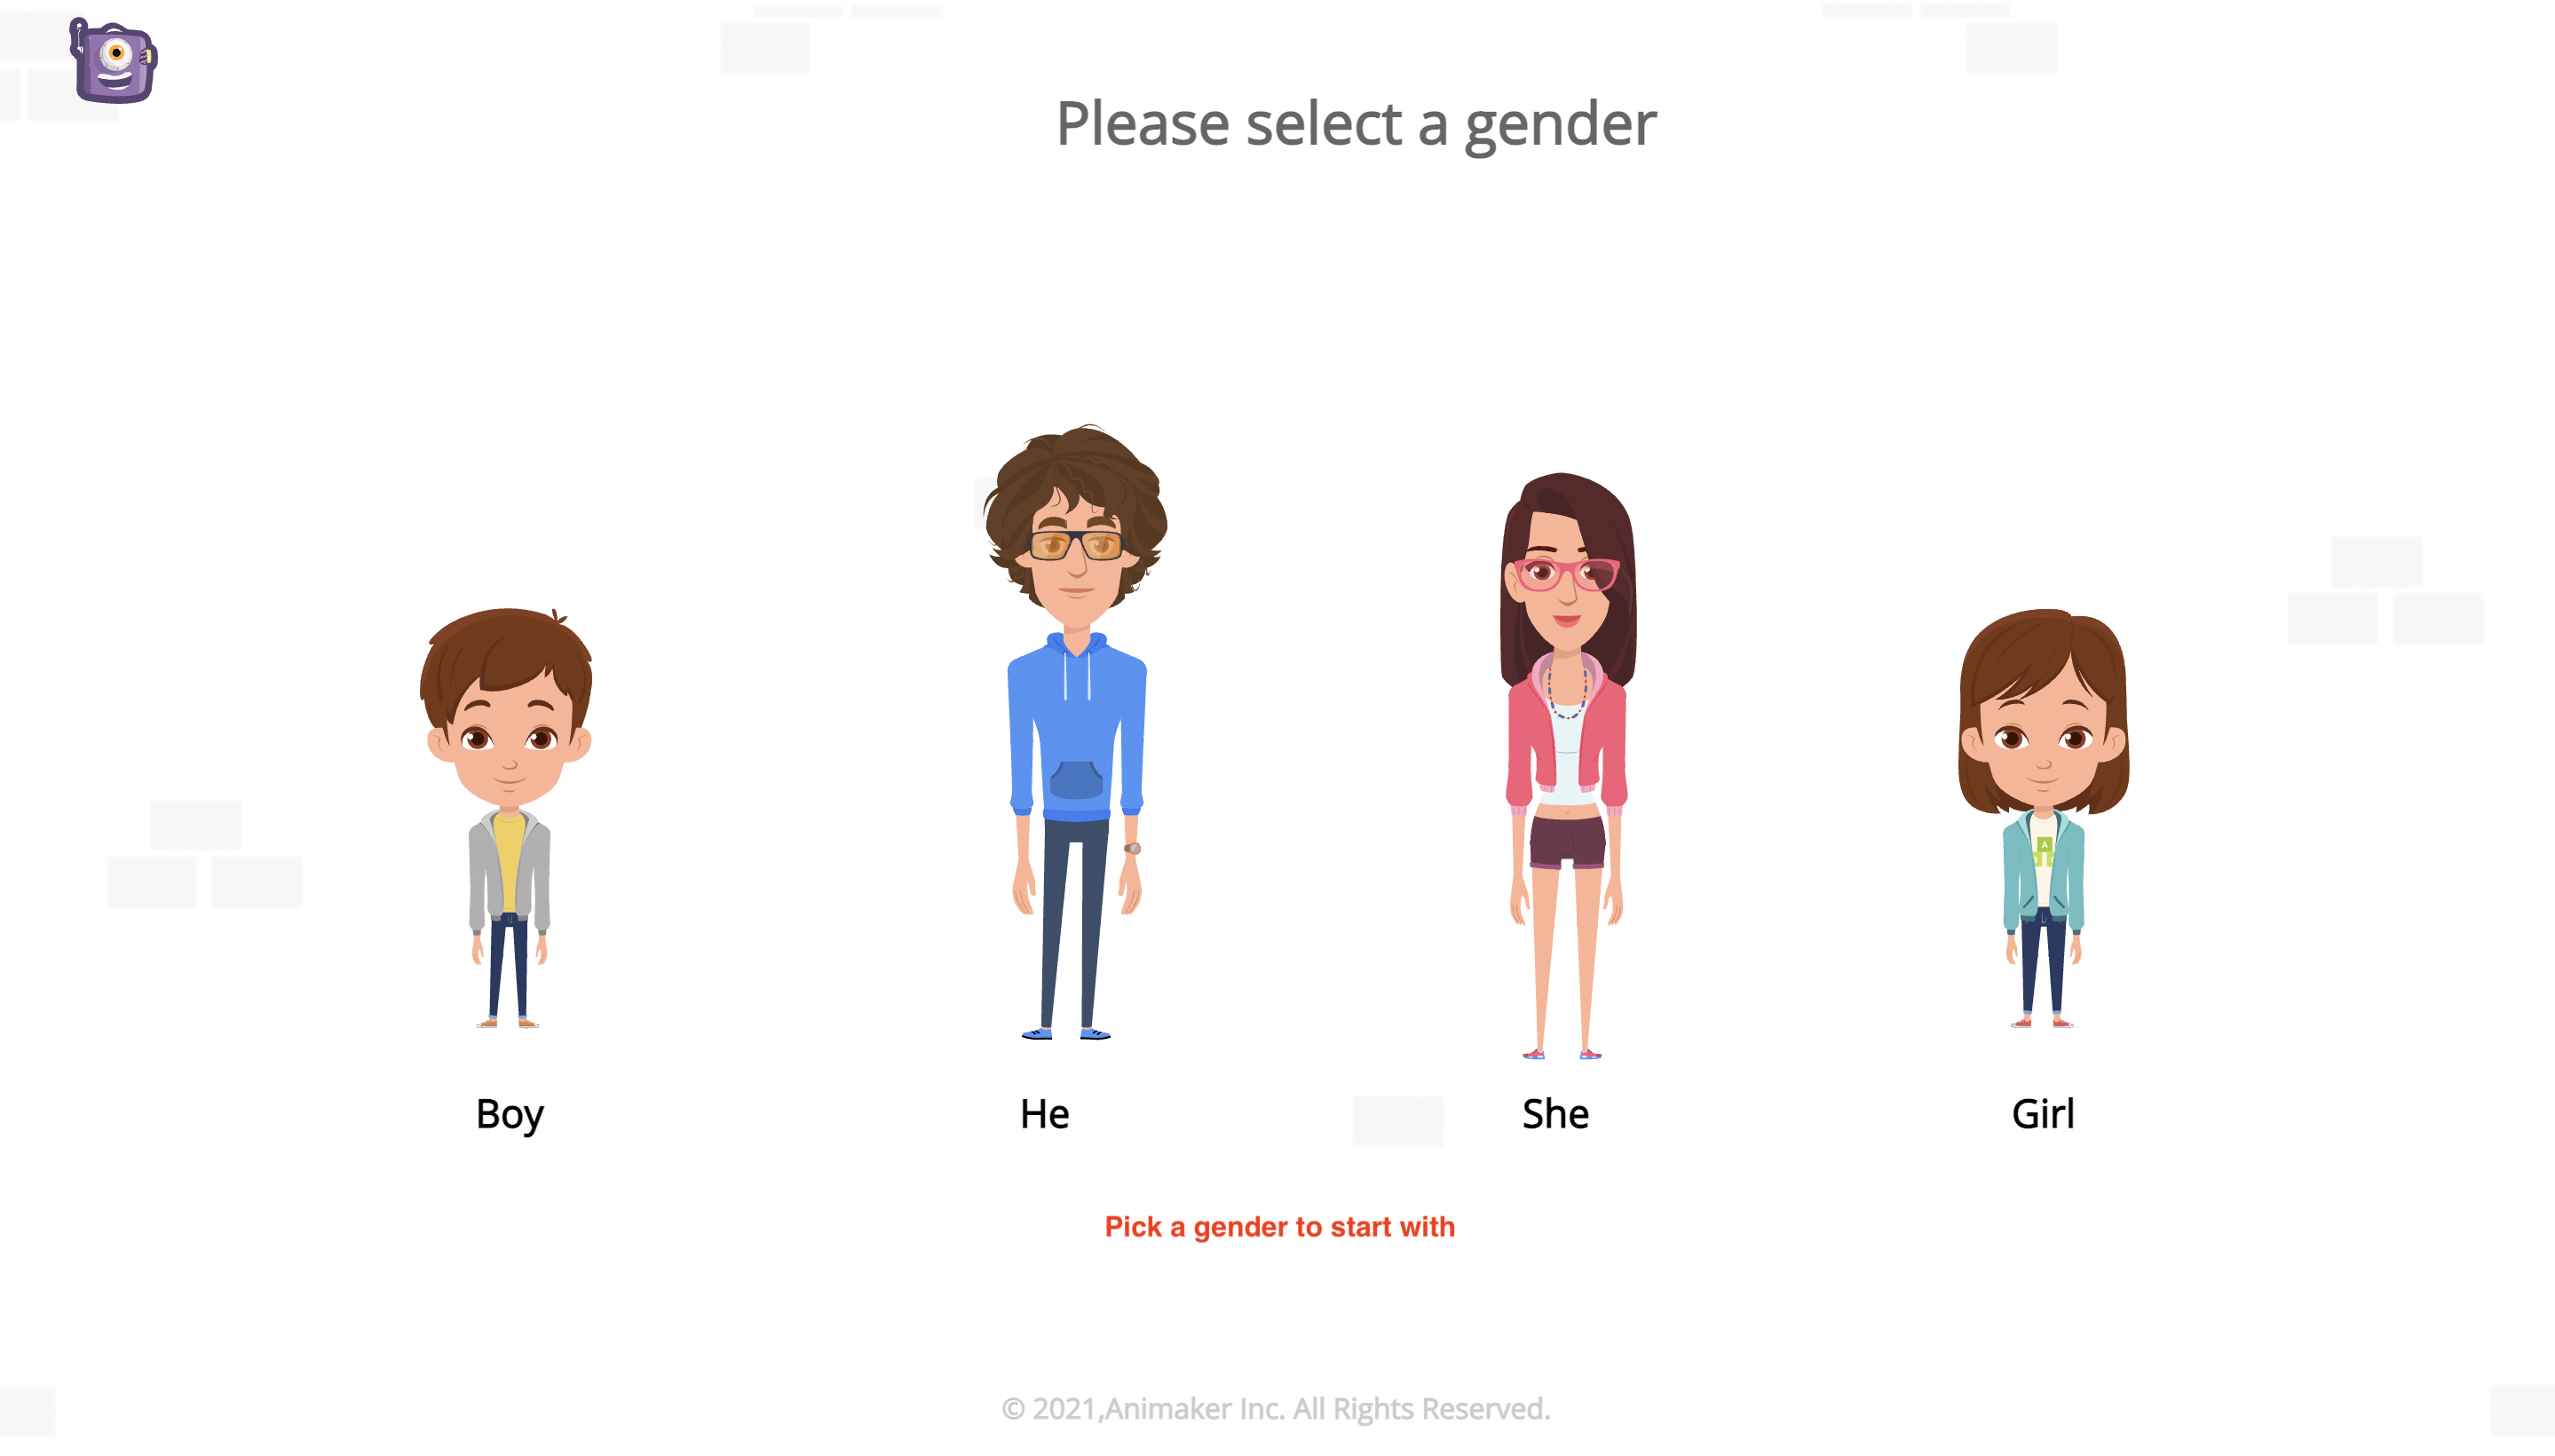 Animaker allows you to choose your character’s look and you can start customizing the character as per your liking.
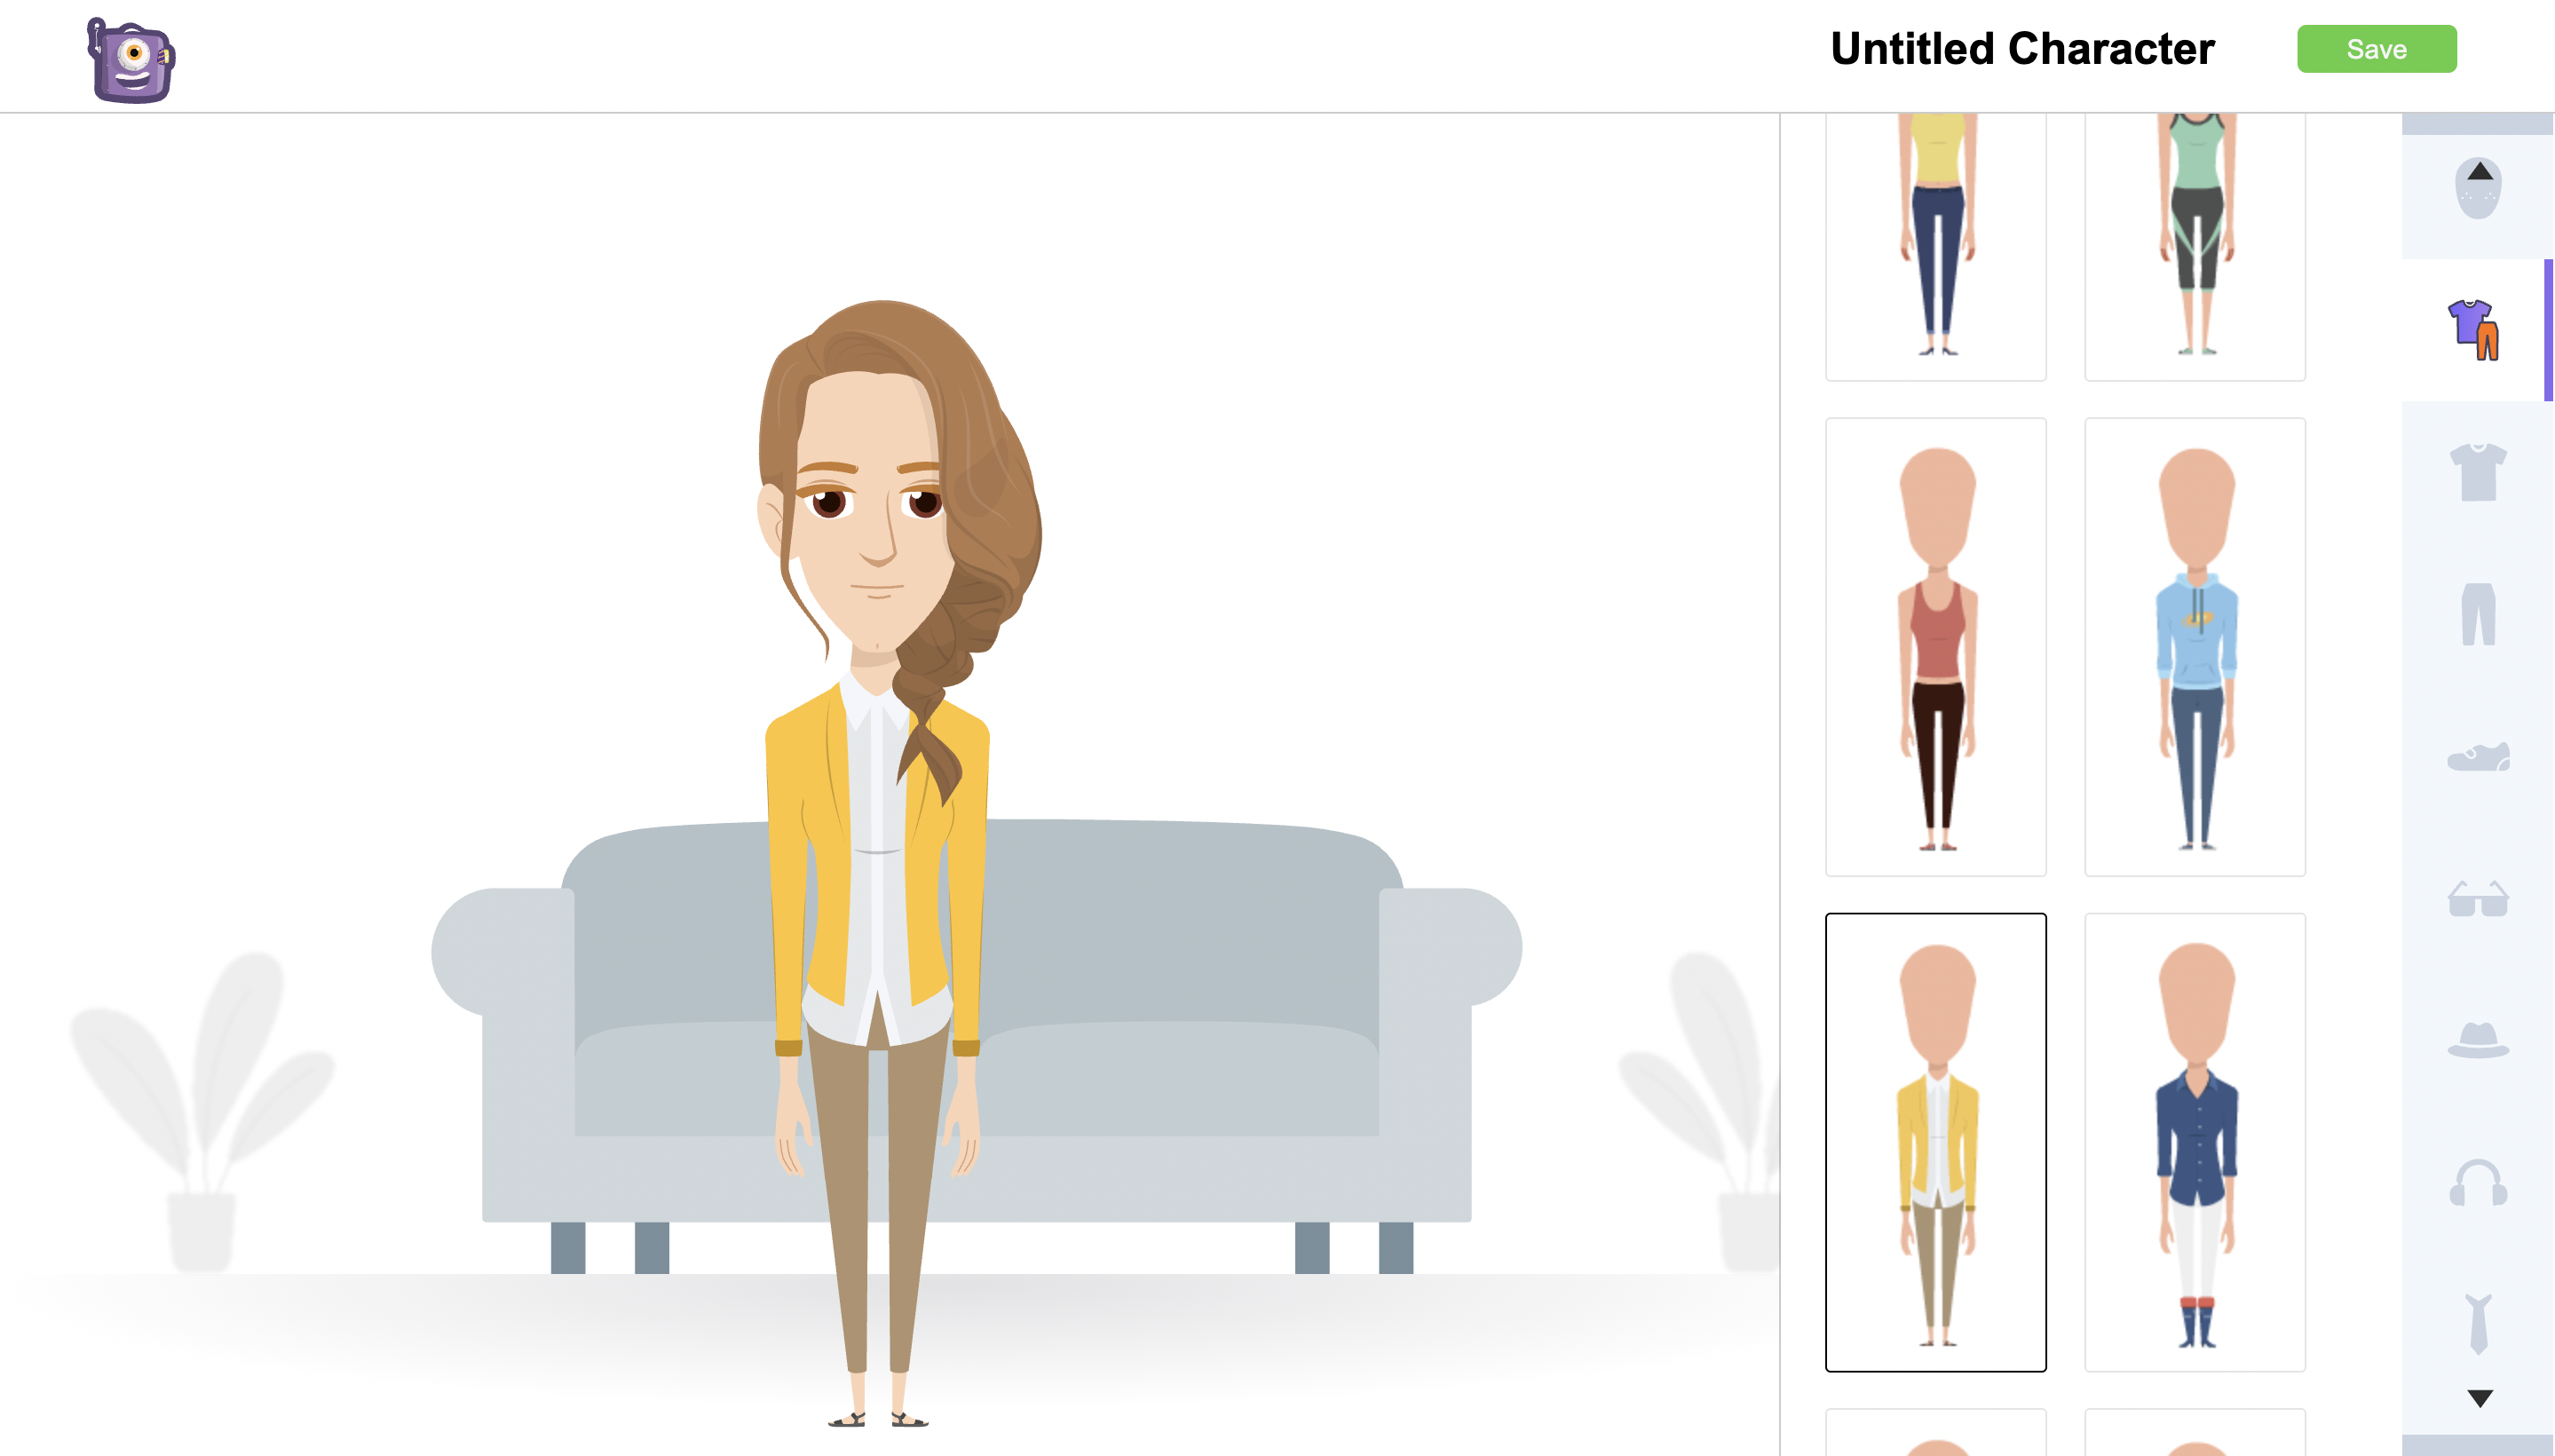
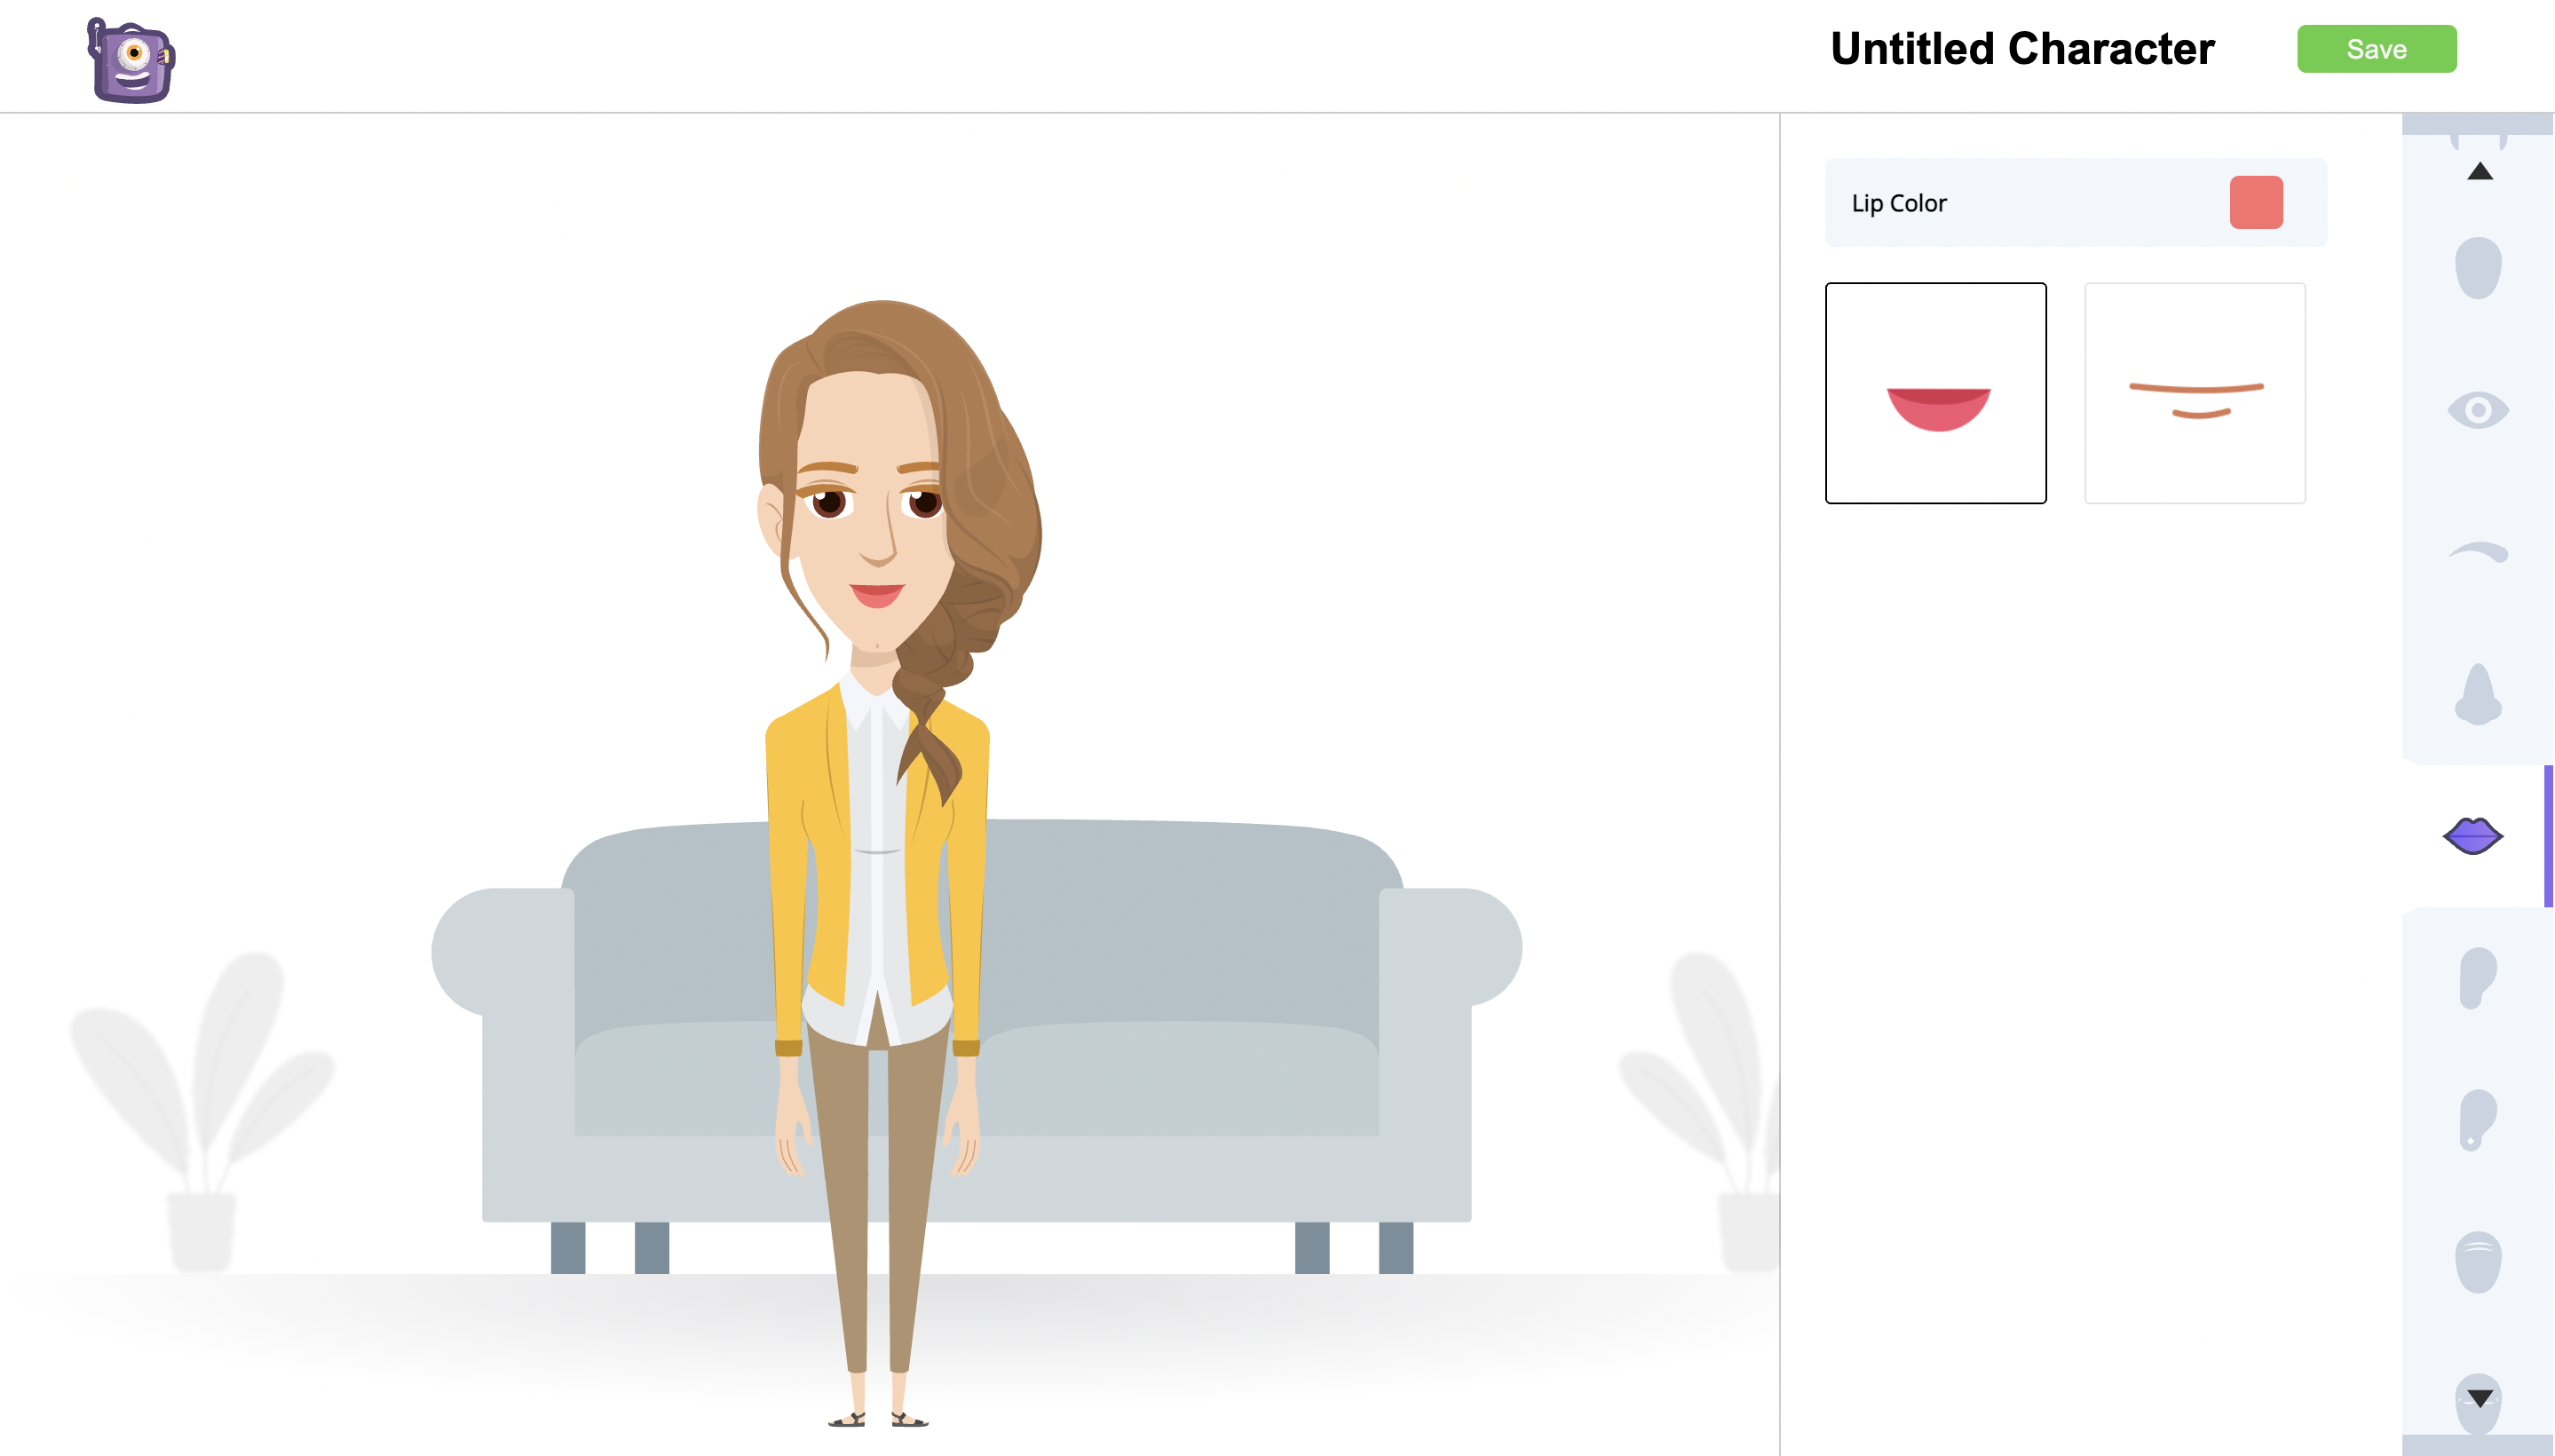
In the Character builder page you will have different customization options to edit your character like customizing the hairstyles, attire, skin tone, lips, accessories etc;
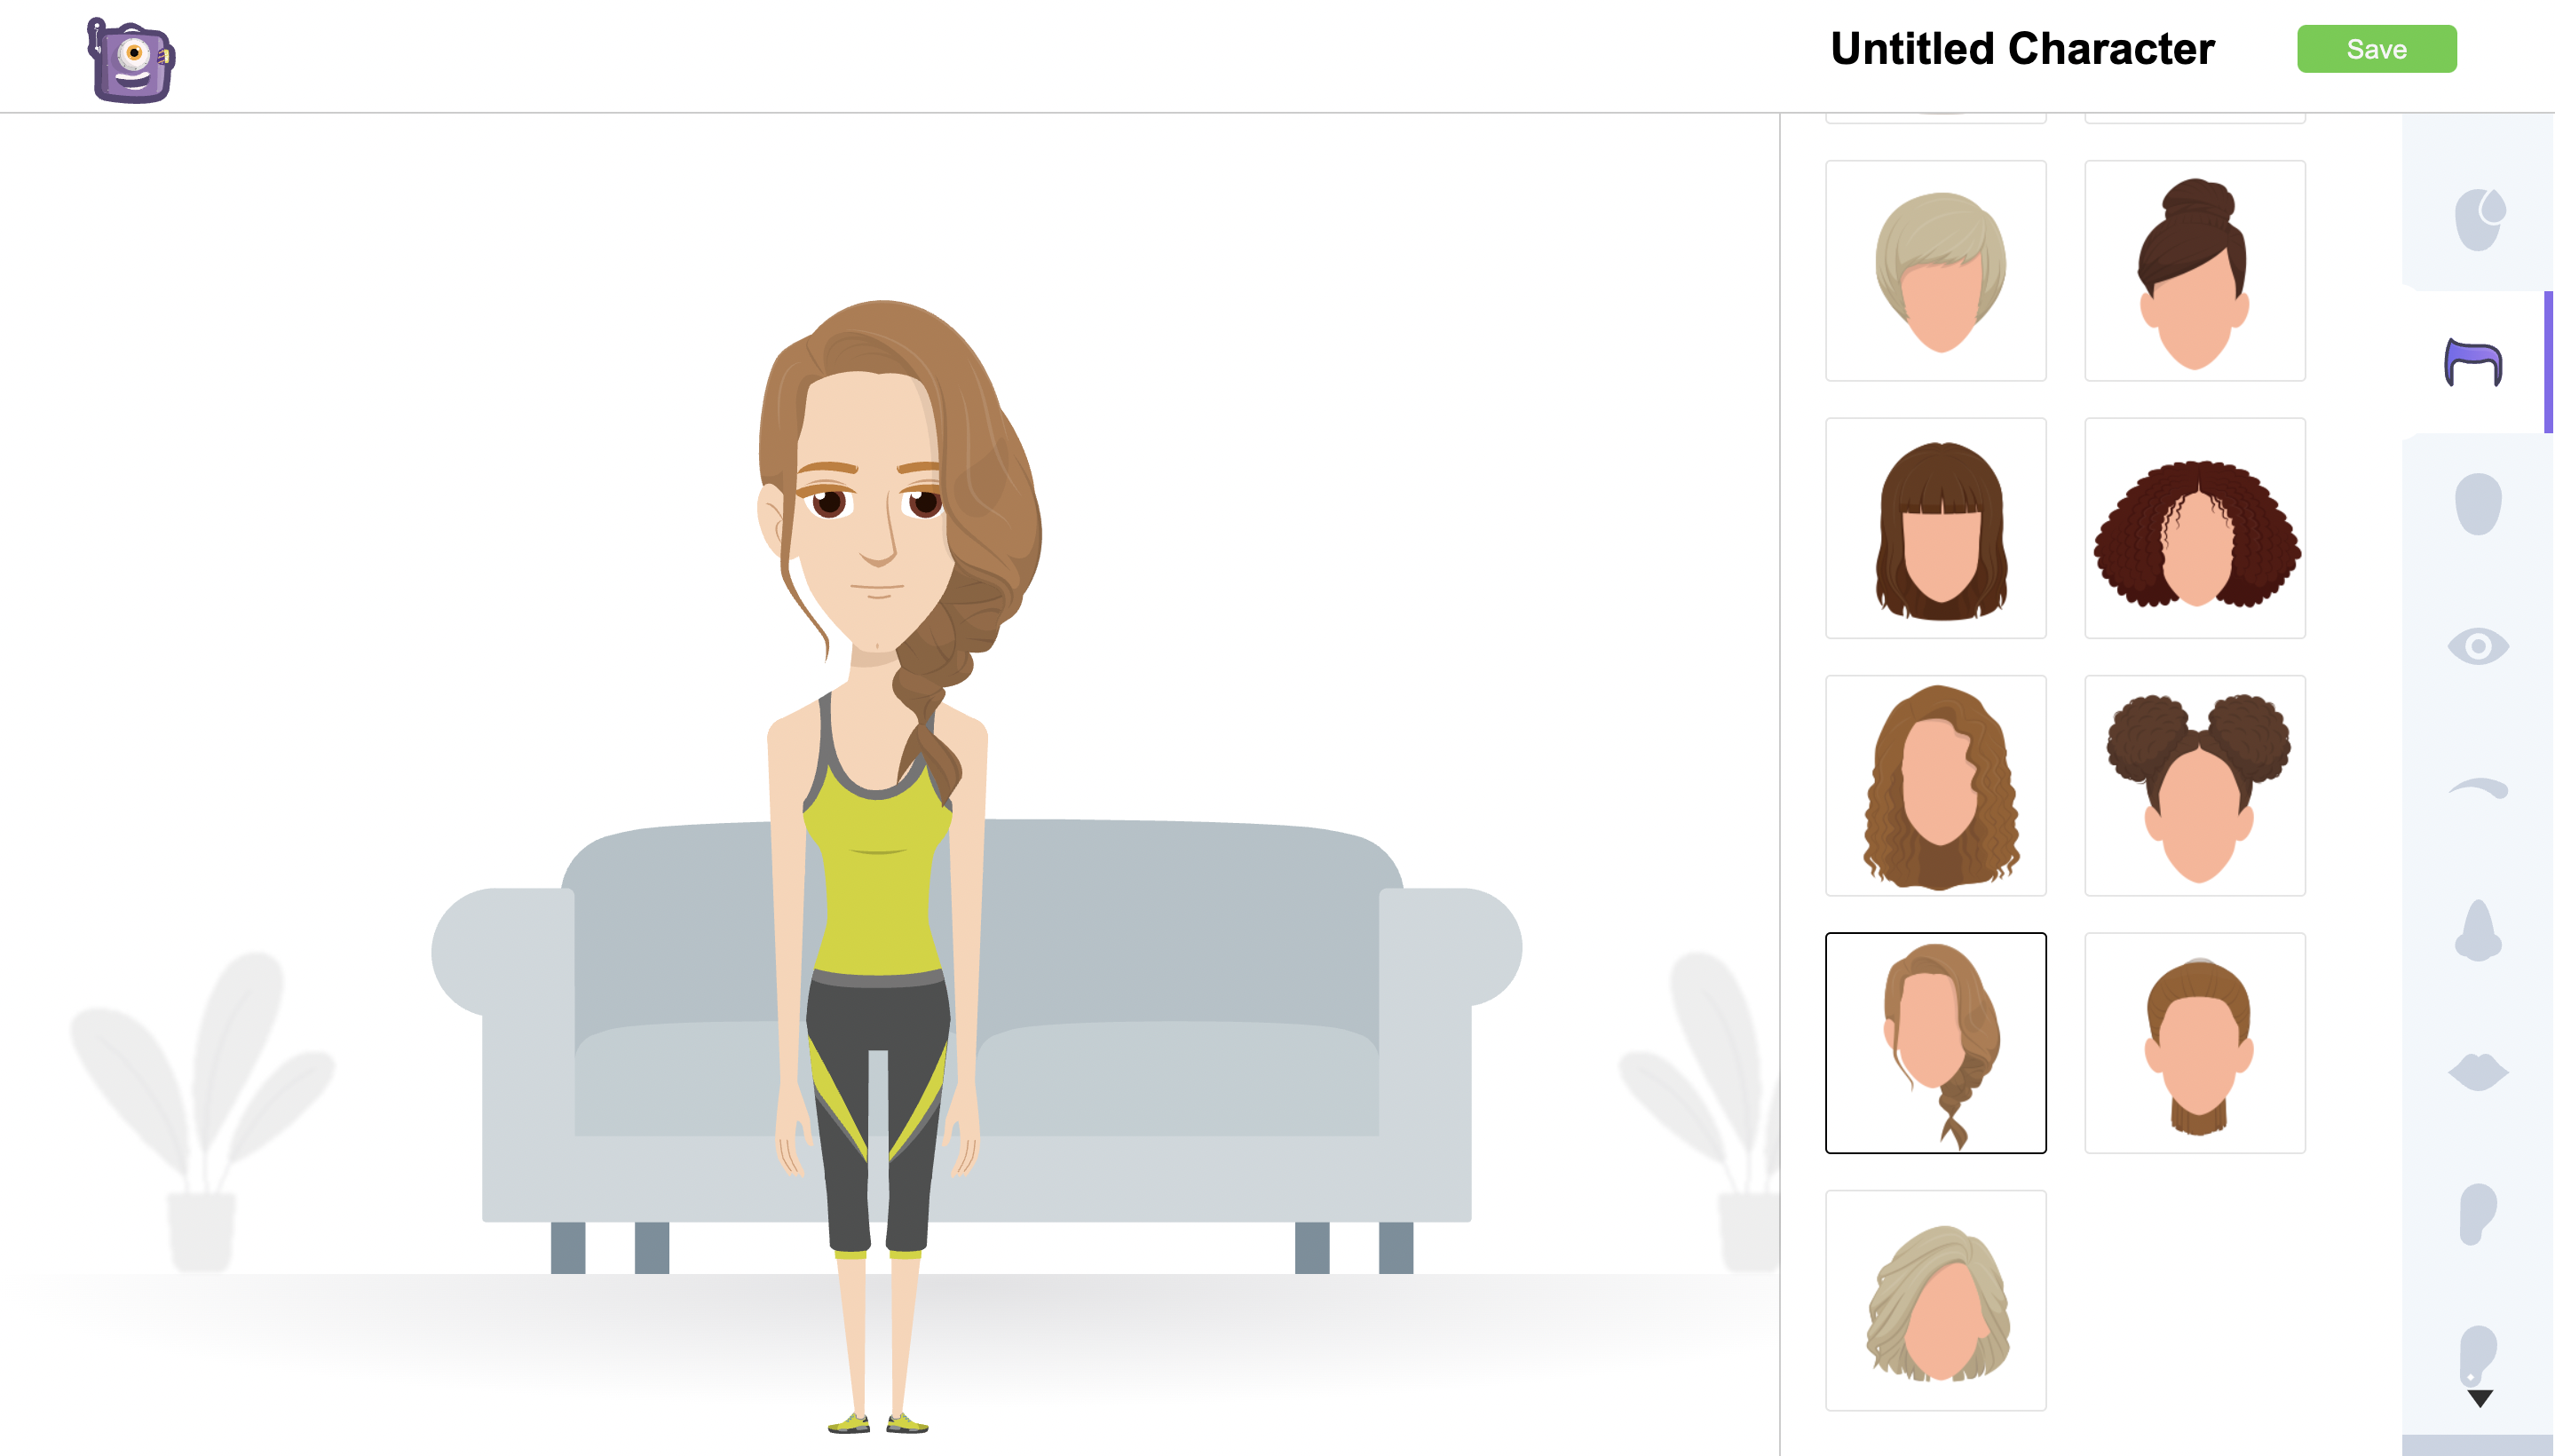 Try out the different options and create a character that suits your scenario.
Once you have customized the character, give a name to your character and save it. Then head back to the project and refresh. You can find the newly created character in the My Characters section.

Use the swap feature from the Item Menu and choose the newly created character.
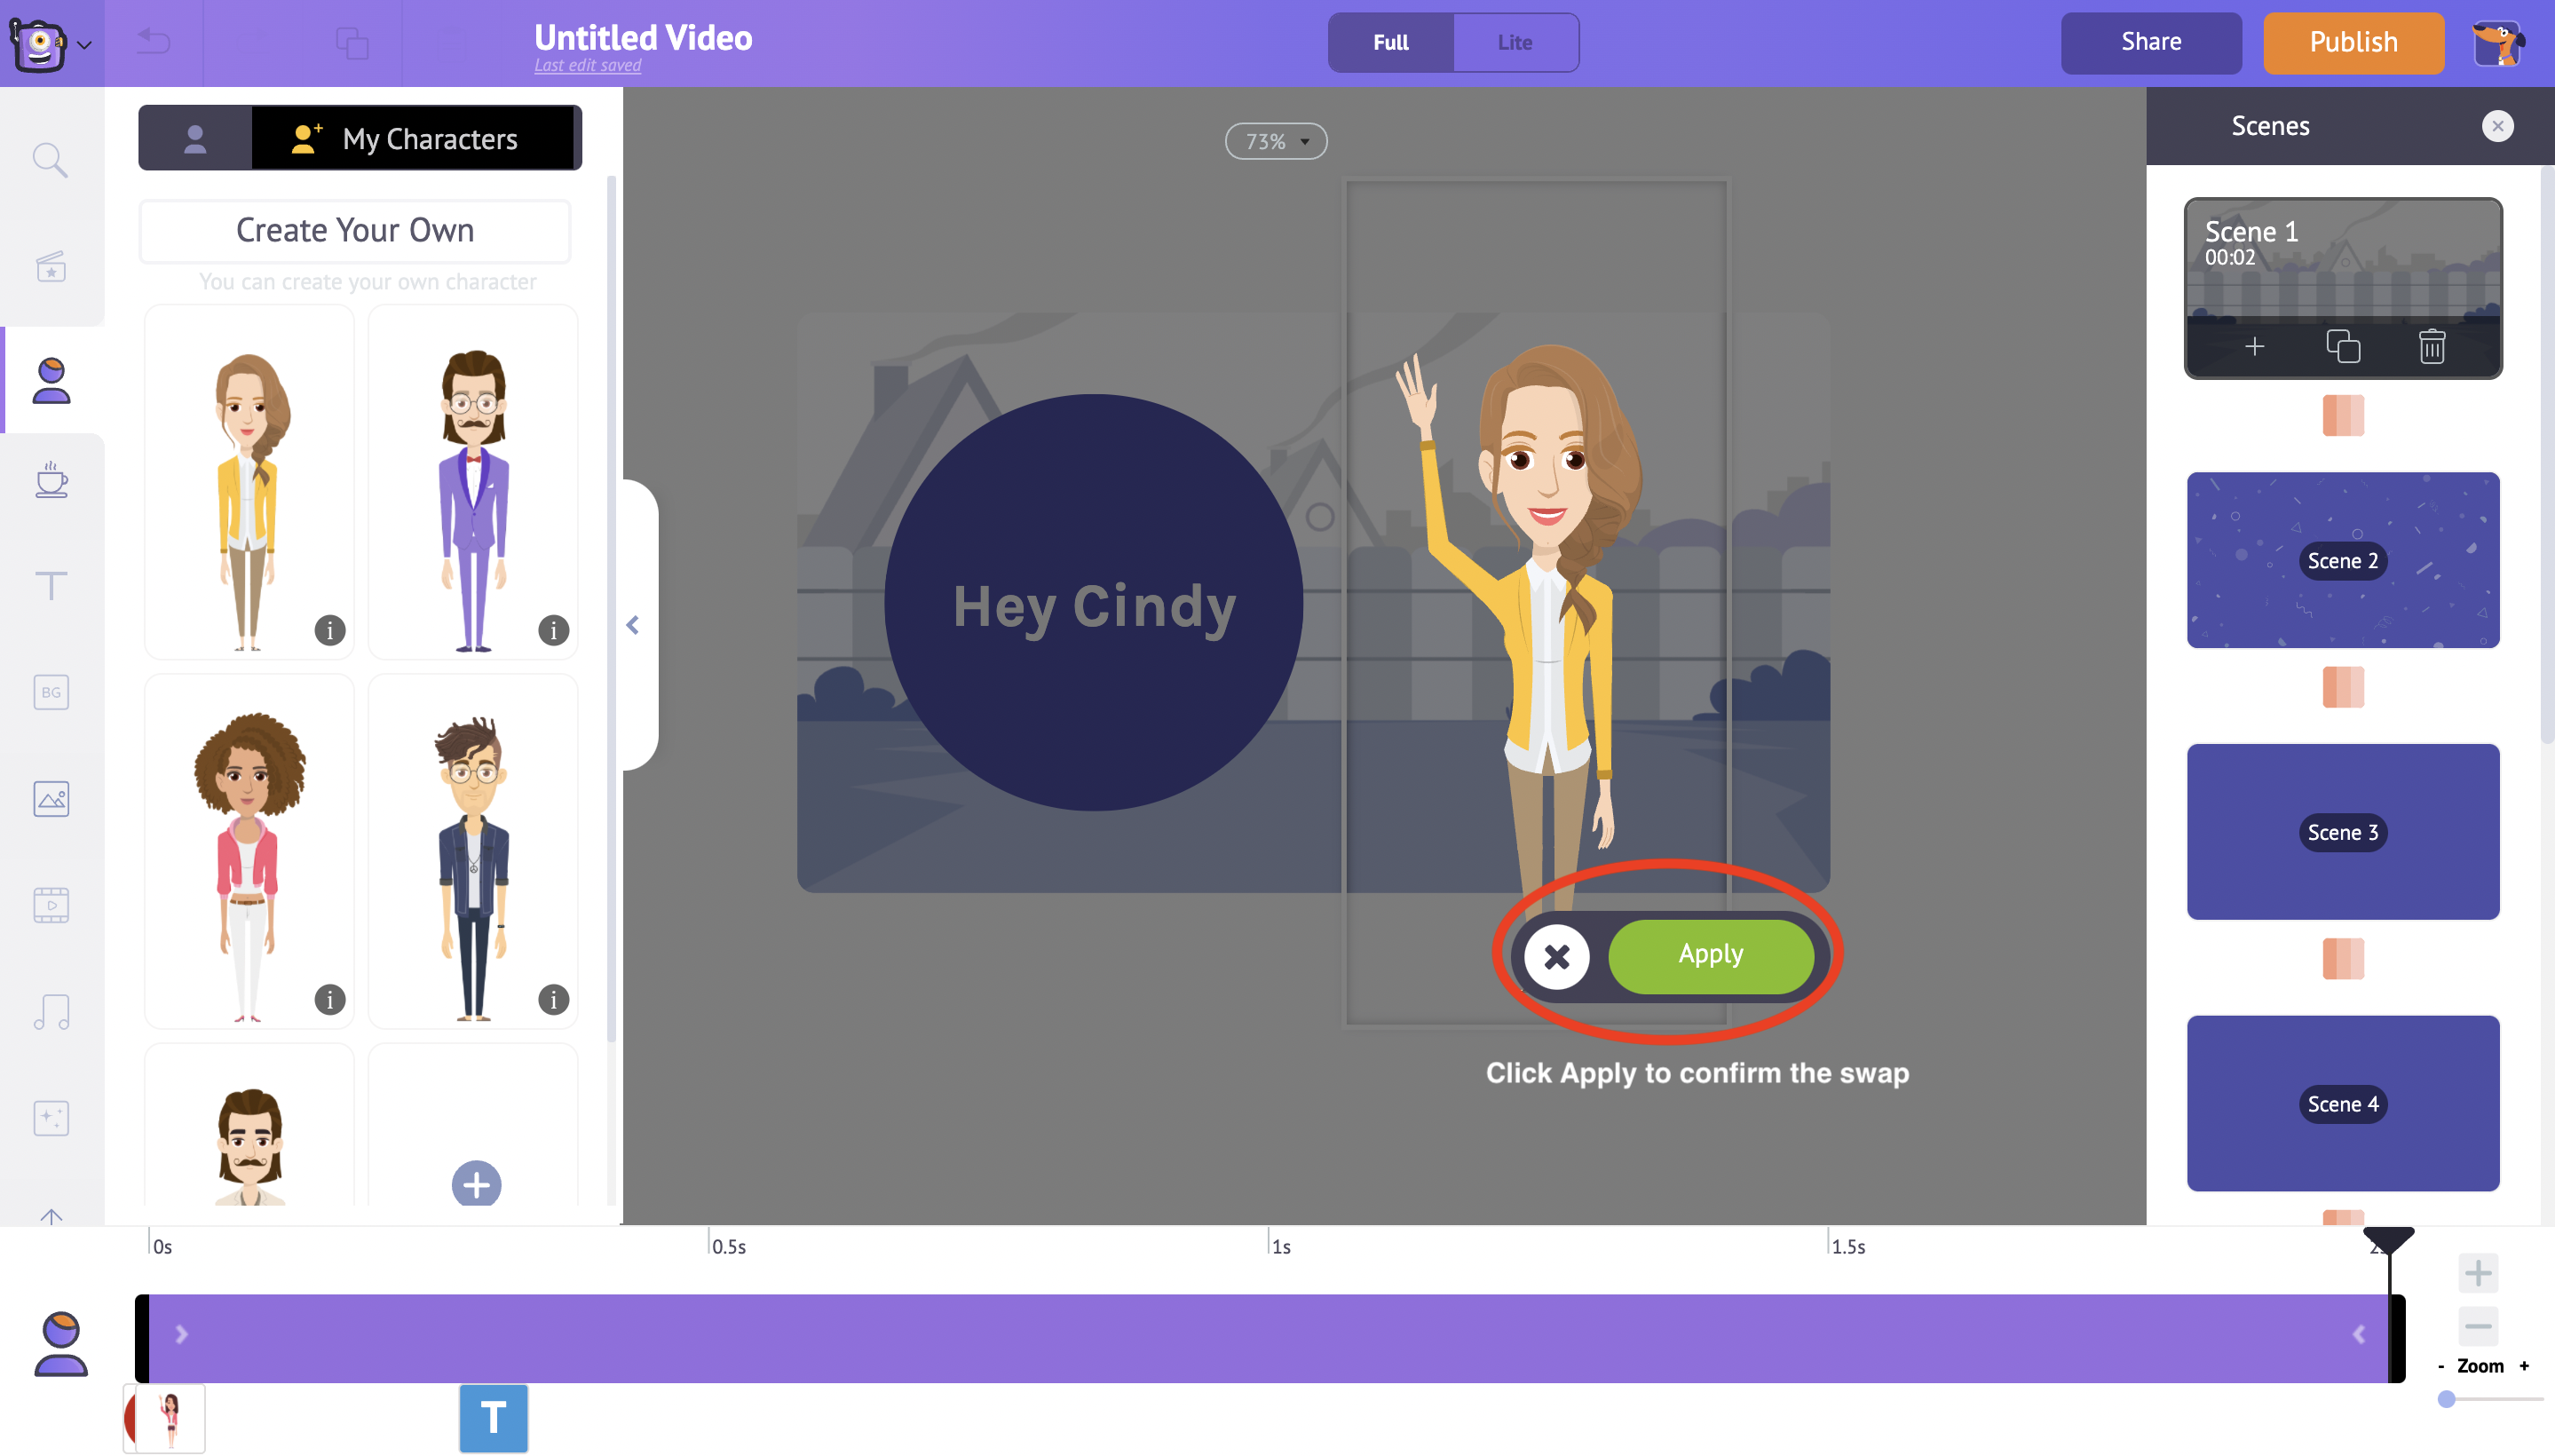
 Click Apply to make the swap and the new character will be visible in the scene now.
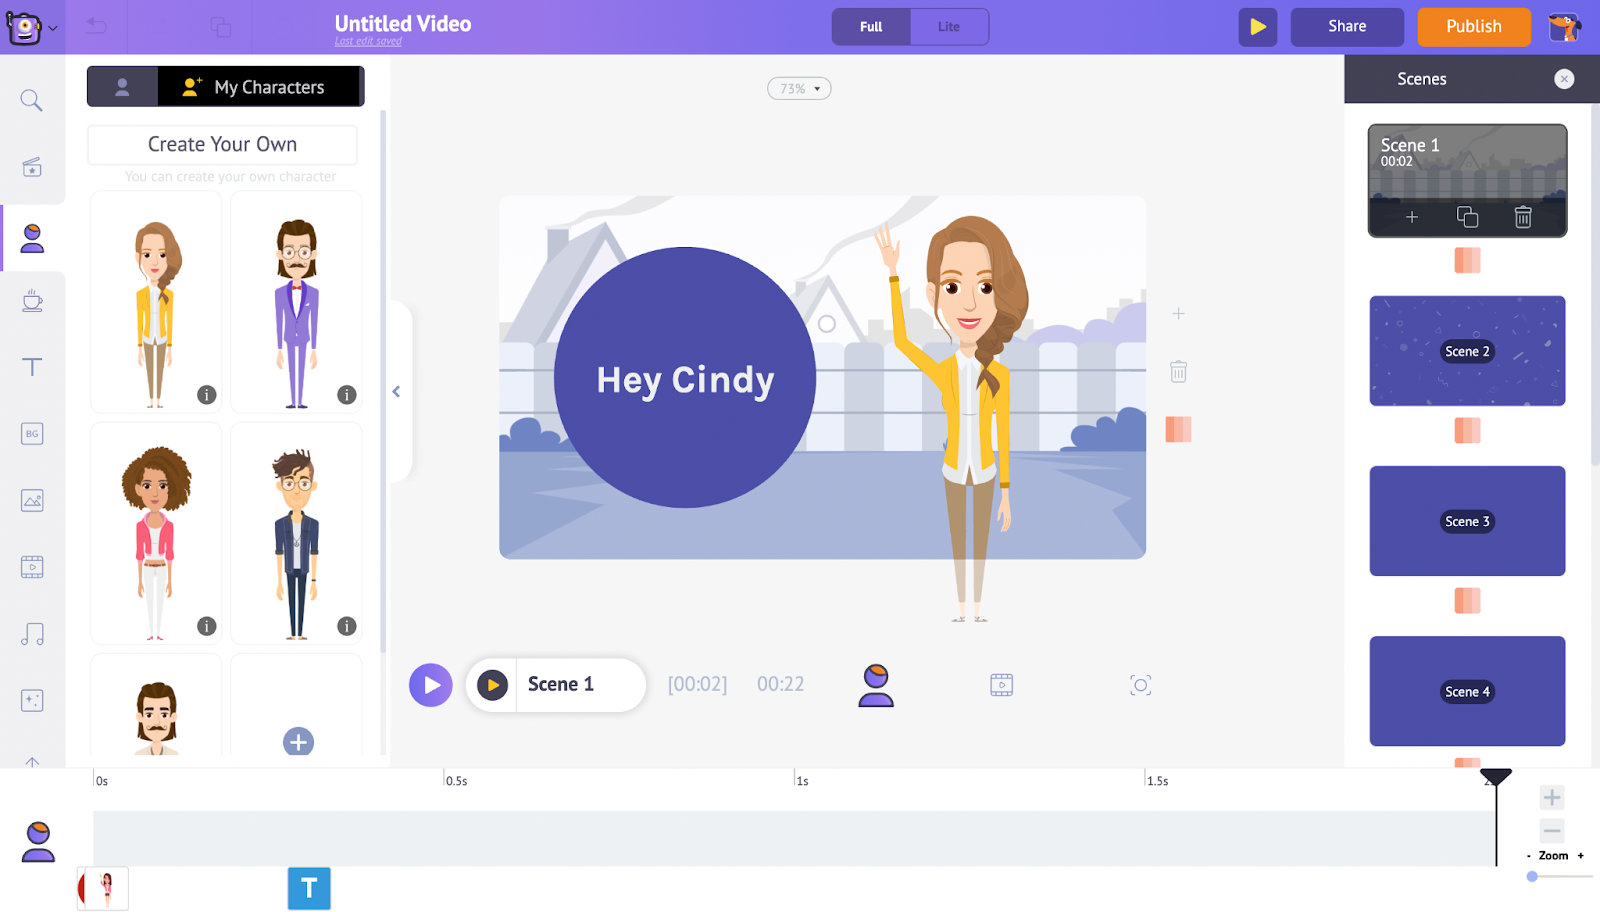
 This way you can create a character on your own that looks alike to yourselves or your loved ones and swap with the default template character easily.
For this article purpose, we are sticking to the default see character that’s in the template
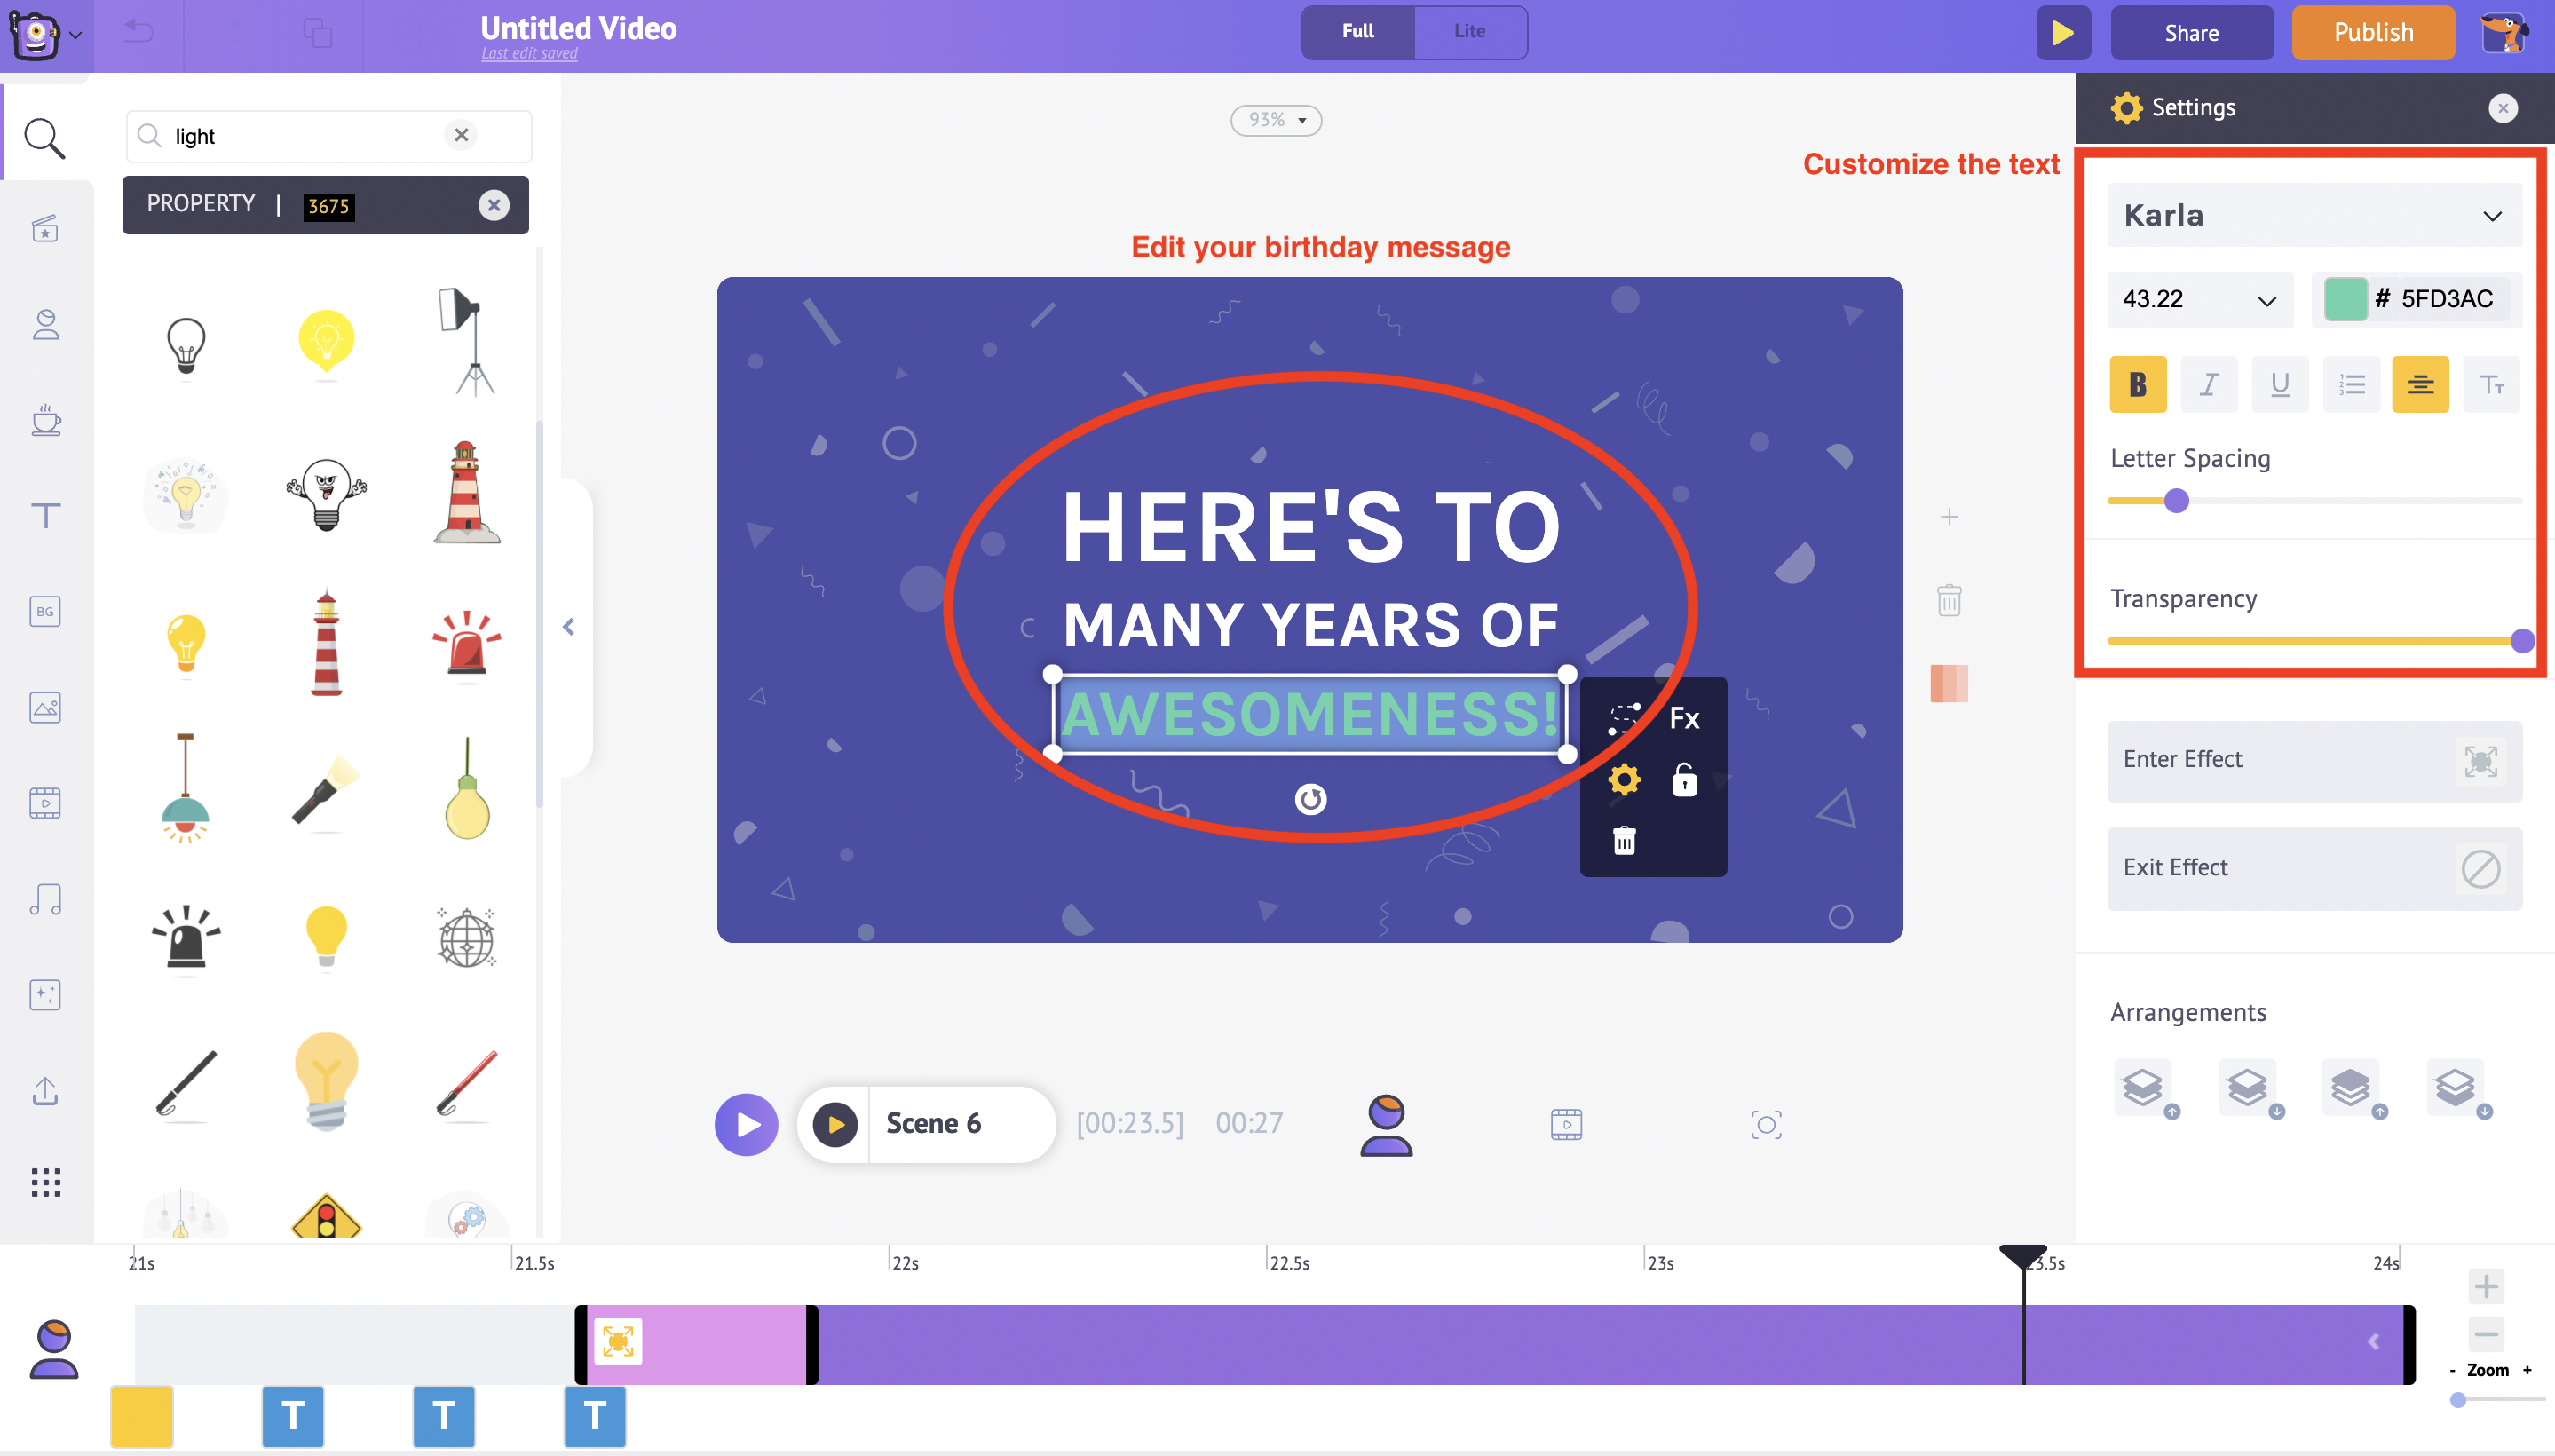
Step 2 - Edit the text the way you want
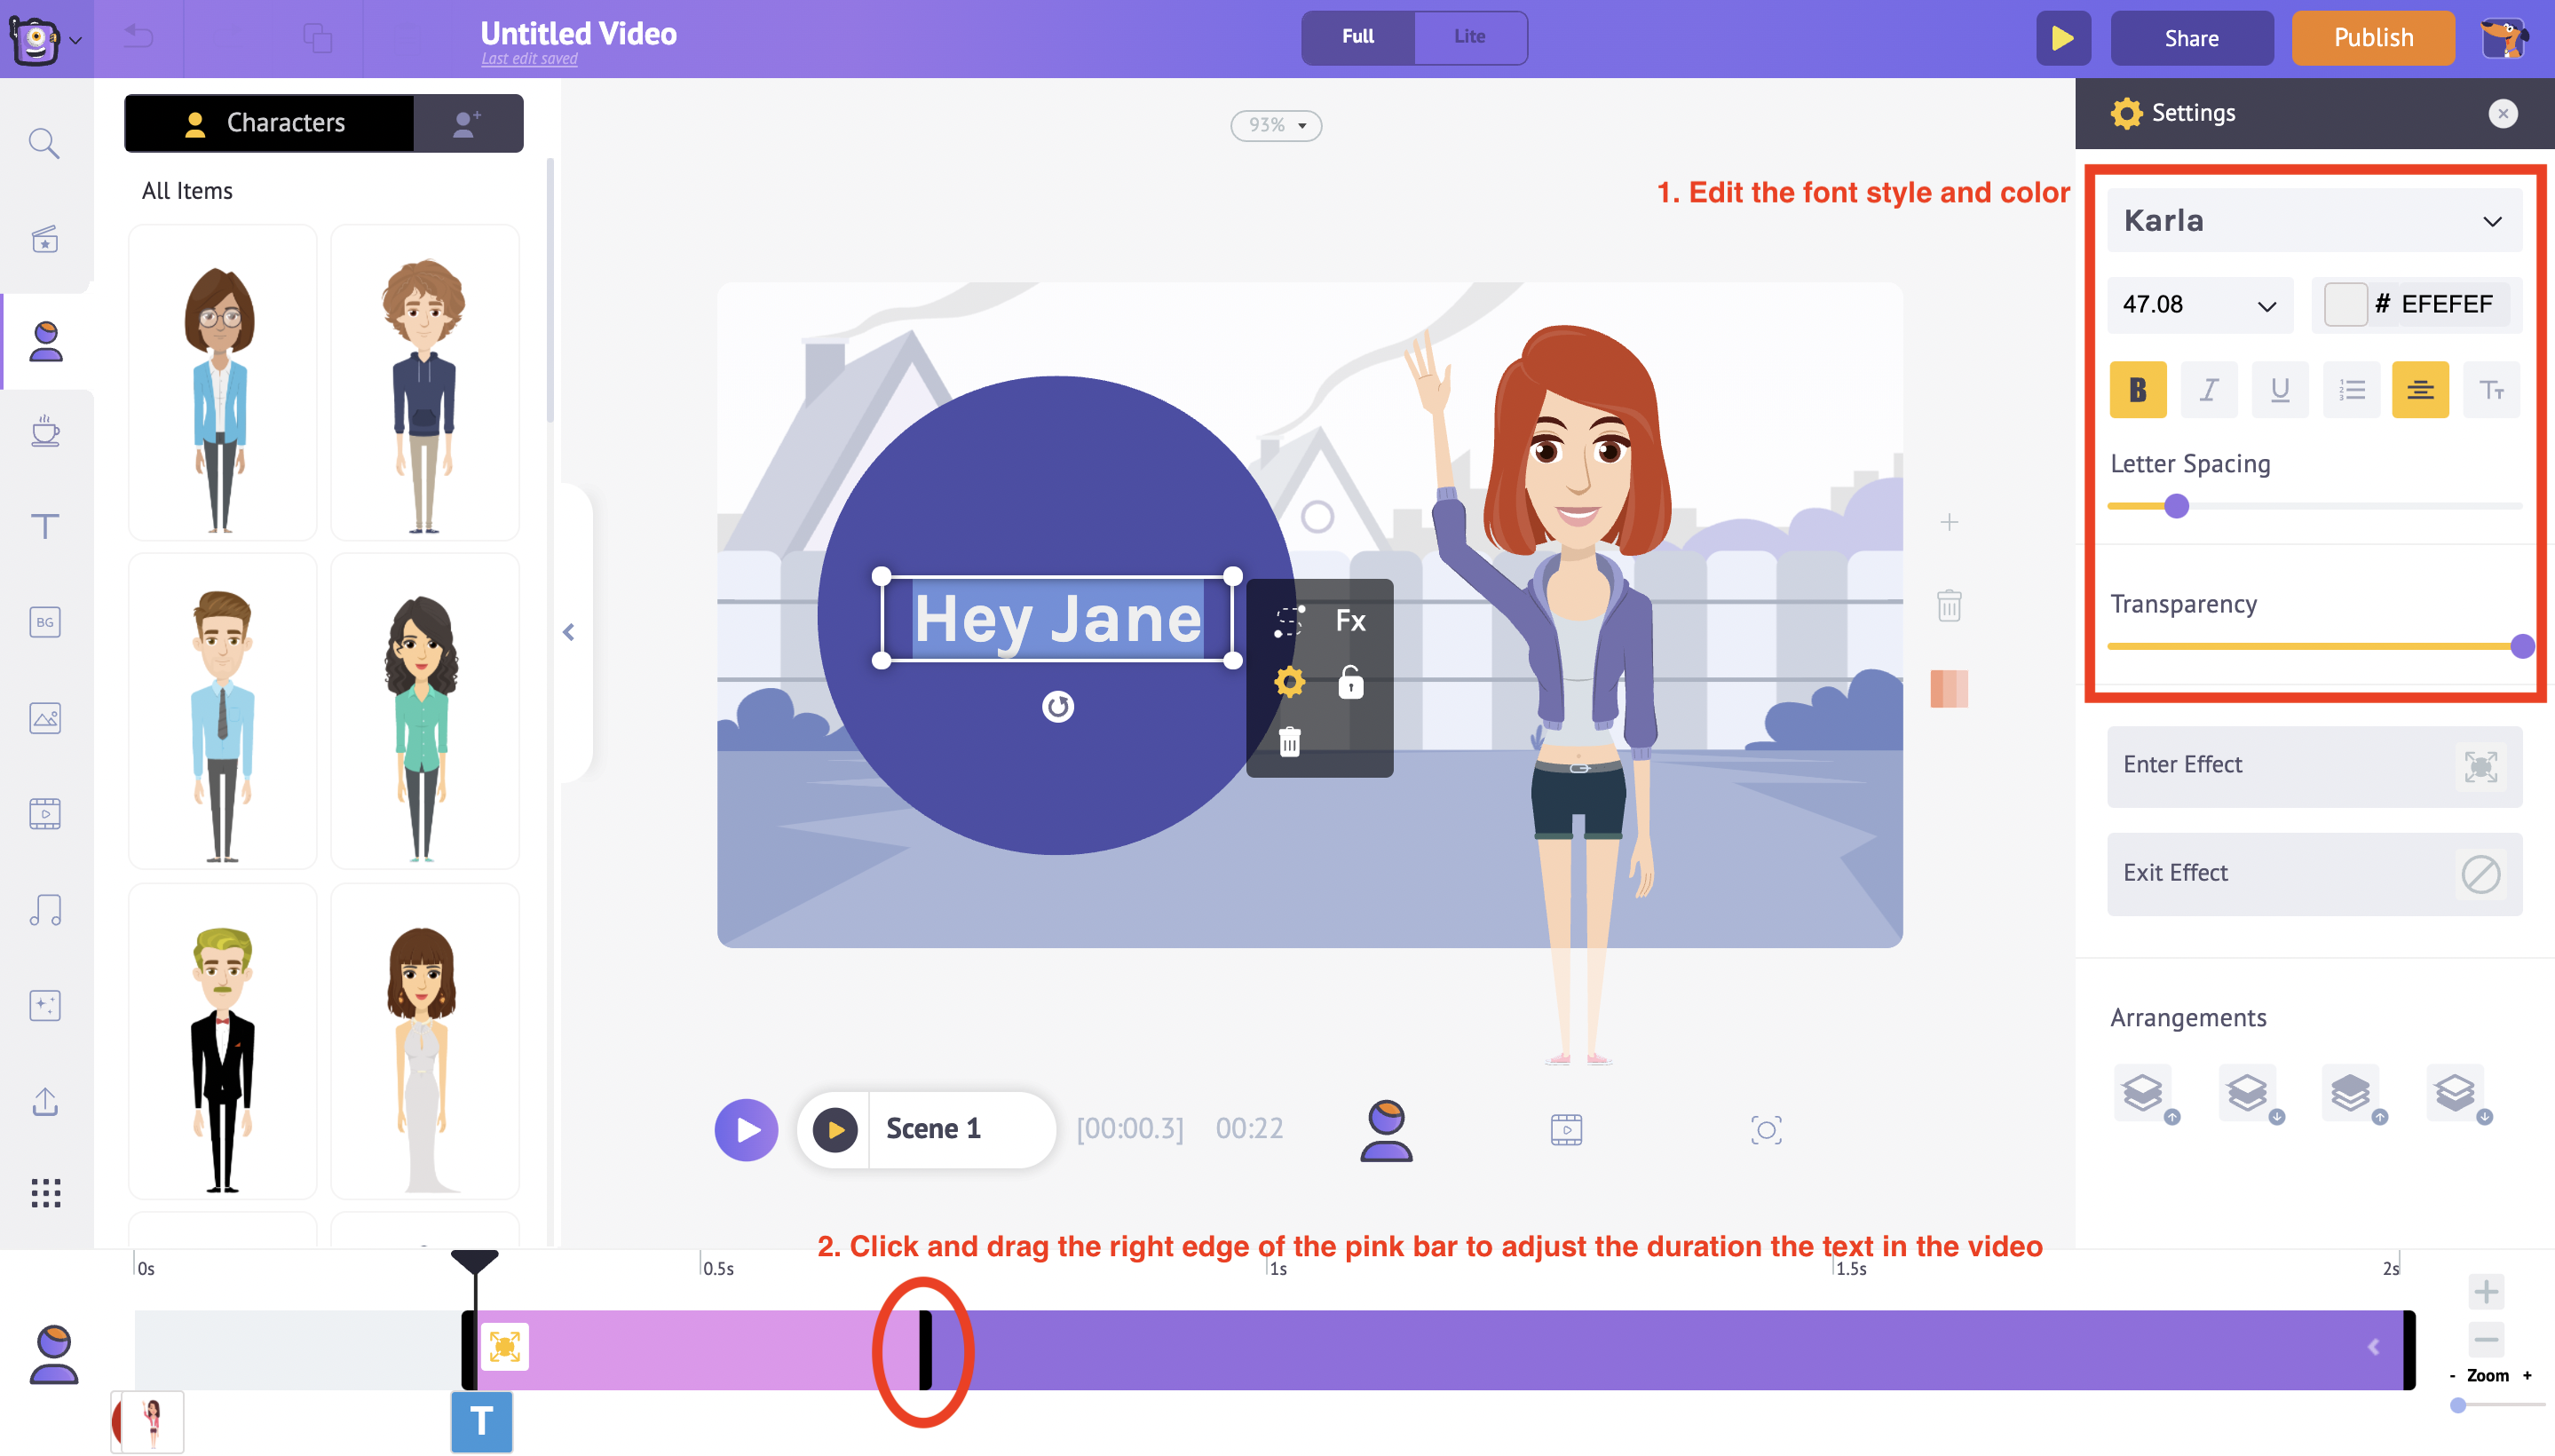
Click on the text box in the workspace and type in to edit the text. Also, clicking on the text box will display the settings panel on the right. Use the settings options available to customize the font style, color and transparency of the text.
In the timeline below you can notice a pink bar, adjust the duration of the text in the video by dragging the right end of the pink bar.
Similarly, you shall edit the birthday message in the video.
Step 3 - Customize the tone of the video to your friend’s favorite color
You can also customize the background color to the scene according to your friend’s favorite color. Click anywhere on the workspace and it prompts the Item Menu.
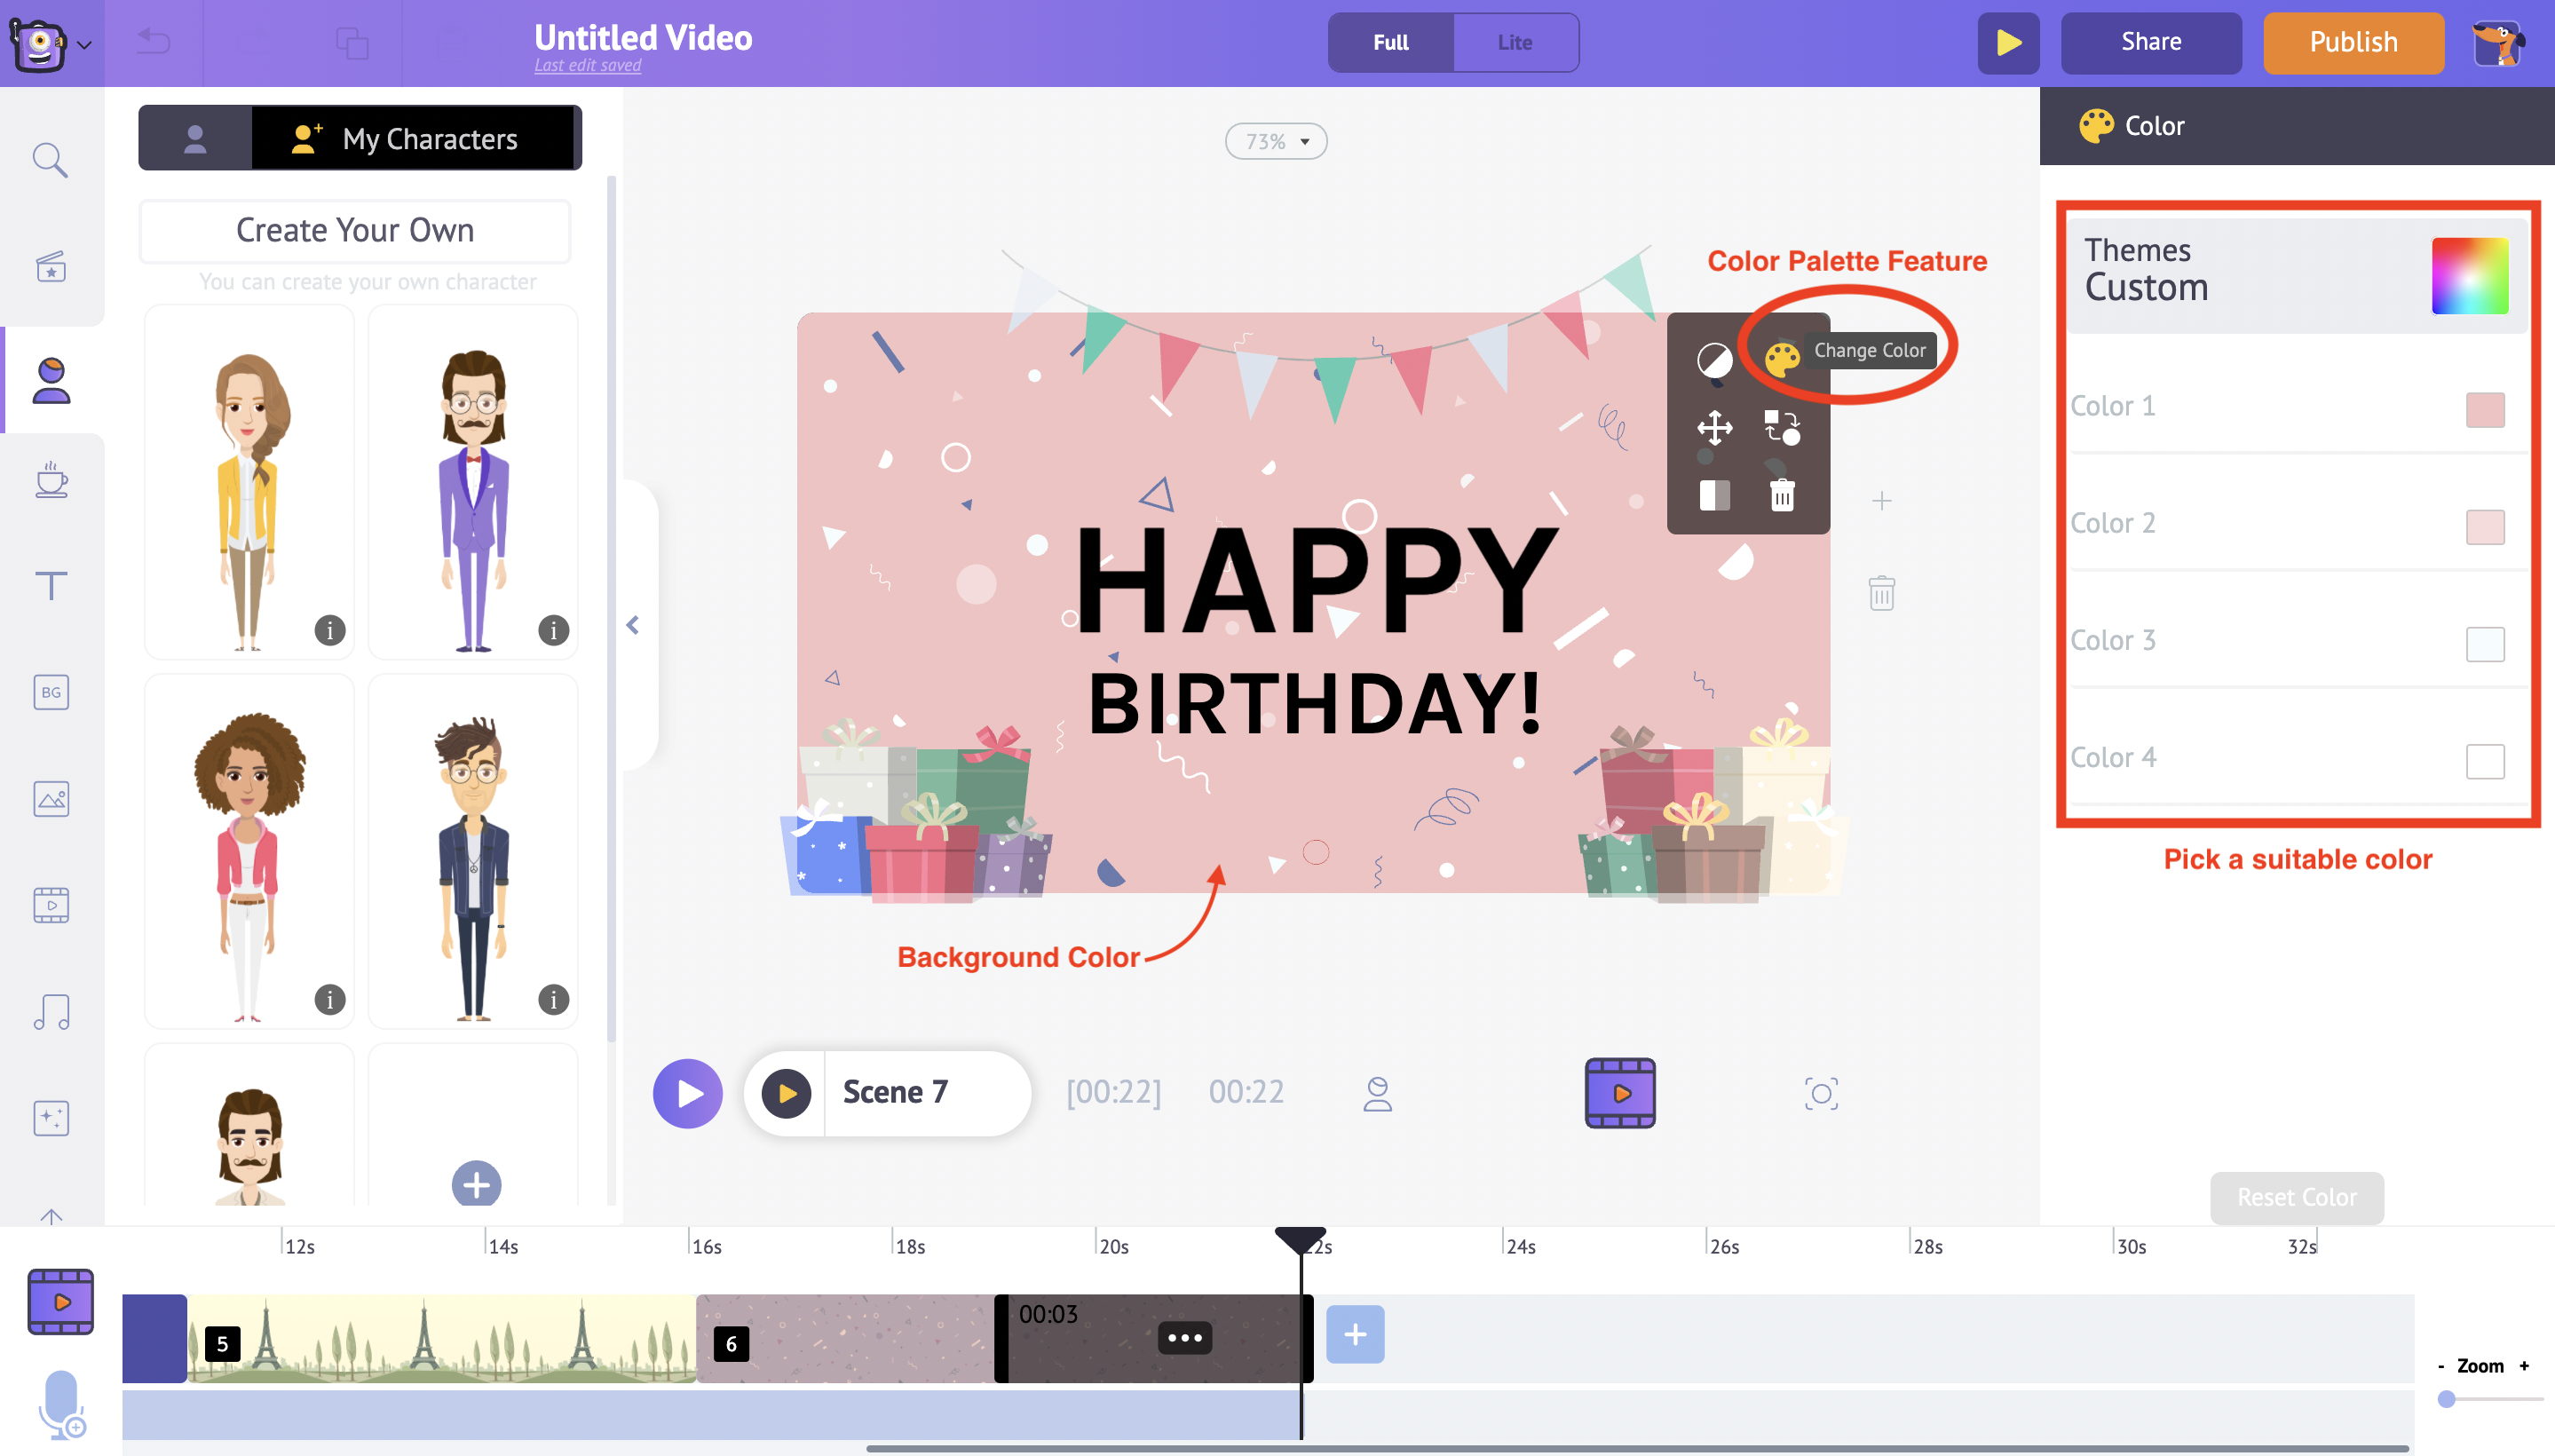
From the Item Menu, click the color palette feature and on the right side it will display the themes customization option. Now you can choose a suitable theme and it will reflect in the scene.
Also, change the font color that’s suitable to the background color of your preference.In this instance for this particular scene, we have chosen a black color font for the text to match with the pastel pink background color. Similarly, you can change the background color for all the scenes and set the tone of the video to your friend’s favorite colour.
Step 4: Add your own twist
- Change the actions of the character
- Add or remove icons and props
- Modify the Enter and exit effect for the props and text
- Modify the transition effects
1. Change the actions of the character
Clicking on the character will display the Actions and Expressions feature on the right side. From the list of Actions and Expressions available, select one and it will reflect the character in the workspace.
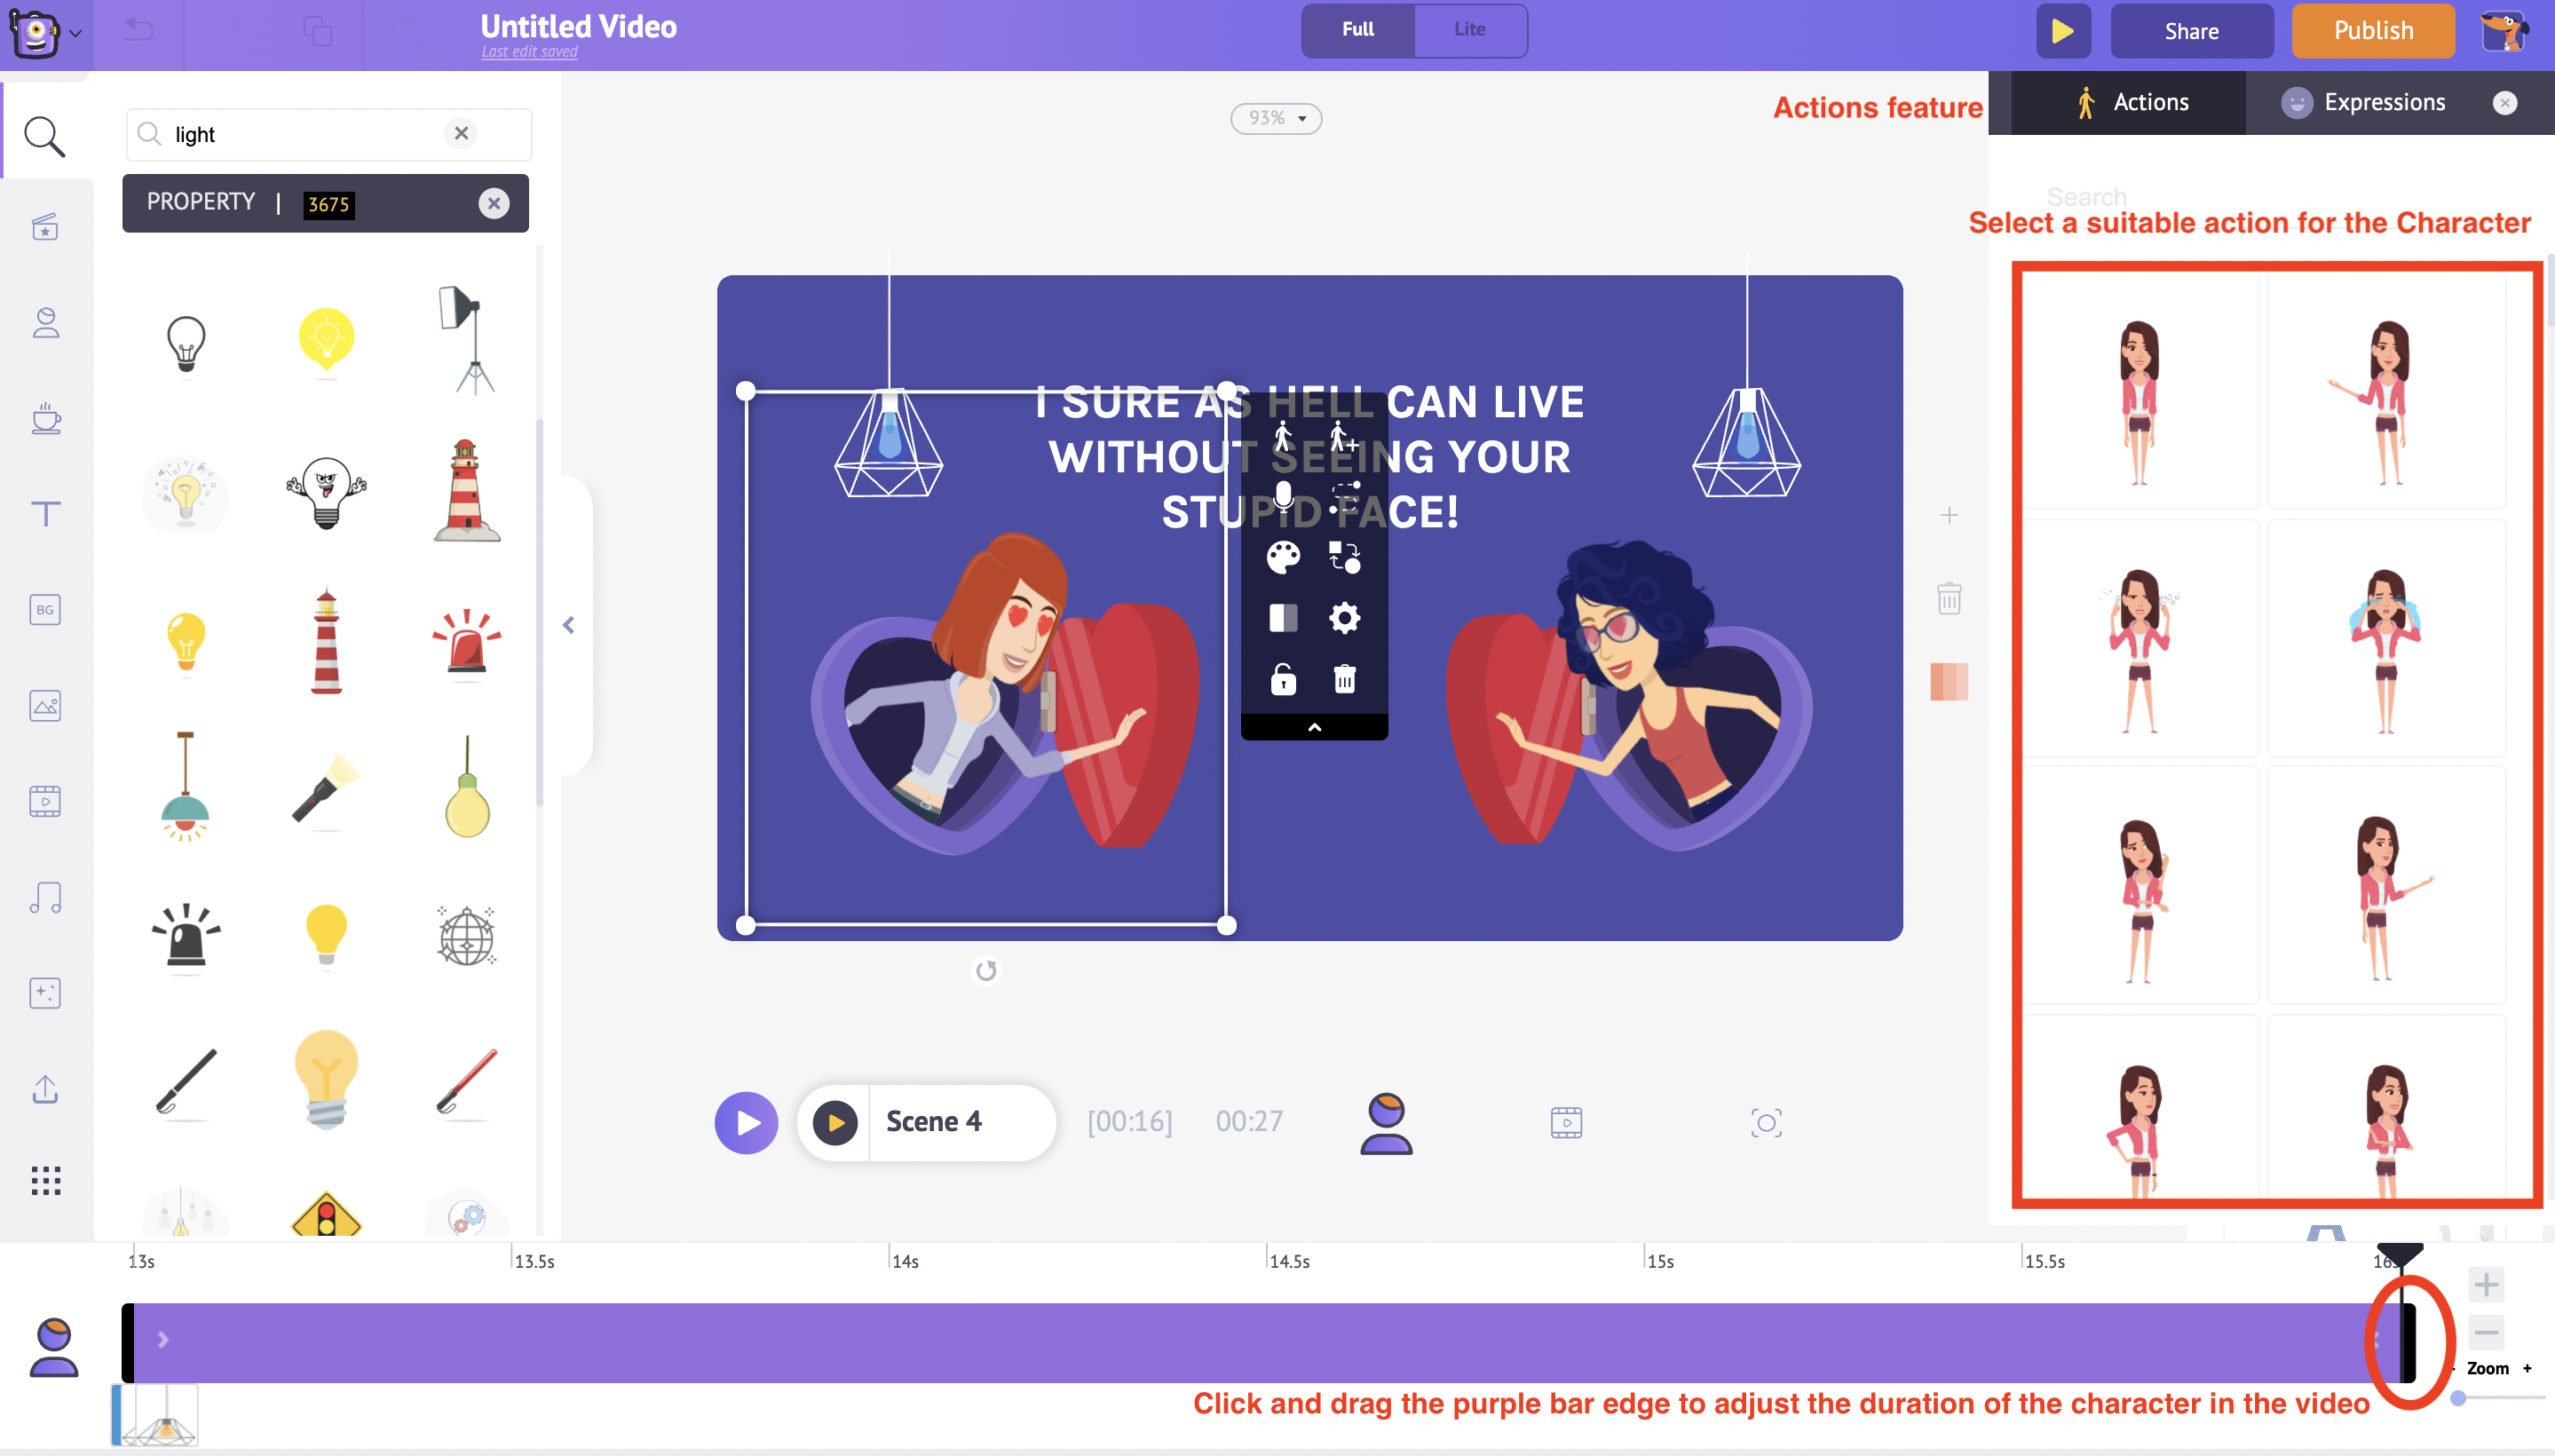
Also, to adjust the duration of the character in the scene, click and drag the edge of the purple bar in the Animation timeline.
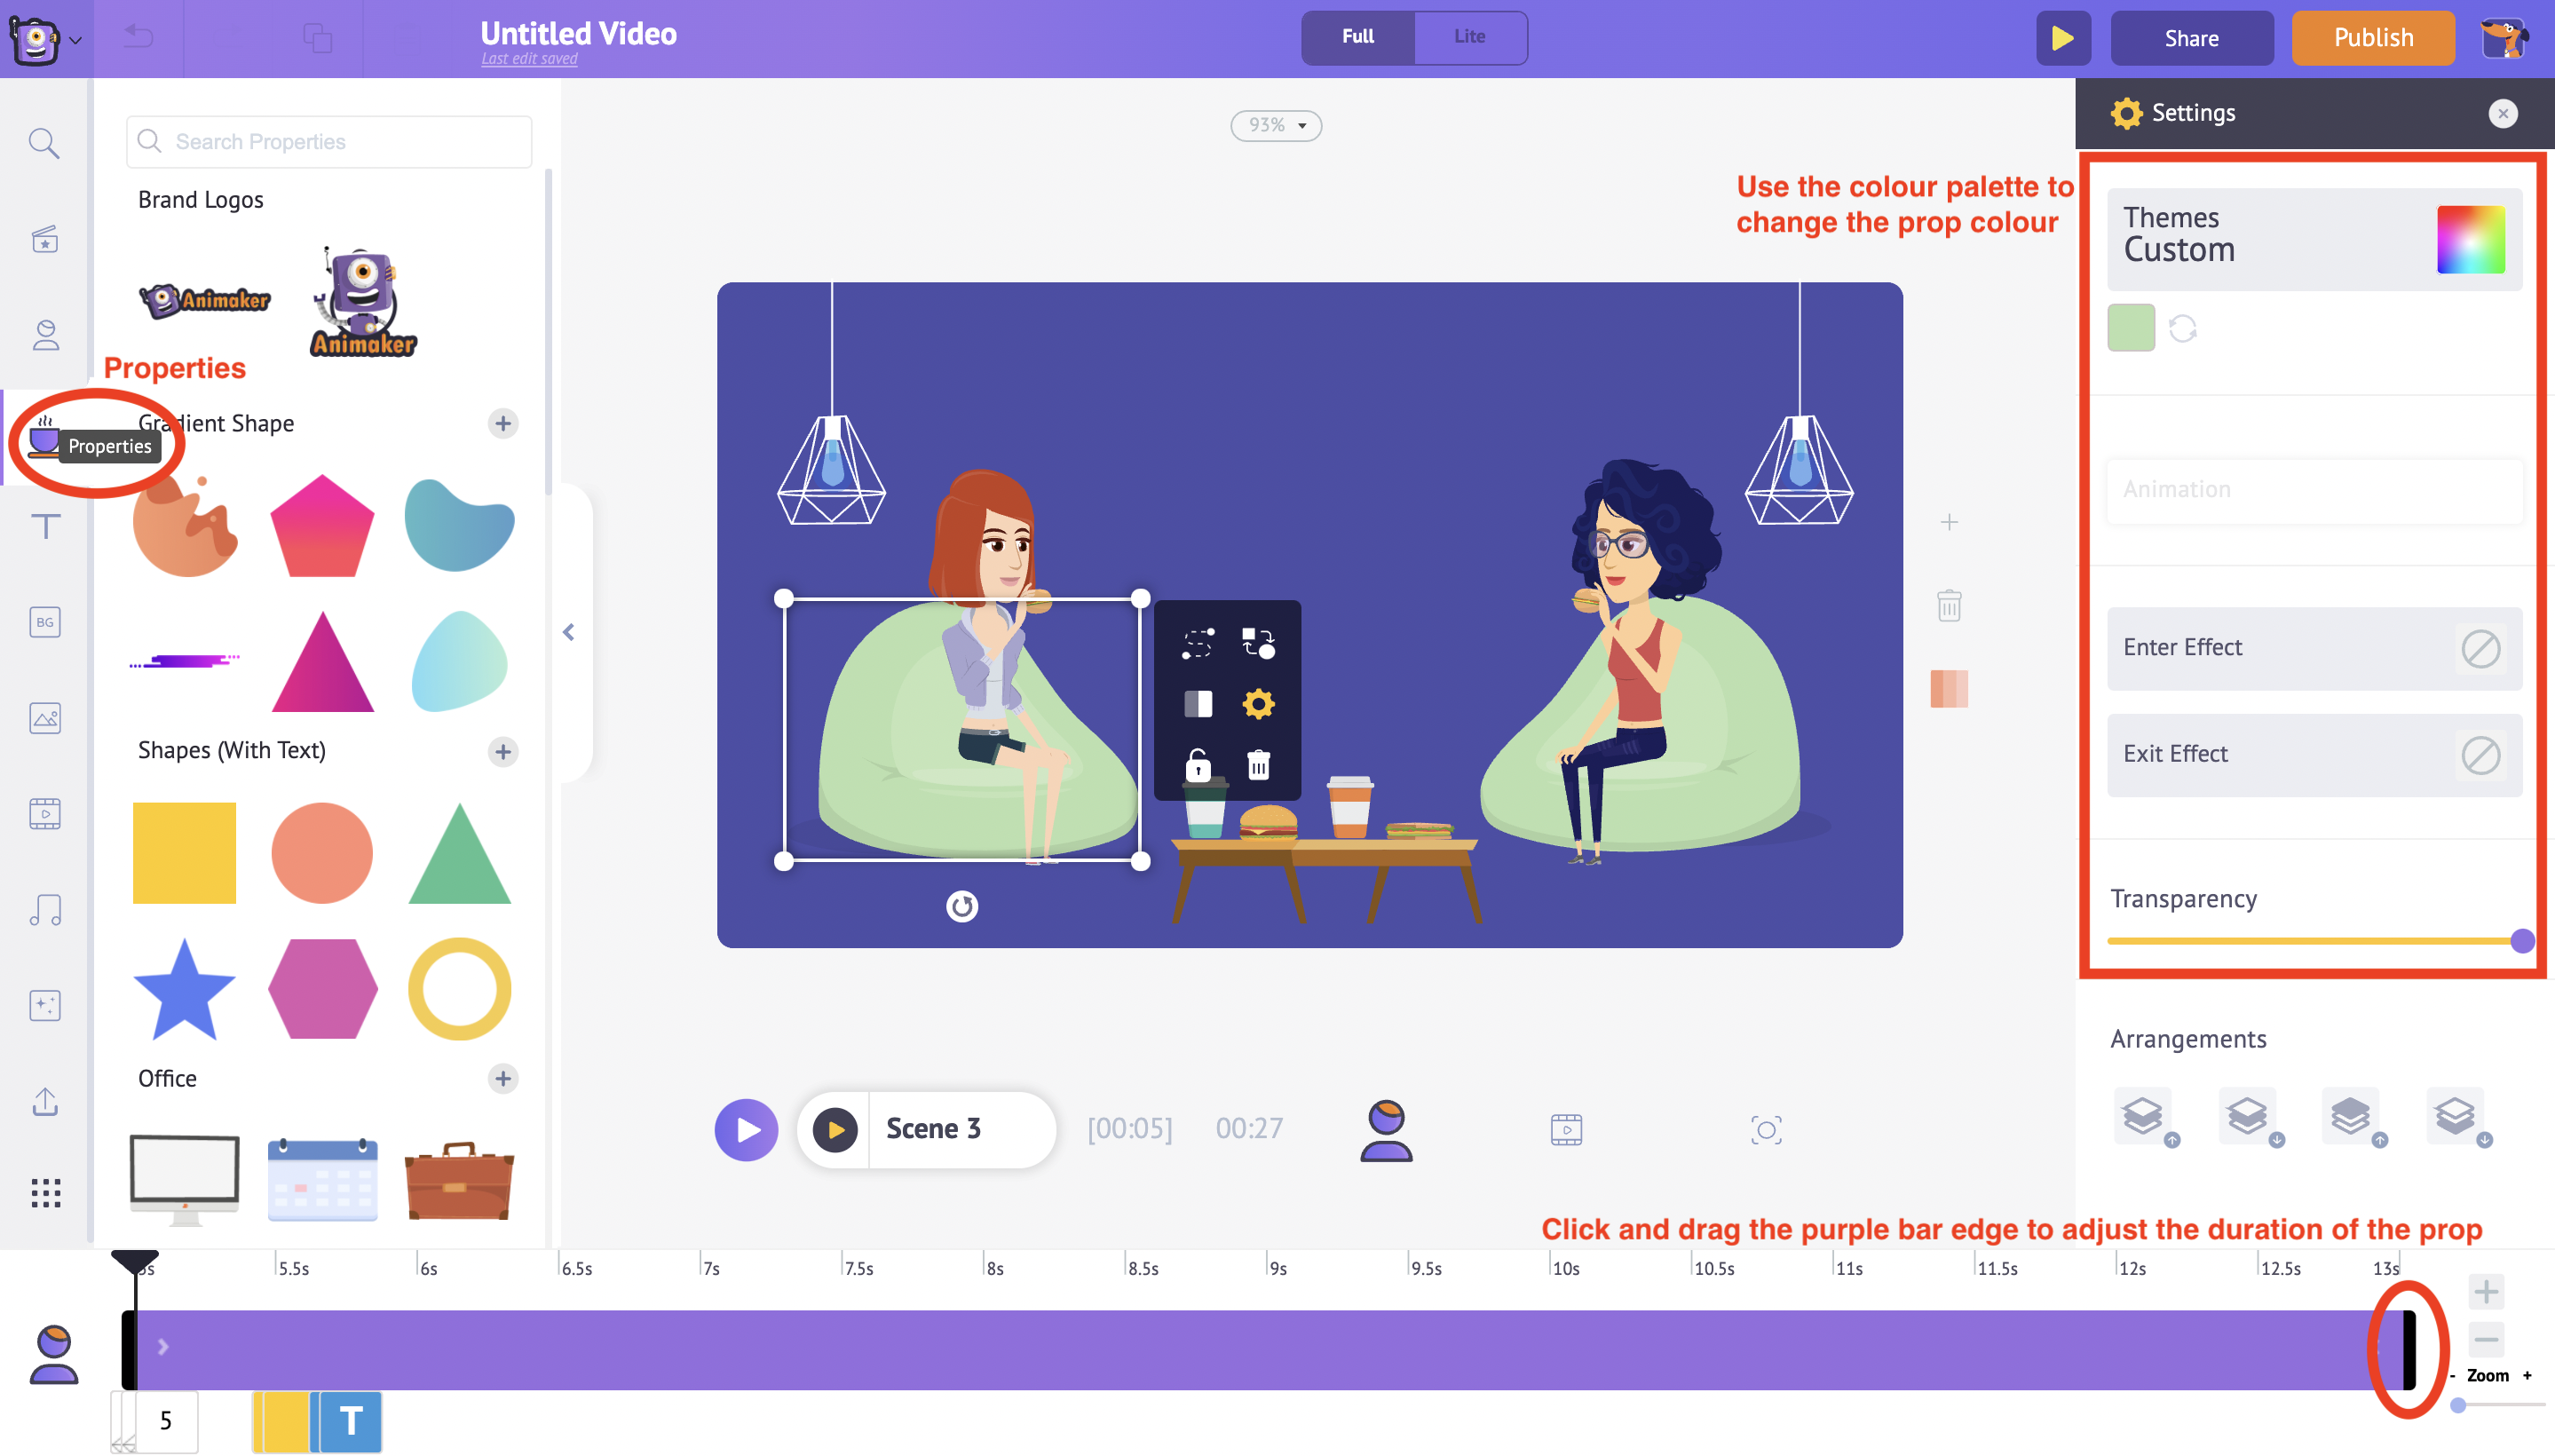
2. Add or remove icons and props
In the next scene, there are props. Animaker application gives us an option to customize the color of the props as well.
Clicking on the prop in the workspace will display the settings option on the right side. Use the color palette to change the color of the prop
Also, to adjust the duration of the prop in the scene, click and drag the edge of the purple bar in the Animation timeline
 You can also introduce new props into the scene
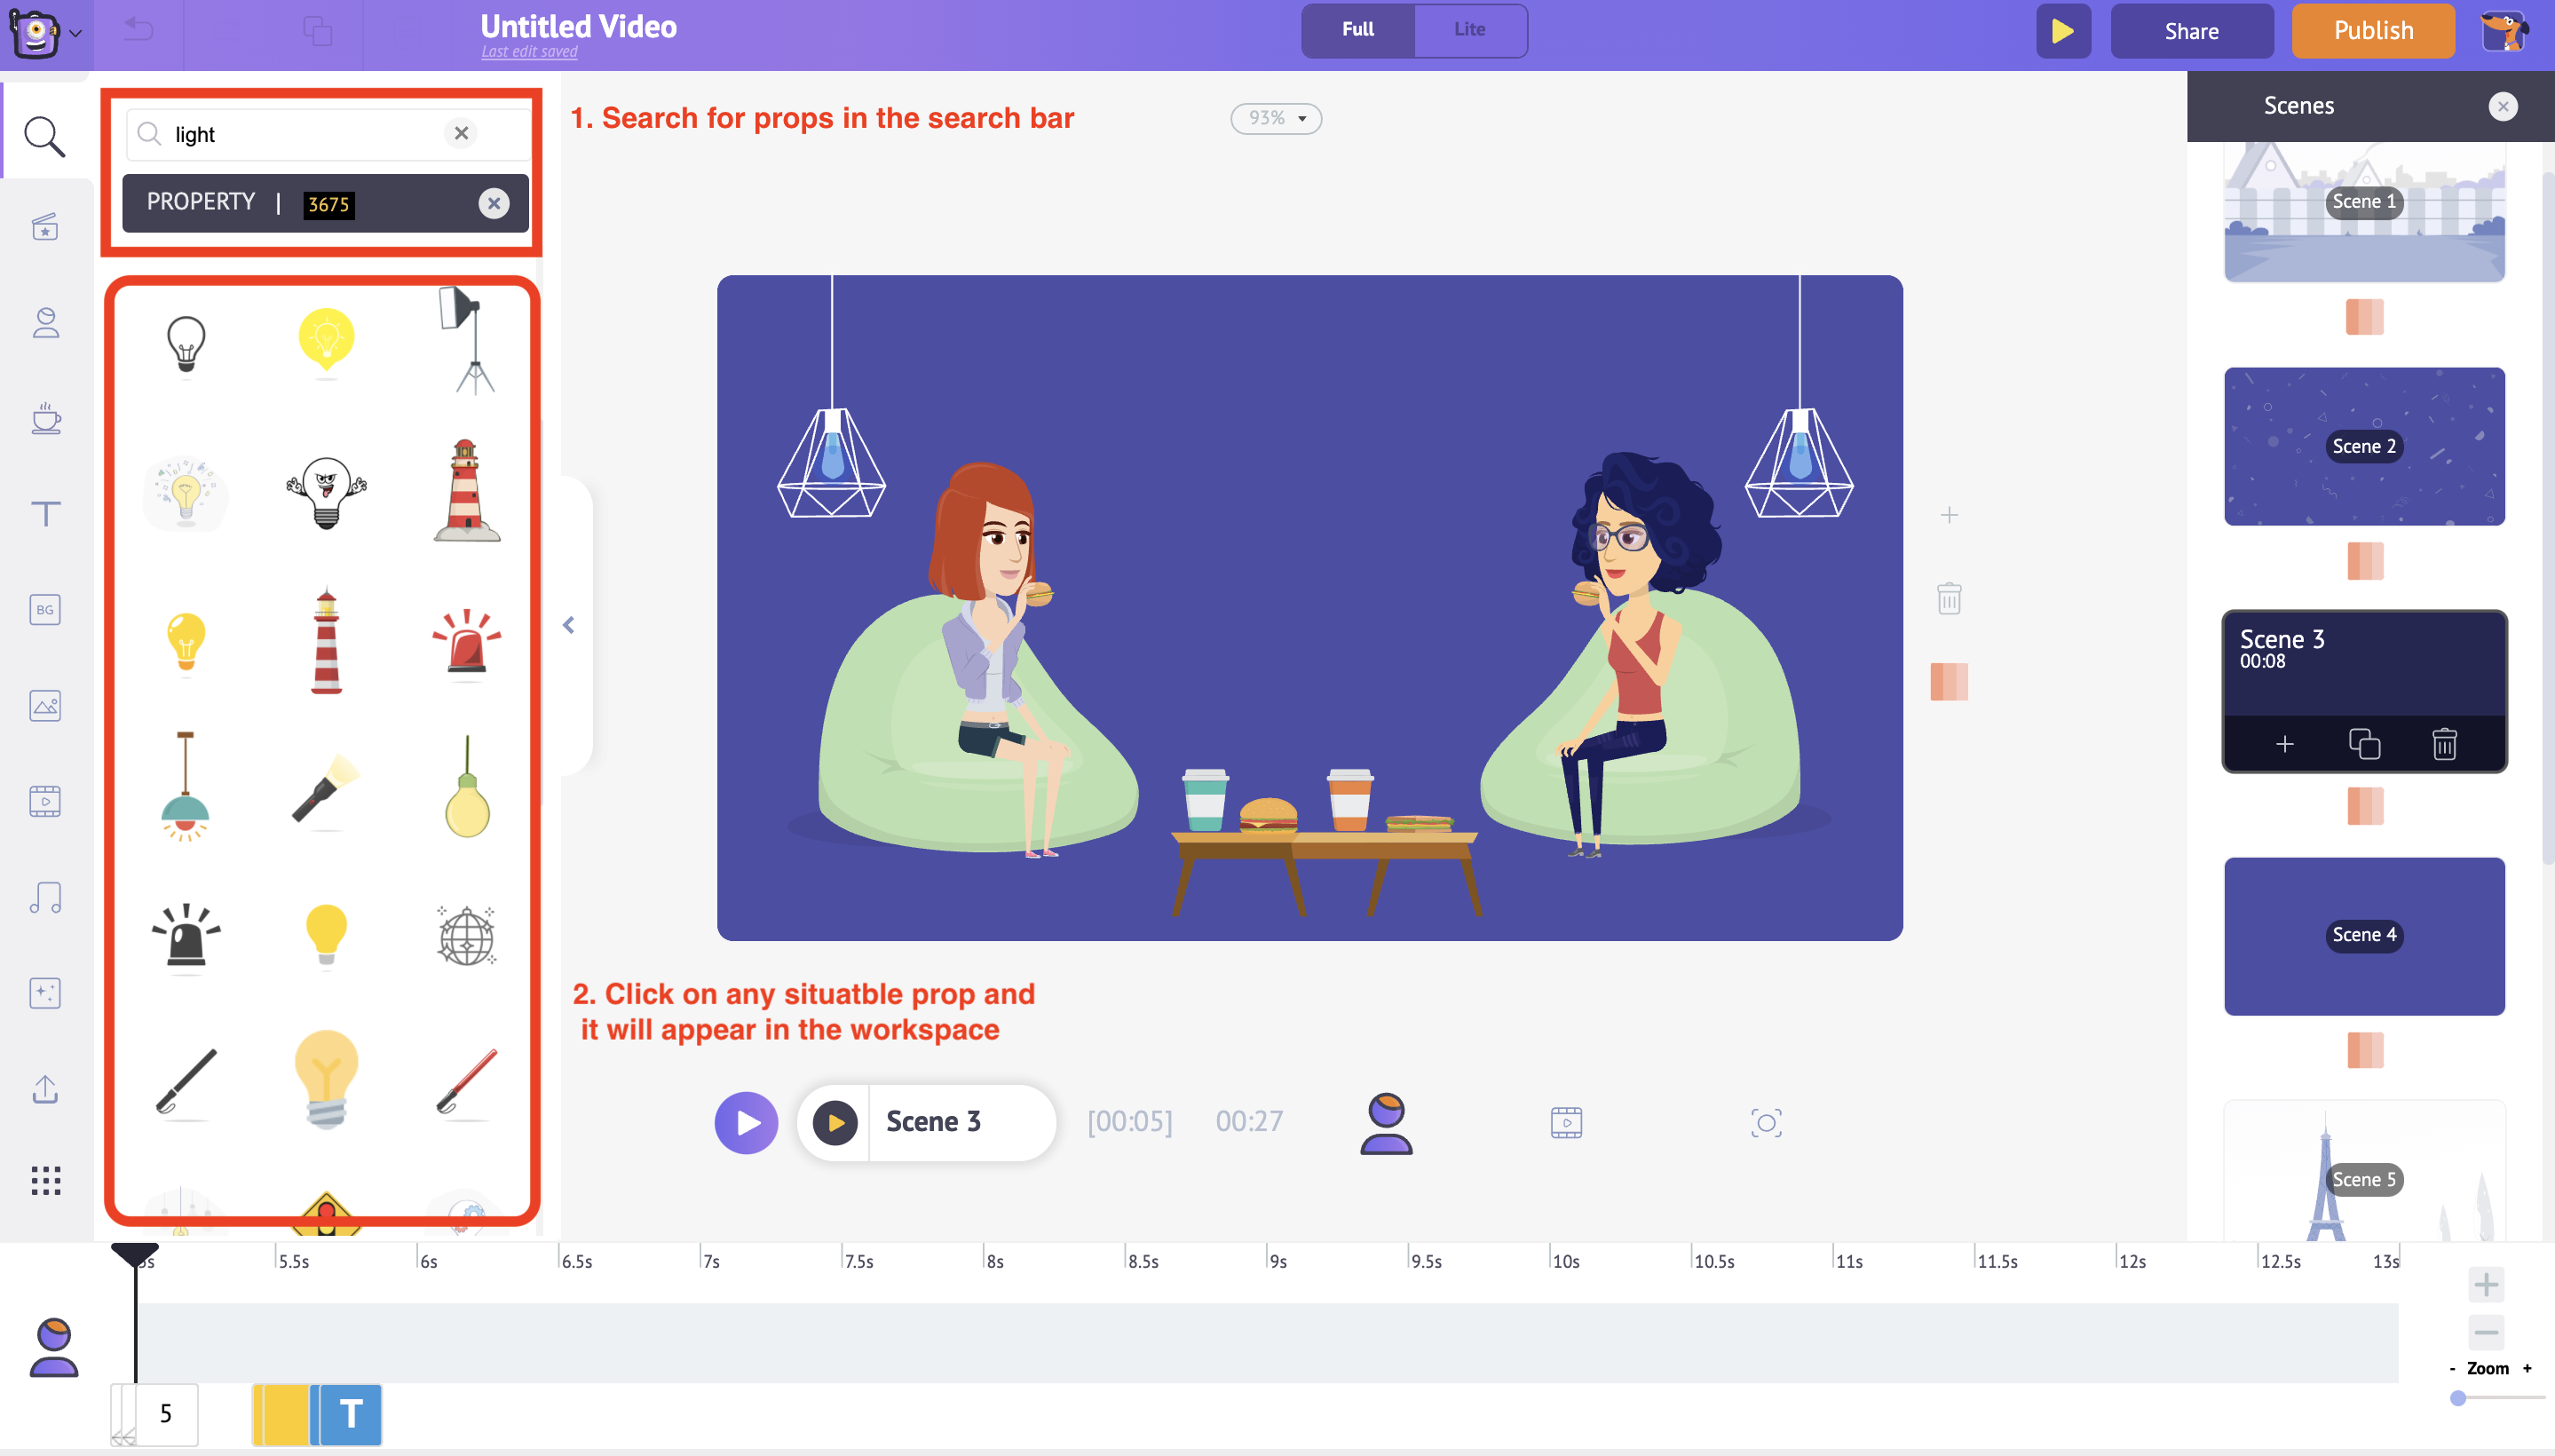
Under the Library section, use the properties feature to introduce new props in the workspace. In the search bar, type in the prop you want to add. And select from the list of props shown in the results.
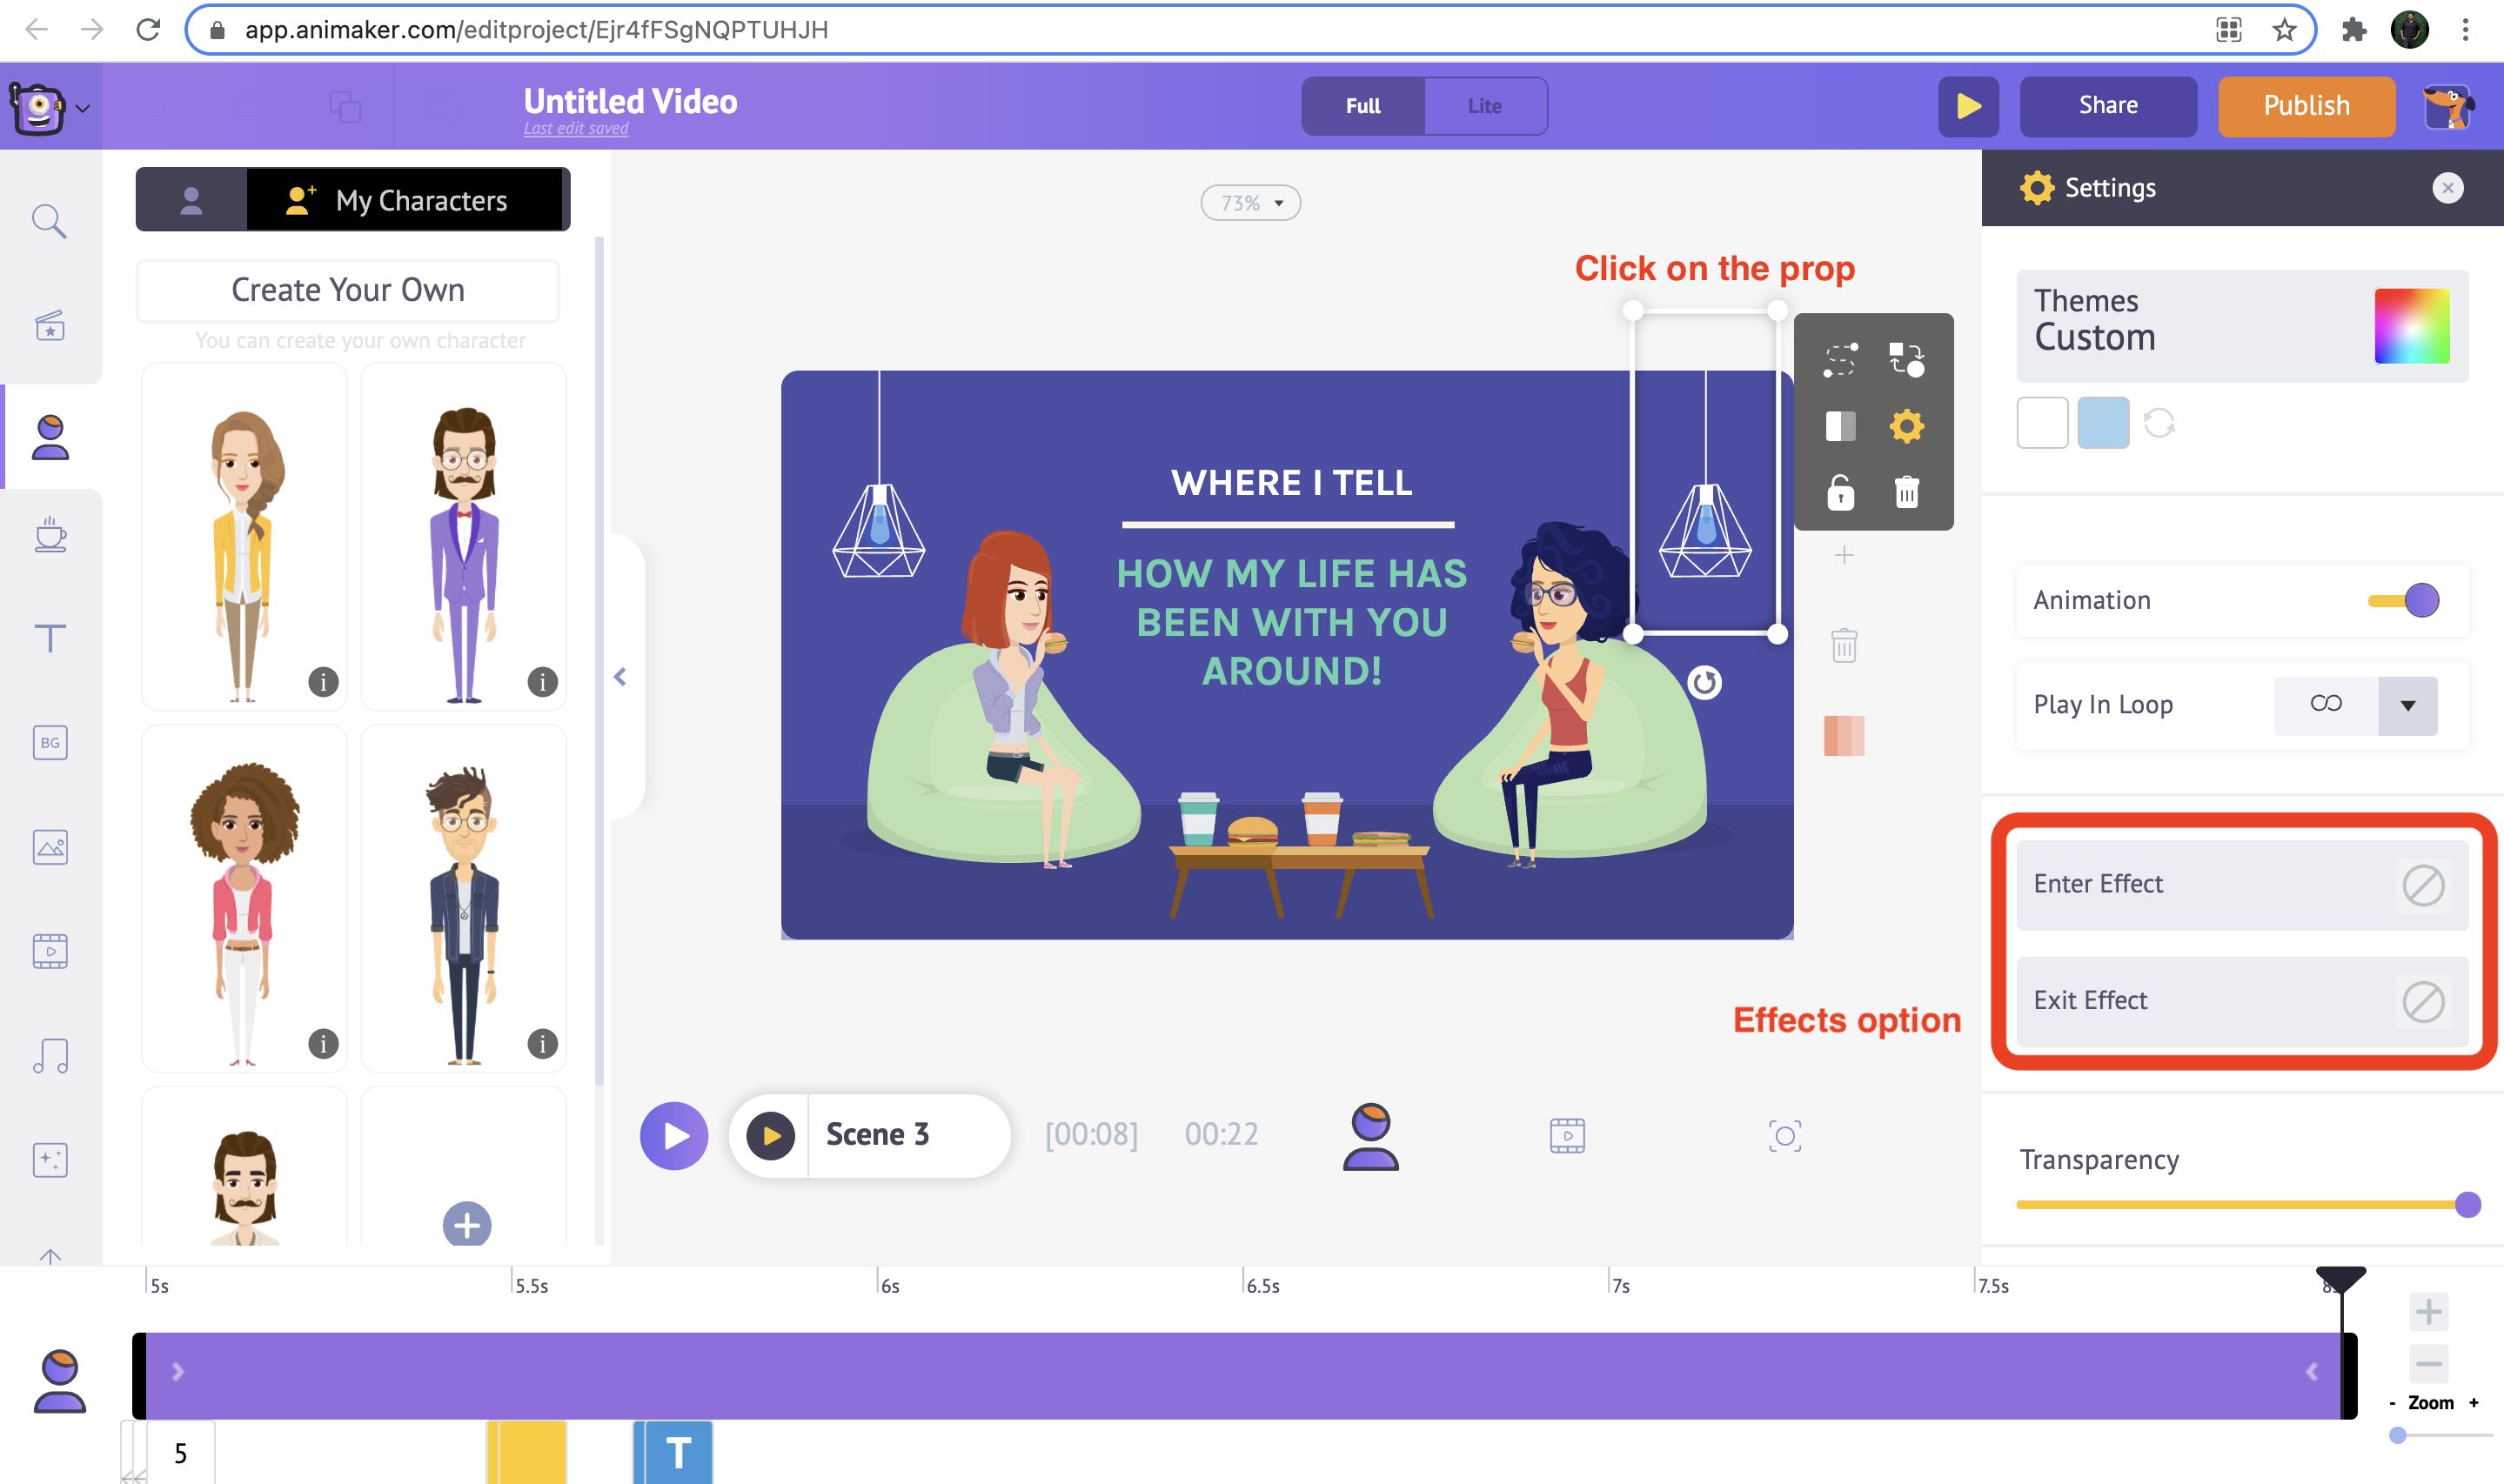
3. Modify the Enter and exit effect for the props and text
You can customize the Enter and Exit effects to the prop. Select the prop in the scene and on the right side from the Enter effect options select the suitable effect and it will be reflected in the scene.
 Use the right edge of the pink bar in the Animation timeline, to adjust the duration of the enter effect to the prop.

Similarly, you can customize the Enter and Exit effects to the text. Select the animated text in the scene and on the right side from the Enter effect options select the suitable effect and it will be reflected in the scene.
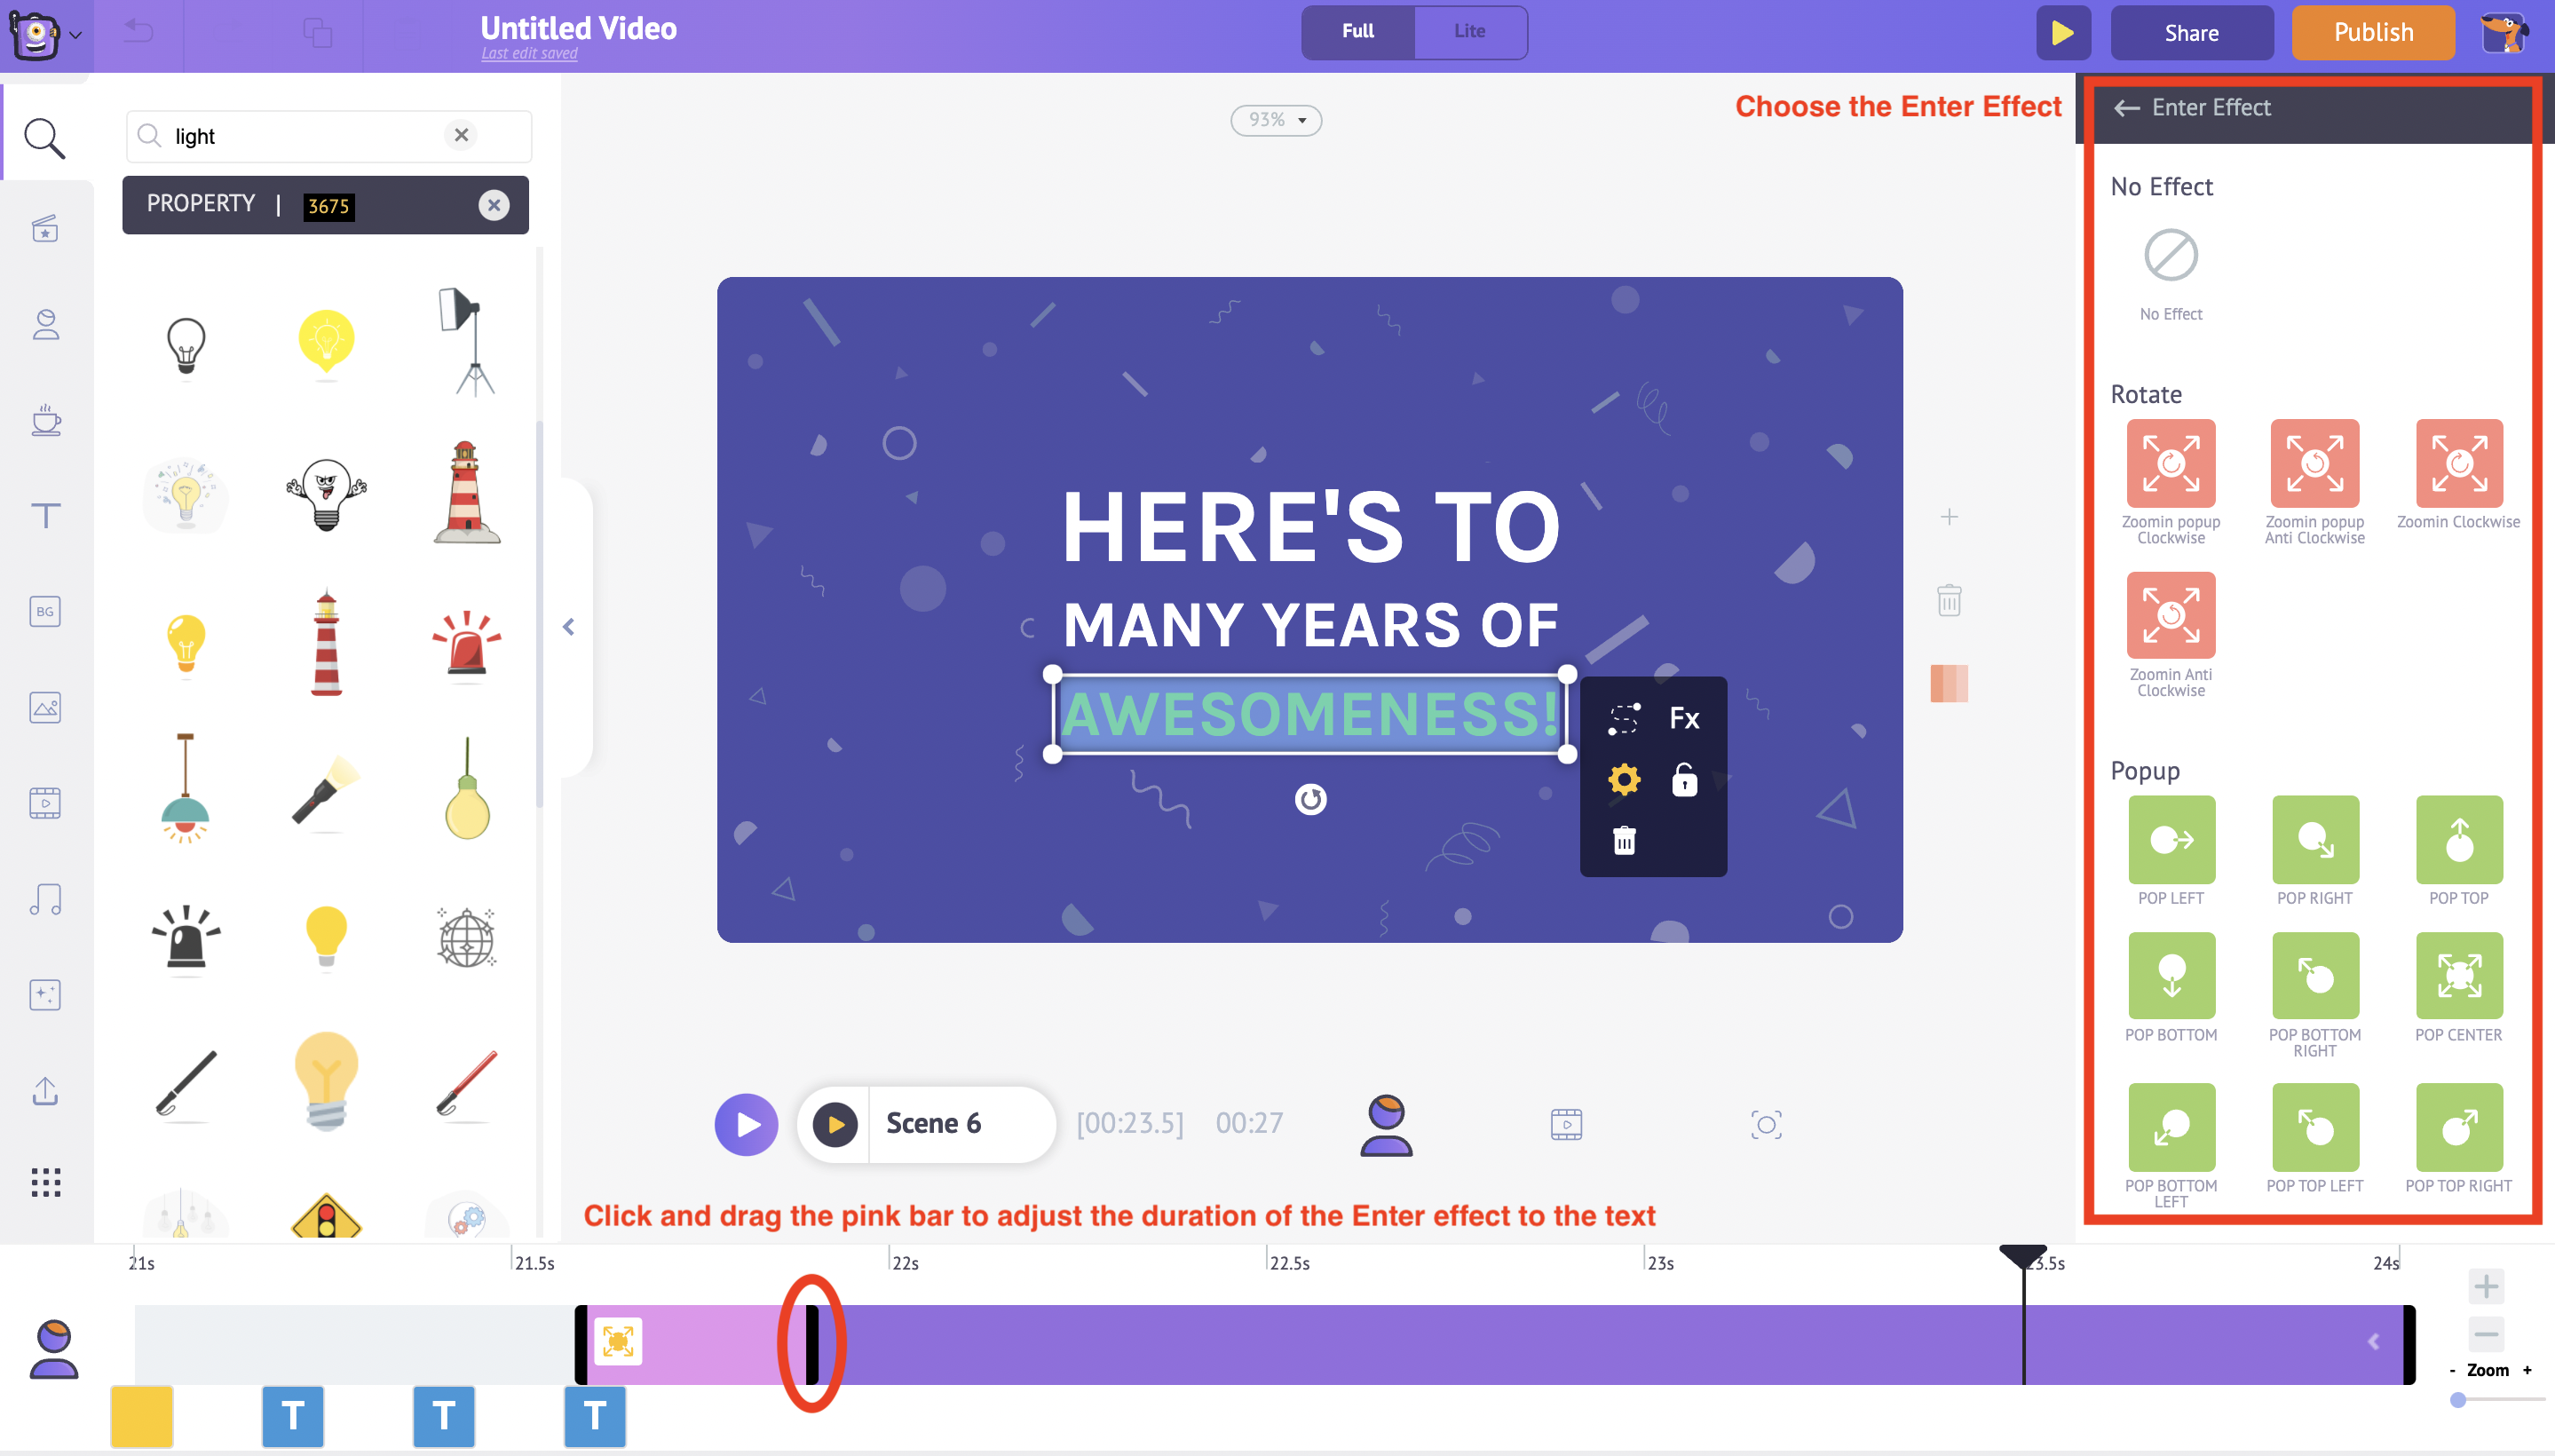
Use the right edge of the pink bar in the Animation timeline, to adjust the duration of the enter effect to the text.
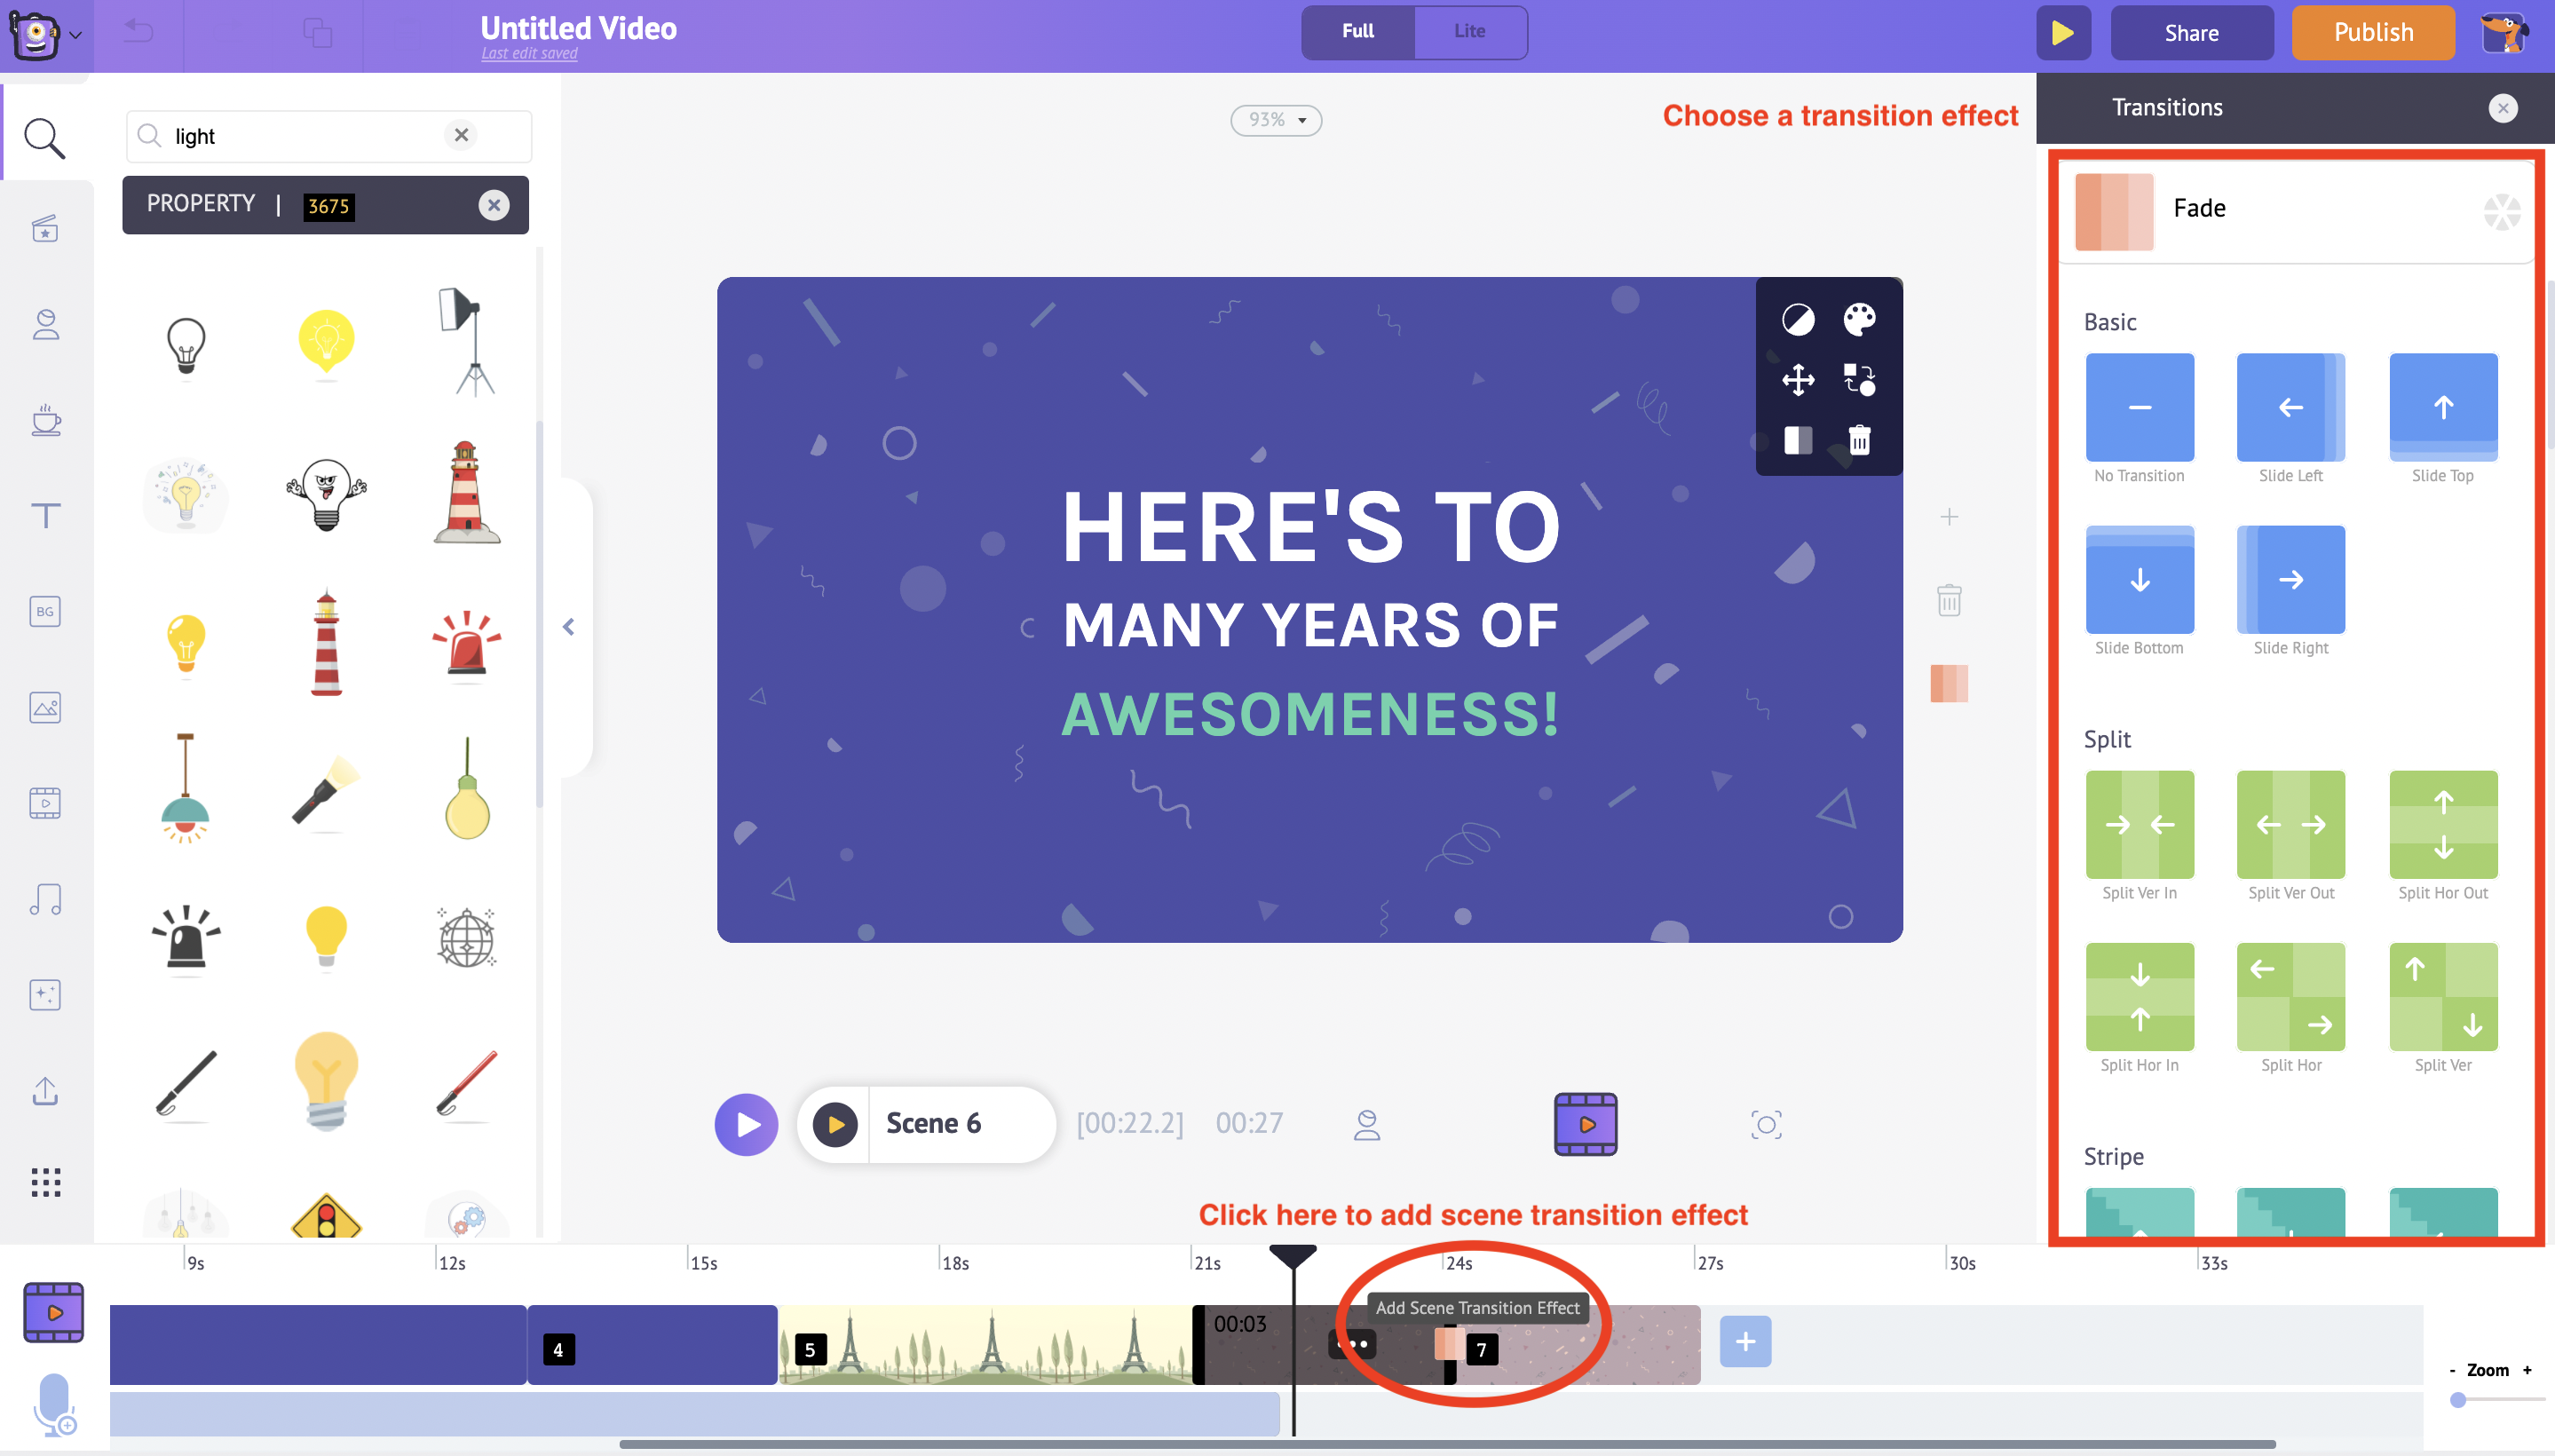
4. Modify the transition effects
You can also add transition effects between two scenes. Click between the two scenes in the Video timeline, you will notice the Transition effects on the right side from where you can choose the appropriate transition effect.
Step 5: Change the music track
You can also customize the music in the video. Under the Video timeline, you will notice the purple bar. Click and drag the edge to adjust the duration.
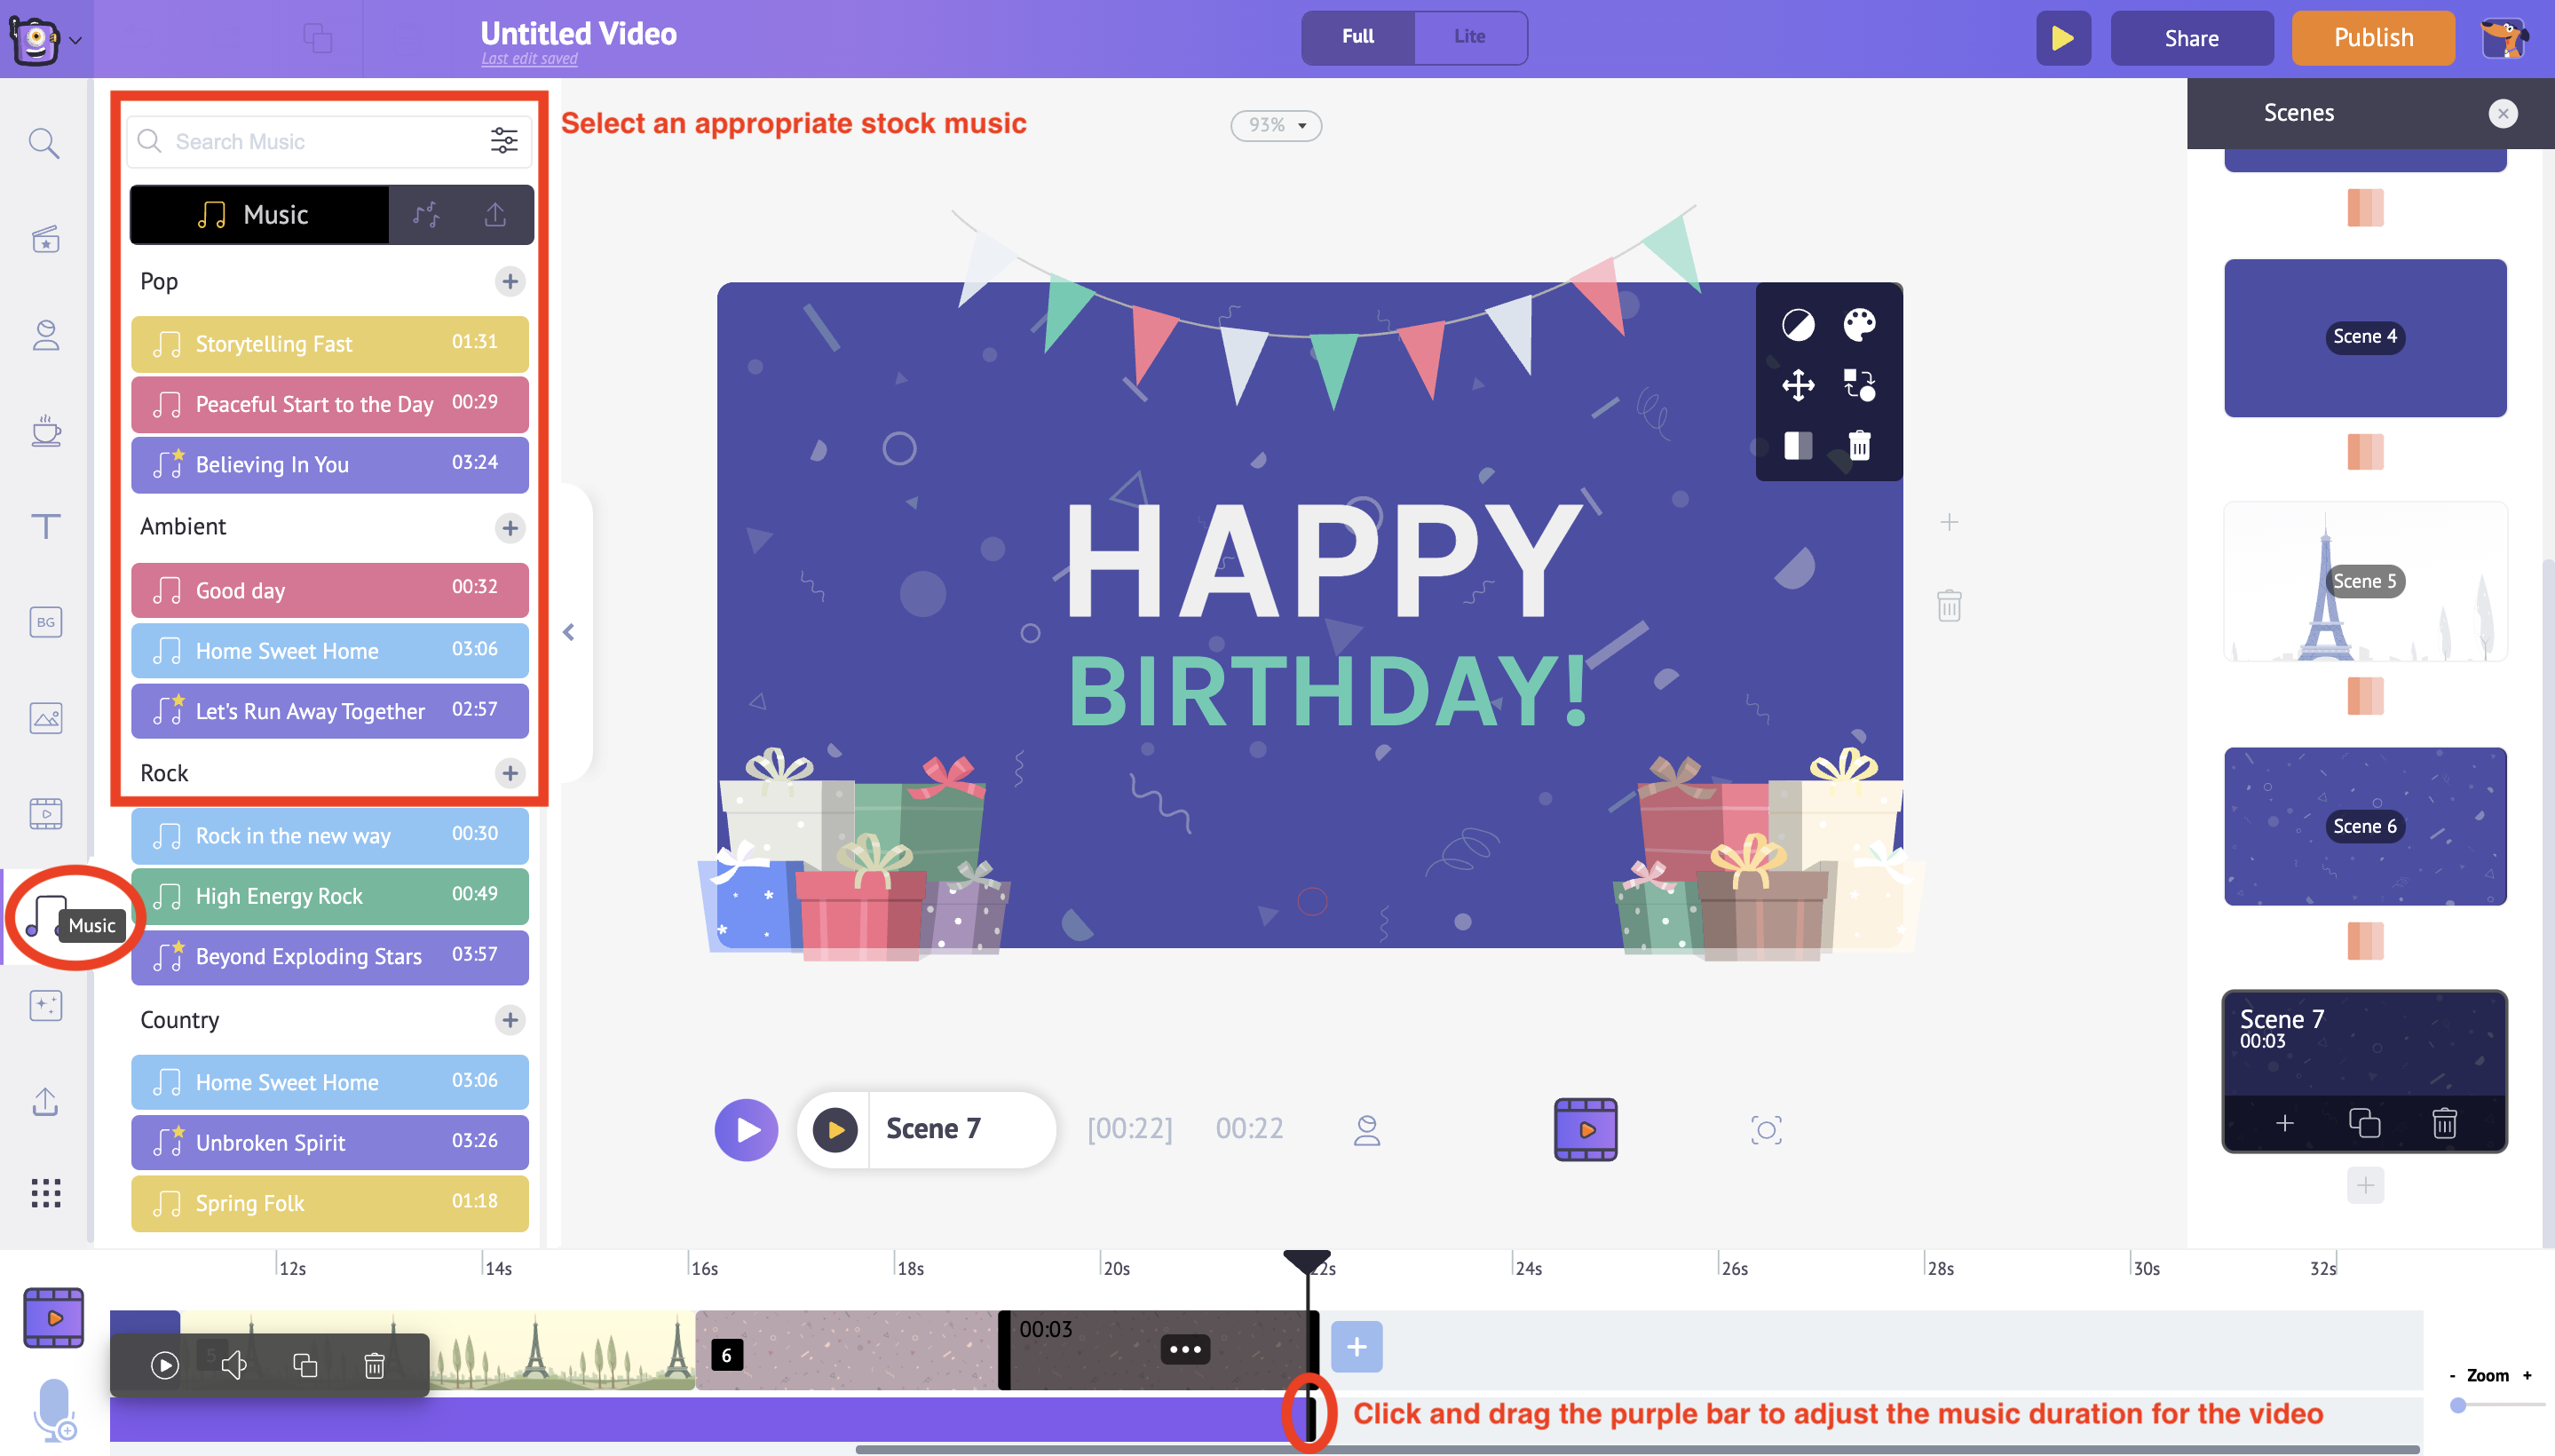
Suppose, you want to change the music, under the library section, you will find the Music option. From here you can select from the array of 30,000 plus premium music tracks available for the video. You can also hear a preview of the music just by hovering over the tracks.
Clicking on a track will introduce it in the timeline and you can adjust the duration accordingly.
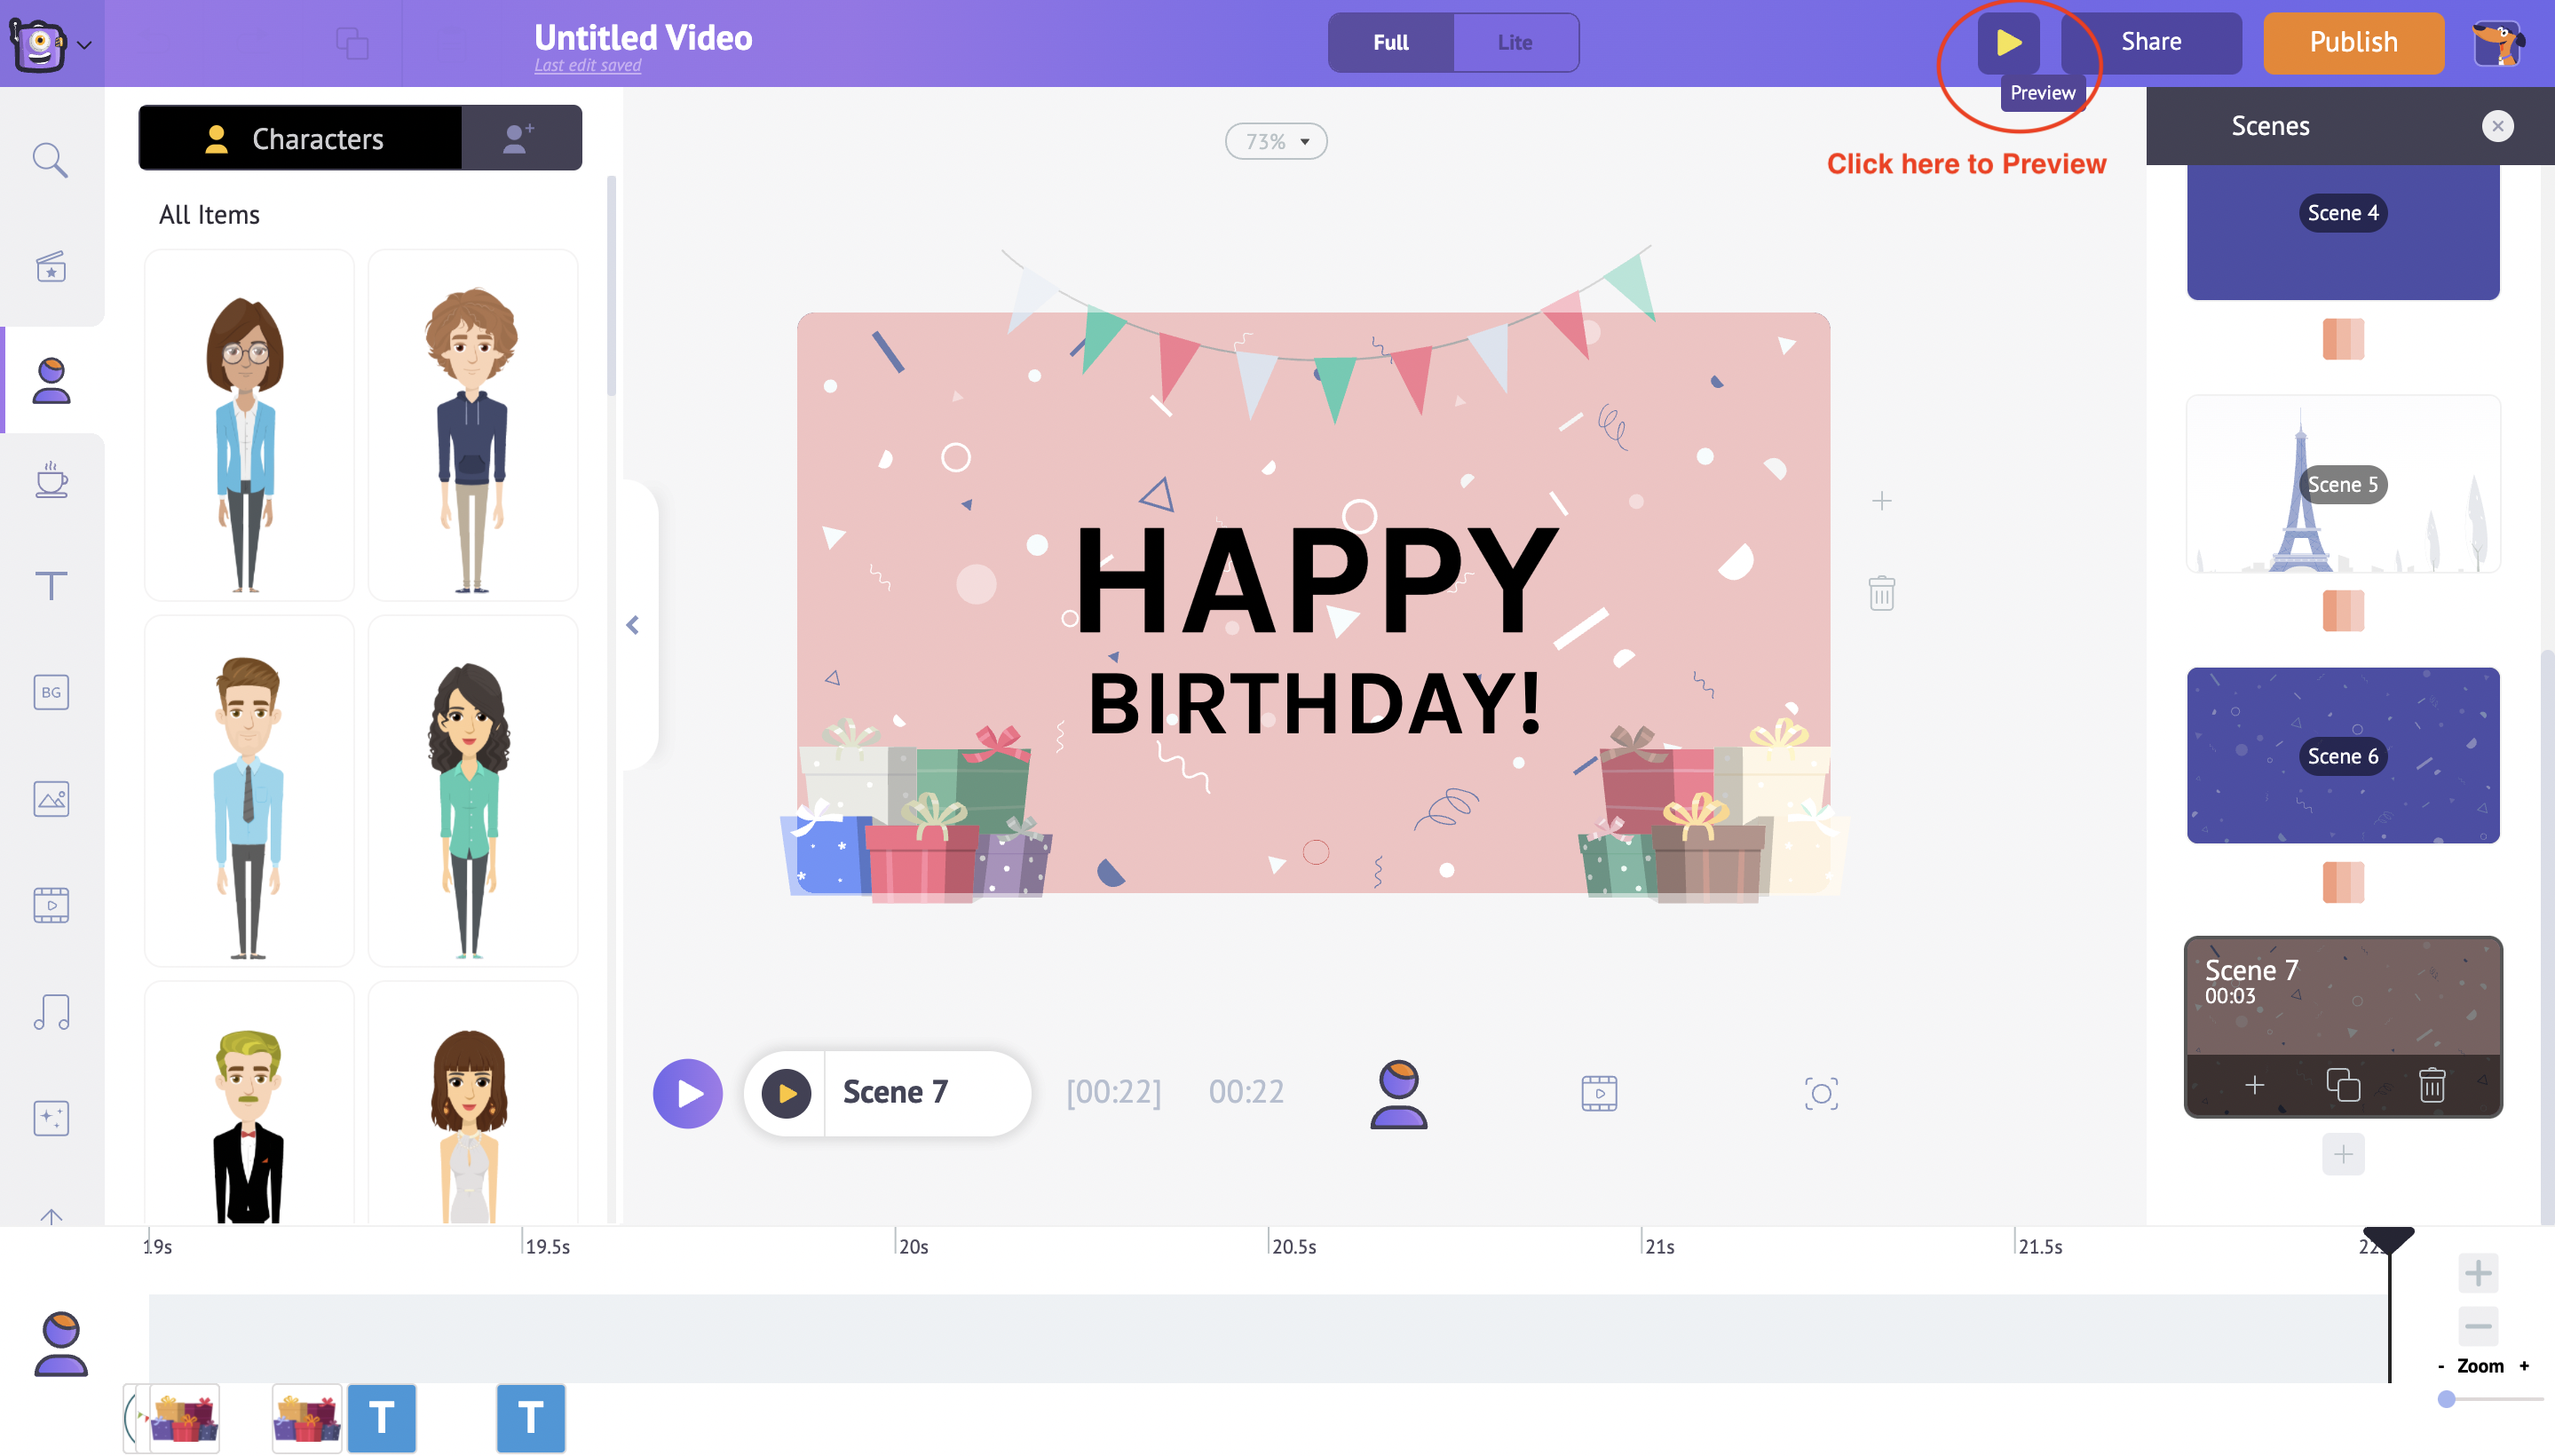
Step 6: Preview
Once all the customization is done in the template, you can preview the scenes. From the top menu, click on the Preview button, to play the video.
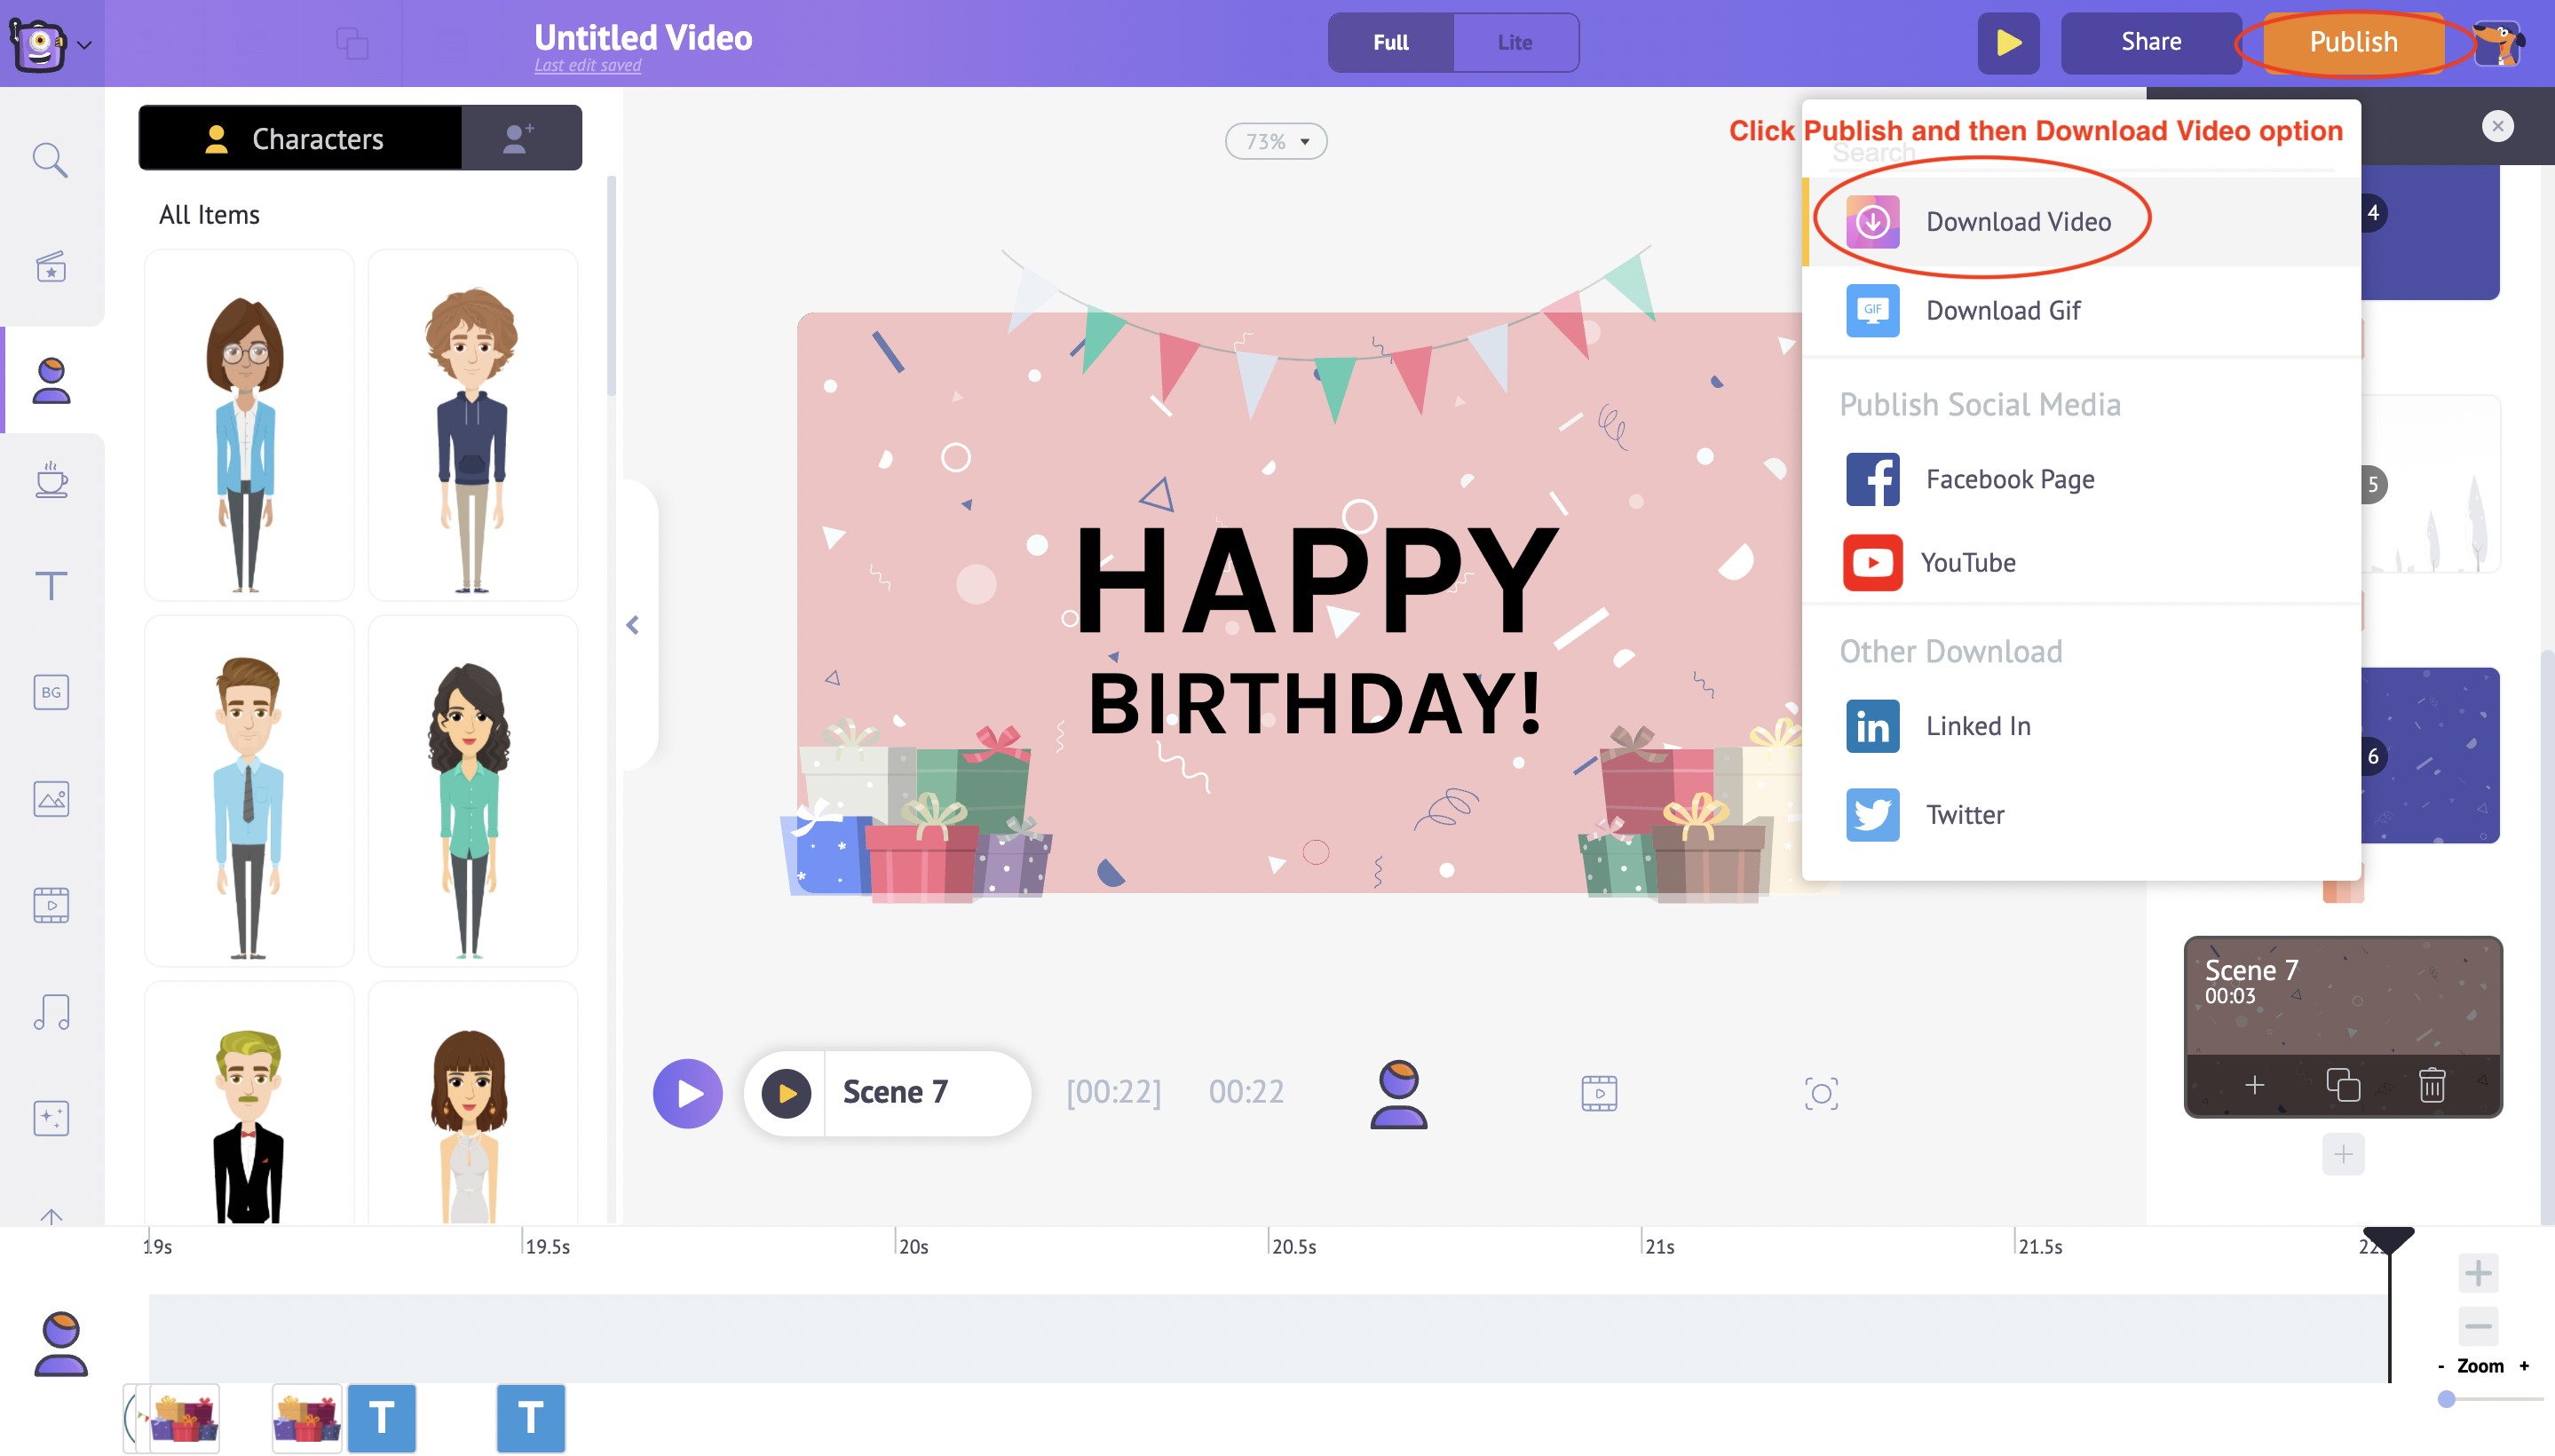
Step 7: Publish and Download
Once everything is done, click on the Publish button in the top right corner. From the options shown, select the Download Video option to download the video.
Clicking on Download Video, the project will be redirected to the export page. Click on the Download button to save the video directly to your PC.
 And Voila! You have successfully managed to create and download the special birthday video for your loved one.
All your efforts for that special person, with a nice video wish from heart, are worth more than all the gifts in the world.
It is, after all, the thought that matters.
And Voila! You have successfully managed to create and download the special birthday video for your loved one.
All your efforts for that special person, with a nice video wish from heart, are worth more than all the gifts in the world.
It is, after all, the thought that matters.