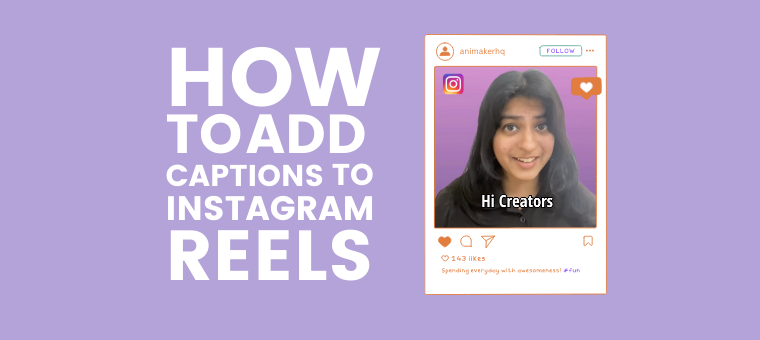
How to add Captions to Reels to Hook your audience!

Ranganayaki R - February 1, 2024 - Leave your thoughts. 10 min read
We all know how everyone is hooked to Instagram Reels nowadays.
In fact, we have heard the “Instagram is used by 2.4 billion monthly users worldwide” stat and the “Reels receive more engagement than other IG posts” stat more than James Bond says…

Many renowned brands and content creators utilize Instagram Reels like "business cards" and leverage its popularity.
To ensure that they achieve maximized engagement and increase their chances of becoming viral through reels, they use different techniques. And one of the simplest techniques they use is adding captions to their reel.
Wondering how captions increase a Reel’s engagement?
- Reels are short-form videos that keep playing in a loop. People watching may tend to get confused by the dialogues, background audio, etc. Captions will help hold the viewers’ attention and help them understand the content better.
- Many users watch Reels on mute. If you share important information in your video, you wouldn’t want this “group-on-mute” to miss out, right? So, adding those captions is beneficial!
- Reels are meant to be enjoyed by all, irrespective of their challenges. Subtitles are a huge help to those with auditory challenges.
Now that you know why even the Instagram biggies believe in subtitles, I am sure you would want to try out the same strategy in your videos and see the difference.
So, here are two easy ways by which you can add captions to your Instagram Reels.
- How to add captions to reels through IG’s in-built automatic captioning feature
- How to add captions to reels using a Free online Subtitle Generator app
If you are someone who is out of time and will just be happy with limited customization, then you can create your captions using the captioning feature available with Instagram itself.
But if you are someone who wants elaborate customization and wants to make their captioned videos look uniquely cool, then you can use the Free subtitle generator app we have recommended.
For the purpose of this article, I will use a popular reel video from our IG feed to teach you how to add captions.
View this post on Instagram
Without further delays, let’s jump right into learning how to add captions to your Instagram reel video through the in-built feature.
1. How to add captions to reels through IG’s in-built automatic captioning feature
Adding subtitles or captions would make the Reel more understandable and helpful for the viewer.
To add subtitles to Reels using the built-in captioning feature, follow the steps below:
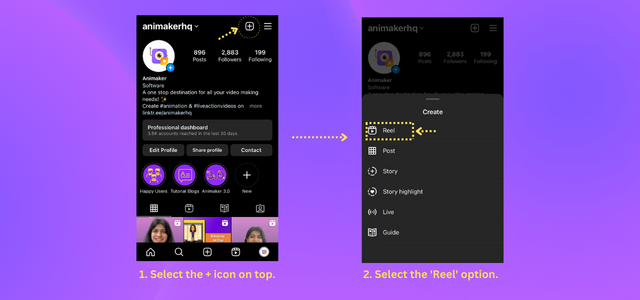
Step 1: Drafting a Reel:
Log in to your profile and click on the plus (+) icon on top to add a new post. Under the “Create” section, select ‘Reel.’
Step 2: Uploading a Video
This opens the camera. You can record the video using the camera or select a pre-made video to upload as the reel. Here, I select a pre-made video and click on ‘Add.’
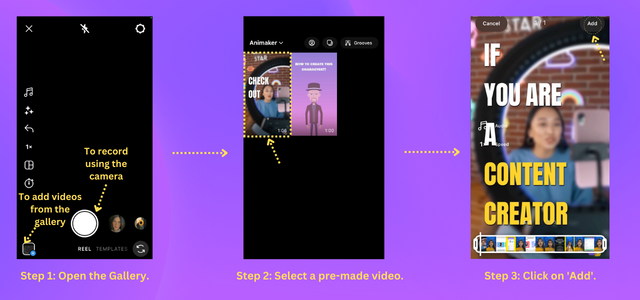
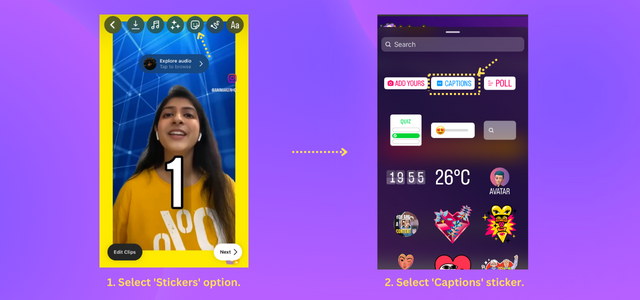
Step 3: Adding Captions to the Reel
Once the video is uploaded, click on the ‘Stickers’ option on top. This opens a huge list of stickers.
Here, select the “Captions” sticker. Selecting this option makes Instagram automatically transcribe the audio and generate subtitles.
The transcription can take quite a while,
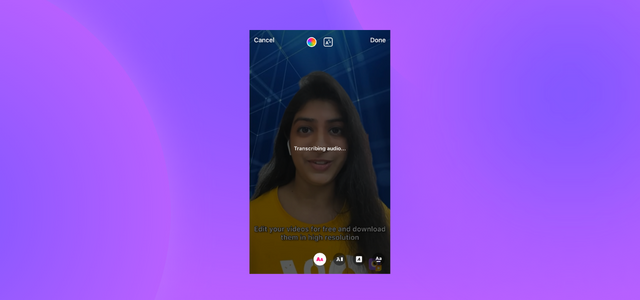
But once it is done, here’s what the reel with the subtitles looks like!
That was very easy, wasn’t it?
Now, let’s jump to the next method of adding subtitles to Instagram reel.
2. How to add captions to reels using a Free online Subtitle Generator app
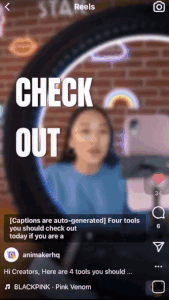
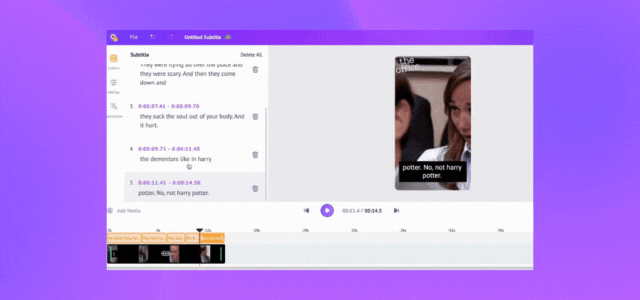
Though the built-in feature is very easy to use, there are many situations where the subtitles generated by the app may be erroneous. Like this…

This might be caused due to bad pronunciation or overlap of background music with the dialogues, making the subtitle generator interpret the dialogues wrong.
There are a number of generators out there that do the job. But as always, we are particular on presenting you with the best.
So for this, we will be using a tool called Animaker. Animaker is an online video-making platform that helps users create awesome videos in a matter of minutes. The vast library of Animaker is enriched with 150+ animated characters, 70K+ icons, 30K+ music tracks, 100M+ stock images and videos, etc.; you name it, you can add it! In short, you will be left spoilt for choice!
Recently, Animaker has developed the ultimate Subtitle Generator to help you add the perfect subtitles and avoid embarrassing situations, as in the GIF above. This AI-powered tool helps you generate subtitles that are 99% accurate.
Where’s the missing 1%, do you ask? Well, the Subtitle maker highlights parts of the generated subtitles that might be an error, giving you the option to judge whether they are correct.
This makes it easy for you to identify and correct errors if necessary, rather than having to scout for mistakes by checking the subtitles line by line.
With Animaker Subtitles, you can add subtitles to your Instagram reel videos in just four simple steps!
- Step 1: Uploading a video
- Step 2: Adding Subtitles
- Step 3: Editing the Subtitles
- Step 4: Downloading the video
Without any further ado, let’s dive in!
Step 1: Uploading a video
Firstly, Signup/Login to Animaker. Once you log in, you will be taken to the dashboard.

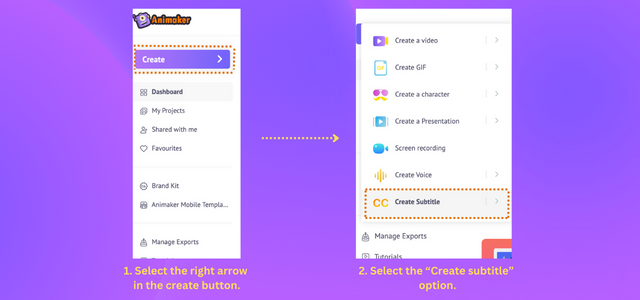
Here, select the right arrow in the create button. This lists a number of create options. Select the “Create subtitle” option.
This opens a new project. First, you must select the video for which subtitles need to be generated. You can either upload the video from your PC, choose a video you have exported from Animaker, or choose a video you have uploaded previously.
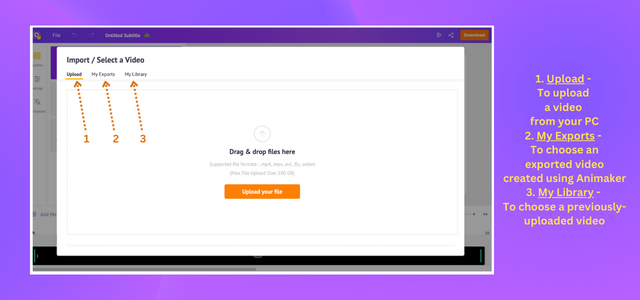
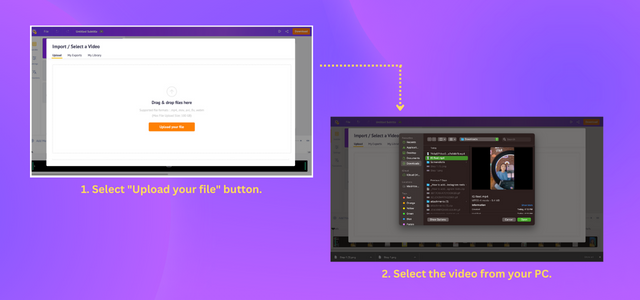
Since I have the video in hand, I am going to select the first option. To do the same, click on the “Upload your file” button and select the video from your file manager.
The video is uploaded. Before we learn how to auto-generate subtitles for this video, let’s quickly learn what the interface of Animaker’s Subtitle Maker looks like.
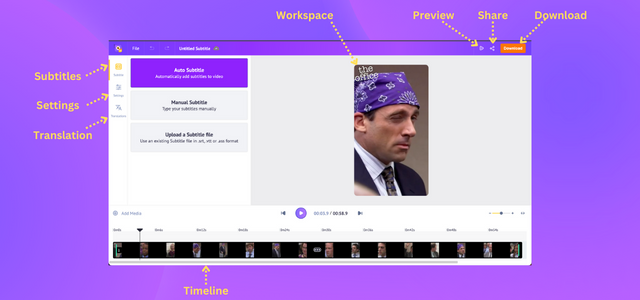
- On the left is the library with the Subtitle, Settings, and Translation Tabs.
- On the top is the menu with options to rename, preview, share, and download the video.
- In the center is the workspace. This is where you upload your video.
- On the bottom is the timeline. You can see the uploaded video on the timeline below.
Now that you have a better understanding of the interface, let’s proceed to the next step.
Step 2: Adding Subtitles
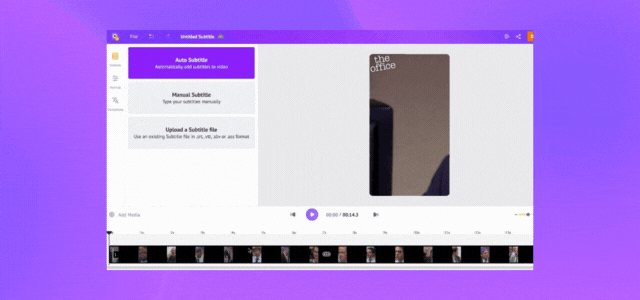
As mentioned before, Animaker Subtitles offers three different methods of adding subtitles to your video.
- Auto-subtitles – to generate subtitles automatically
- Manual subtitles – to type them out manually
- Upload a Subtitle File – to upload a subtitle file and sync it with your video
Let’s see how to add subtitles using each method.
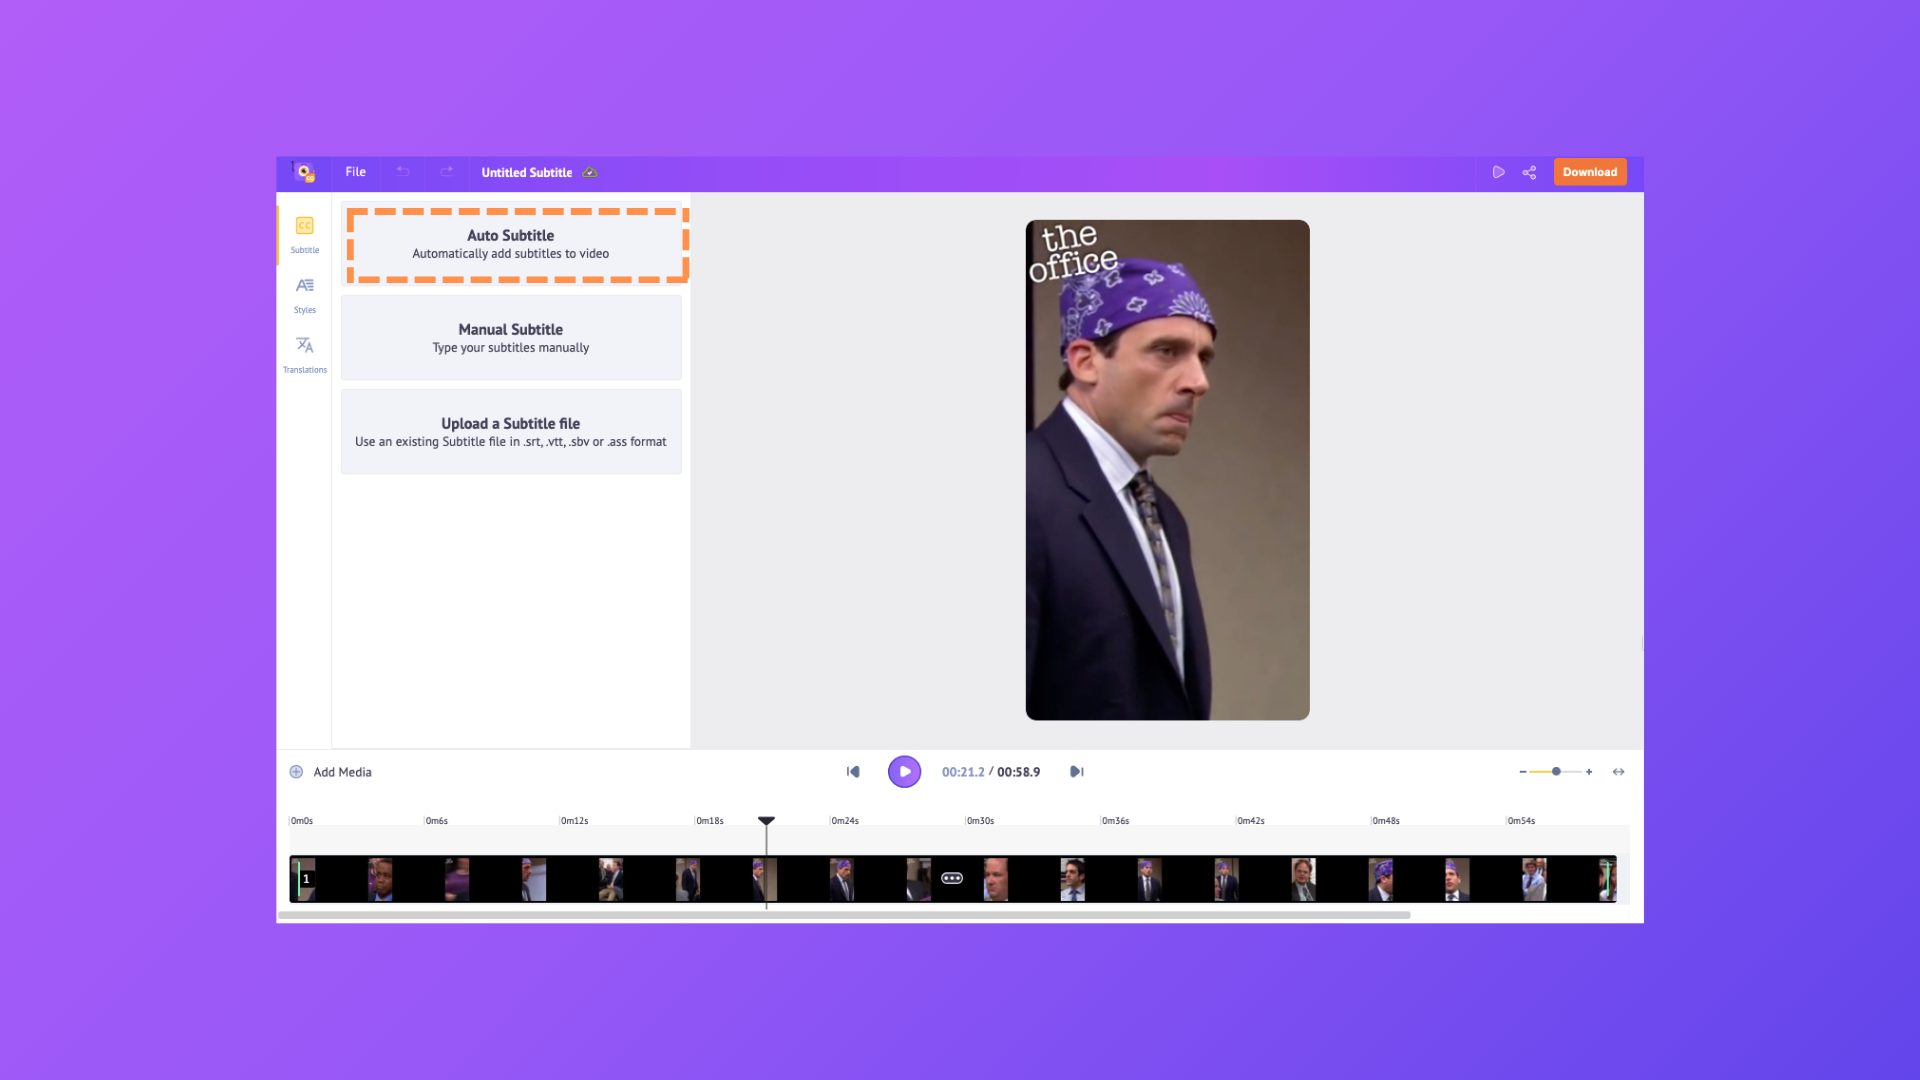
1. Auto-Subtitles
To add automatic subtitles to your video, navigate to the Subtitle tab of the library and click on the "Auto Subtitle" option.
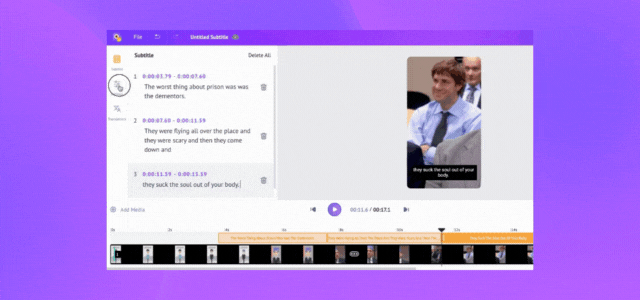
Tadaaa! In a few seconds, the subtitles are ready!
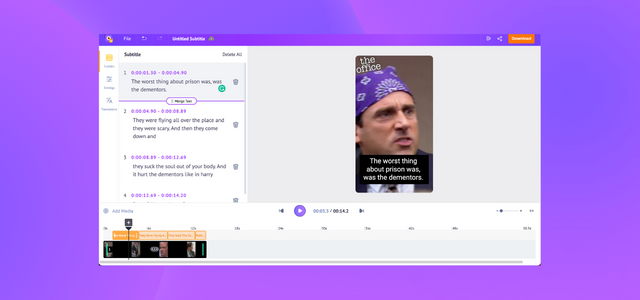
You can see how the audio has been transcribed, and the subtitles have been generated perfectly for the right durations, as in the image below.
This is how you add subtitles using the Auto-subtitle method. Let’s look at the second method.
2. Manual Subtitles
To add subtitles manually, select the “Manual Subtitle” option. This opens the Subtitle pane. You will notice a blank provision (to enter the subtitle) for a duration of two seconds.
By default, the duration of every new subtitle is two seconds. Since I know the dialogue and its exact duration, I type it as in the GIF below.
Now that we know how to add subtitles manually, let’s look at the final method of adding subtitles.
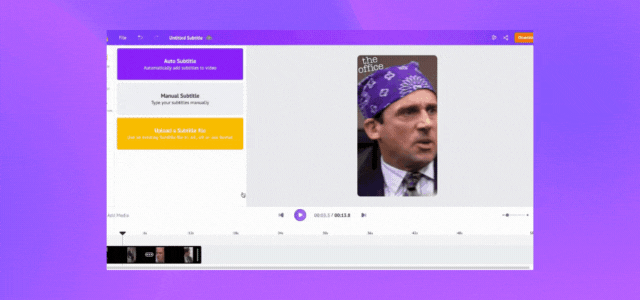
3. Upload a Subtitle File
If you have a subtitle file already in possession, select the “Upload Subtitle” option. This opens the File explorer on your PC. Select the file you want to add.
Note: The allowed file formats are .srt, .vtt, and .ass.
Since subtitles files have the text and durations defined perfectly, Animaker’s Subtitle Maker takes not more than two seconds to sync it with the video, like this…
Amazing, right?!
These are the three methods of adding subtitles to your video.
Next, let’s see the various ways of editing the added subtitles.
Step 3: Editing the subtitles
Once the subtitles are added, you can make changes to them in the following ways:
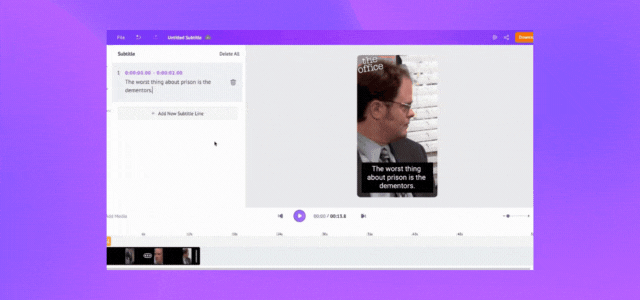
1. Edit text – The subtitles generated or uploaded can easily be edited by clicking on a subtitle line and making changes to it.
2. Adjust the duration – By default, each subtitle duration is 2 seconds. If you wish to extend or adjust the timestamps, you can click on it to edit and modify the subtitle duration.
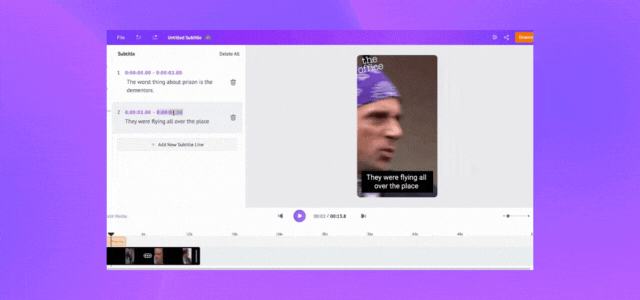
3. Add a new subtitle line - If you want to add a new line, click on the “Add new subtitle line” option. Doing this adds a new line for a two-second duration by default.
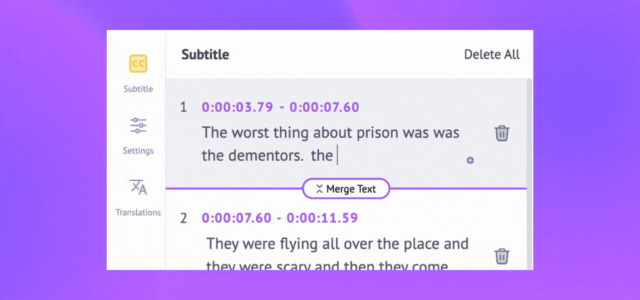
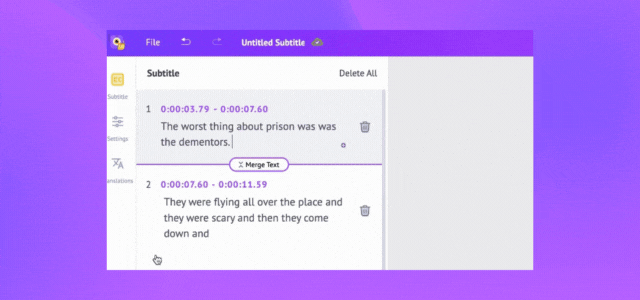
4. Merge - With this option, you can merge two subtitles into one in a single click.
After selecting, notice how the subtitle lines and their duration are combined in the Subtitles pane. Apart from this, you can also see the lines getting combined both in the workspace and in the timeline.
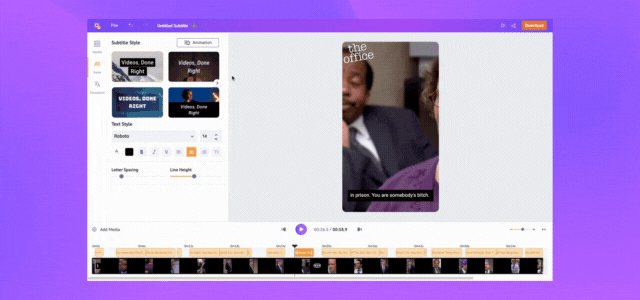
5. Customize the text – Additionally, you can step up your subtitles game by customizing and playing around with your subtitle designs.
To edit the format of these subtitles, go to the Settings tab. Here, you can change the subtitle’s font style, size, color, alignment, letter, spacing, etc.
Choose from the 150+ font styles available and make your subtitle look absolutely amazing.
The best part is that you don’t have to get your hands dirty trying to carve the captions perfectly. There are 15 premade text styles that you can apply to your subtitles, making it look cool and professional.
Congrats! You have now added some style to your subtitles!
But…is that enough?
What if I told you that you could make your subtitles pop by adding animations to it?
Don’t worry! It is not at all complicated. Check out this video if you prefer a quick video tutorial:
Or, if you wish to learn here, let me show you how.
Click on the Animation button above. This will open the animation tab with 10+ animation options.
Here, you can choose how you want your subtitles to be animated.
There are several options available, such as animating the subtitles word-by-word, highlighting each word as spoken, and even the words appearing in sync with the audio!
Choose one and hit the play button to see how the subtitles appear with animation.
See? Now the subtitles pop and the video looks much more engaging!
All in just one click!
Now that we have seen how to edit the subtitles, there is only one more step left to do.
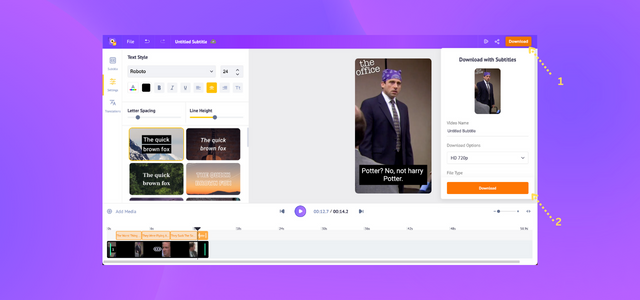
Step 4: Downloading the Video
Once you are done doing all the edits, you can download the video by clicking on the download button.
That’s it! That’s how you add subtitles to a video using Animaker’s Subtitle Generator!
Bonus Tip:
Now that you know how to add subtitles to an Instagram reel video using three different methods, here’s a bonus tip for you.
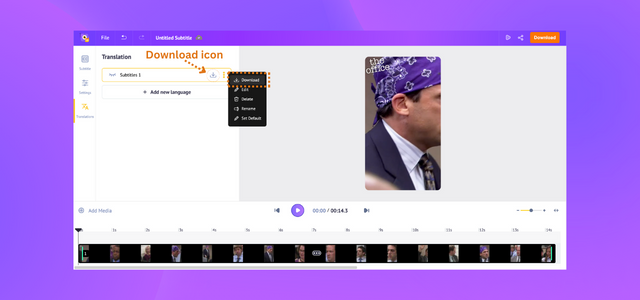
Apart from downloading the subtitled video, you can also rename and download the Subtitle File.
To rename the file, go to the Translations tab. You will notice the subtitled file. Click on it to rename. Alternatively, you can also select the three dots and then select the Rename option.
To download the subtitle file in .srt (or) .vtt, (or) .ass formats, use the download icon or select Download from the three dots.
That’s it, fellas!
It’s time for you to grow the habit of adding Subtitles to all your Reels! I am sure this newfound habit will have an immense impact on your IG profile!
Hope this article was helpful for you to learn how to add captions to Instagram Reels. Without any delay, jump right into uploading your reel video and adding subtitles for it using Animaker’s Subtitle Generator!
Got any questions? Please add them in the comments below. We will be more than happy to help you out!