How to make a cute valentine's day video? [A Simple Guide!]

Nandhini TS - February 11, 2021 - Leave your thoughts. 12 min read
February is the month of love.
It’s around this time of the year you can see confetti, chocolates, roses, and heart-shaped balloons all around you.
The V-day buzz calls for a lot of romantic gestures, shopping, and planning surprises.
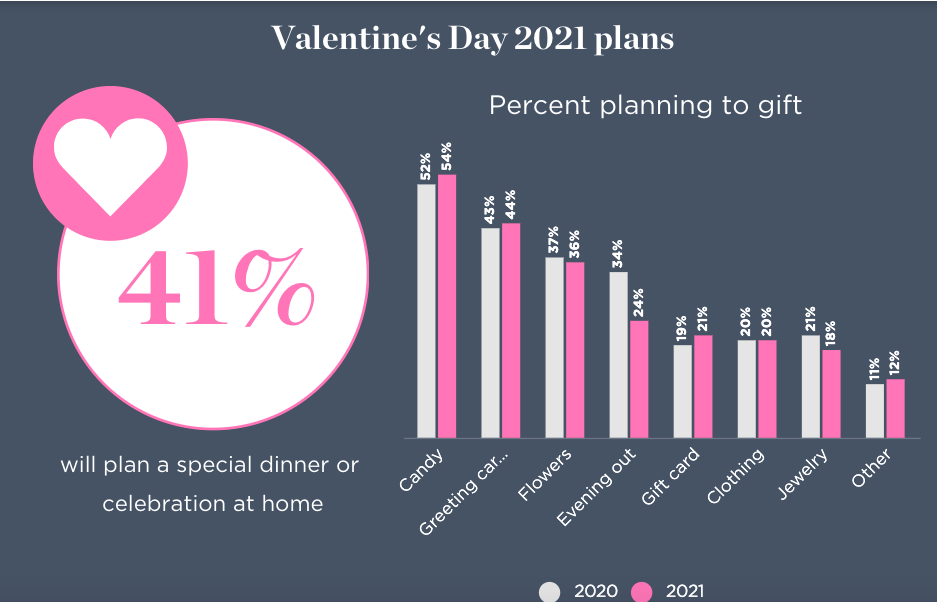
According to NRF, over 52% of U.S. adults plan to celebrate Valentine’s Day this year, spending a total of $21.8 billion.
The day accounts for spending a lot of money on expensive gifts and experiences.
But big romantic gestures need not always be materialistic or dramatic.
In fact, Google revealed in 2020 that searches happening around valentine’s day are not always about tangible gifts but also about getting creative with conveying your emotions!
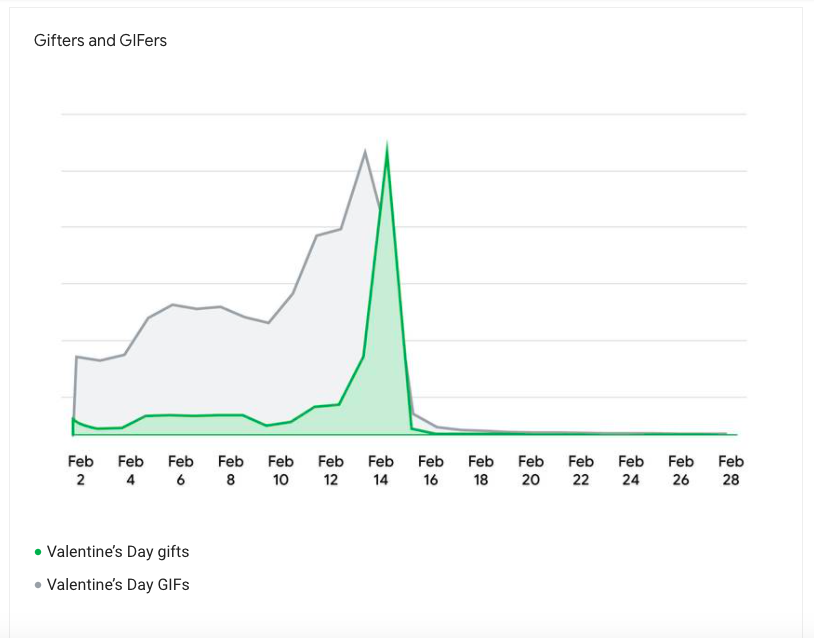
Source: Think with Google
On Valentine’s Day, there are almost as many searches for “valentine’s day gifs” as “valentine’s day gifts.” The search for GIFs has a specific spike around February 13 and February 14.
Not just that, searches for Valentine’s Day quotes actually exceed both GIFs and gifts.
Does that mean you have to create Gifs for your Valentine?
Not exactly.
This search trend gives us one insight: People want to treat their loved ones with creative and personalized gifts.
Whether it is a cute compilation of digital memories of all the special moments that you have spent together or your favorite quotes and gifs - a cute video would be a great way to sweep 'em off their feet!
With a DIY video maker like Animaker, all it takes is a few minutes to whip up a beautiful video.
Now, you can create a valentine’s day video using Animaker in two ways:
Create a valentine’s day video with a template on Animaker
Create a valentine’s day video on your own from scratch
We’re going to share a step-by-step guide for both ways!
Let’s get started.
How to make a video for valentine’s day
Create a valentine’s day video with a template on Animaker
Animaker’s valentine’s day video maker is easy-to-use and straightforward. The asset library has loads of characters, stock images and videos, properties, music tracks, 2d backgrounds, and more that help you create stunning live-action and animated videos.
To top it off, the app is also loaded with pre-built templates that make video creation possible in minutes. You simply pick a template, swap out properties, characters, and text animations and make it yours.
So, let’s see how to work with valentine’s day templates and quickly create a video.
1.If you already have an Animaker account, go ahead and sign in. But, if you are new, you can create an account here.
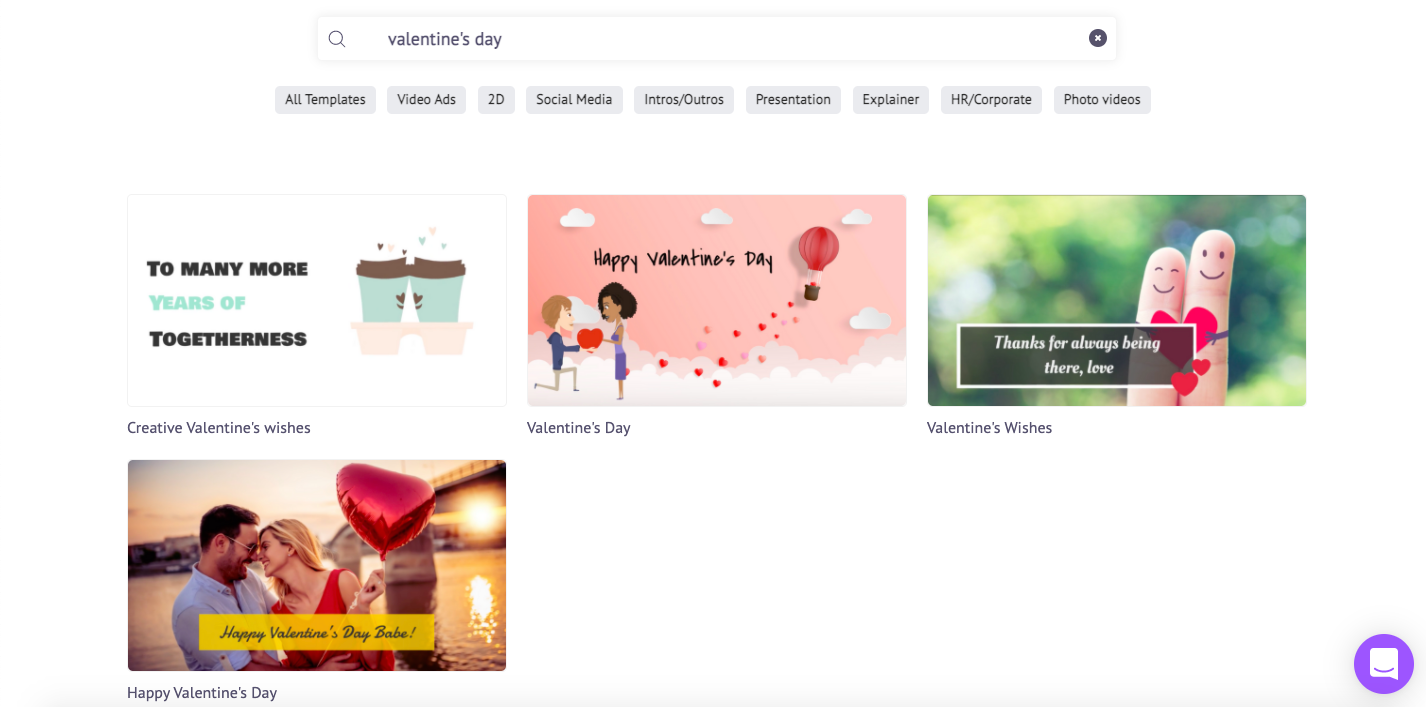
2.Once you are in the app, you can see the dashboard. Go ahead and type on the search bar for the use case you are looking for (valentine’s day in our case).

3. Upon clicking enter, you will be redirected to the moments page which will show you different valentine’s day templates for you to choose from. You can choose your favorite one by clicking on the “Preview” button that appears when you hover over the template.
4. Once you finalize your template, you can click on the “Use” button that’s beside the “Preview” button. This will launch the template as a project.
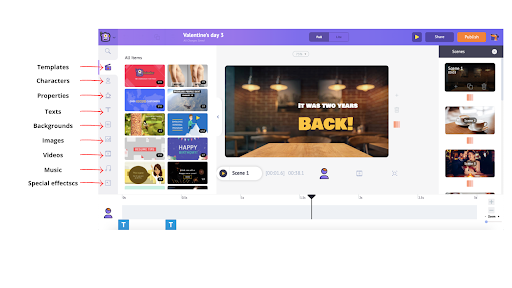
5. Now, what you see on the left side of the screenshot (see below) is the asset library. With the assets available in the library you can customize almost anything you want on the template. You can replace every element including images, colors, texts, music tracks, properties, and more. Alternatively, you can also upload your own assets.
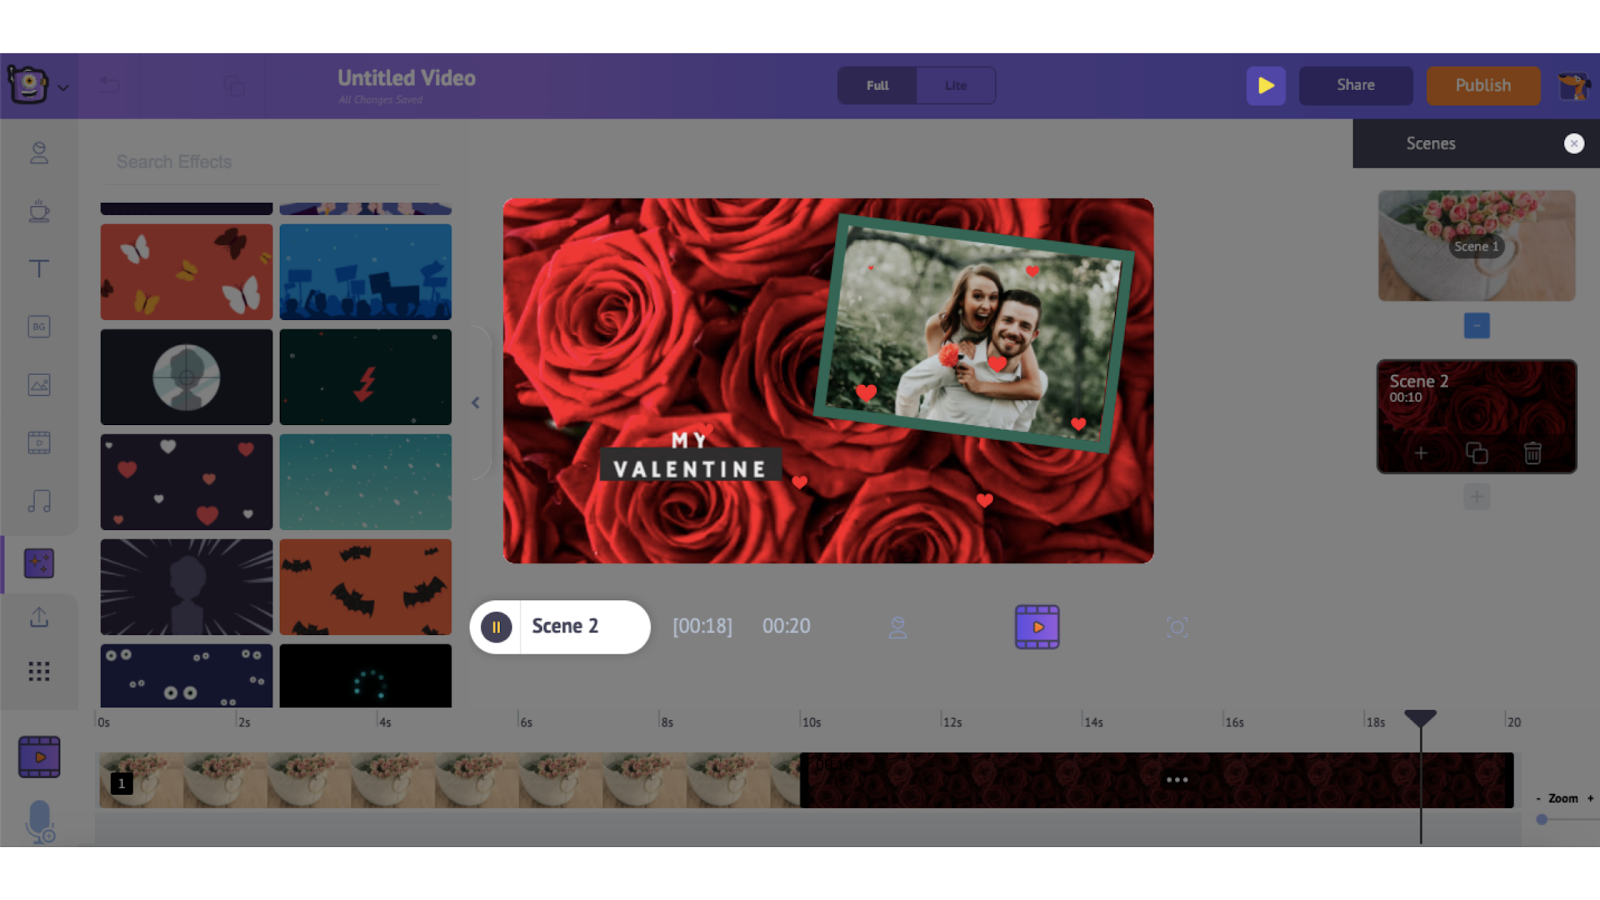
6. Let’s start customizing scene 1 on this template. So, let’s begin by editing the text. To edit the text, you can simply click on the text and then type and replace the existing text with the one you want.
Click on the text on the scene and you will see the options appear on the right to format the text. You can change the font style, size, color, alignment, and more.
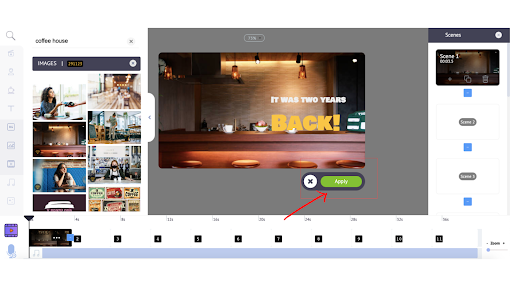
 7. So, now if you want to swap out the background image, you can click on the scene and an item menu appears. Click on the “Swap” icon. This will take you to the massive collection of stock images.

Scroll through the stock images and simply click on the one you like to replace the stock asset on the template and click on the “Apply” button.
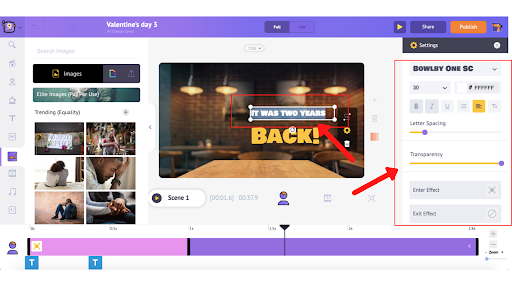
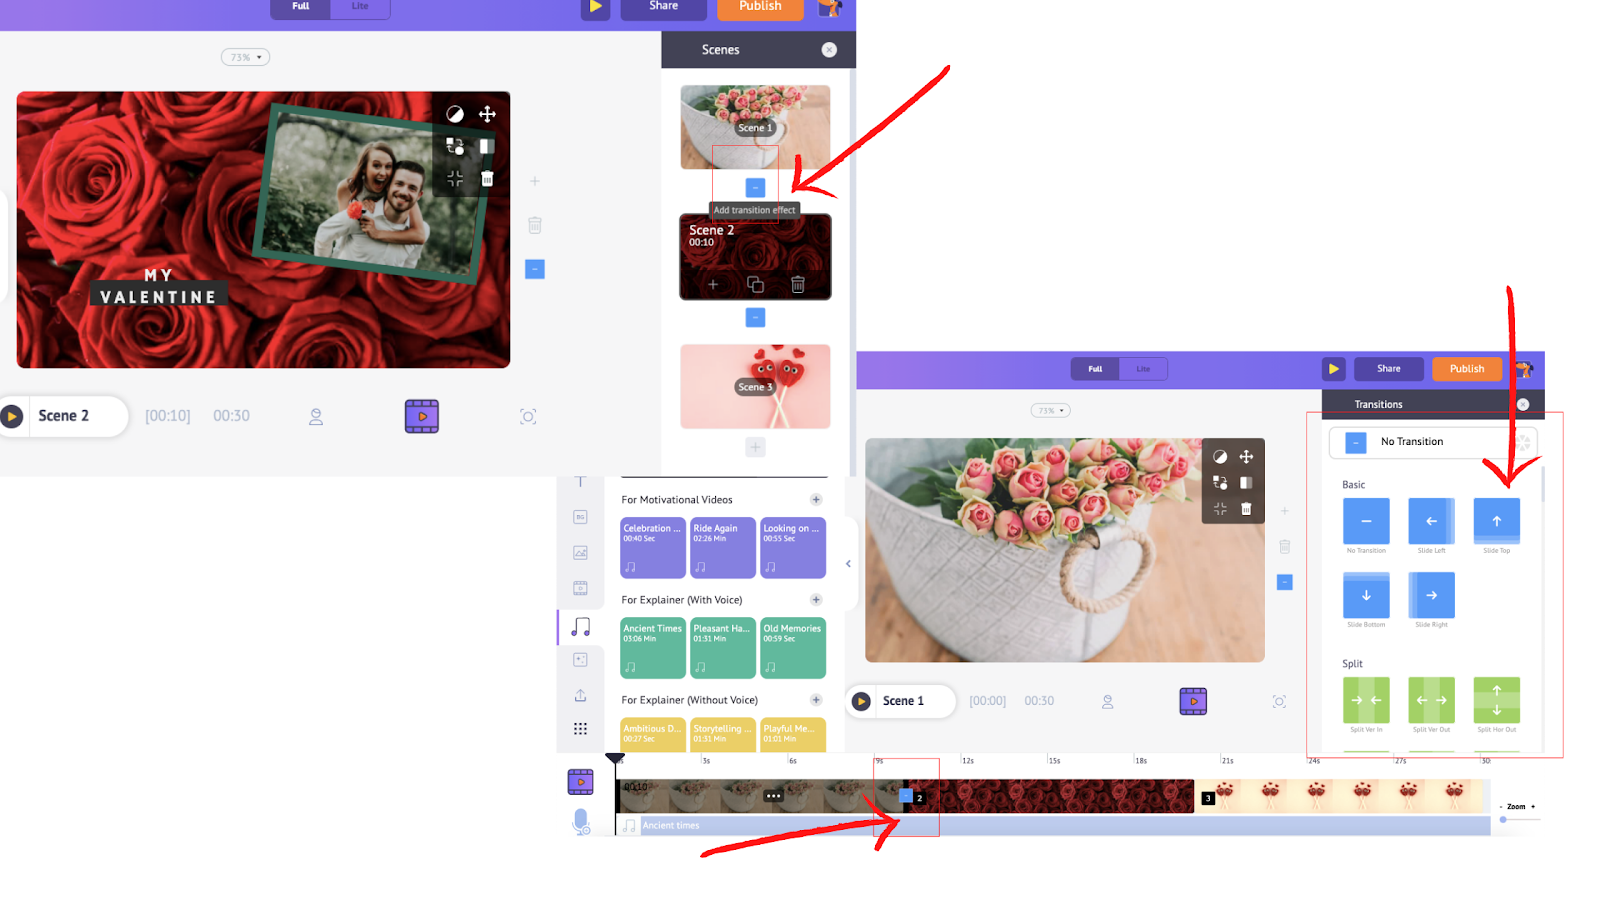
Note: You can also alter the entry and exit effects of all the elements by simply clicking on the “Enter effect” and “Exit effect”. For instance, if you want to change the entry/exit effect for the text, then, click on the buttons below the text formatting options.
You can scroll through various transition effects and choose the one that you want for your text.
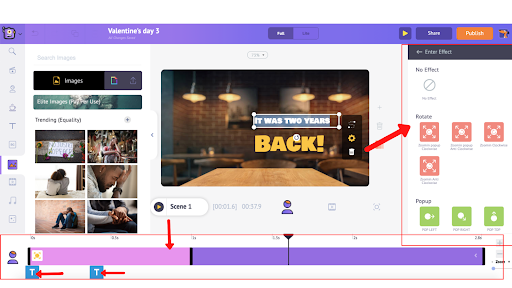
Once you click on the effect you can see pink and purple bars on the timeline.
As you can see from the above picture, the purple bar shows how long the selected element stays in the timeline. To adjust the duration of that element, simply drag in or out black bars. The same applies to every element you wish to customize.
In the same way, when you click on an animated element, you can see the pink bar in the timeline. The pink bar depicts the duration of the entry and exit animation and it can be adjusted the same way as any other element.
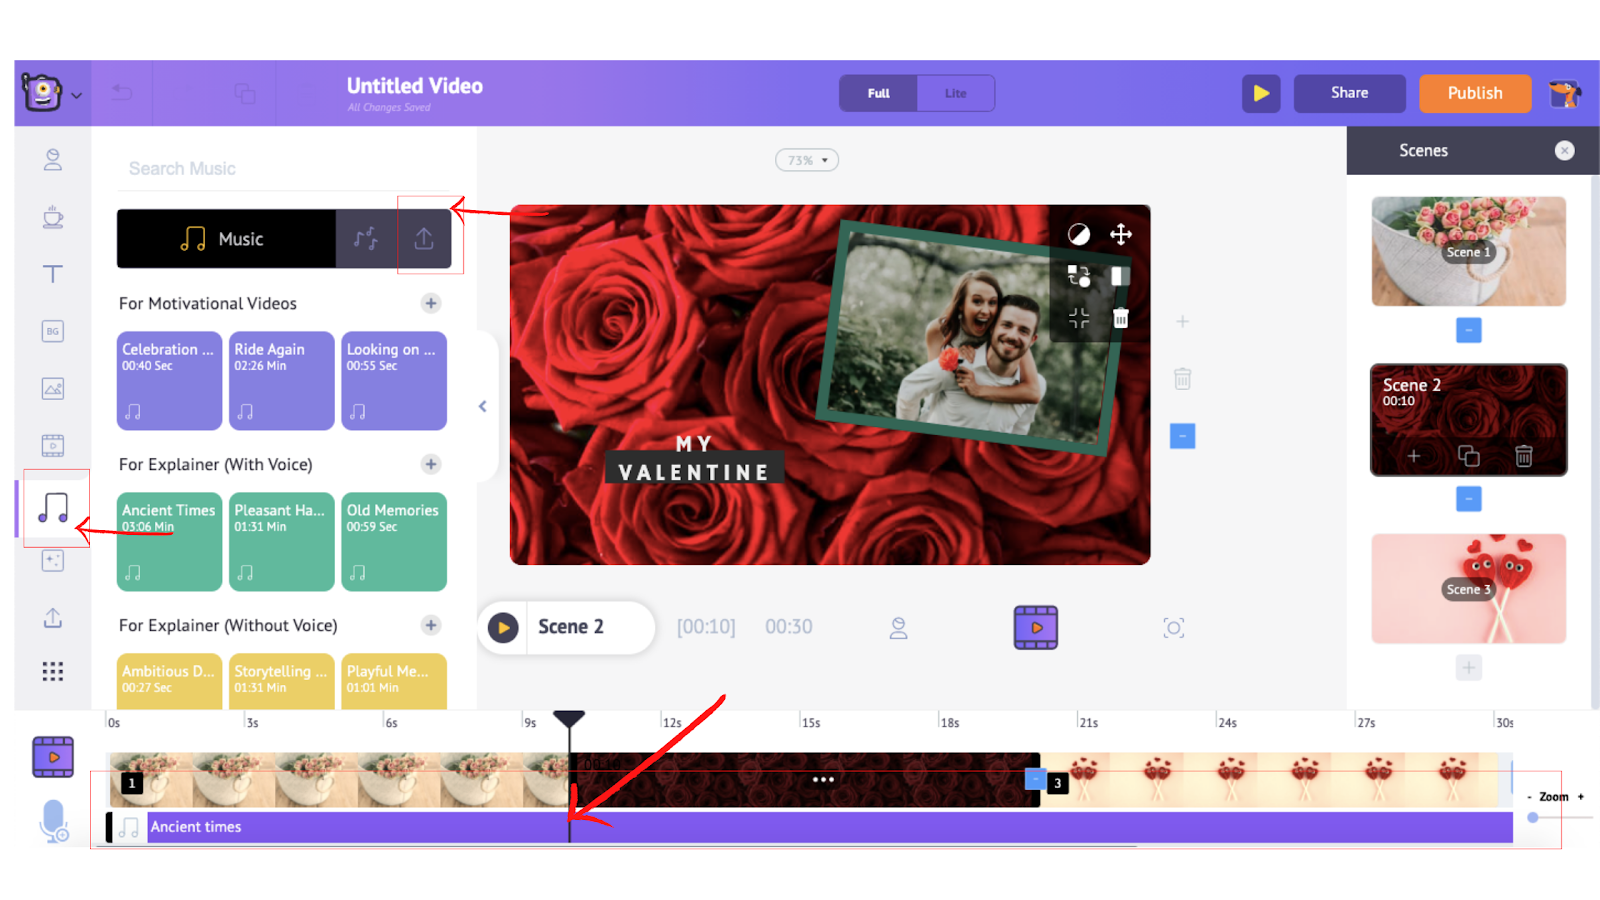
8. The next step is to replace the music track on the template. To do that, just click on the existing music track and choose the delete option (see below).
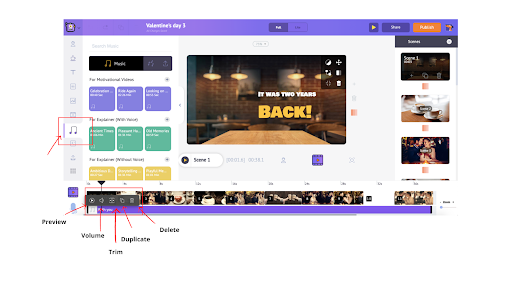 Once you delete the existing music track you can replace it with the one of your choice by clicking on the music icon in the library. You can choose your favorite one by simply hovering over the music track to hear the preview.
Once you know what you want simply click on the music track and it will be automatically added to the timeline. You can even upload your own music track (which will be discussed in the further section).
There are also various other options available - adjust volume, duplicate track, trim, preview, and more.
9. Now, what if you want to add your own pictures, videos, and music tracks you can do so by uploading the assets through the upload option.
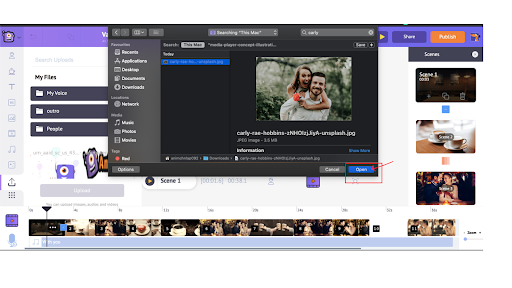
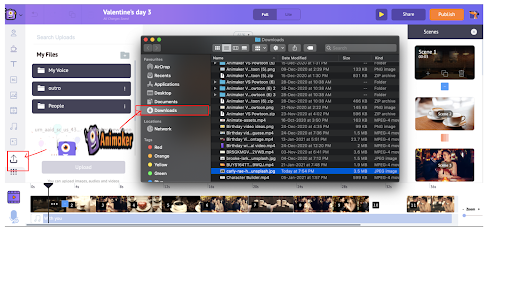 Choose the asset that you want to upload from the local folder and click on “open”. This will be added to the upload section on the Animaker app.
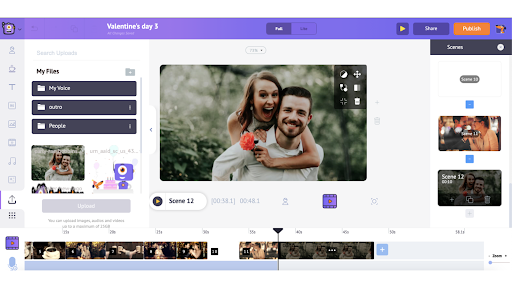
 When you click on the added asset on the uploads it will appear on the workspace. You can set it as a background, add filters, swap it, and do a lot more (check out the options on the item menu that appears upon clicking on the image/video).
You can also upload music tracks in the same way.
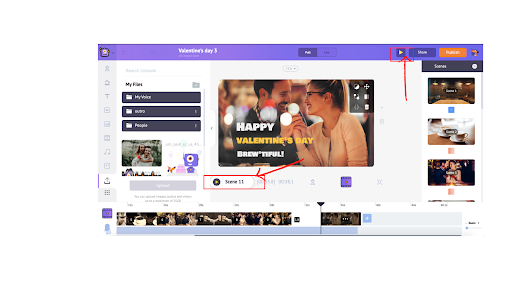
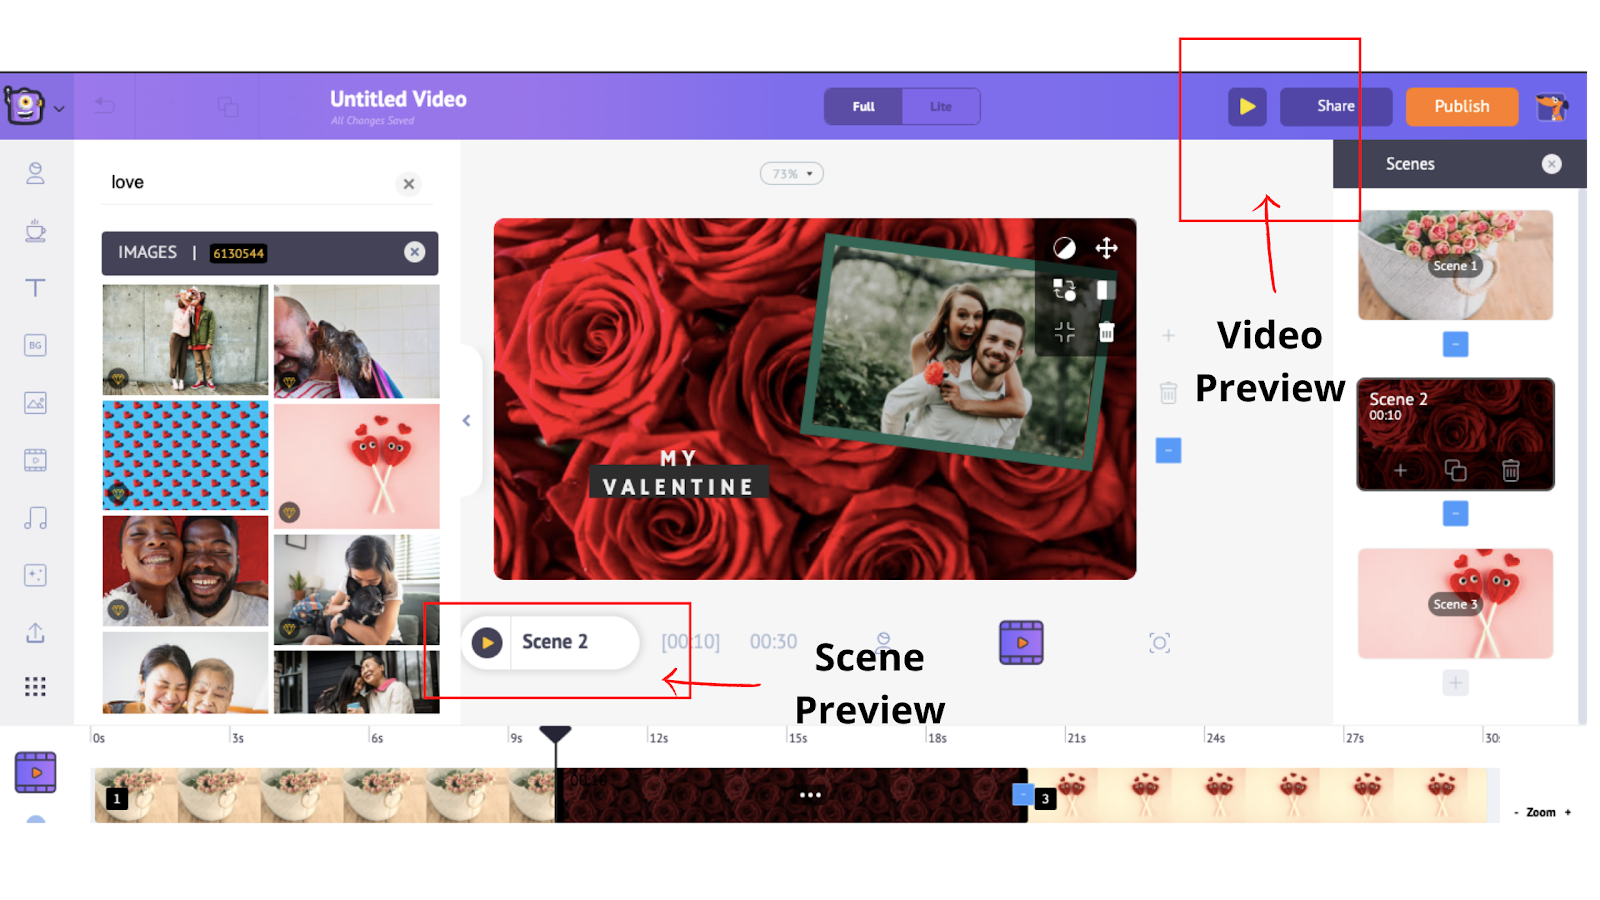
10. After adding all the elements, preview the video to ensure that everything looks fine. Select the Scene Preview option to preview a particular scene and use the Video Preview option to preview the entire video.
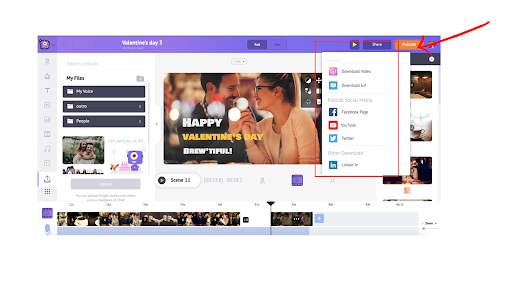
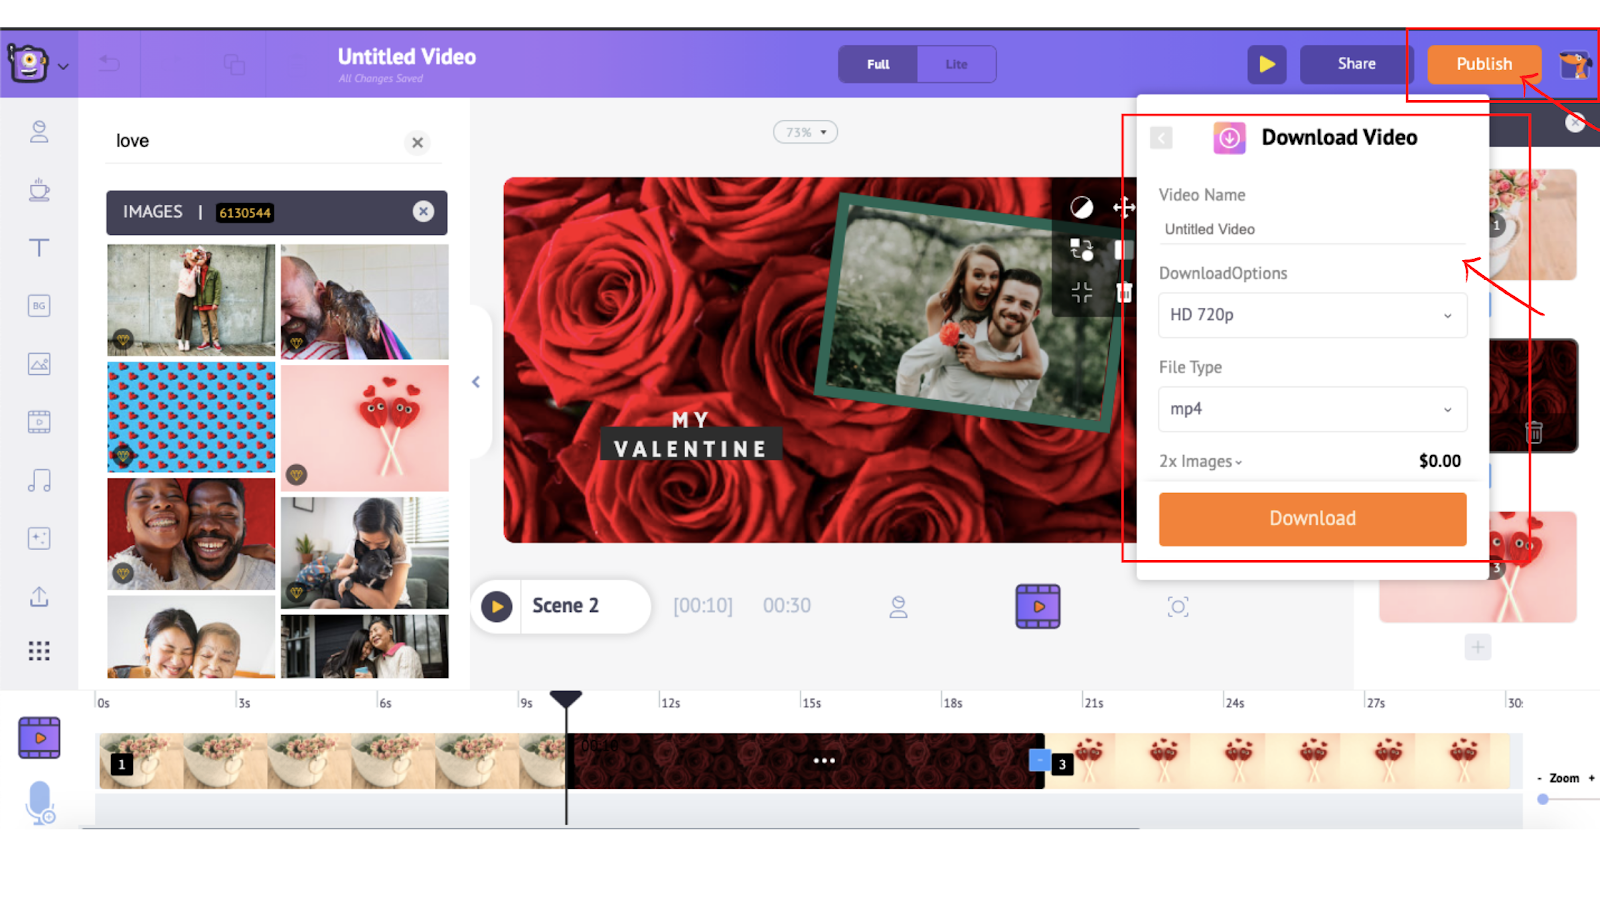
 Once you are done, click on Publish -> Download video. You can rename it, select the preferred video quality, and then click on Download.
You can download the video once the rendering is completed. Additionally, you will also receive the video link via mail.
2. Create a valentine’s day video on your own from scratch
Creating a valentine’s day video using a template would be ideal if it is planned at the last minute. But, if you have the time and want to get creative, then, you create a valentine’s day video from scratch.
We're now going to look at a detailed step-by-step process of creating a video from scratch.
How to make a valentine’s day video from scratch
1. Create a new project
To create a video from scratch, first login (or sign up if you are a new user) to the app and head over to the dashboard.
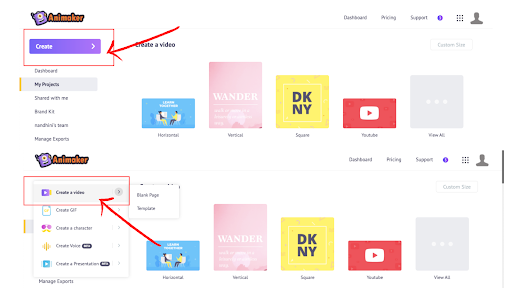
Click on Create>>Create a video.
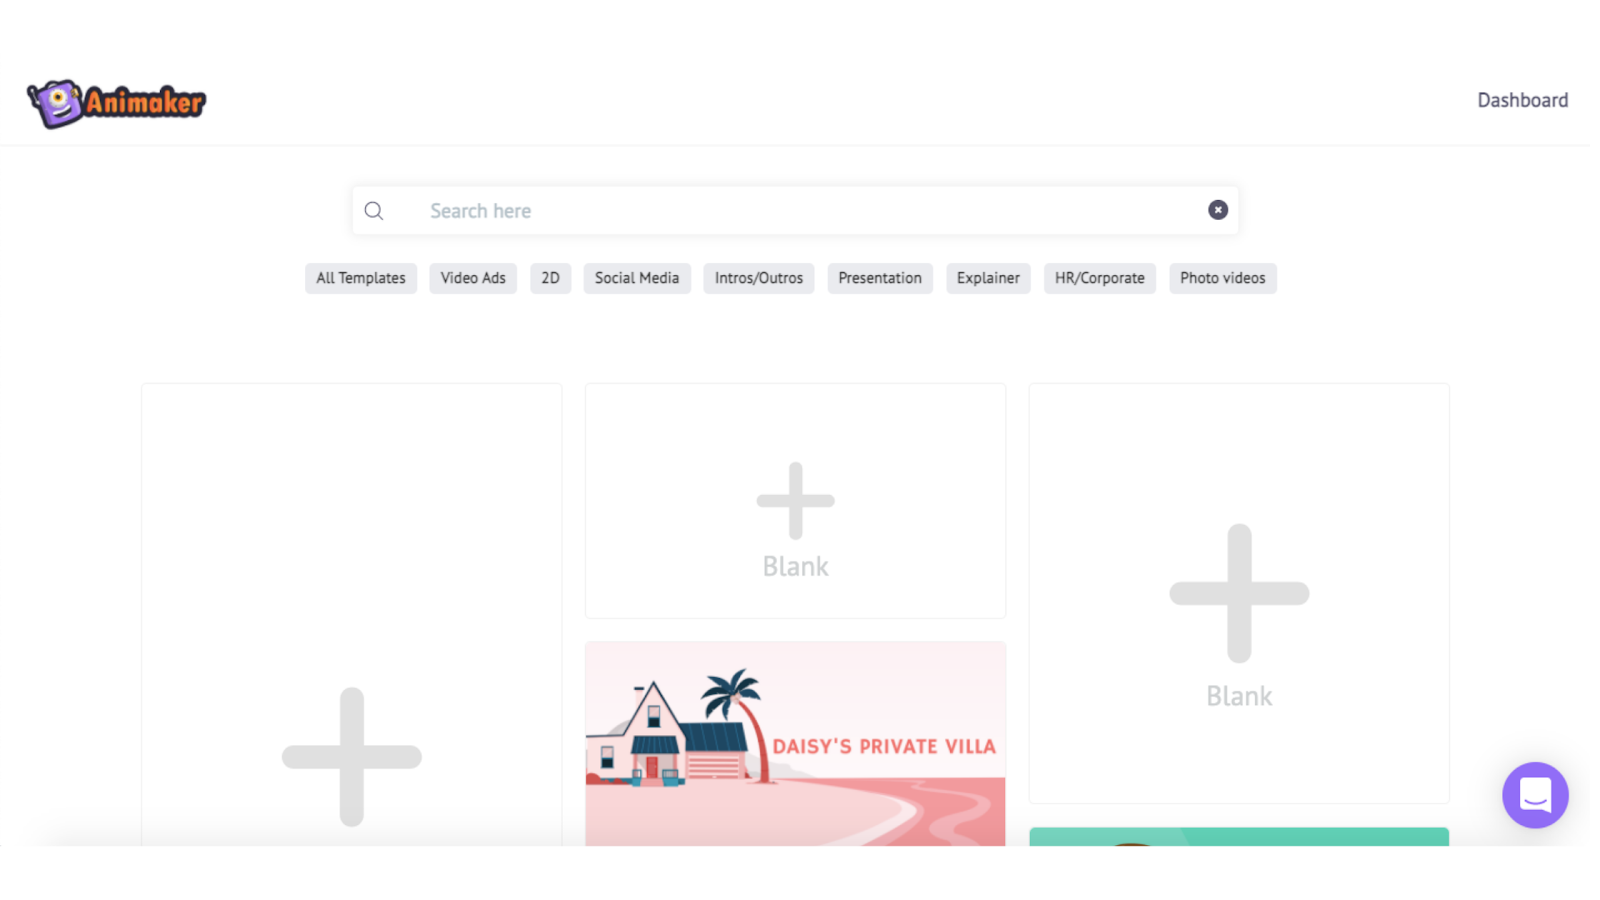
You will now be taken to the moments page where you can see three predefined blank templates in different dimensions.
I am going to choose the horizontal one.
2. Upload your own media to the project
Now, you will see the project (see screenshot below). Before we start creating the video, let’s first upload all the assets like images, videos, or audio that we want to include in our project.
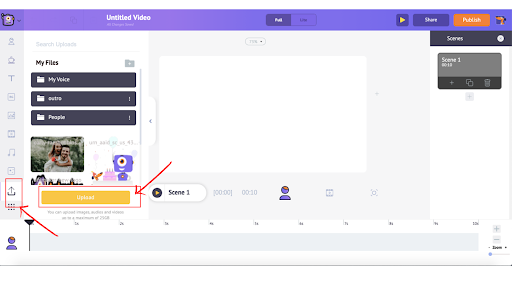
To upload assets, choose the asset that you want to upload from the local folder and click on “open”. This will be added to the upload section on the Animaker app.
When you click on the added asset on the uploads it will appear on the workspace. You can set it as a background, add filters, swap it, and do a lot more (check out the options on the item menu that appears upon clicking on the image/video).
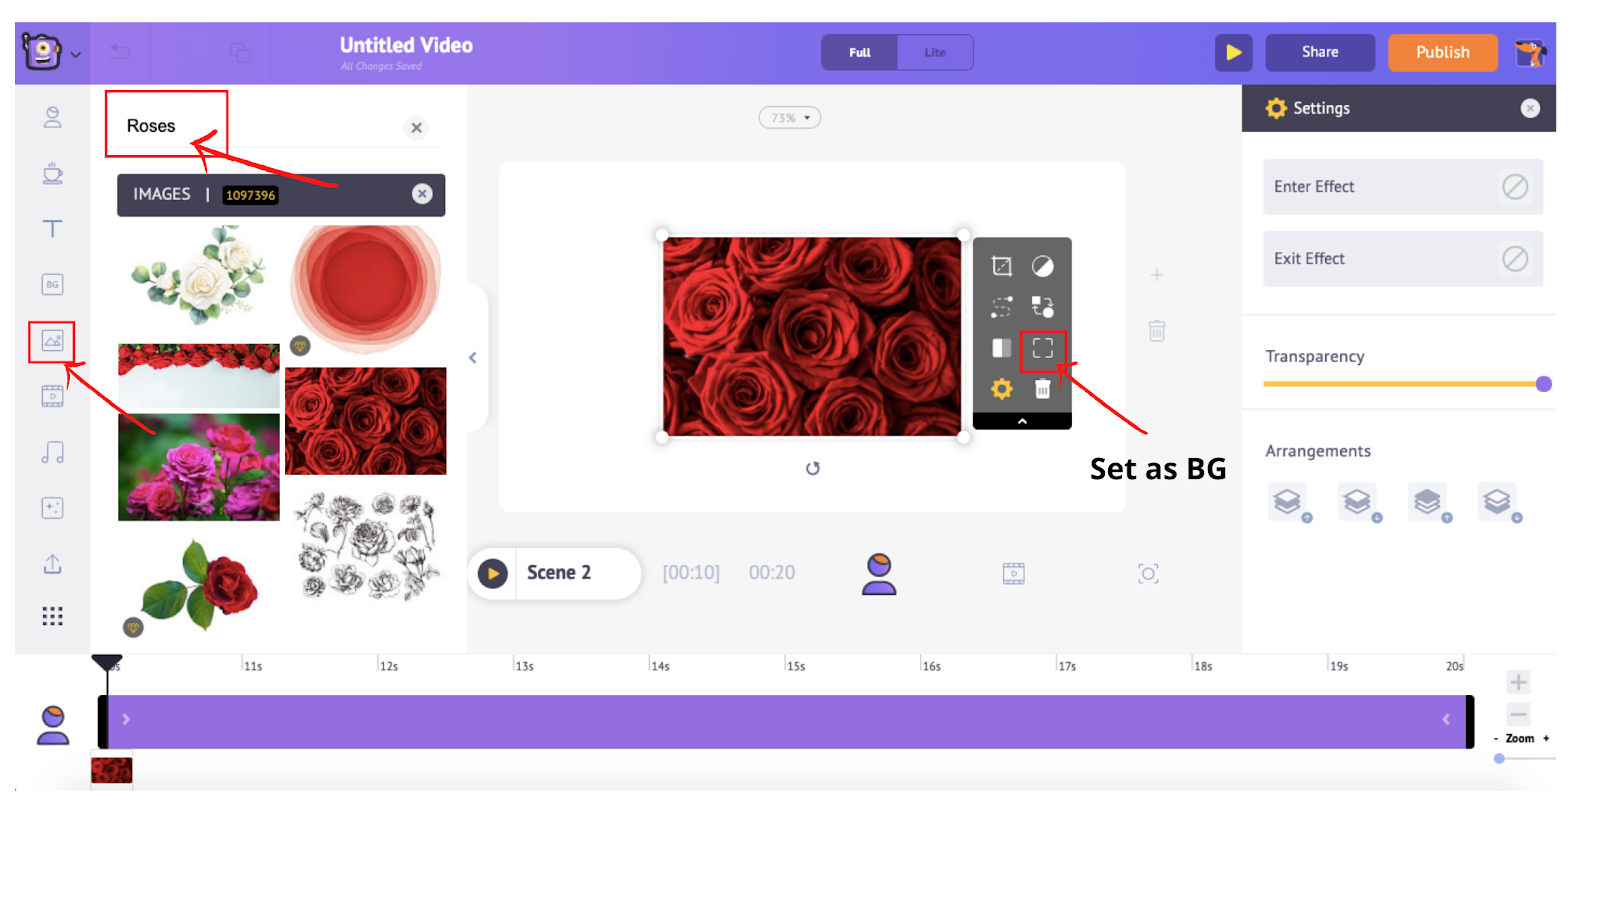
3. Add a background image
Now, if you want to add a background image to your scene you can also choose one from the Animaker asset library.
You can 2d backgrounds, Stock video, or image background.
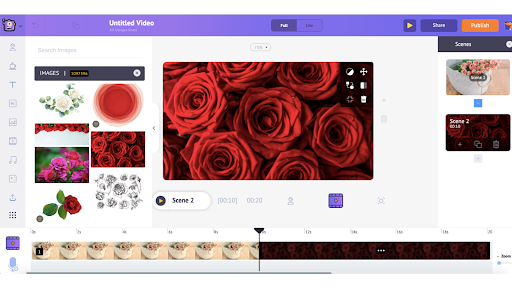
In our case, we are going to be adding “roses” as a background. You can however add 2d backgrounds or even a video background. To add an asset as a background, click on the BG icon/Image icon/video icon>> Search for the keyword>> Scroll through to find the best match>>Click on it>>Set as background.
4. Customize the scene
This is the most fun part of creating a video from scratch because you can go crazy over here with all the effects, text animations, properties, and more!
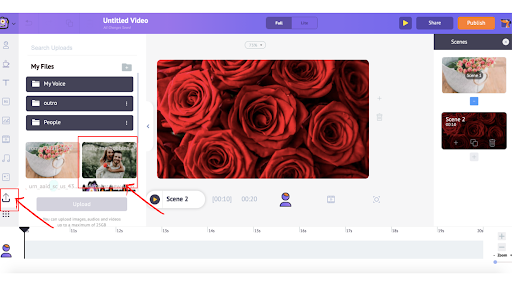
So, first, let’s see how we can add the uploaded asset to the scene and frame the image.
First, head on to the uploads section and click on the uploaded image. This will make the image appear on the scene. You can rotate and resize to match your taste.
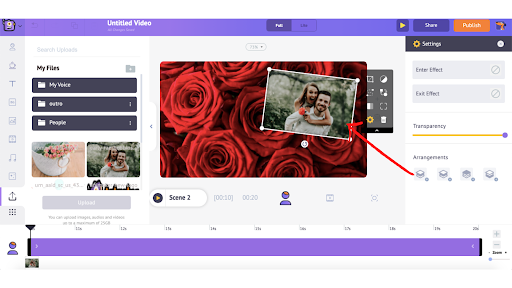
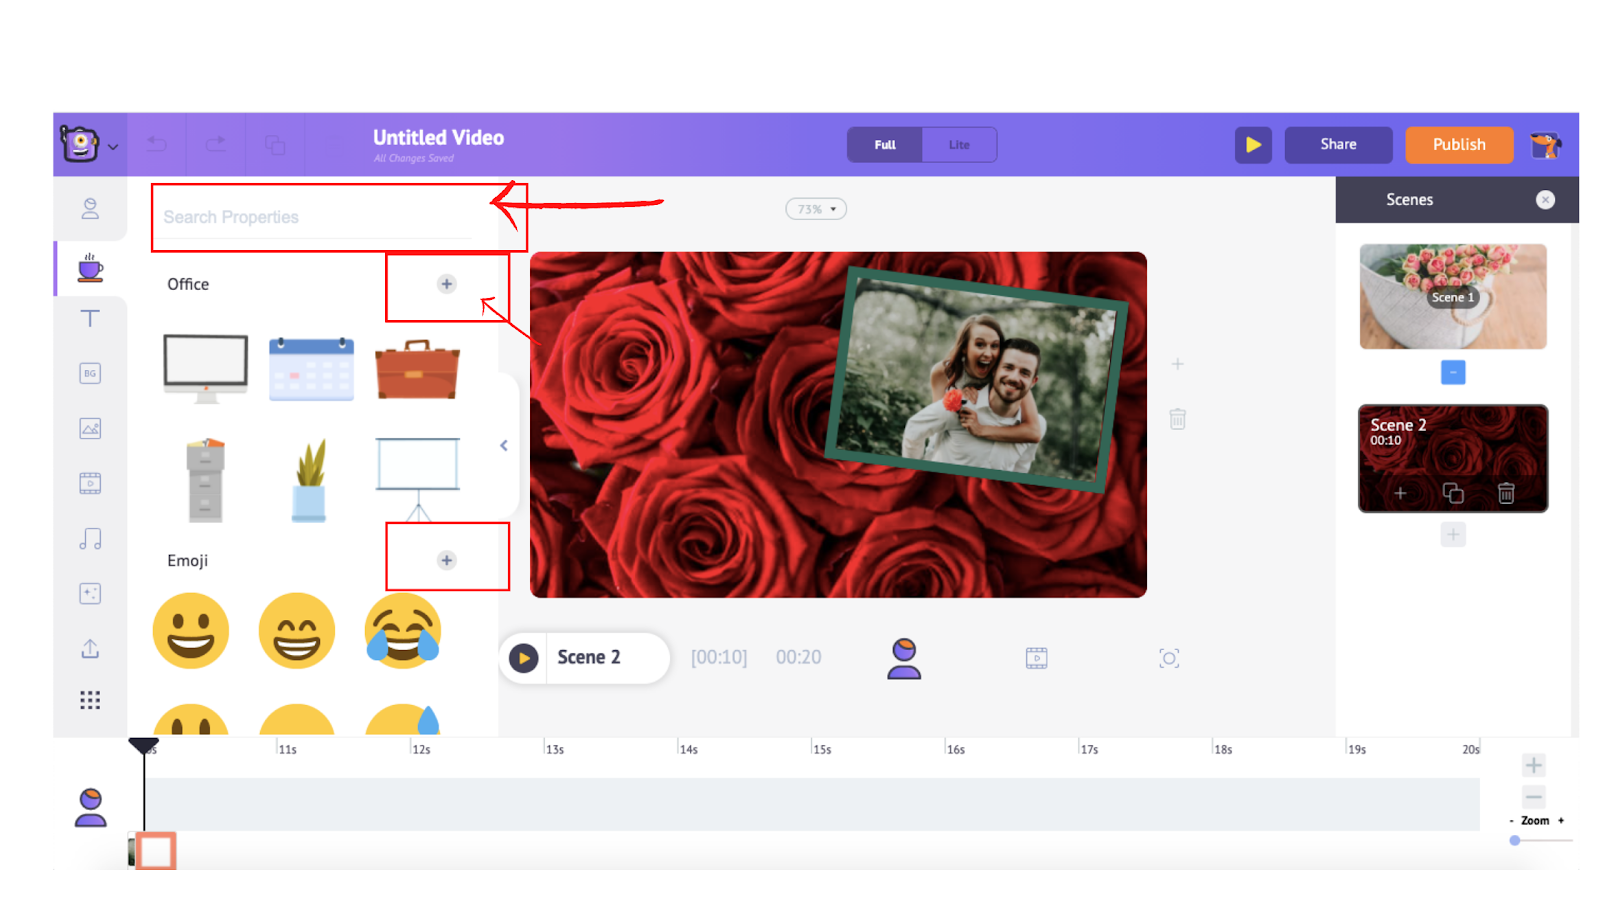
Next, you can choose a property by clicking on the properties icon. This will show you a bunch of properties that you can add to the scene to make the assets pop out! You can also make use of the search bar to type and look for what exactly you want to add.
Now, once you pick what property you want to add to your scene, you can click on it. In this case, we are going to pick the “frame” property. Just click on the property and it will appear on the workspace.
You can move it around, rotate, and resize it.
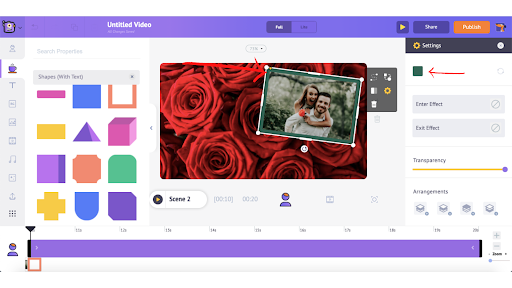
 You can further customize by changing the color, adding effects, and adjusting the transparency.
Not just shapes, you can also look for other properties by clicking on the small “+” icon or by simply typing out your preference on the search bar.
You’d definitely want to pour your heart out on the video and texts are the best way to do that! To add texts or pre-built text animation, simply click on the text icon in the asset library and either choose a plain text or scroll through hundreds of text animations.
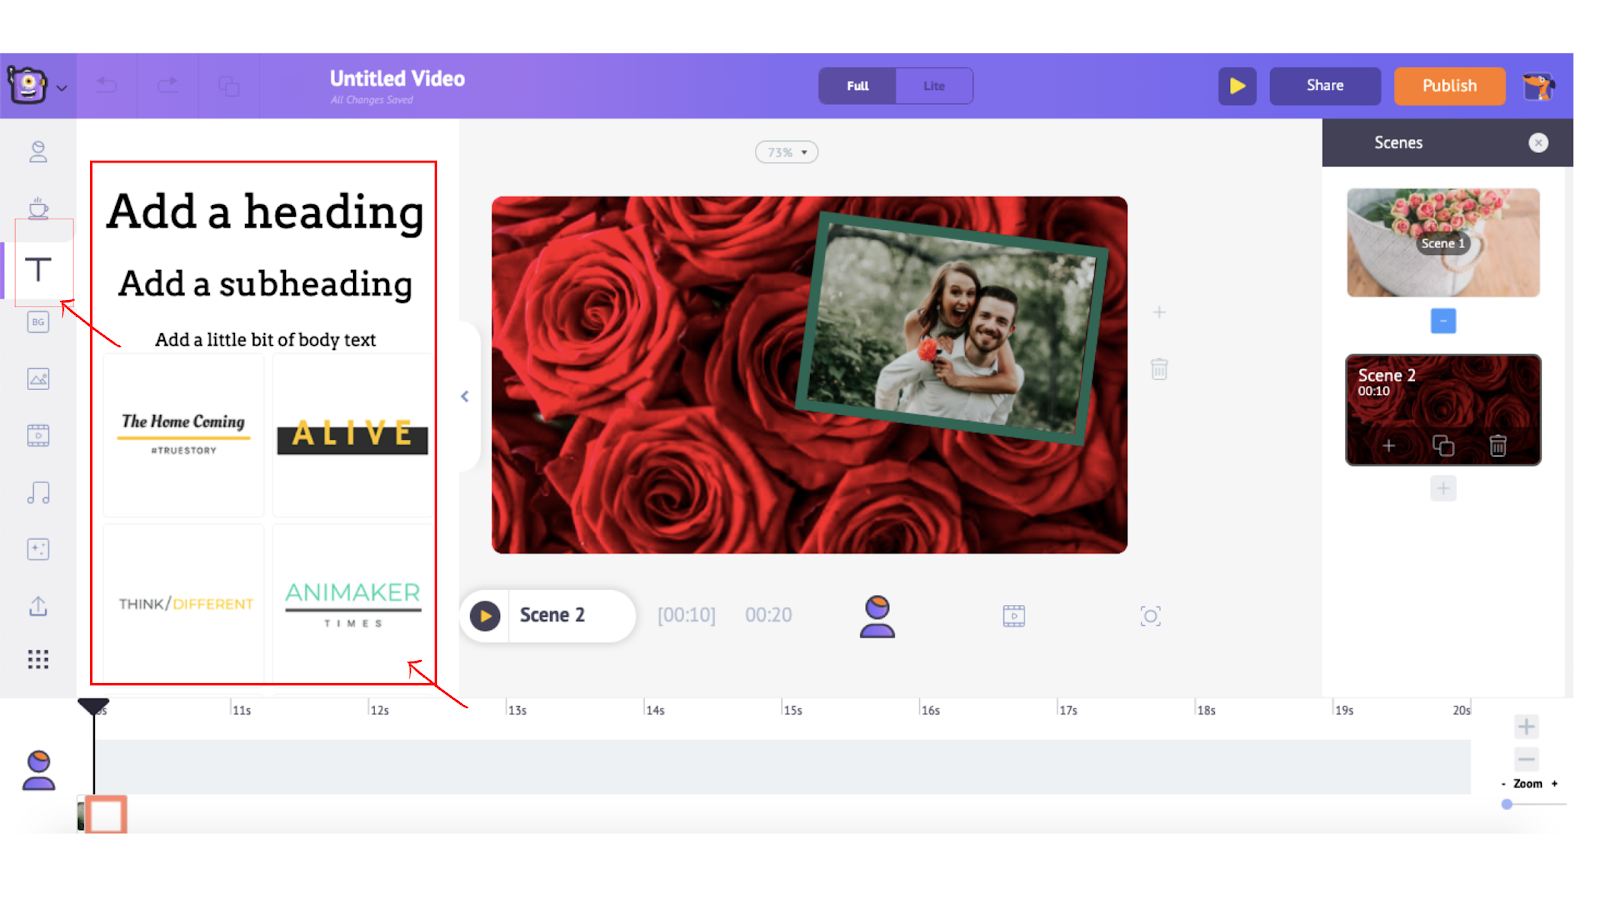
Choose the one that you like the best and it will appear on the scene.
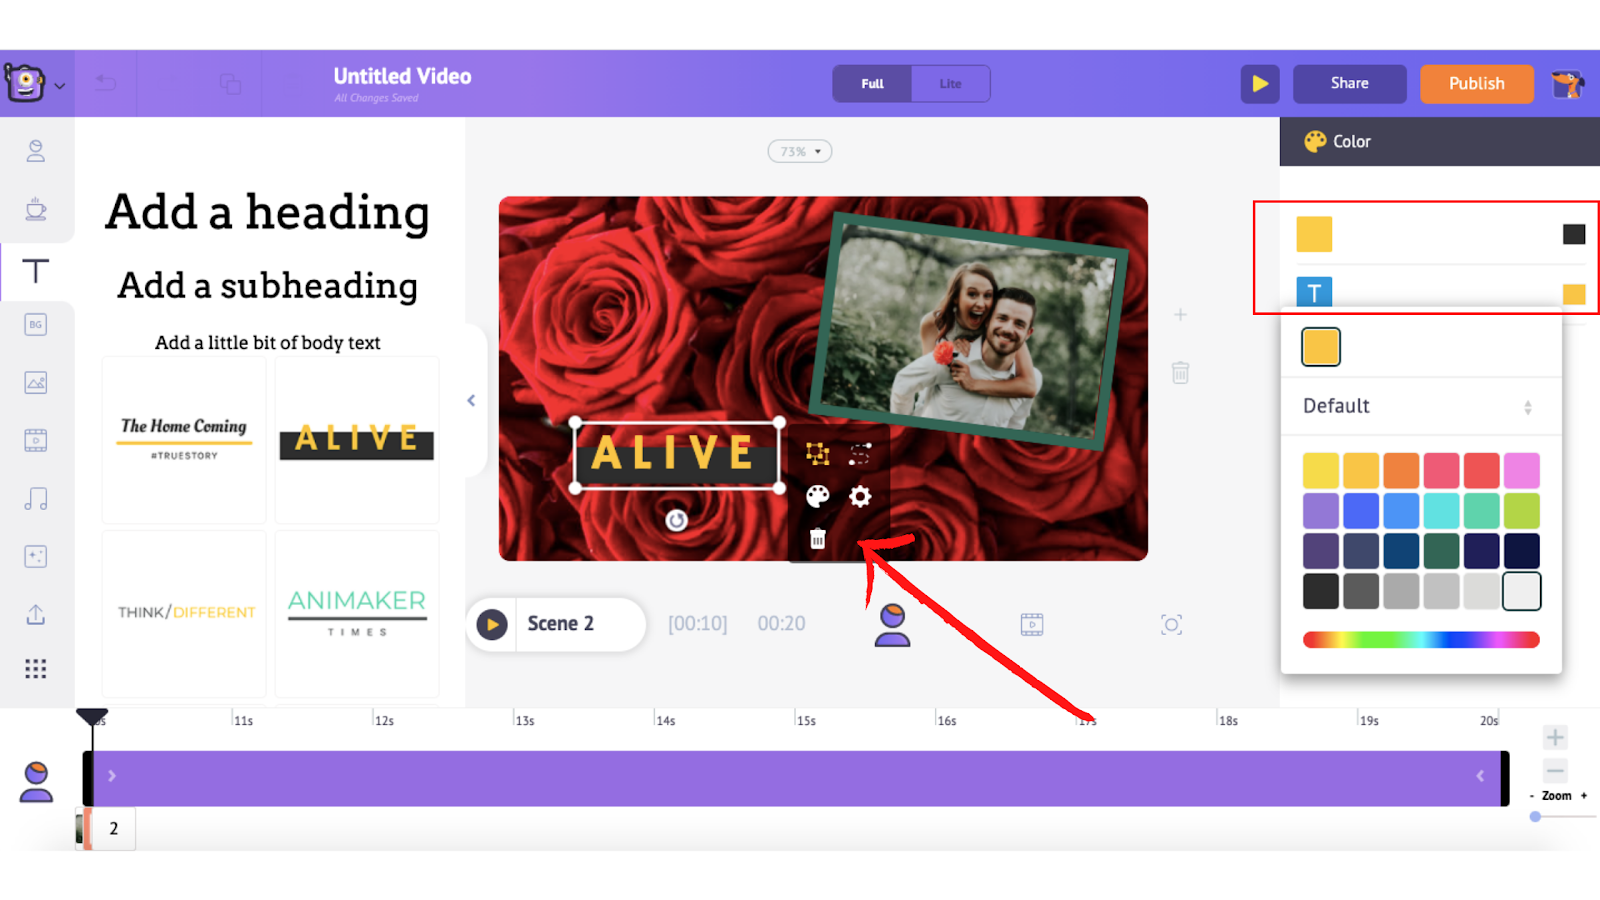
You can simply type to replace the default text. Now, you can do a bunch of formatting to the text by changing colors, size, position, and more. To do so, just click on the text and an item menu would open. You can make the edits right there.
Screen effects are a great way to add that quirkiness to your video and for valentine’s day video you may want to make it a lot cuter, right?
So, to add screen effects click on the screen effects icon and scroll through a bunch of screen effects, and click on it to add it to your scene.
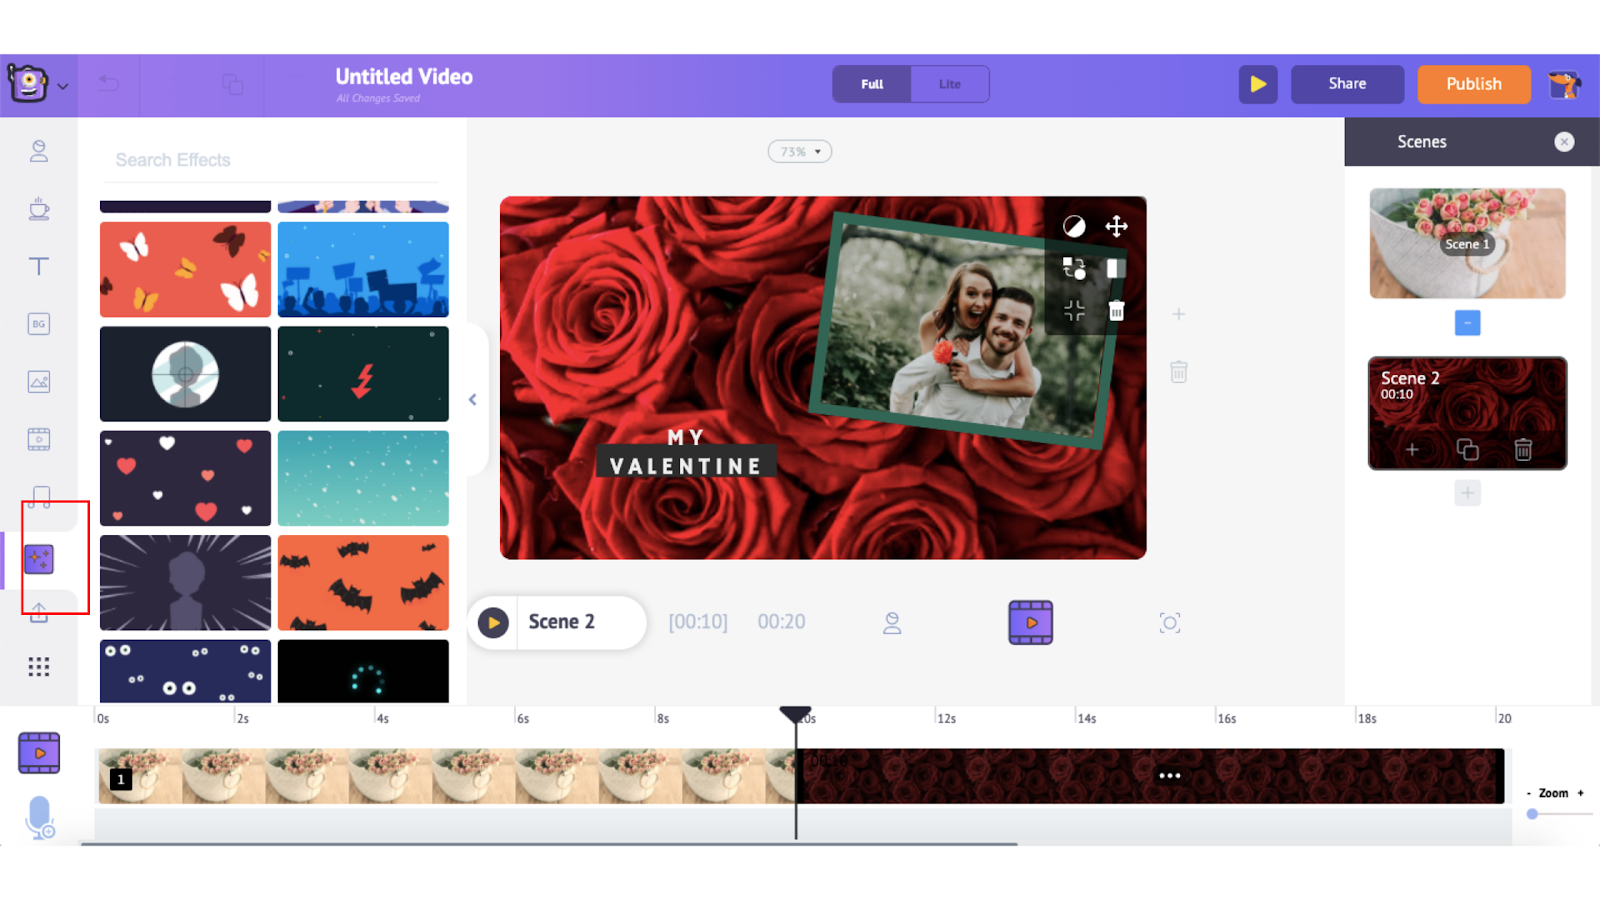
You can click on the preview button to see how the screen effects look on your video.
Now similar to how you built your first scene, you can construct the rest of the scenes based on your script.
Once you have built all your scenes, the next step would be to add transition effects. To add transition effects to your scenes simply click on the “Enter effect” and “Exit effect” buttons. You can scroll through various transition effects and choose the one that you want for your text.
5. Add background music to your video
You can add a new music track by clicking on the music icon in the library and you can choose your favorite one by simply hovering over the music track to hear the preview.
Once you know what you want simply click on the music track and it will be automatically added to the timeline. You can even upload your own music track (which will be discussed in the further section).
Once you add the music track you have the option to adjust the volume, trim it, duplicate it, delete it, and preview it).
6. Export your beautiful creation
After adding all the elements, preview the video to ensure that everything looks fine. Select the Scene Preview option to preview a particular scene and use the Video Preview option to preview the entire video.
Once you are done, click on Publish -> Download video. You can rename it, select the preferred video quality, and then click on Download.
If you need more help building your awesome video from scratch, please check out our full tutorial here.
In Conclusion
Valentine’s day is right around the corner and if you haven’t thought of a cool gift yet, then surprise your loved one with a video! Even if you have a gift, create a video and play it on valentine’s day to make it more special and memorable.
We hope this article has helped you. Do drop a comment if you have any questions!