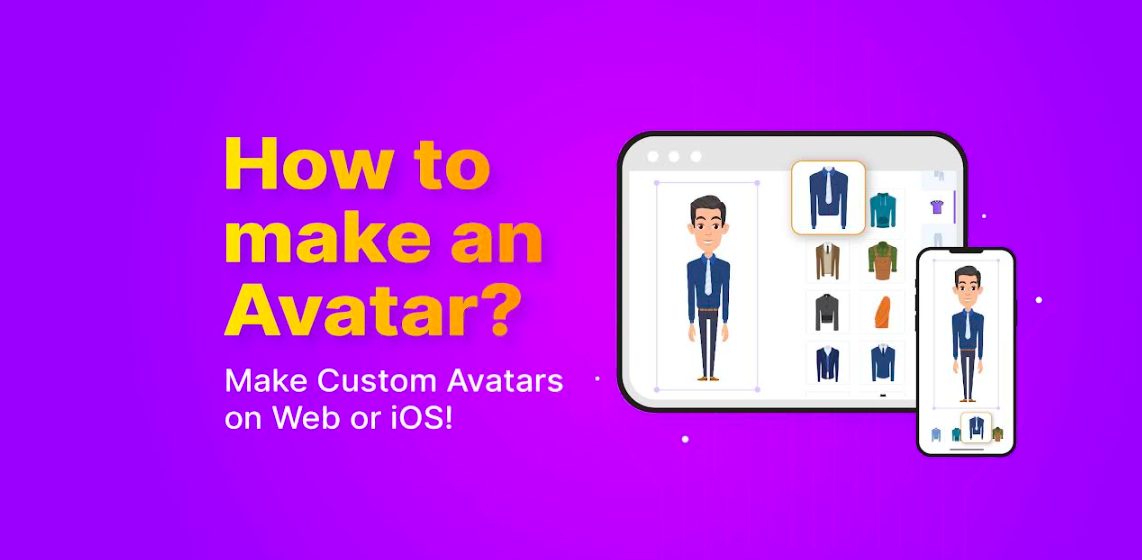
How to Make an Avatar with Animaker (iOS + Web Tutorial)

Shreshtra - September 5, 2025 - Leave your thoughts. 11 min read
Are you looking to create a cute mini version of yourself (aka an avatar) but not sure where to start?
You’re not alone!
Over the past few years, avatars have exploded in popularity across social media, messaging apps, and even professional platforms.
People are using them for everything from profile pictures and stickers to GIFs and animated videos. They're fun, expressive, and totally customizable.
But here’s the real question - how to make an avatar that feels uniquely you and not just another lookalike your friend already made?
That’s exactly what this guide is here to help you with.
Whether you're using a computer or an iPhone, we’ll walk you through how to make an avatar like these from scratch, step by step.
Let’s get started!
Depending on your device, feel free to jump to the section that suits you best.
How to make an avatar on an iPhone?
Creating an avatar on your iPhone is quick, fun, and super intuitive. With the Animaker app, you can design your character on the go in just a few taps.
Here’s what you’ll learn in this section -
Step 1: Download the Animaker iOS app
Step 2: Choose Your Avatar base
Step 3: Customize your avatar’s look
Step 4: Save & animate your avatar
Step 1: Download the Animaker iOS app
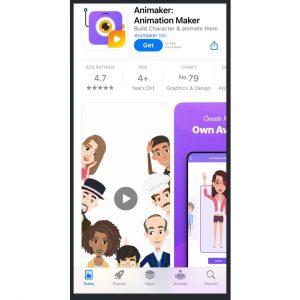
To begin, download the Animaker Animation Video Maker from the App Store and sign up for free!
Once you're logged in, you’ll land on the dashboard. Tap “Create Your Own Character” to access the Avatar Maker.
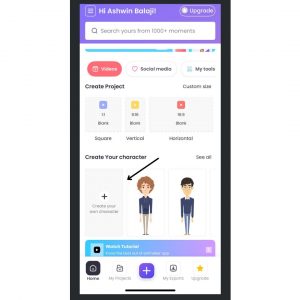
Here’s where the fun begins!
Let’s create our Avatar now! 😀
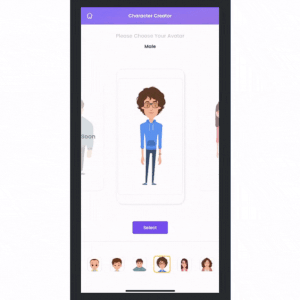
Step 2: Choose Your Avatar base
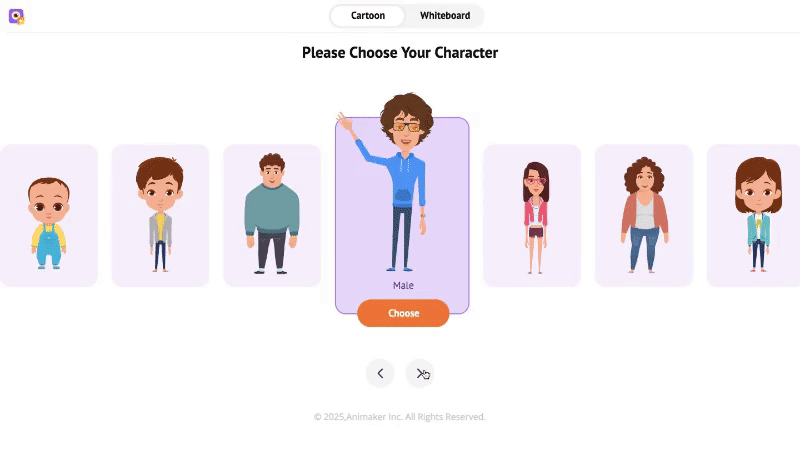
First, choose the base of your Avatar. You can either pick a Male Avatar or a Female Avatar.
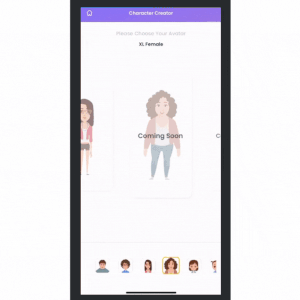
The best part is that you will soon have a wide range of alternatives to pick from, including plus-sized characters, kids, and even infants! So it is just going to get more exciting using the app! 😀
Now, after selecting the base, pick the template that closely resembles the Avatar you want to create in order to begin customizing it.

Hit the “Customize” button to begin. You'll have access to the entire Avatar Creation Suite, where you can alter your character from head to toe!
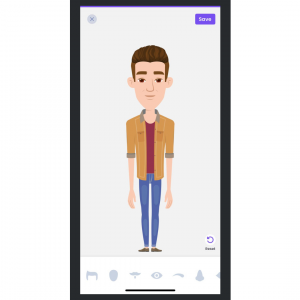
Step 3: Customize your avatar’s look
Let’s start giving your avatar its own personality.
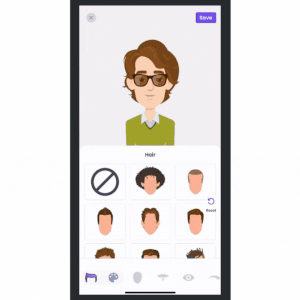
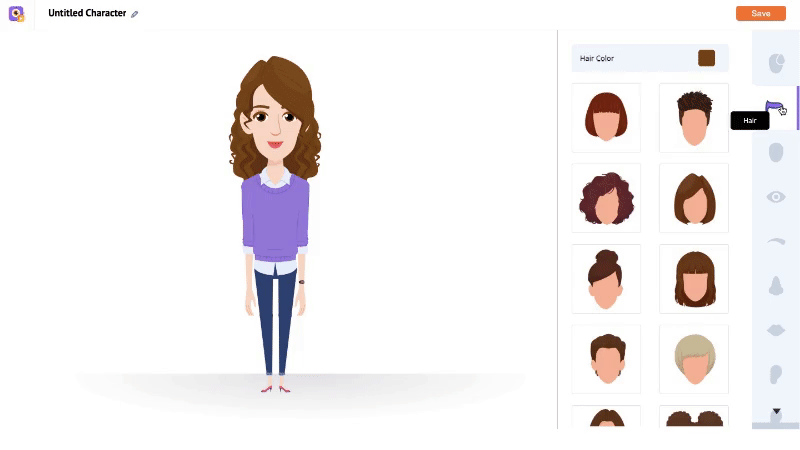
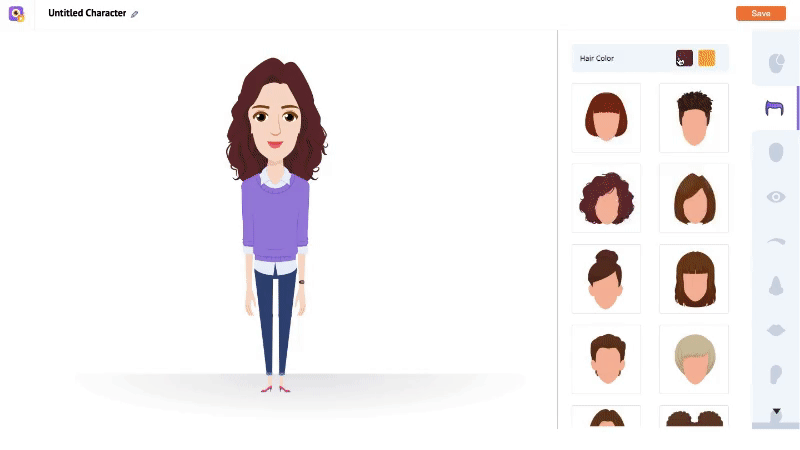
1. Hairstyle & Hair Color
There are several stylish hairstyles available for you to select from. Just tap on one to try.
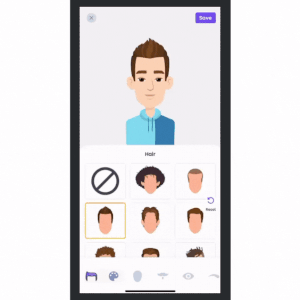
You can also modify the hair color by switching to the color section.
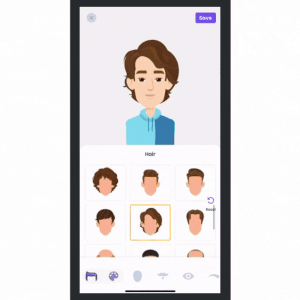
Looks decent, right? Let’s continue.
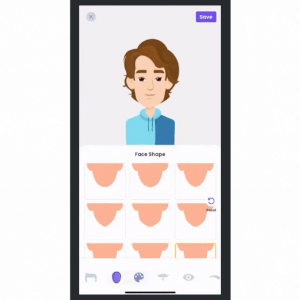
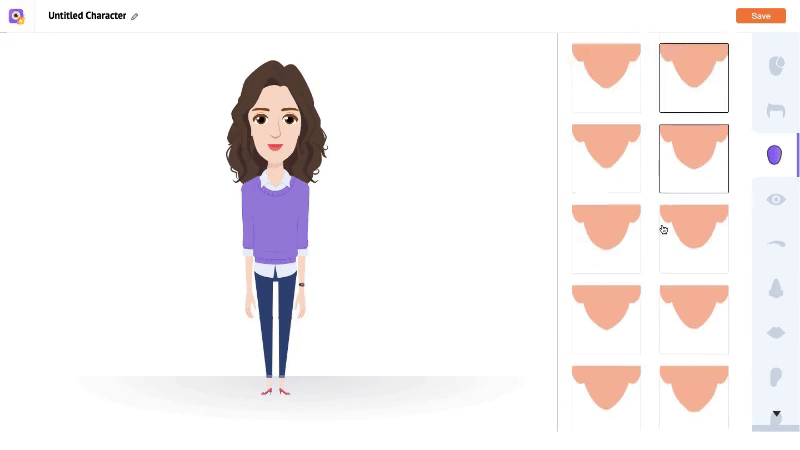
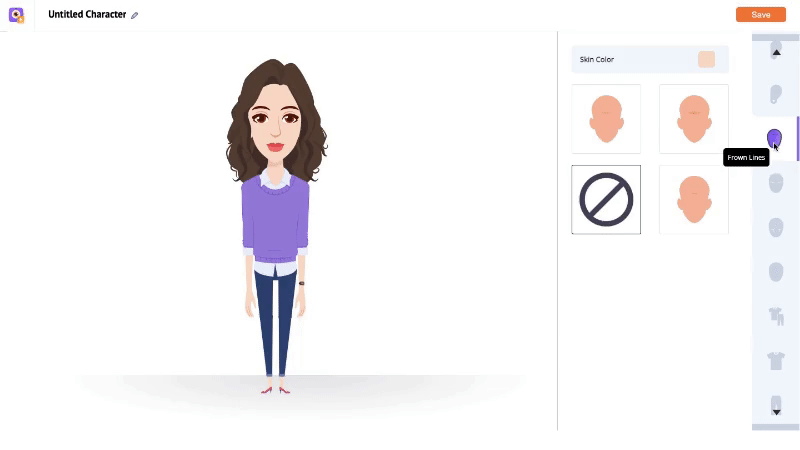
2. Facial Features
Customize our character's facial features, such as eyebrows, eyes, nose, and lips, and add a mustache or beard if you’re looking for a signature style! Just tap to apply to the character.
Want to make your avatar appear older? No problem! We got wrinkles and frown lines for the mature look!
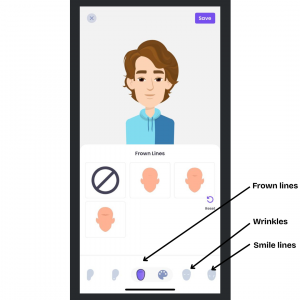
Cool, right?
That’s how detailed you can personalize your Avatar’s Facial Features.
Ready to glam up your avatar? Let’s dive into outfits and accessories!
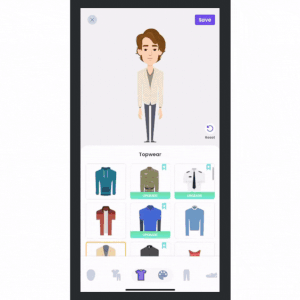
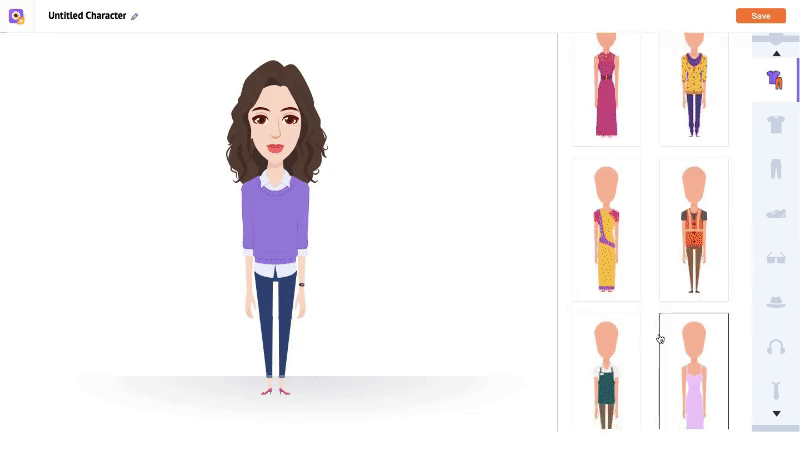
3. Outfits
Animaker’s Avatar Wardrobe is massive! Whether you're going for cool and casual or bold and glamorous, there’s something for everyone.
So much so, you might find yourself scrolling for hours trying to pick the perfect look.
Here's a quick peek into Animaker's Wardrobe for you.
Give your Avatar an instant full look with classy outfits like sleek suits, partywear, or even quirky themed costumes. (Psst…for female characters, the wardrobe opens up to additional glamorous gowns, chic dresses, and more fashionable choices!)
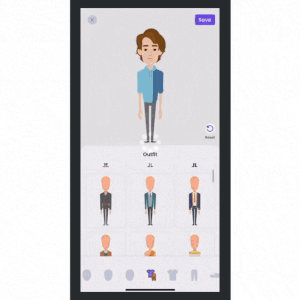
Or if you want to show off your fashion sense, you can even mix and match different pair of trousers and shirts from the Topwear & Bottomwear section!
It’s completely your choice! 😀
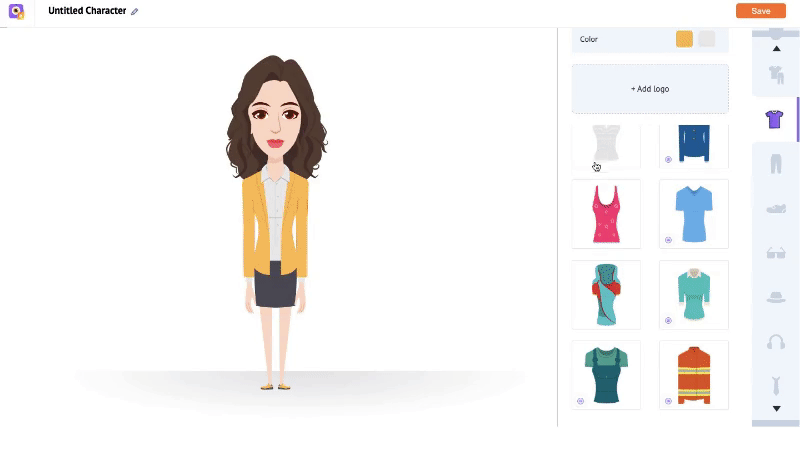
And to really complete the look, let’s add the perfect set of accessories to your Avatar.
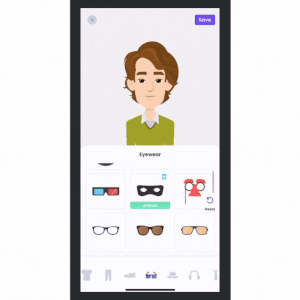
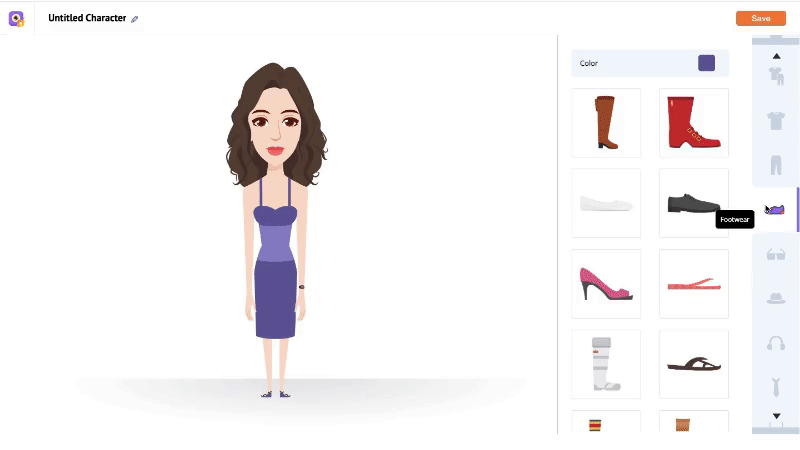
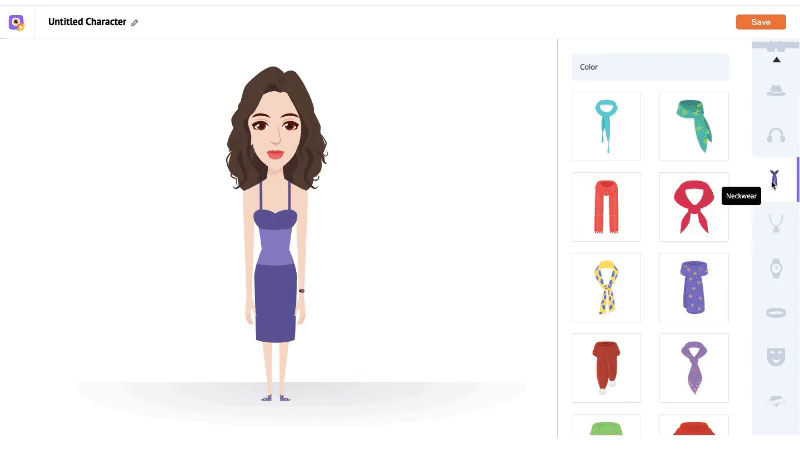
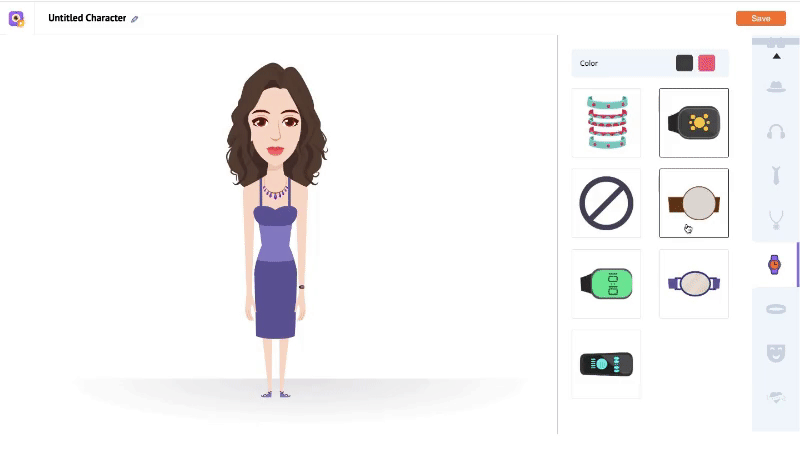
4. Accessories
Animaker offers a wide range of stylish add-ons, from practical to playful, to help you add those perfect finishing touches.
You can start by adding a cool pair of eyewear or stylish hats and headphones to match your vibe.
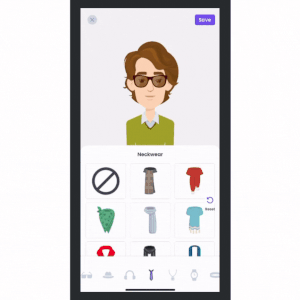
Then, if you want to add some sparkle or a touch of elegance, try neckwear and jewelry to glam things up.
If you’re looking for an edgy look, go for wristbands, watches, tattoos, or even quirky face masks.
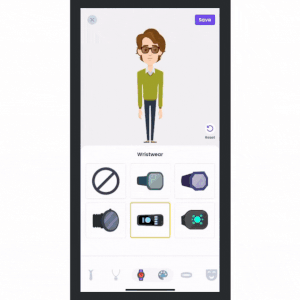
With so many accessory options to explore, the possibilities are endless!
Step 4: Save & animate your avatar
Once you’re happy with your avatar’s look, just tap on the “Save” button to name and save it.
After you save your character, you will see a pop-up with two options -

If you want to create a new avatar, go for it! You now know how easy it is to make an avatar on the Animaker app.
But, if you want to move to the next step, click on the “Go to Dashboard” option.
Once you’re redirected to the Dashboard, the Avatar you created will be featured in the "Create Your Character" section. You can identify it by the name you’ve given it.
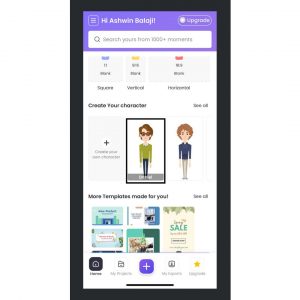
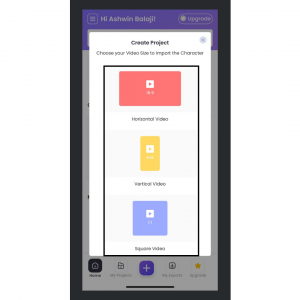
Select it and choose the project size (Horizontal, Vertical, or Square) you want to add the Avatar to.
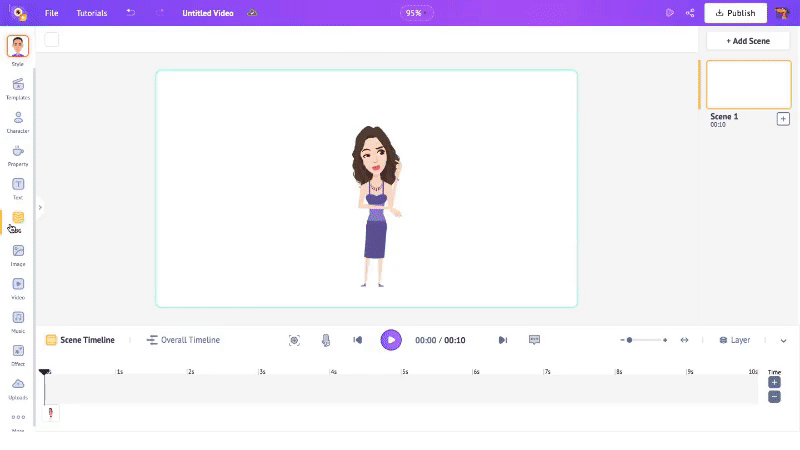
The workspace will open up with the Avatar you just created!
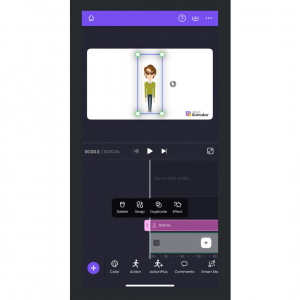
To animate your avatar, click on it and tap the “Action” button on the toolbar below.
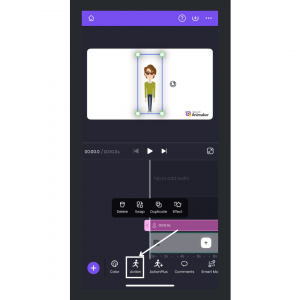
The Actions (aka predefined animations) Library will open below (loaded with 100+ unique animations). Choose the one you would like to use!
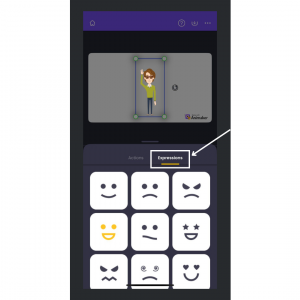
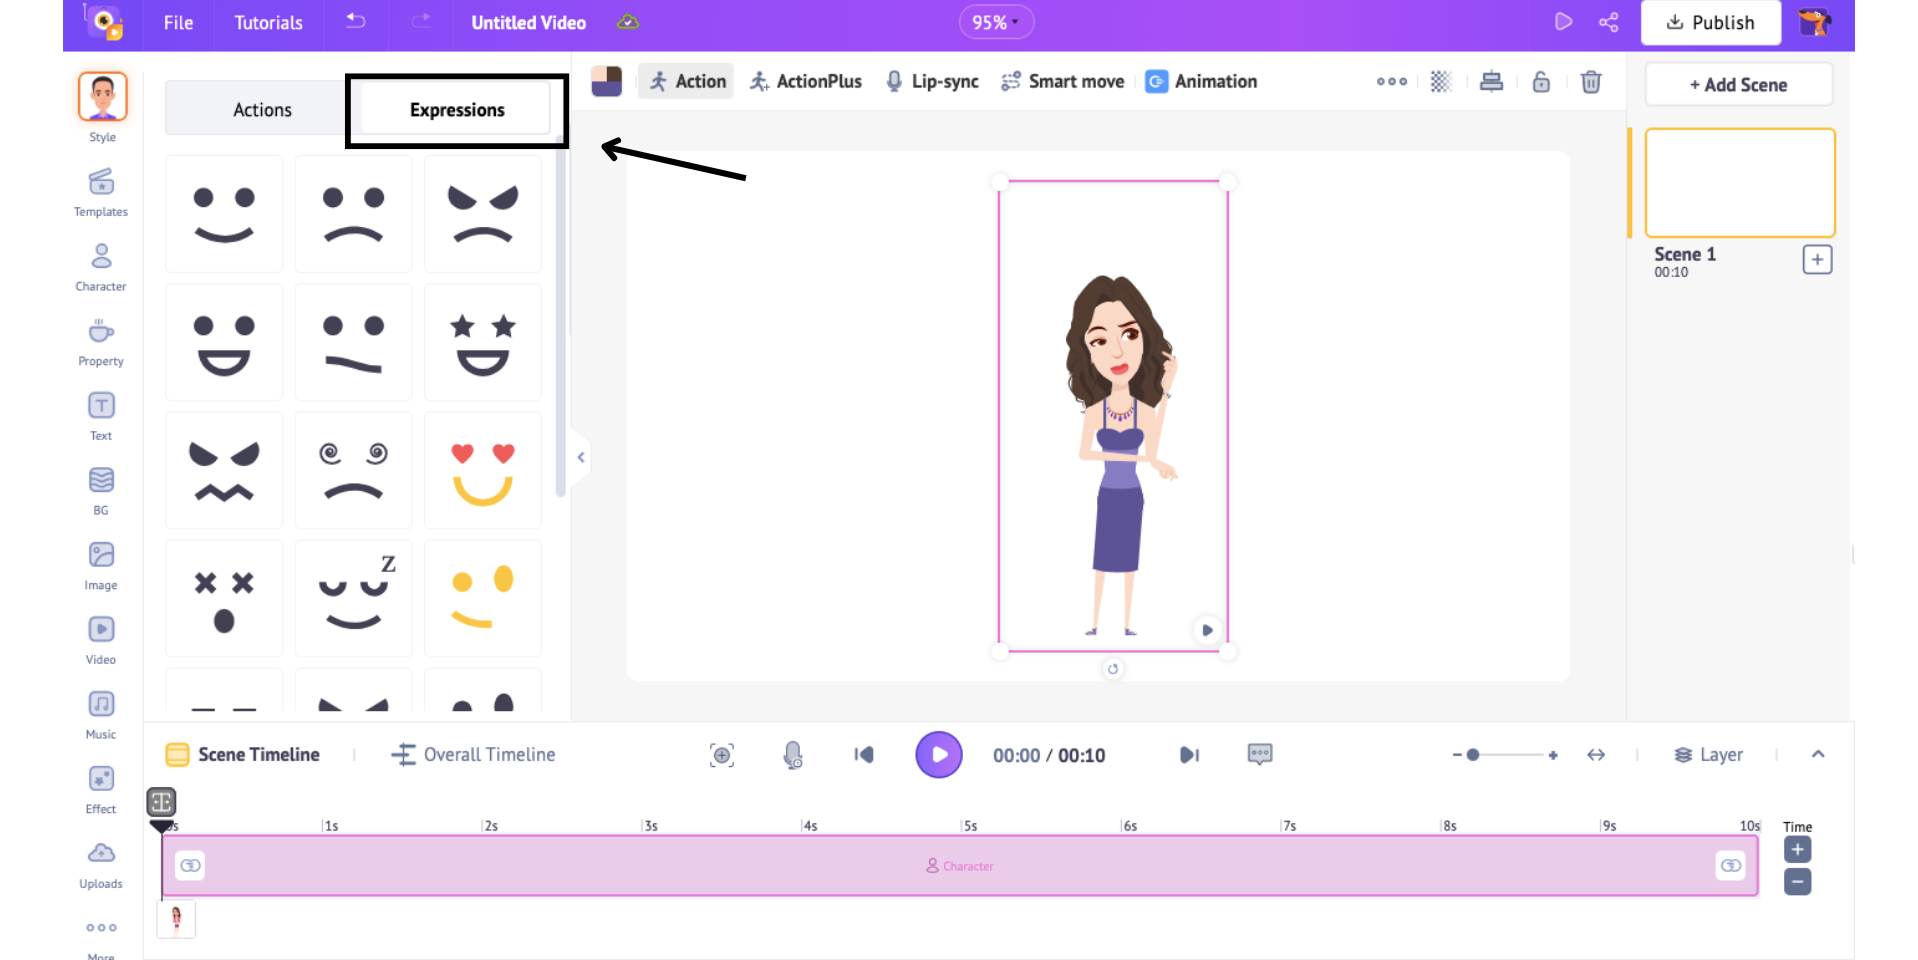
You can also change the expression of your character by switching to “Expressions” & choosing from 20+ unique ones!
Now that your character has the perfect animation and expression, it’s time to set the scene!
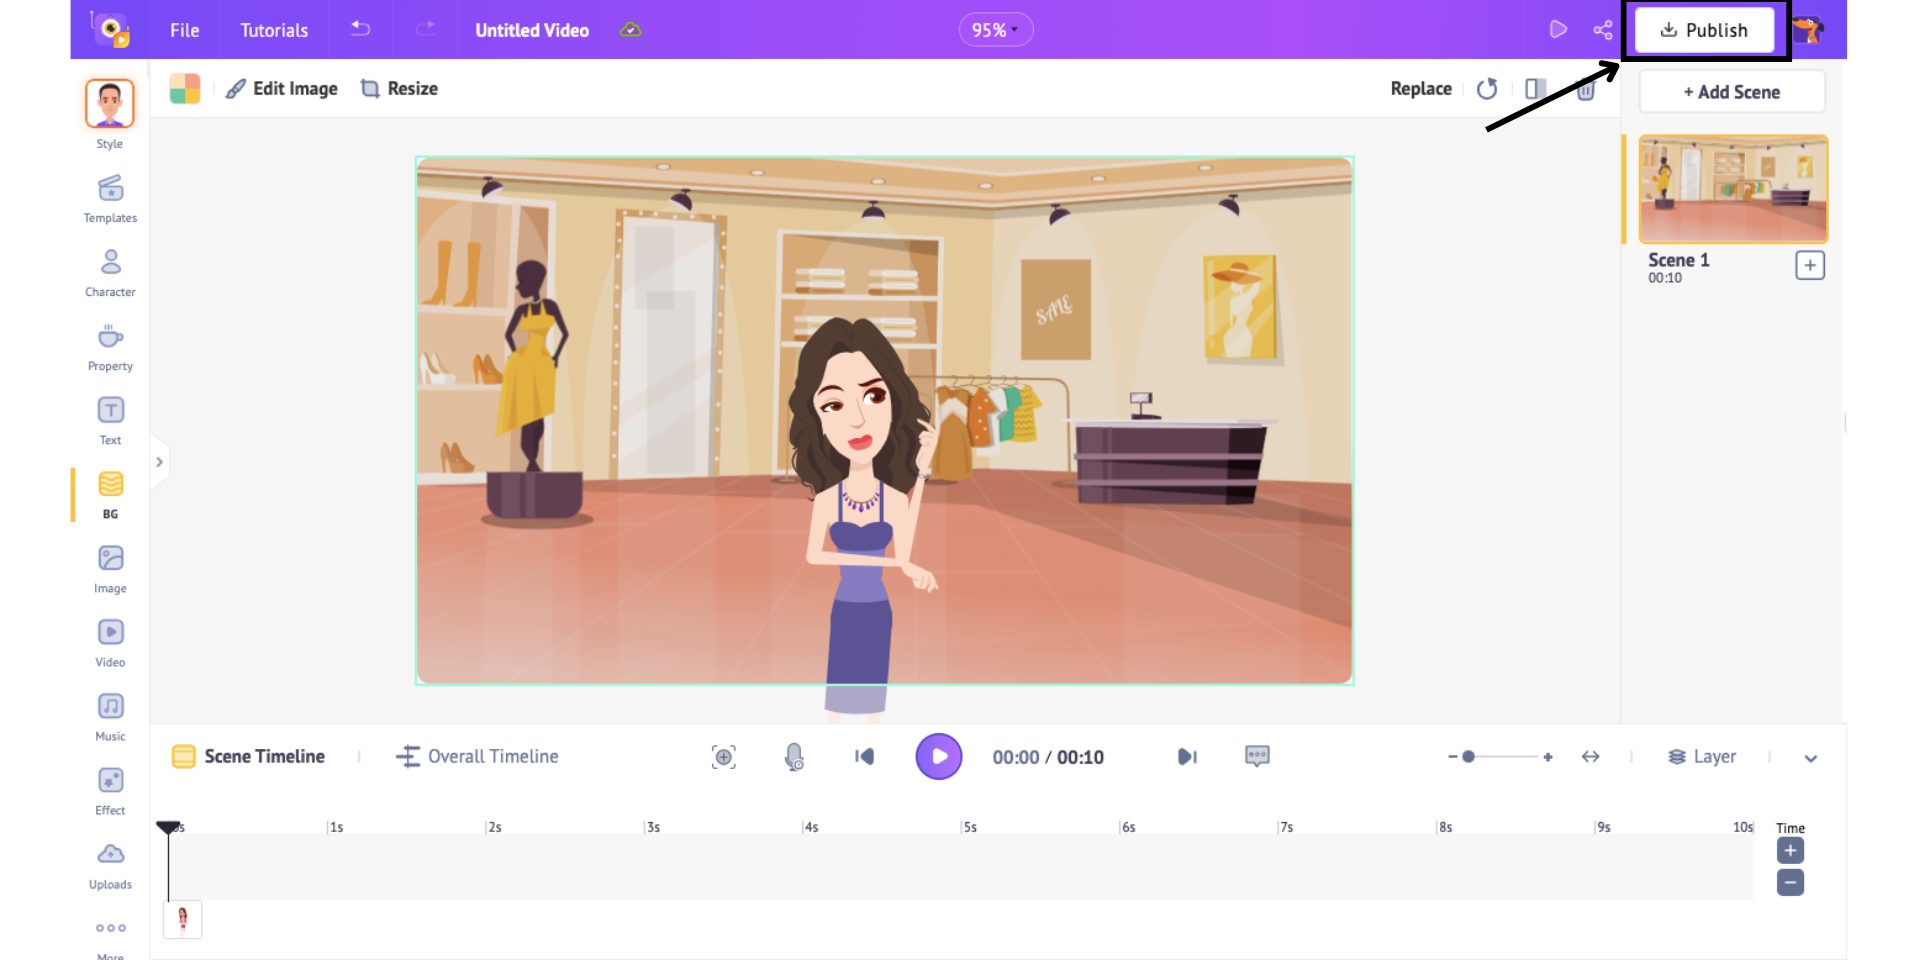
Click on the “+” button and scroll to the Background section. Pick a backdrop that matches your avatar’s mood or story.
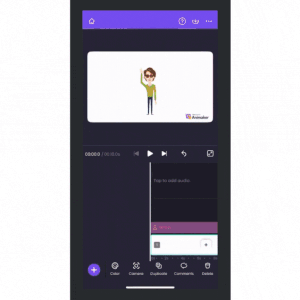
I am giving my avatar a classroom background to fit the cool teacher vibe!
To take things up a notch, you can enhance your scene with props, text, special effects, music, and much more. Just scroll through the toolbar below to check your options.
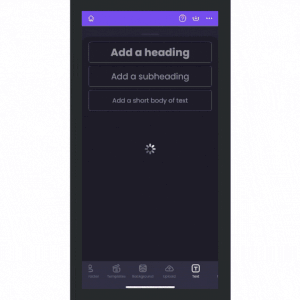
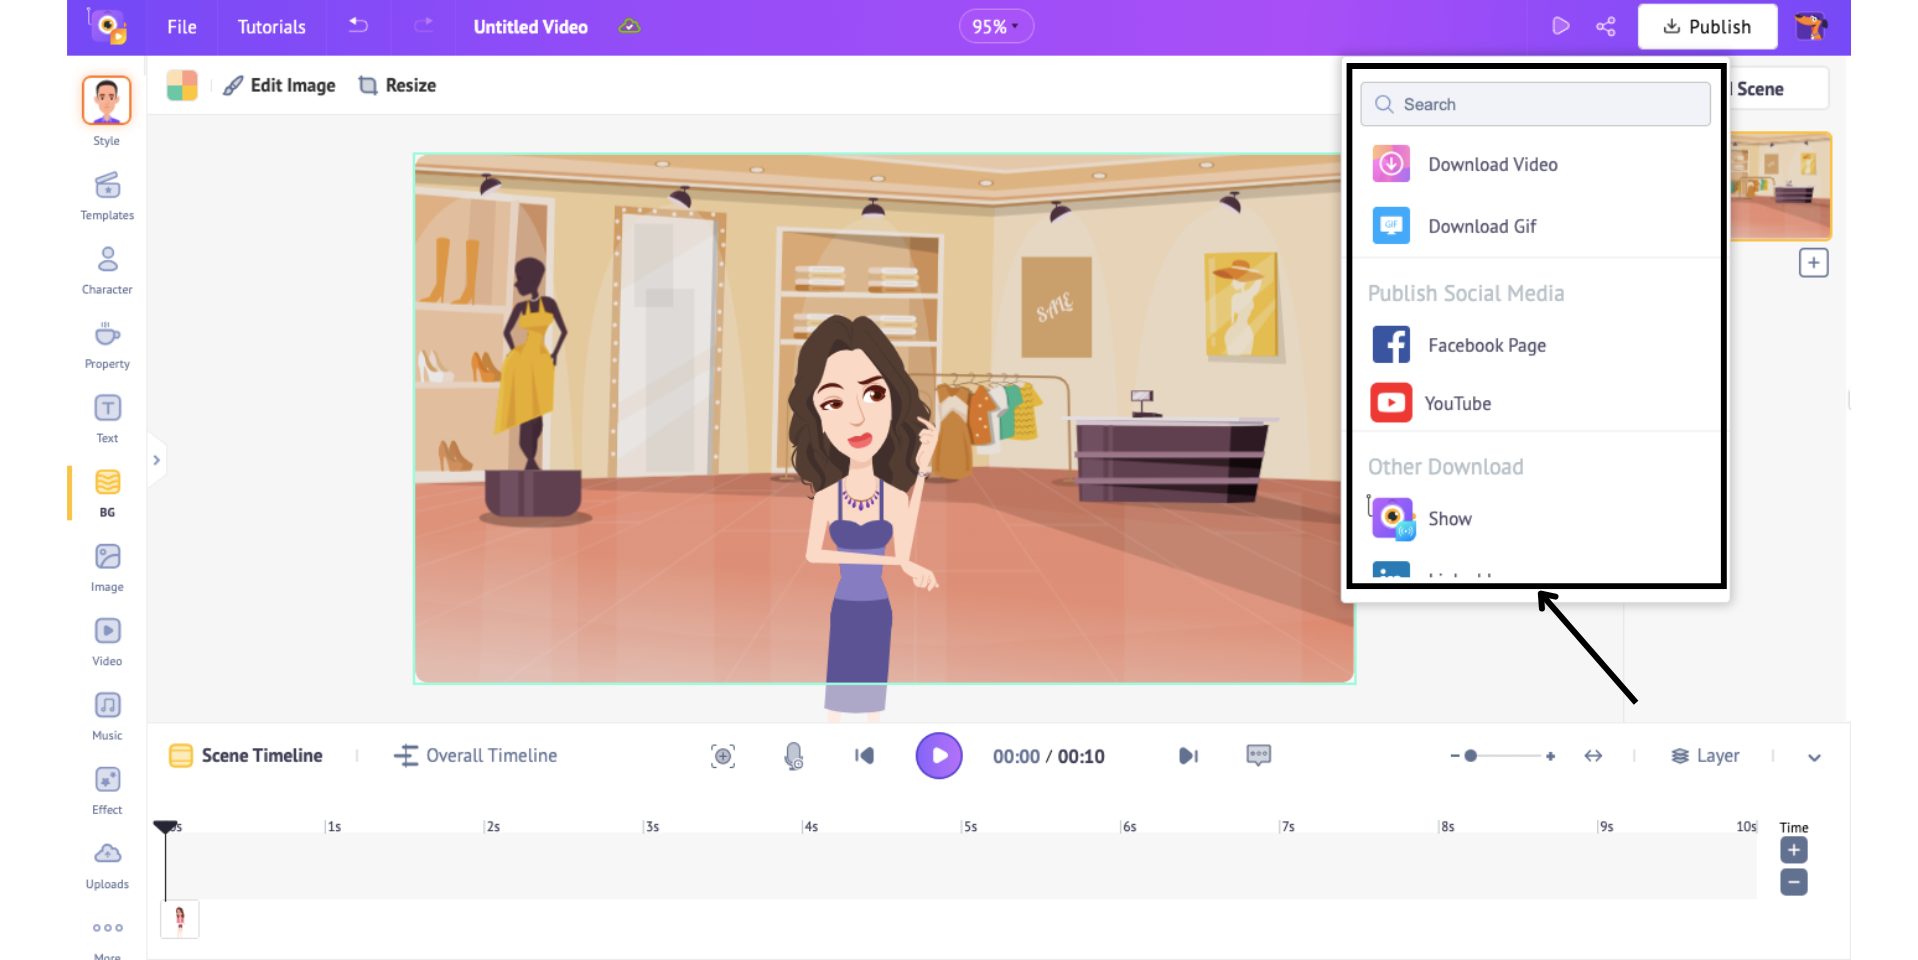
Once you're happy with your creation, click the Download icon at the top right corner.
From there, you can choose to download your avatar as an Image, Video, or even a GIF (if the duration is under 30 seconds).
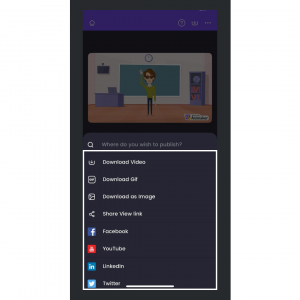
Depending on the format you choose, you can use your avatar as a profile picture, share it as a fun animated GIF in chats, or even post it as a video, totally up to you!
Don’t forget to share your avatar with your friends and challenge them to make one of their own, too!
How to make an avatar using a Computer or a Laptop?
Making your avatar on the Animaker website is seamless and packed with customization options. No installations, no fuss, just open your browser and start designing.
Here’s what you’ll learn in this section -
Step 1: Sign up/Login to Animaker’s Avatar Maker
Step 2: Choose Your Avatar base
Step 3: Customize your avatar’s look
Step 4: Save & animate your avatar
Step 1: Sign up/Login to Animaker’s Avatar Maker
Start with signing up for Animaker’s Avatar Maker or simply log in if you’re already have an account!
Once you're in, you’ll land on the dashboard featuring Animaker’s different creative tools.
From here, click on the More Tools icon and select Character Builder to open the character builder suite.
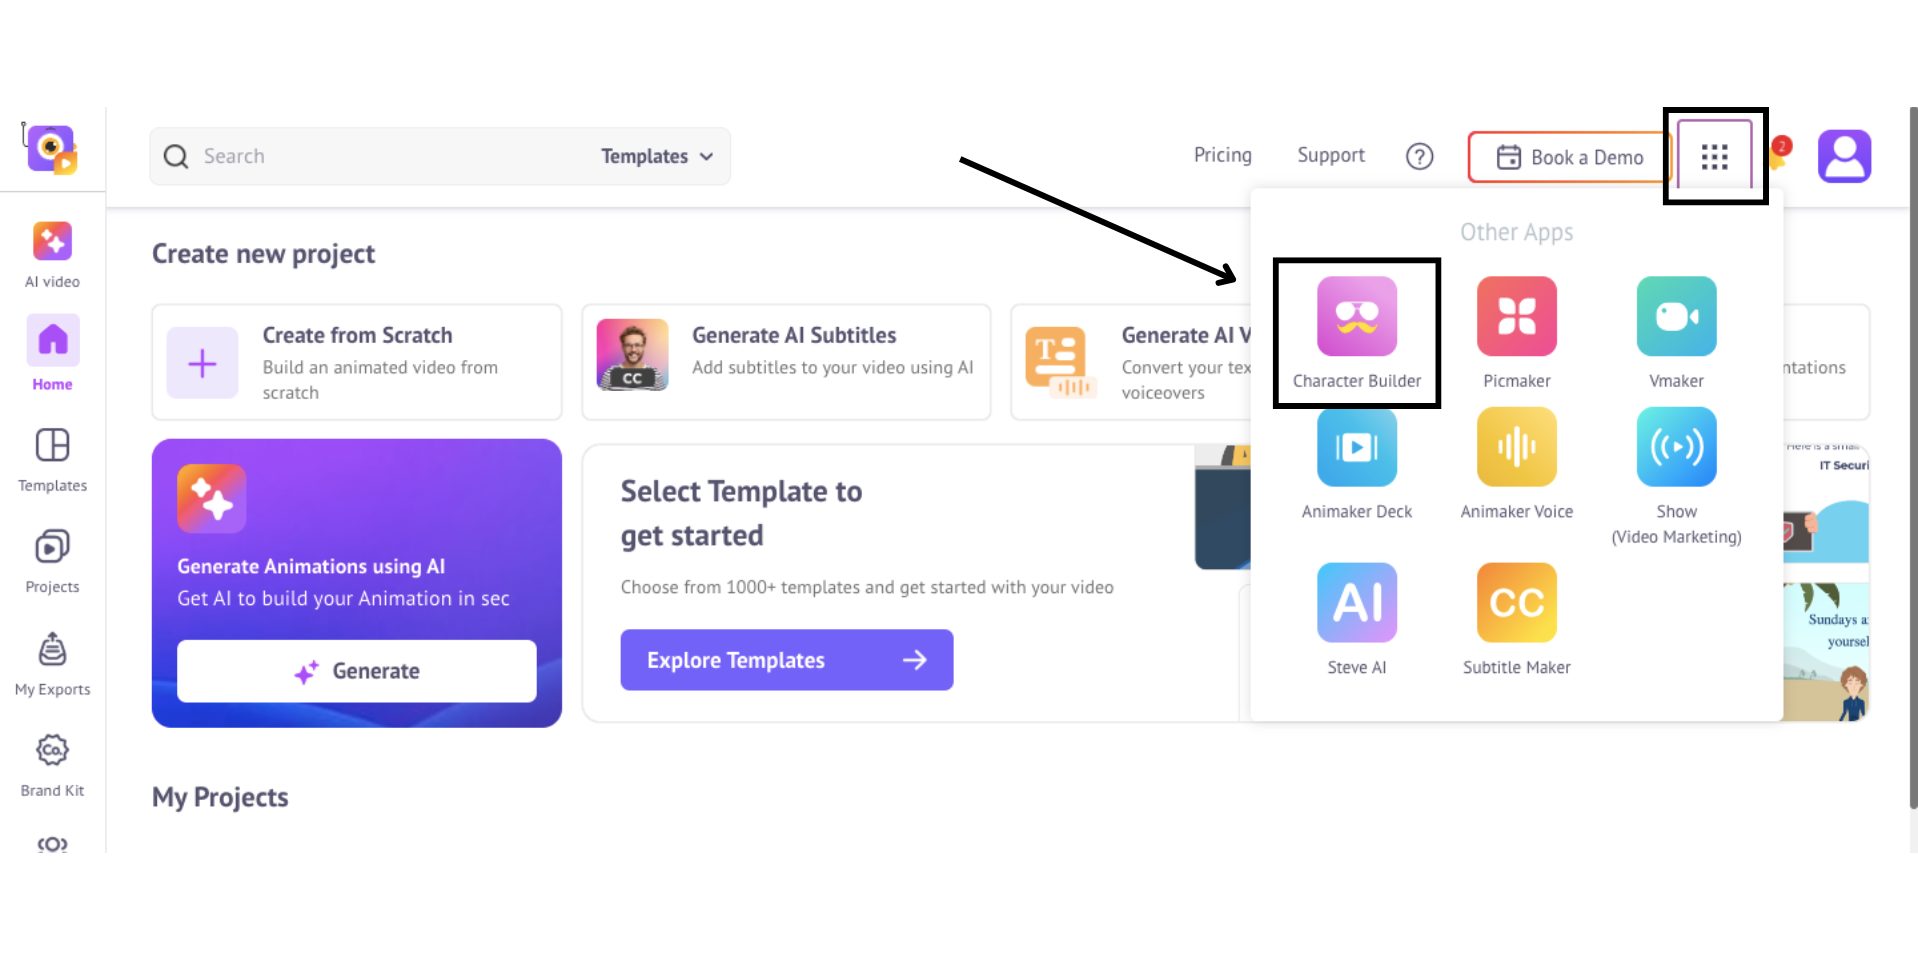
Let’s build our avatar now!
Step 2: Choose Your Avatar base
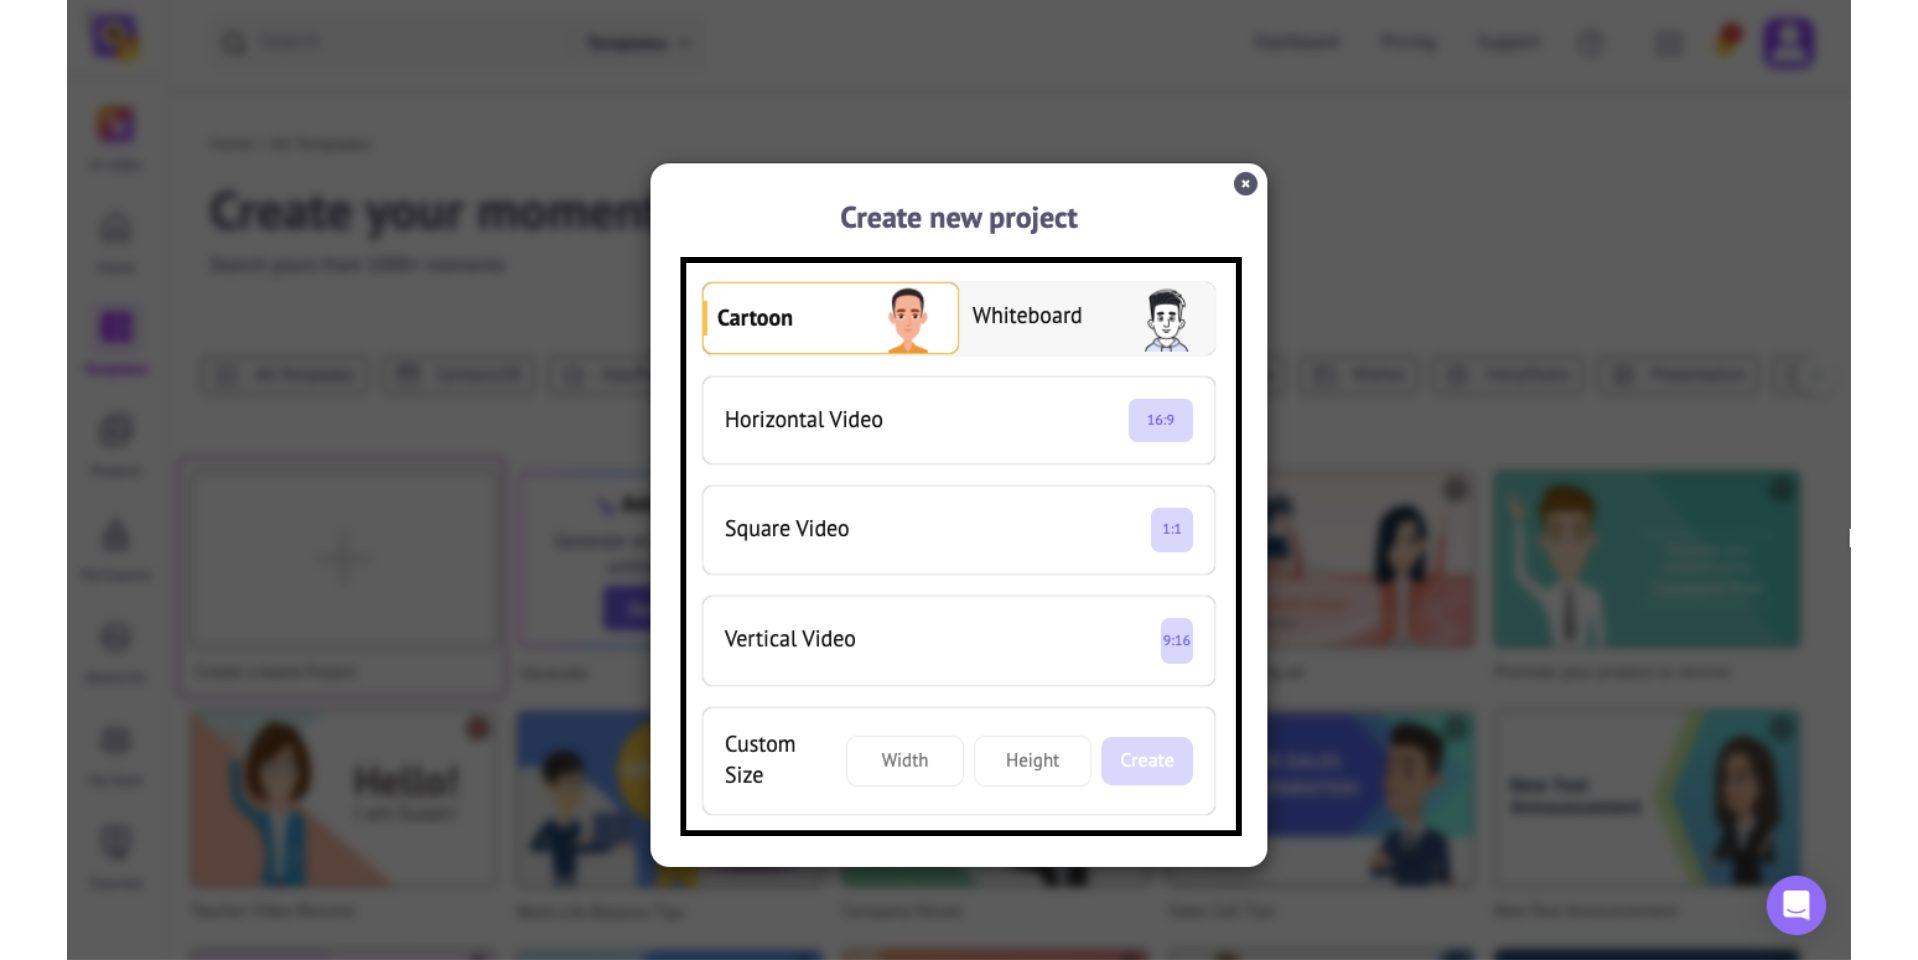
You’ll first see two style options – Cartoon and Whiteboard.
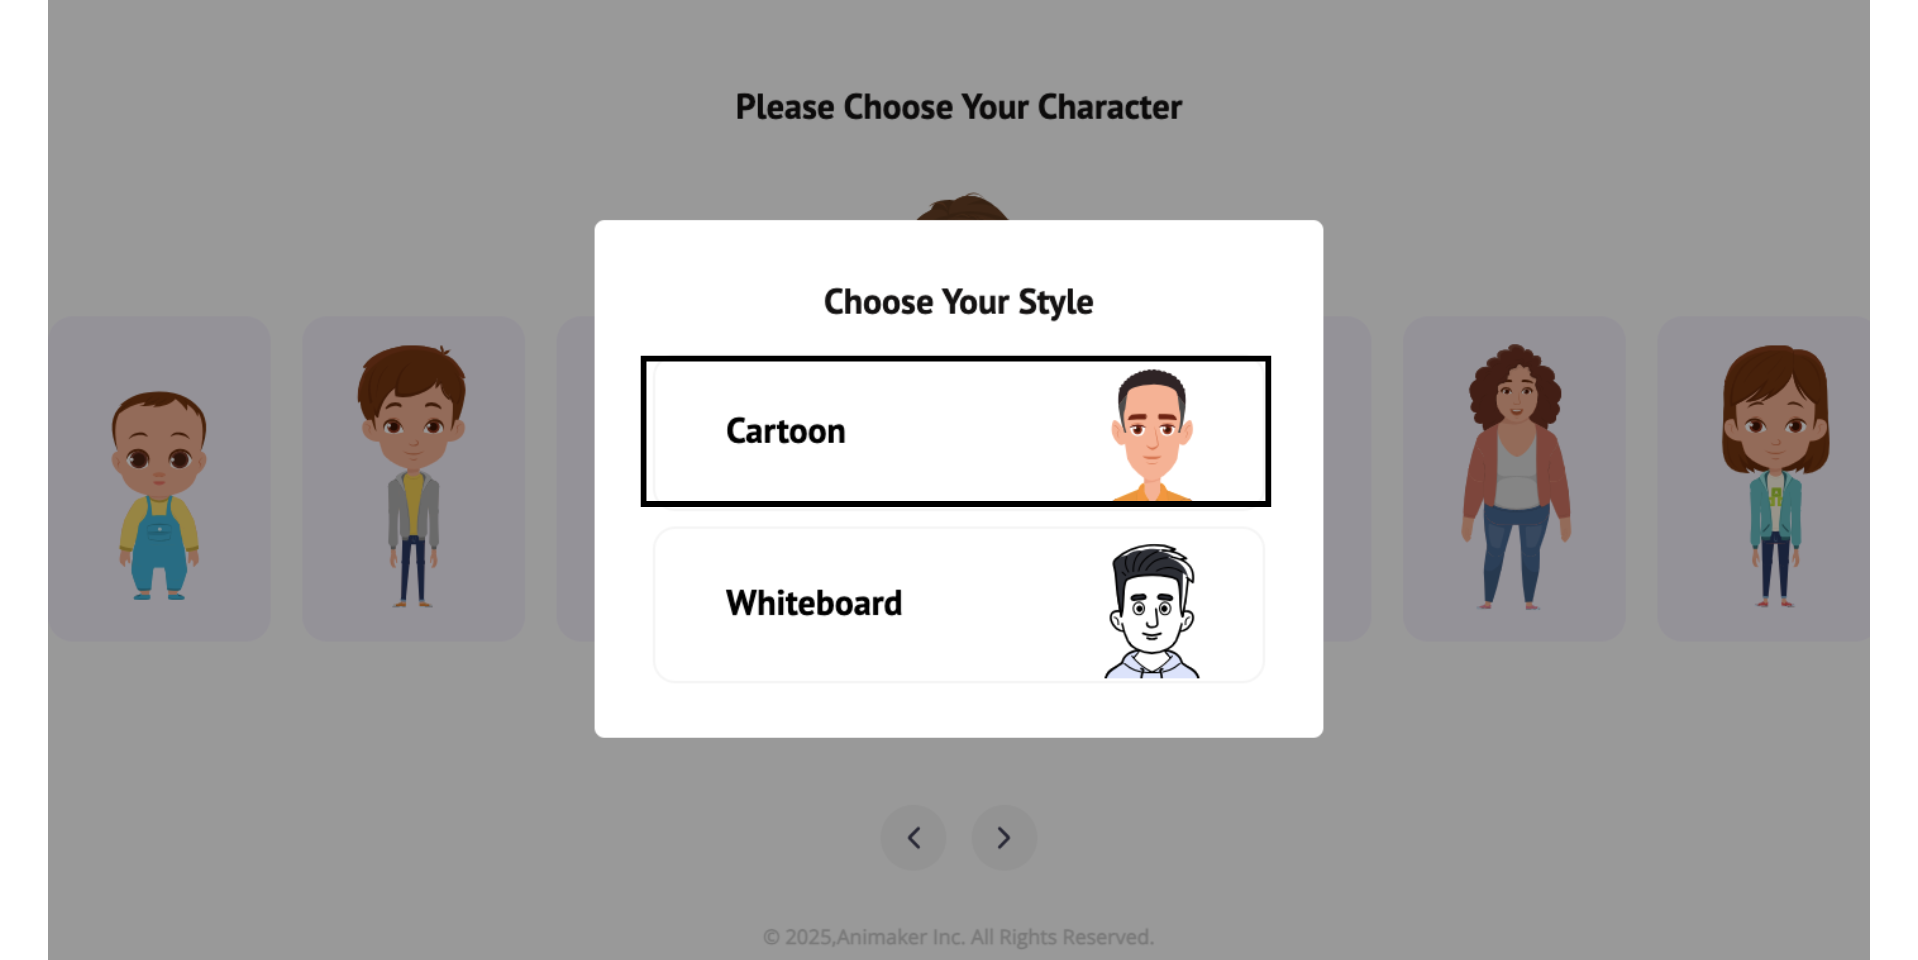
For now, we’ll go with the “Cartoon” style.
When you click on it, it shows the available character types that Animaker offers.
Click on a character type that suits your style, then choose a template that closely matches the Avatar you have in mind.

From there, you’ll enter the Avatar Builder, packed with customization tools to make your character truly unique.
Step 3: Customize your avatar’s look
Now, let’s see make an avatar of your own from this base character.
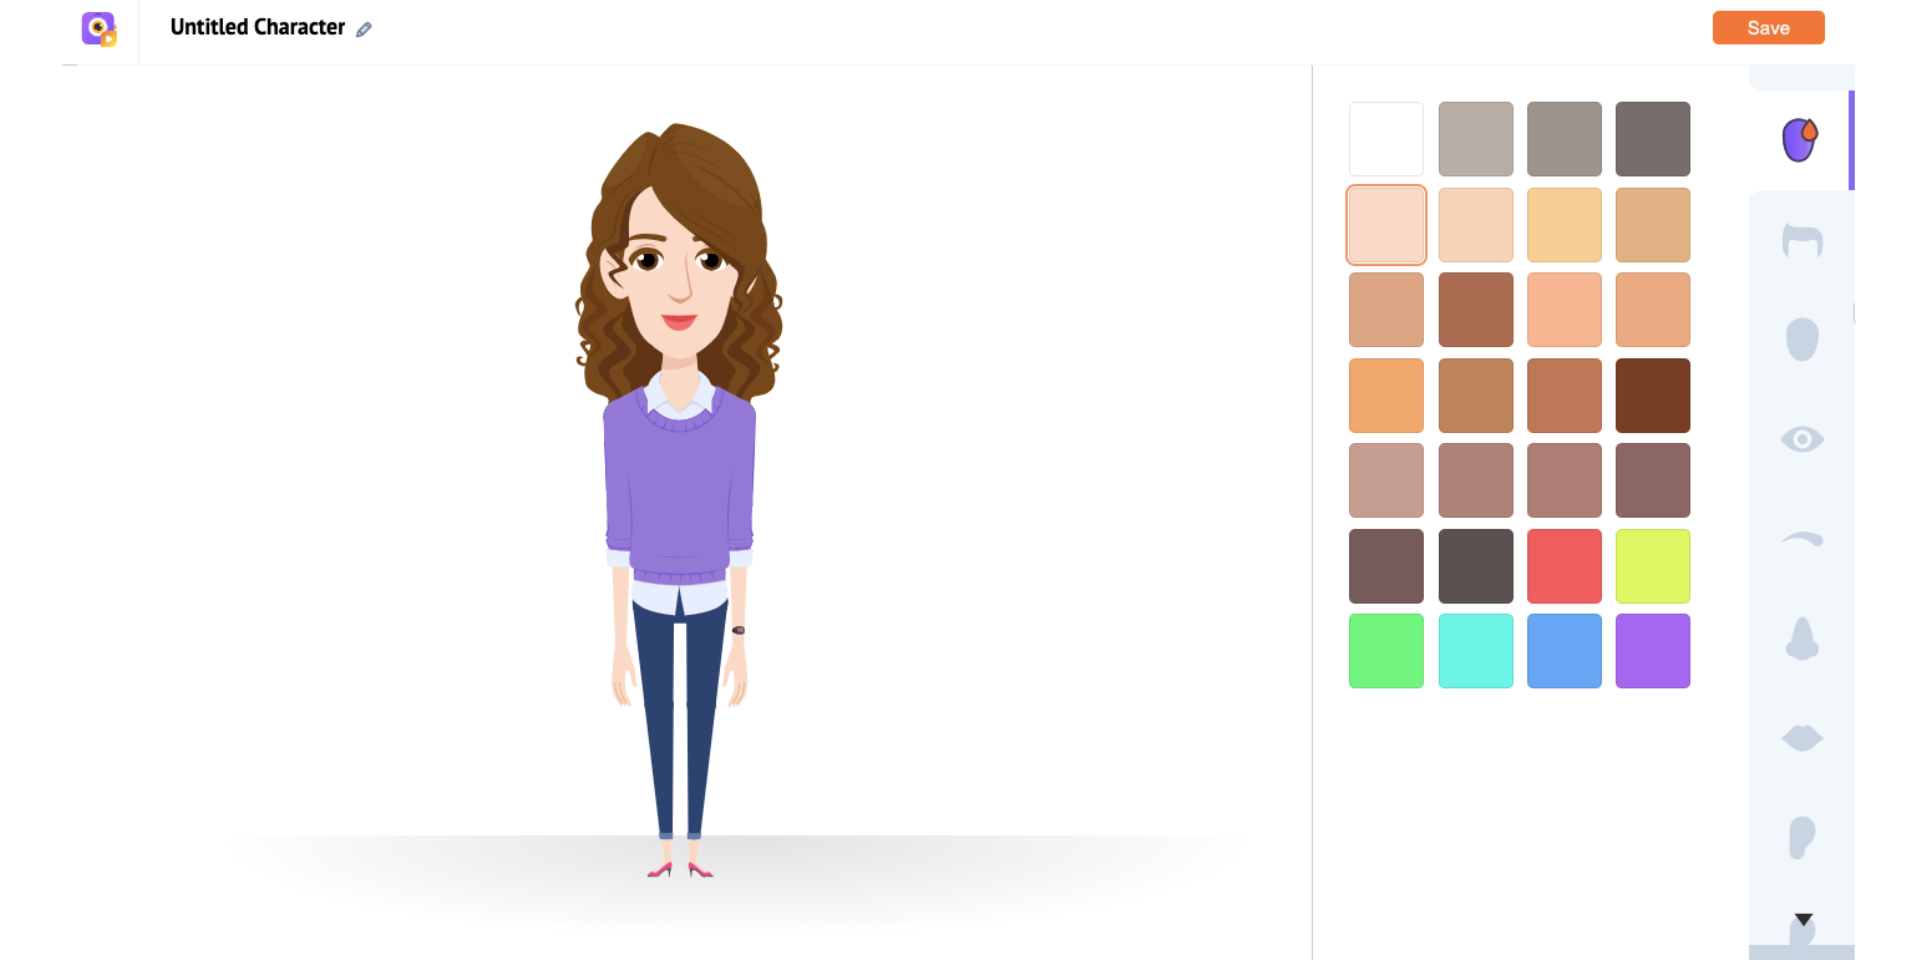
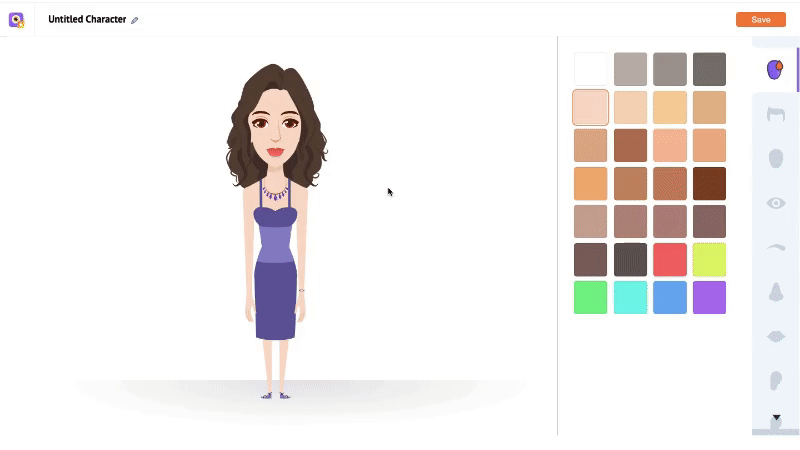
1. Complexion
Let’s start by customizing the skin tone of your character.
You’ll find a wide palette of shades, from natural tones that celebrate diversity to bold and vibrant colors if you’re feeling creative.
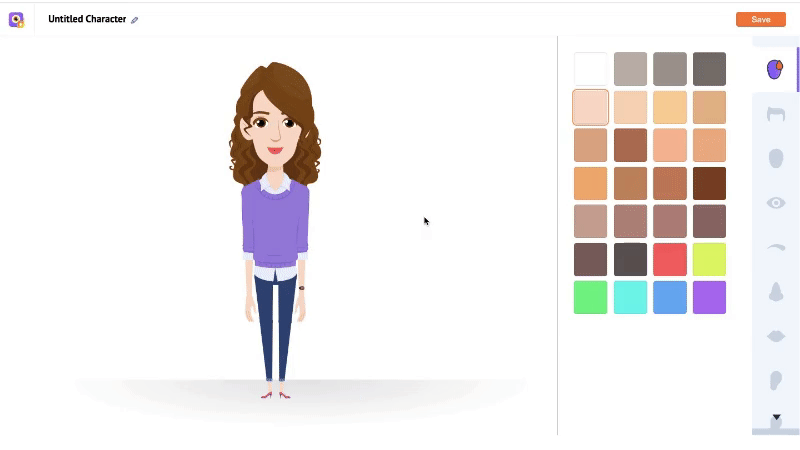
With so many options to explore, you can create a character that looks just like you or design something completely unique.
2. Hairstyle & Hair Color
Next, choose a hairstyle that suits your character. You can browse through different styles, from casual to formal, and pick one that fits the look you’re going for.
You can also change the hair color by clicking the color box above the hairstyle options and selecting a shade that matches your preference.
 3. Facial Features
Then, move on to the facial features - adjust the eyes, nose, mouth, and eyebrows to shape your avatar’s facial features.
Want to give your character a more mature appearance? You’ll also find options to add freckles, wrinkles, smile lines, or frown lines for that touch of age and realism.
As you can see, the level of detail you can add to your avatar’s face is impressive.
4. Outfits
Animaker’s wardrobe offers a wide variety of outfits tailored for both male and female characters.
In this case of female characters, you will find options like professional attire, evening gowns, casual dresses, and even themed costumes.
If you prefer mixing it up, you can head to the Topwear and Bottomwear section to put together a custom outfit with individual tops and bottoms.
And once the outfit’s sorted, let’s complete the look with accessories!
5. Accessories
Explore items like footwear, glasses, caps, and headphones to give your character a distinct personality.
You can even add elegant jewelry or subtle neckwear for a more polished look.
For a stylish or edgy touch, try wristbands, watches, tattoos, or even fun face masks.
Customize and explore more options to fine-tune your avatar.
Step 4: Save & animate your avatar
Once you're happy with your avatar, give it a name using the text box on the left and hit “Save.”
And just like that, your avatar is ready!
After saving, you’ll see a pop-up with the option to “Create a New Project”. Click it to begin animating!
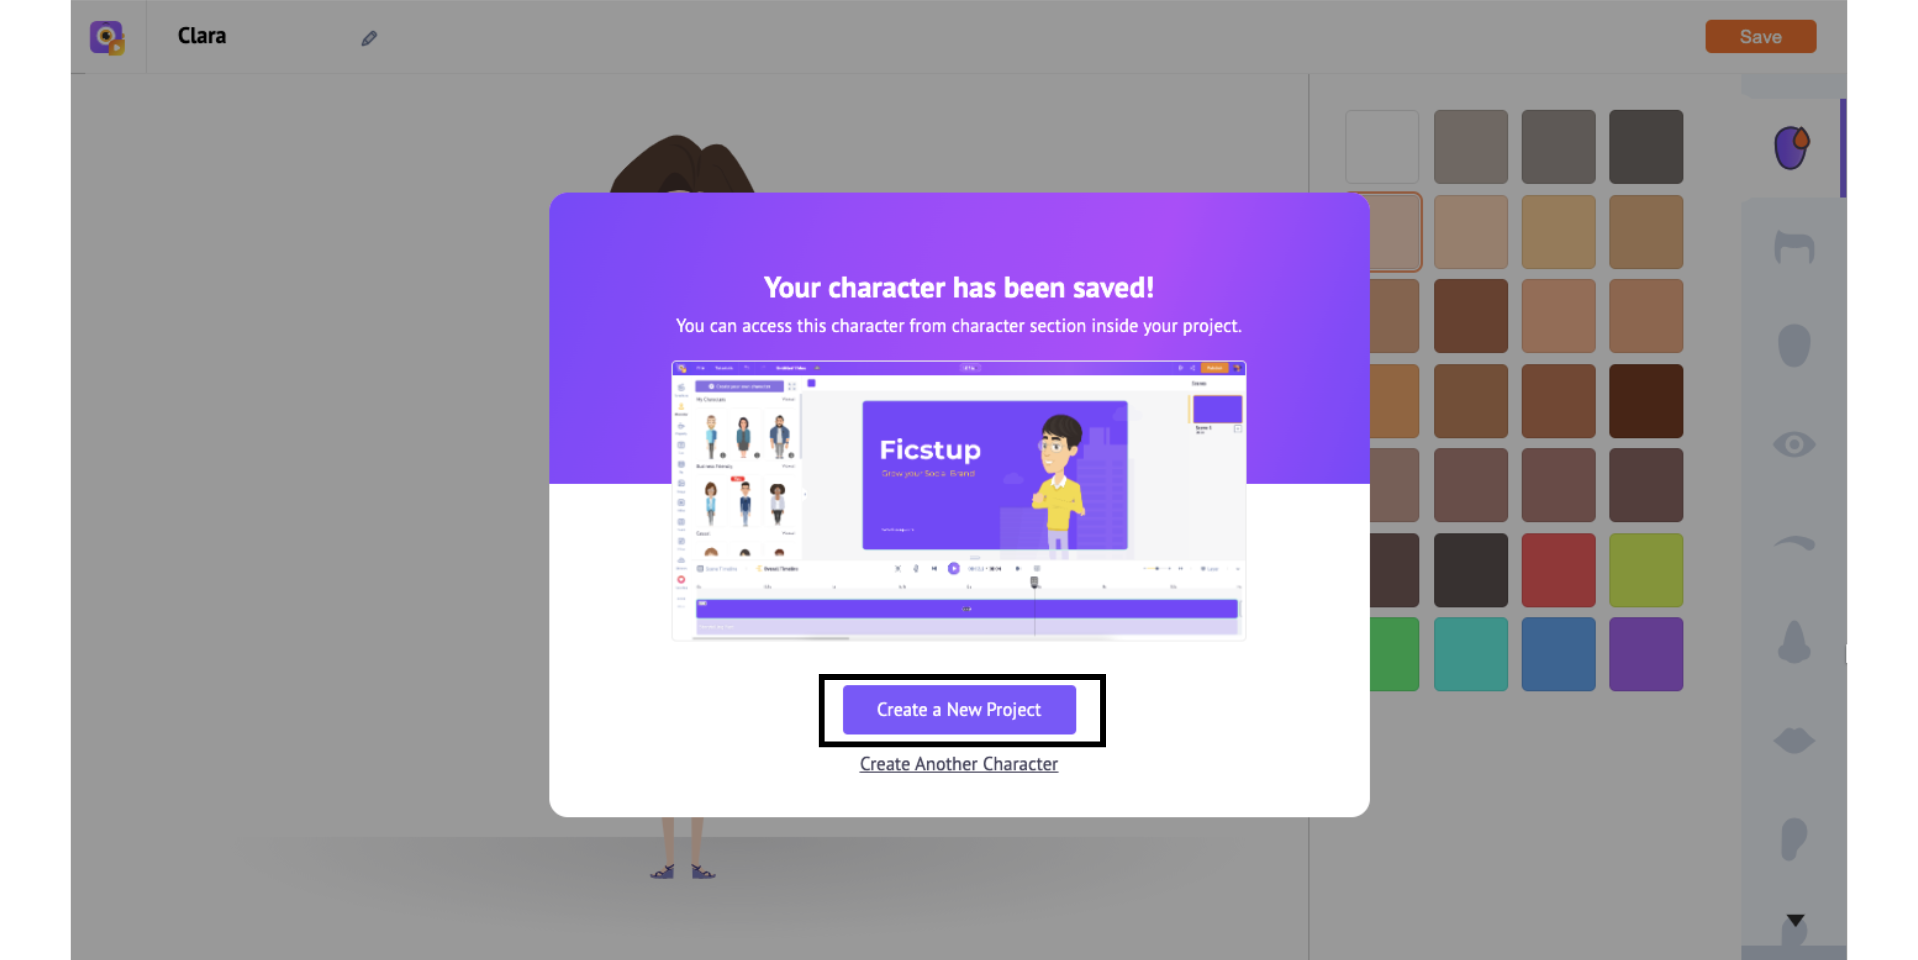
Once you click, you'll be taken to the Moments page with options to add avatars in -
- a Template
- Or a Blank Project
For this walkthrough, let’s go with the Blank Project option.
How to Add an Avatar in a Blank Project?
Select “Create a Blank Project” from the Moments Page.
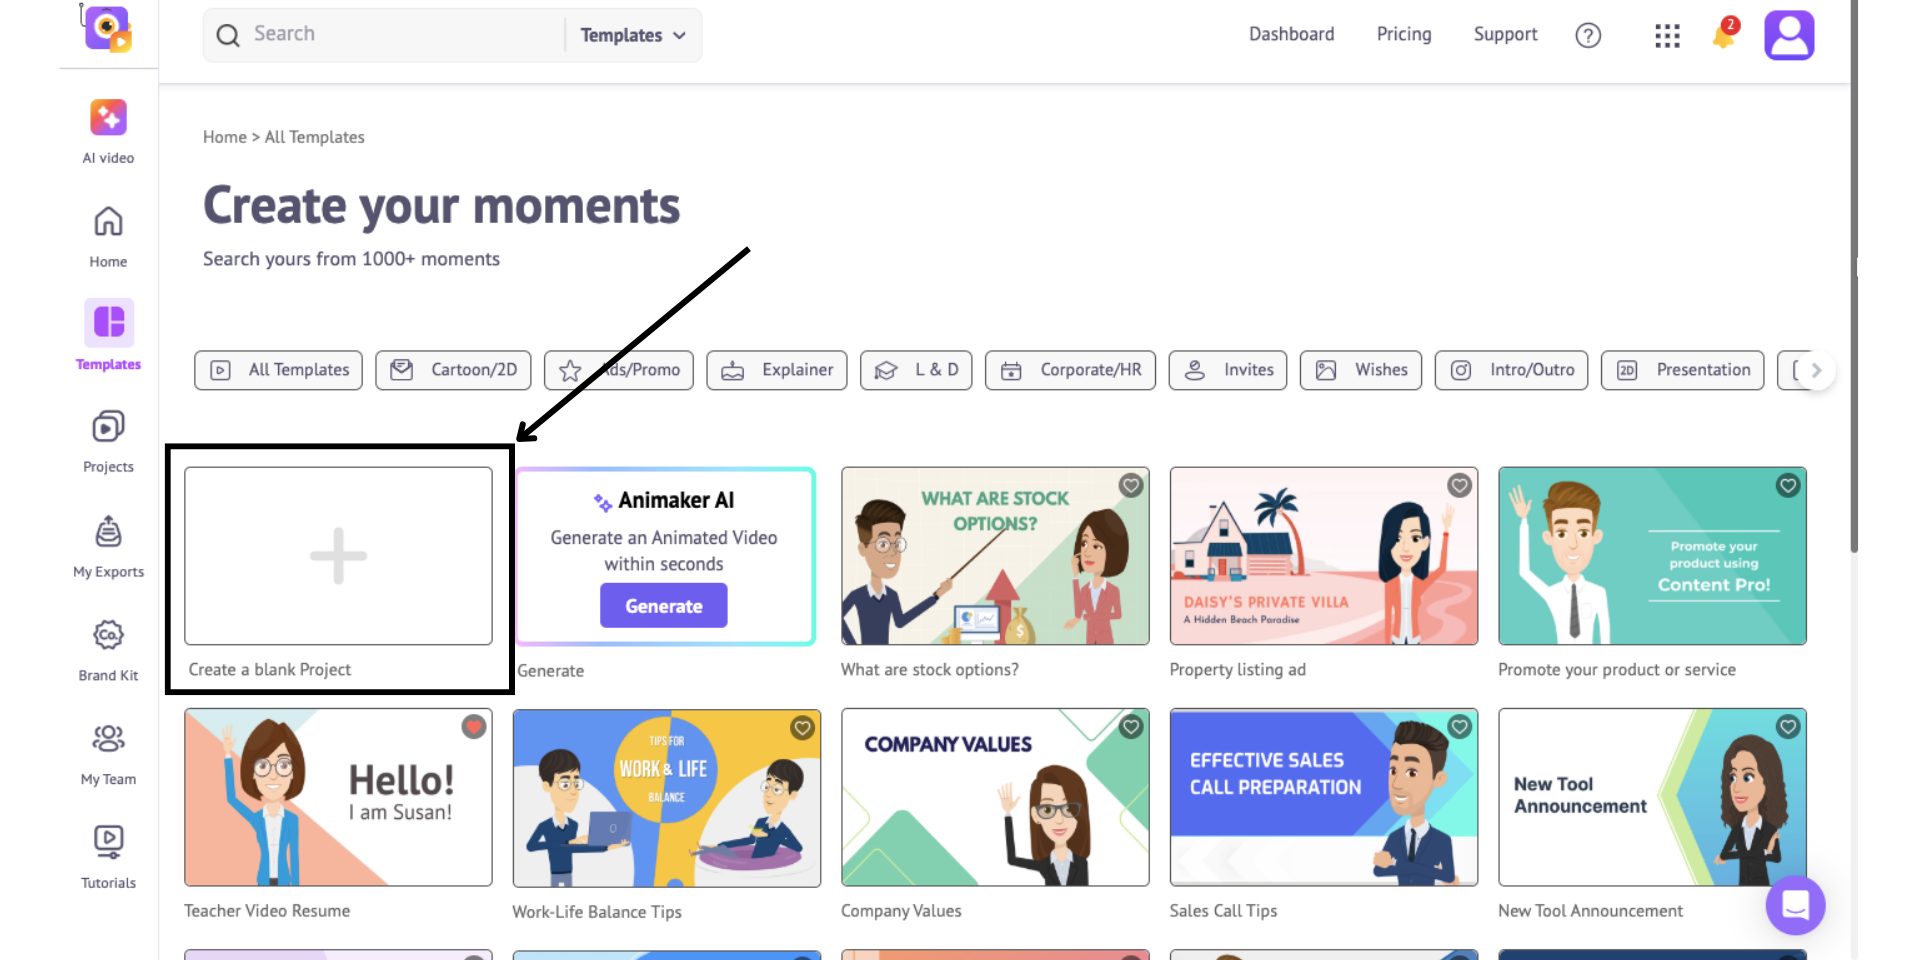
A pop-up will appear asking you to choose a video style and project size.
Select any size that fits your needs, but make sure to pick the Cartoon style since your avatar was created in that style.
Once inside the workspace, you’ll find all the tools you need to start animating.
Your avatar will appear right at the top of the “Character” section.
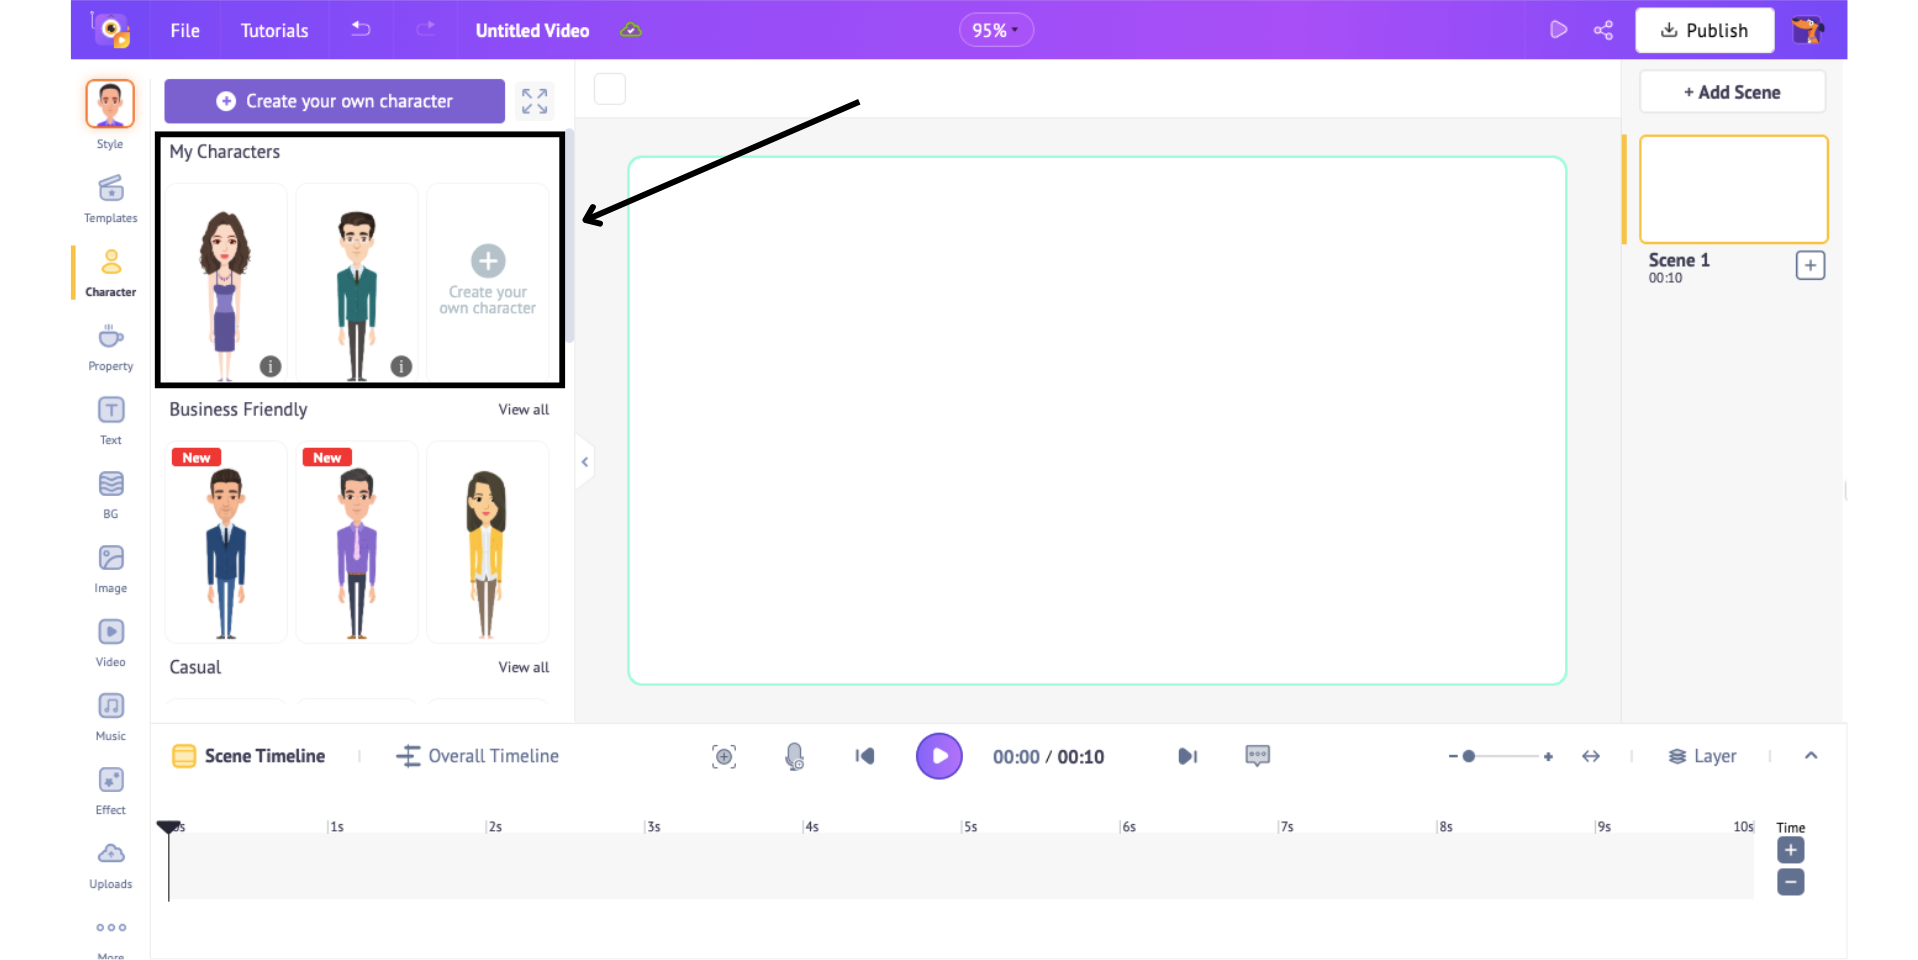
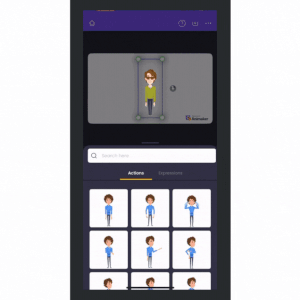
Click on it to add it to the scene. This will open the “Actions Library” on the left, packed with 1000+ predefined animations.
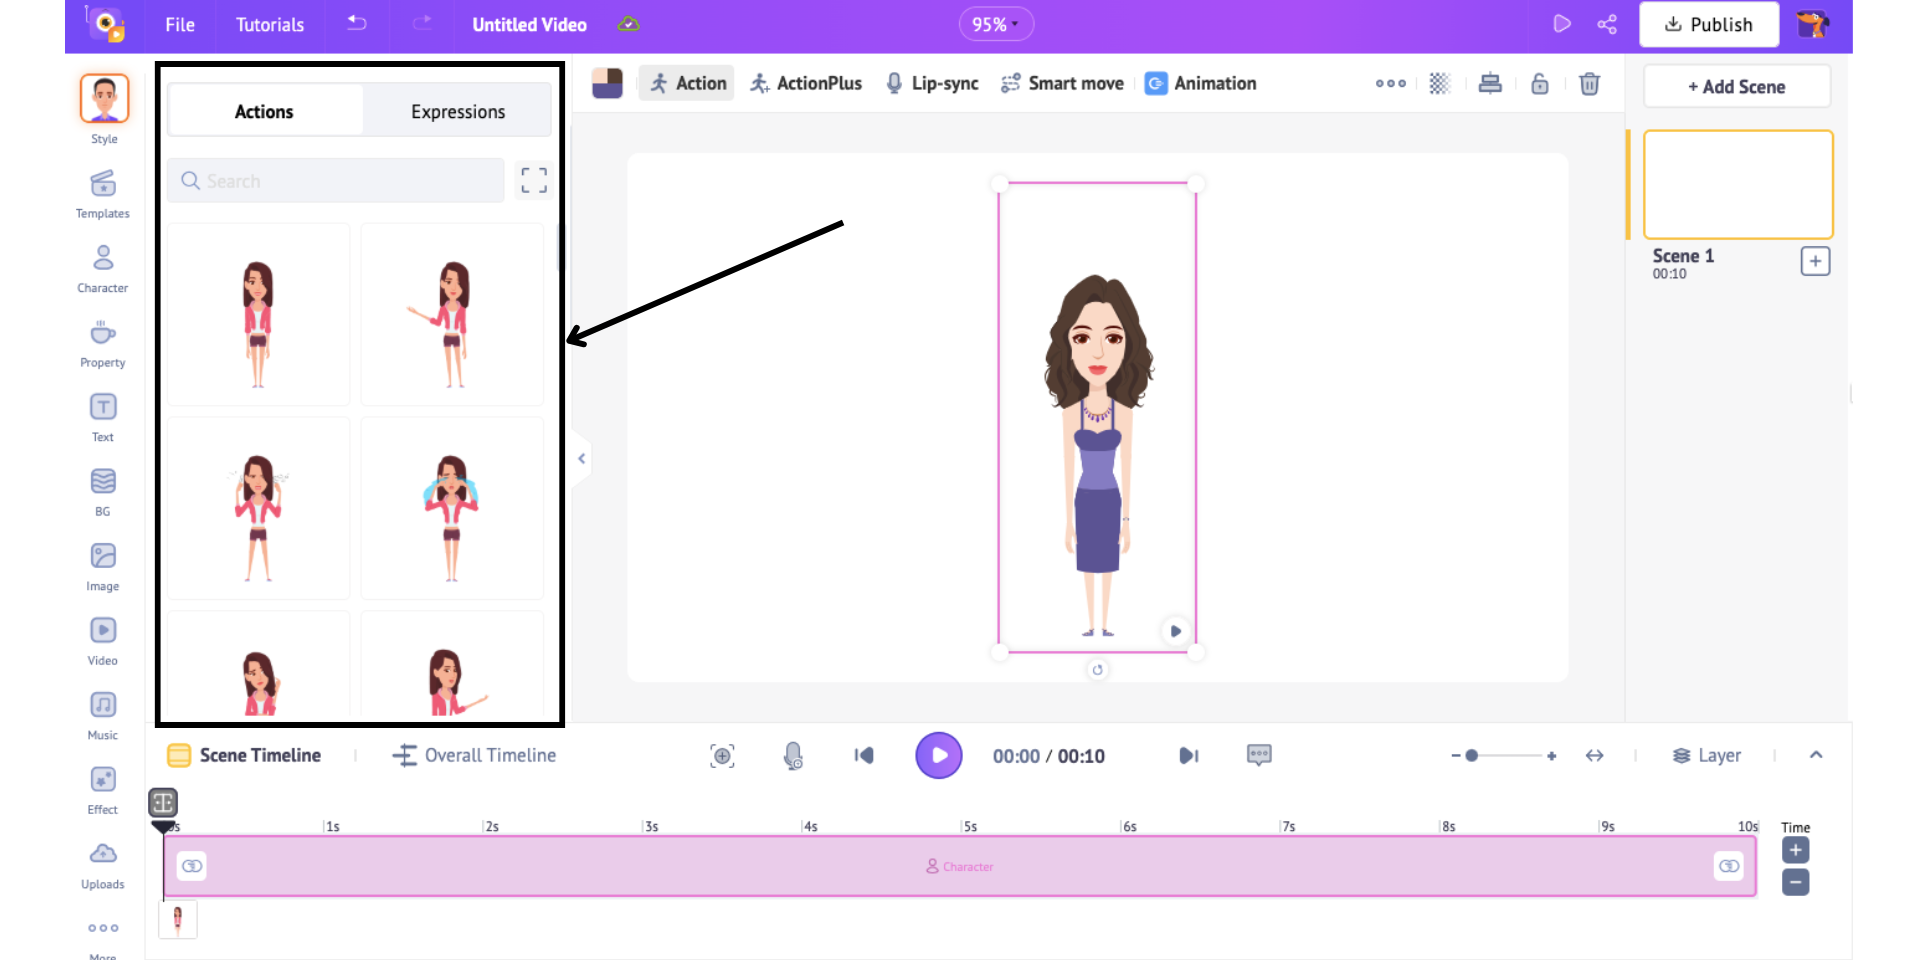
Choose the one you would like to use!
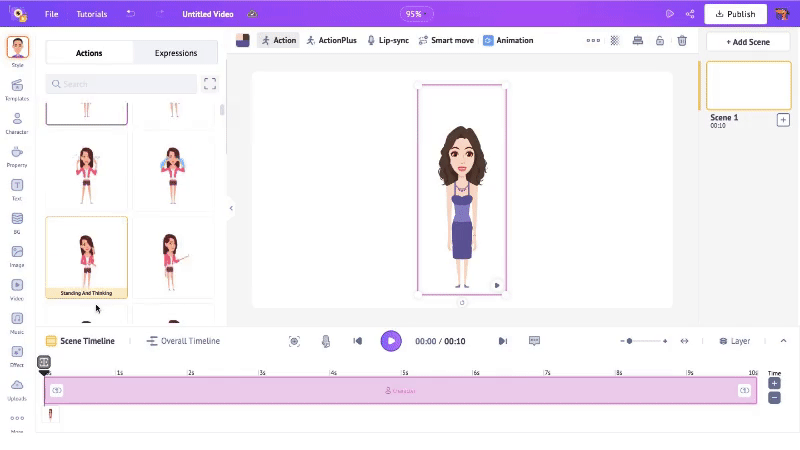
You can also switch to the “Expressions” tab to change how your character feels or reacts.
You can further detail your scene by adding a stunning background from the “Bg” Section and adjusting your character’s size and position to fit the scene just right.
(Note: You can further add props, texts, special effects & more scenes to your project. For a full guide on how to create elearning videos, check out the link provided.)
When you're ready to share your animated avatar, click the “Publish” button.
You can download it as a video, a GIF (for projects under 30 seconds), or share it directly on social media!
***
Now that you’ve explored both the iOS and Web versions, you know exactly how to make an avatar using Animaker, no design skills needed!
Whether you're on your phone or computer, the process is quick, intuitive, and completely customizable.
From tweaking facial features to picking outfits, adding accessories, and even animating your character, you’re in complete control every step of the way.
So, if you were wondering how to make an avatar that truly represents you, now you’ve got the answer.
Go ahead, start creating, and let your imagination shine with your new animated persona. Try it out today on iOS or Web and bring your character to life with Animaker!