How to Overlay Videos: The Ultimate Guide [with 5 Overlay Types]

Shreshtra - August 29, 2023 - Leave your thoughts. 15 min read
In this current era of Tiktok and Reels, video creation isn’t just a way to show off one’s creativity but has become an integral part of modern communication.
Whether it is video memes or fan edits, this generation is having the best time having all the resources to make a great video. While some videos garner millions of views, not all manage to do so.
Have you wondered what separates such remarkable videos from the rest?
Hint: The answer is Overlays.
What is an Overlay, you ask?
An Overlay is when an element is stacked or layered on top of another element. Those dreamy effects and dynamic text often seen in videos are examples of overlays. It is a creative technique that transforms your content from ordinary to extraordinary.
One of the most common examples is the game streams, where the gamer’s webcam footage is placed as an overlay in the corner, making the game its main focus.
There are different types of overlays that enhance the video's visual aesthetics and provide an engaging experience for the audience. Let us look at each of them in detail.
- Video - A video-on-video overlay is when one video is displayed over the other simultaneously. Also known as picture-in-picture, this technique is most popularly used in reaction videos.

- Image - Adding images on top of a video is called an image overlay. An example of image overlay on a video is “story-time videos”, where images are placed on the video when the narrator is describing a story. These pictures help the audience visualize and understand the content better.

- Shape - Shapes overlaid on videos are useful when making catchy intros and engaging transitions. Sometimes, shapes and emojis are also added to cover/censor a portion of the video frame. Shape overlays on video are also used as a watermark with reduced transparency.
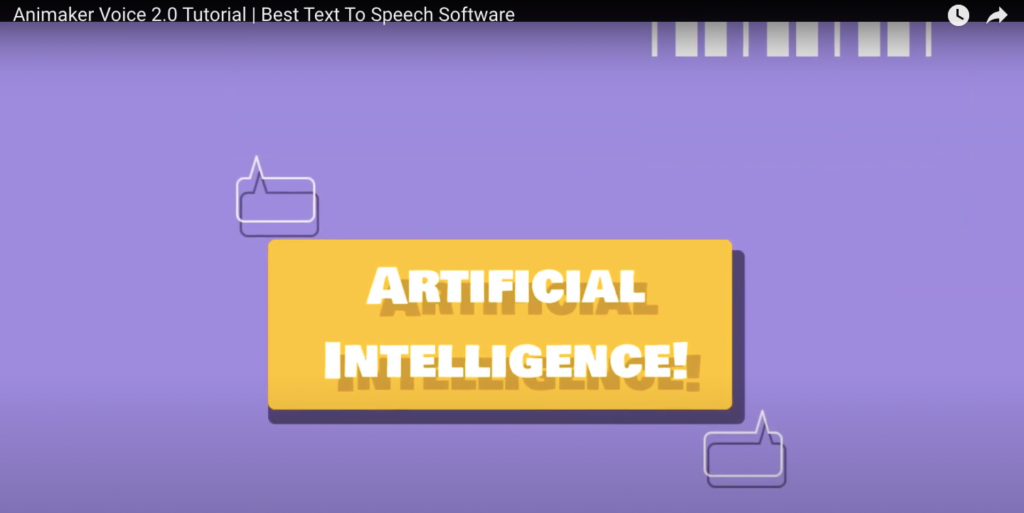
- Text - A text overlay is when you add a text element on top of a video. A popular example of text overlays is subtitles (or) captions. Adding text on top of a video is a sure way to keep the audience engaged even if they watch the video on mute.

- Effects - Overlaying effects are popular in anime and cartoon videos. Overlaying effects on videos tend to help set the video's tone. Whether it is a confetti congratulatory effect or a screen crack effect, video effects strike the audience on another level. In addition, effects can also be used in making fun intro and outro videos.

Now that you got a gist of what overlays are, let’s learn how to overlay videos.
How to overlay videos using Animaker?
Step 1: Create a new project
Step 2: Upload your base video
Step 3: Place the overlay
Step 4: Preview and Download your video
Let’s jump right in and learn how to overlay videos!
Step 1: Create a new project
Log into Animaker if you're an existing user. Sign up if you’re new!
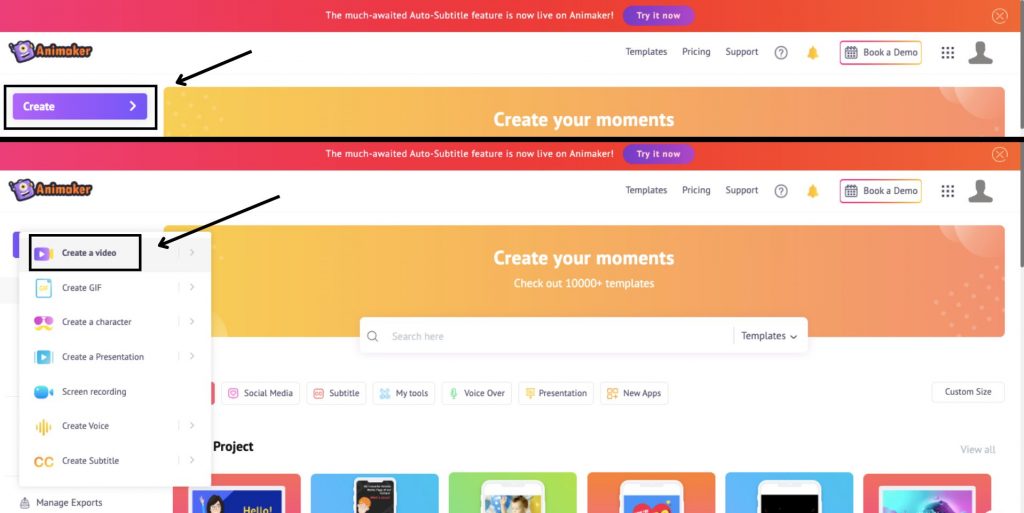
Once you log in, you're in the dashboard. Click on Create > Create a video.
The next step would be to select “Create a blank project” and choose the size for your video.
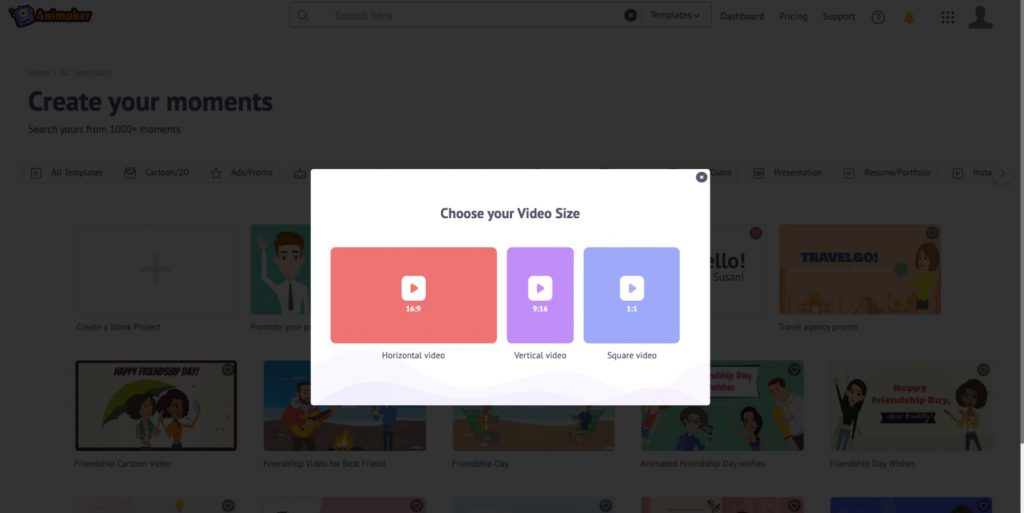
After that, you will be taken to the workspace window where you can create the magic!
Step 2: Upload your base video
This is what Animaker’s web app interface looks like.
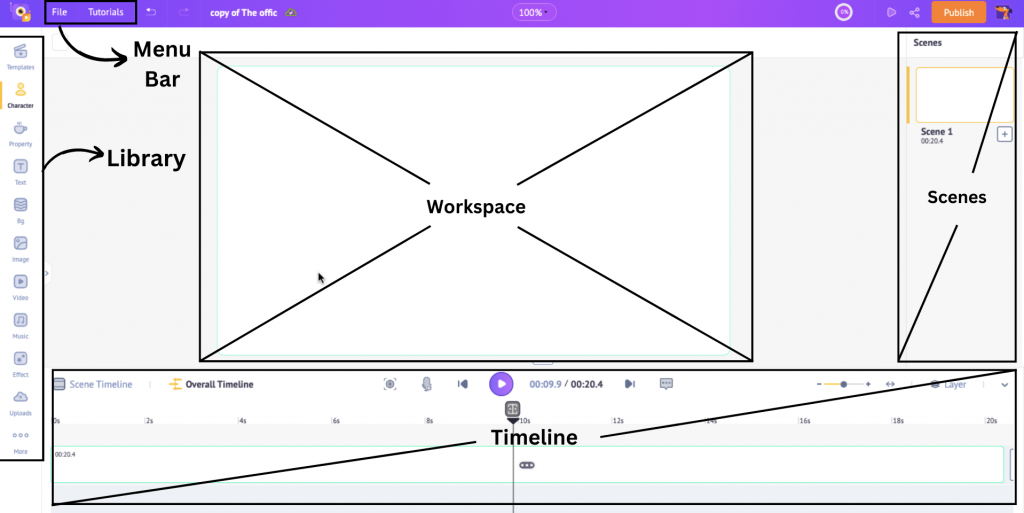
In the center is the workspace, where you can work on your video. The library is located on the left, where you can access thousands of assets, characters, templates, etc.
The scenes section on the right allows you to manage and organize your scenes. Above the workspace is a menu bar that offers additional options and tools, and at the bottom is the timeline to adjust your video and its assets to precision.
Now that we have a good understanding of the various sections of the interface, it’s time to select the base video. You can either upload the base video or choose one from the library.
If you choose to select one from the library, you can do so by clicking on the Video option from the library.
Or, you can upload a video from your local device, too. For this example, I am going to upload a video from my computer. Here’s how.
Click on the Uploads option from the library and then upload the video from one of your local folders.
Once you have uploaded the base video, adjust its duration, if necessary, before proceeding to the next step.
Step 3: Place your overlay
The next step is to place the overlay. Let’s see how to place the different kinds of overlays.
1. How to overlay a Video (or) an Image on a video:
To place the video or image overlay, we will be making use of a feature called Frames. Frames allow you to add media to an already existing element using outlines.
With the Frames feature on Animaker, you can add multiple videos/images on the base video. Let me show you how frames work.
Click on Frames in the Property section of the library. Here, you have many different frame shapes to choose from.
Position the frame wherever you want on the base video. I am going to position the frame on the bottom right corner of my workspace.
The blue section on the timeline represents the frame element. Drag the frame's ends on the overall timeline to set when you want the frame to appear and adjust its duration.
The frame has now been set. We now need to add the overlay video or image to the frame. You can either upload your overlay video or image or choose one from the thousands of stock images/videos available in the library.
Placing a video as an overlay:
If you are a visual learner and prefer watching a video for this section, we have one that explains how to add a video overlay using Animaker.
Let’s select a video from the stock library as an overlay. To do so, click on the Video option from the library. In the search bar, type in the kind of video you want. Choose one that fits your needs best from so many options available, and drag that video towards the existing frame.
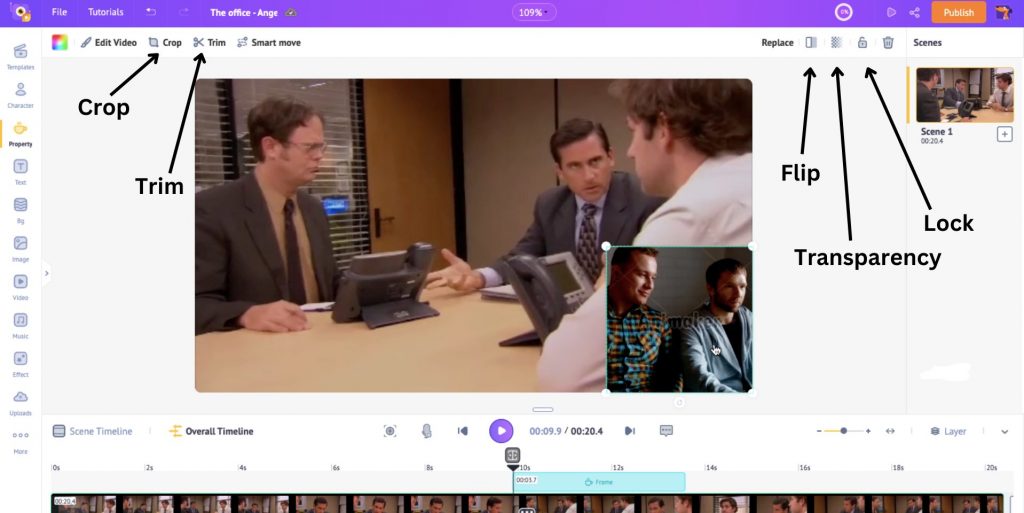
The video will now be placed inside the frame.
You have options above the workspace to flip the video, adjust its transparency, crop the video, and trim its duration.
Moreover, you can also hold the overlay video in place by clicking the lock option. It makes sure that your overlay video stays in its spot.
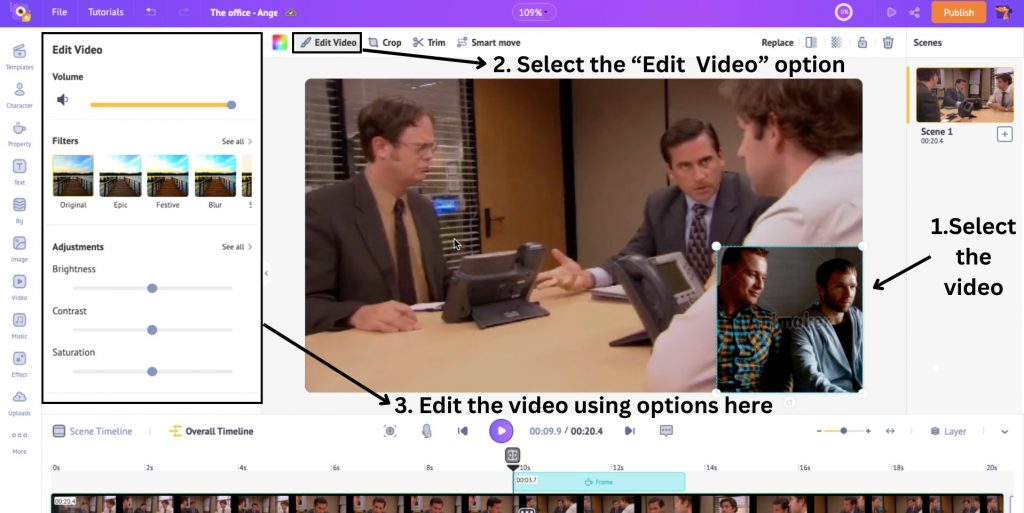
To edit the base or overlay video, you can click on the video, choose the Edit video option, and make use of the options that appear in the edit video window.
Here, you can adjust the video’s volume, apply filters to the video, and adjust its brightness, contrast, and saturation.
To avoid audio overlap between the two videos, you can use the volume option to reduce/mute the audio from one of the videos.
Now that the videos have been added, it’s time to add some oomph to the video by adding animations to the elements. This means you can choose the entry and exit animation for the second video from the multiple animation options available.
To do so, select the overlay video by clicking and dragging the cursor over the entire frame. You will see the Animation option appear above the workspace.
Once you choose the entry and exit animations, you will see the frame element on the timeline has two darker sections added on either end. These sections indicate the duration of the entry and exit animation.
You can adjust the duration of the animation by moving the inner ends of the frame element on the timeline.
That’s how you place a video as an overlay. Simple, right?
Now, let’s learn how to place an image as an overlay.
Placing an image as an overlay:
Click on the Image option from the library. In the search bar, type in the kind of image you want. Choose one that fits your needs best from so many options available, and drag that image towards the existing frame.
The image will now be placed inside the frame.
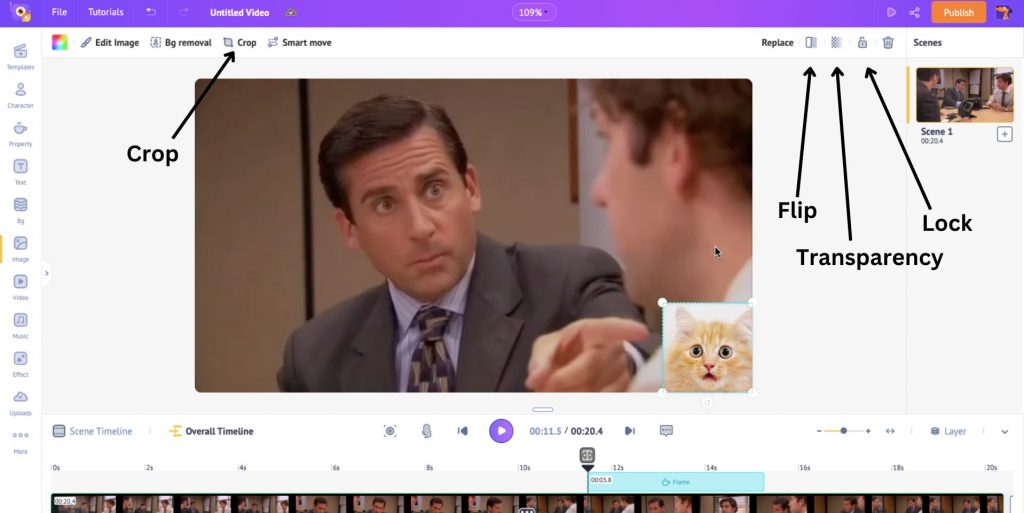
You have options above the workspace to flip the image, adjust its transparency, and crop it inside the frame.
Moreover, you can also hold the image in place by clicking the lock option. It makes sure that your image stays in its spot.
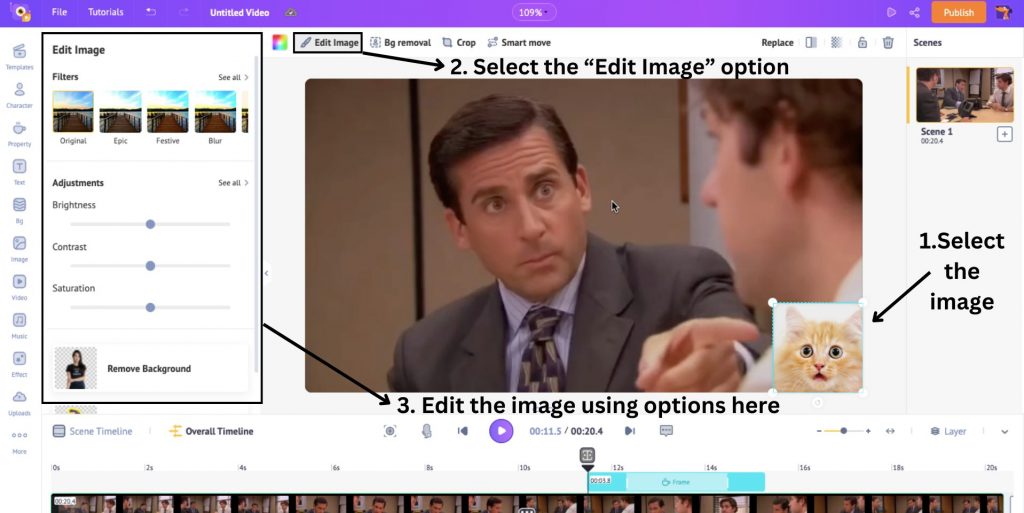
To edit the image overlay, you can click on the image, choose the Edit image option, and make use of the options that appear in the edit image window.
Here, you can apply filters to the image and adjust its brightness, contrast, and saturation.
Now that the image has been added, it’s time to elevate the video by adding animations to the image. This means you can choose the entry and exit animation for the image from multiple animation options available.
To do so, click and drag the cursor over the entire image frame. You will see the Animation option appear above the workspace.
Once you choose the entry and exit animations, you will see that the frame element on the timeline has two darker sections added on either end. These sections indicate the duration of the entry and exit animation.
You can adjust the duration of the animation by moving the inner ends across the frame element on the timeline.
Awesome. Now, you have learned how to put a video/image on a video.
In the next section, we will be learning how to overlay a shape on a video.
2. How to overlay a Shape on a video:
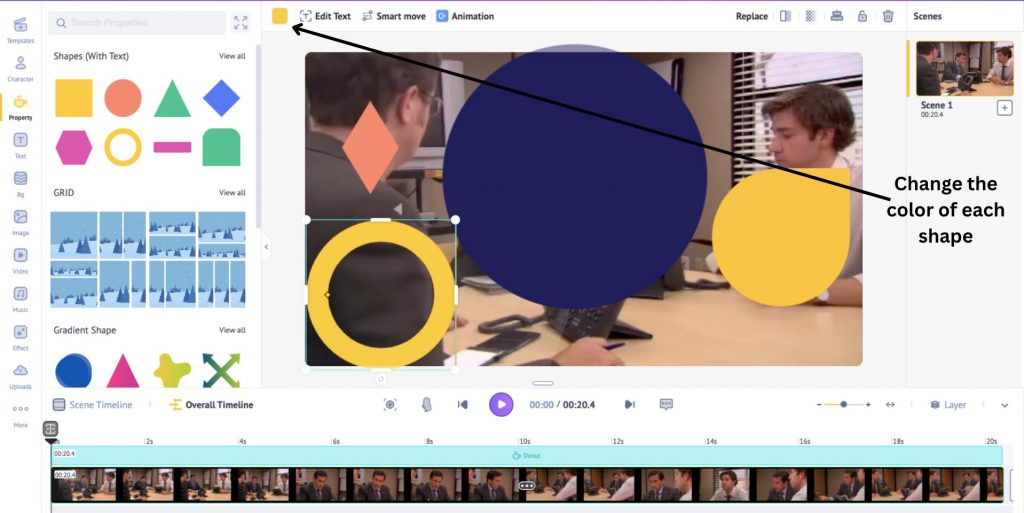
To place a shape as an overlay, open the Property option from the library and click on shapes.
You can choose one or multiple shapes. Let's say, for example, you want to create a watermark using multiple shapes. To do that, pick a bunch of shapes from the library.
Right now, it looks nothing like a watermark. But worry not; we just need to arrange the shapes correctly. Before that, you can change the color of each shape by selecting the shape and clicking on the Change Color option.
Once you have changed the shapes’ colors, it’s time to layer them and create a watermark.
To layer a shape on another, you need to right-click on the shape. You will see the position option, which has four different choices. You can position the shapes on the front or back or move them forward/backward to layer them accordingly.
Here, I am going to place the solid circle as the base and place the other shapes on top of it by choosing the "to front" option.
Arrange the other shapes on the base shape similarly.
It is starting to look good, isn’t it?
Once all the shapes have been arranged, we need to group them as a single unit so that it is easier to move them around as a whole. To do this, click and drag the cursor over the shapes to select them all. Then, click on the group option that is present above the workspace.
Now, the shapes have been grouped and will be considered a single element. Position it where you want on the base video and adjust the transparency.
You can see that the grouped shape on the timeline is purple. Move the purple section across the overall timeline to adjust when you want the group to appear on the video. To adjust the group’s duration, drag the ends of the purple section across the overall timeline.
I want the shape to appear throughout the video. So, I’m going to extend the purple section throughout the timeline.

With the shape in place, let’s add a spark to the video by adding animations to the group. This means you can choose the entry and exit animation for the shapes from multiple animation options available.
To do so, select the group. You will see the Animation option appear above the workspace.
Once you choose the entry and exit animations, you will see the grouped shape on the timeline has two darker sections added on either end. These sections indicate the duration of the entry and exit animation.
You can adjust the duration of the animation by moving the inner ends across the frame element on the timeline.
This animation feature is not limited to just grouped shapes. You can add different animations for the individual shapes added.
But this must be done before grouping all the shapes. Before grouping, select each shape and apply separate animations for each. Once you adjust the durations for each shape’s animation, you can select and group them all.
Who knew it was this easy?!
Now that we have seen how to overlay shapes on a video, let us see how to overlay text on a video.
3. How to overlay Text on a video:
Open the Text option from the library to place a text as an overlay. Here, you will find two types of text boxes - Pre-build and Plain.
Text Pre-builds are those that have a design, text colors, and animations pre-added. You can choose one from the multiple options and simply edit the text in the pre-build.
The best part about text pre-builds is that you don’t have to design the text and its animations from scratch. They are all pre-made for you.
Or, if you want to simply add text, you can choose a plain text box. But for text boxes, you must add animations separately.
Here, I’m going to choose a text pre-build to add text.
Once you position the text box, type in the text.
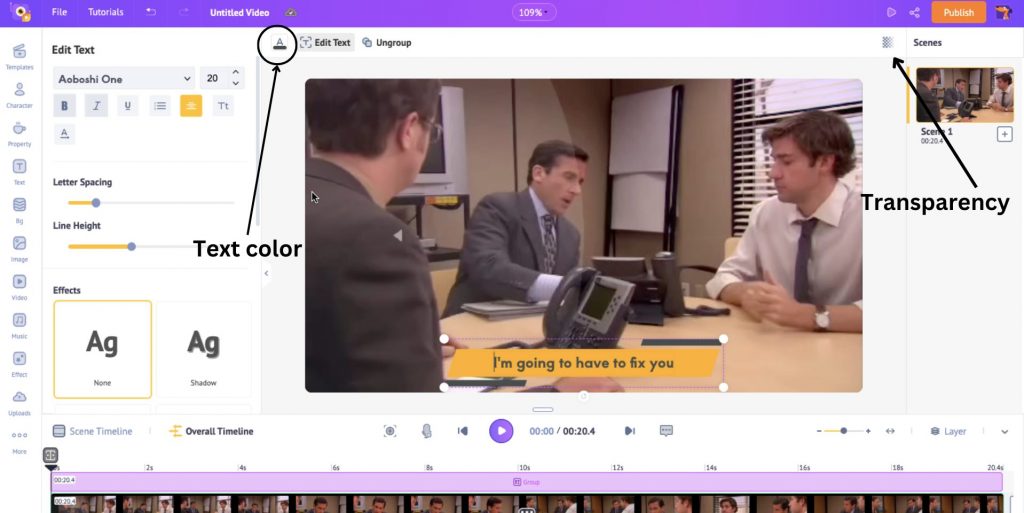
You can edit the text by clicking on the edit text option. Here, you can choose the font, size, and text effects.

You can also change the text color and adjust the transparency.
The purple section on the timeline indicates the text. Hold and move the purple section across the overall timeline to adjust when you want the text to appear on the video.
Now, to adjust how long you want that text to stay on the video, adjust the text's duration by dragging the ends of the purple section across the overall timeline.
You can add multiple text boxes similarly, arranging them on the timeline next to each other.
That was quick, wasn’t it?
Now that we have seen how to add text on a video, let us move on to overlaying effects on a video.
4. How to overlay Effects on a video:
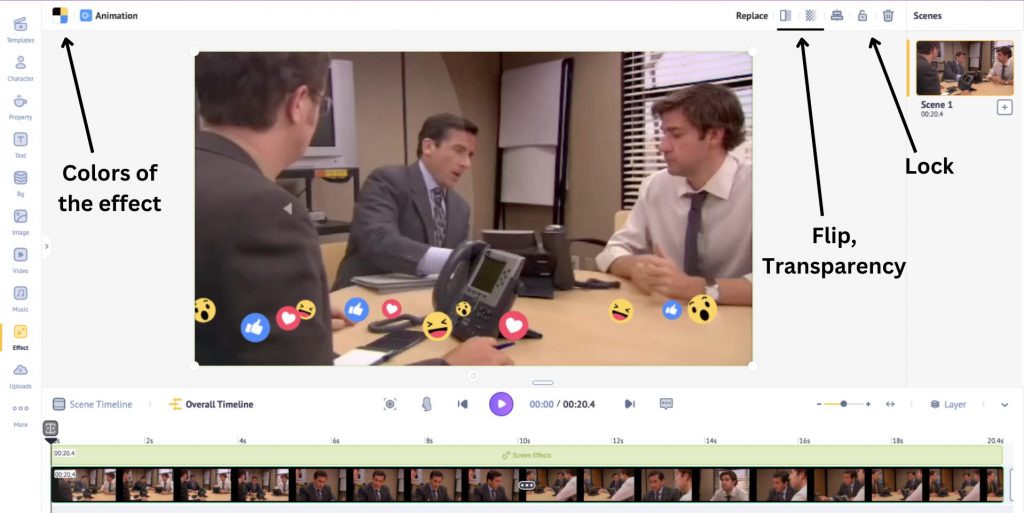
Let us now add effects to the video! To do so, click on the Effects option in the library. Here, you will have multiple effects to choose from.
Once you click on an effect, it automatically gets added to the video. Notice the light green section on the timeline. It indicates the effect.
You can adjust the timing of the effect in the timeline by moving the effect element across the overall timeline. You can also increase or decrease the effect duration by adjusting the ends of the green section.
You have options to change the elements' color and flip it if you want. You also have options to adjust the effect's transparency. Moreover, you can also hold the effect in place by clicking the lock option. It makes sure that your effect stays in its spot.
It is now time to give your video an extra layer of magic by adding animations to the effect. This means you can choose the entry and exit animation for the effect from multiple options. To do so, click on the effect layer. You will see the Animation option appear above the workspace.
Once you choose the entry and exit animations, you can then adjust their animation timeline by moving their ends across the effect timeline.
You can also add multiple effects on the same video.
Awesome, right?!
So far, we have learned how to place different overlays on a video. Let us move on to the next step.
Step 4: Preview and Download your video
Now that the videos have been added, edited, and enhanced, it’s time to see how it looks.
To watch the video you just created, click the preview option. I’m going to preview the video I just created with an effect overlay.
After you feel satisfied with the video you created, all there is left to do is rename your video and download the finished product! You can even publish it directly to your social handles.

Now THAT’s how easy it is to place an overlay on a video using Animaker! Finally, Let us explore why overlays are essential for elevating videos.
Why are Overlays used?
Overlays on videos are used for a variety of reasons. In general, they are used to:
- Make videos more engaging.
- Draw attention to a particular part of the screen.
- Give the audience more context and feeling.
- Improve the quality of the content.
- Make fun intro and outro videos.
- Make cool transitions.
- Make watermarks.
With the correct type of overlays, you can make a video look more lively and complete.
From this article, you will have learned about different types of overlays and how to place them on a video. Armed with this knowledge, you are now equipped to make amazing videos that stand out!
So, what are you waiting for?!
Create amazing videos with overlays using Animaker!