Aksara NKR

Author Archives: Aksara NKR

Aksara is a passionate marketer at Animaker by day and a gamer by night. He believes life is about learning new things everyday. The new things you learn everyday creates you a path to live along.

How to extract subtitles from video quickly! [3 best methods]

Subtitles are truly amazing! They serve as a bridge between languages, allowing people worldwide to connect and enjoy the beauty of storytelling. With subtitles, language barriers are no longer a hindrance; everyone can fully immerse themselves in the experience. It’s incredible how something so simple can profoundly impact our ability to communicate and understand each other.

Apart from helping the audience understand the video, subtitles also help improve your video’s visibility online. Subtitles provide textual content that search engines can index and potentially helps in improving the visibility and discoverability of your video on various platforms.

Subtitles can be a highly valuable way for learners, international audiences, and aid those with hearing impairments as they provide a way to associate spoken words in a written form.

If you want to target a multilingual audience, then extracting subtitles from a video and translating them into multiple languages makes the content more accessible and promotes cultural exchange.

Now, you’d wonder, how do I extract subtitles from a video?

Well, when it comes to extracting subtitles from a video, there are many ways to do it. But before that, you need to know the basics of subtitles. Subtitles are of two kinds –

Softcoded subtitles – Softcoded subtitles, also known as external subtitles, are separate files that accompany a video but are not permanently embedded in a video. This kind of softcoded subtitles comes in various formats, such as SRT, VTT, etc. Softcoded subtitles offer a lot of flexibility as the viewer can turn on or off during the playback.

Hardcoded subtitles – Hardcoded subtitles are permanently embedded on the video. This means the text is always visible when you play the video and cannot be turned off or changed. Since the subtitles are embedded in the video, they can be shared across the platforms without sharing a separate subtitle file, and is accessible to all regardless of the media player used and the support.

Now that you know the basics of subtitles and how they work, let’s check out how to extract subtitles from a video.

How to extract subtitles from a video?

This section will explain three different ways to extract subtitles from a video and some additional tips for each way.

Let’s check them out!

1. How to extract subtitles from YouTube?
2. How to extract subtitles from VLC?
3. How to extract subtitles using an Online Subtitle Extractor?

How to extract subtitles from YouTube?

YouTube allows its users to access subtitles in different ways. You can view them as CC (Closed Captions) on the video player or view the transcript. In this section, we will show you how to extract subtitles from YouTube.

1. To extract the subtitles from YouTube, go to the YouTube video you want to extract the subtitles from.

2. Click on the three dots icon below the video.

3. Select the option “Show Transcript.”

4. Select the text and copy it.

5. Paste the text into a notepad or editor.

Wasn’t that simpler than you thought? Up next, let’s check out how to extract subtitles using VLC, one of the most used media players across computers.

How to extract subtitles from VLC?

VLC is a free and open-source media player that can be used to play a wide variety of video and audio files. In this section, we will check out how to extract subtitles on VLC and media player.

1. To extract subtitles on VLC, open the video on the VLC media player.

2. Once the video is open on VLC, go to View > VLsub.

3. In this tab, you can download the subtitles by searching for a relevant tag. For this example, we just have to search for the song title in the search box.

4. If the searched term is available, then you can simply download by clicking on ‘Download selection.’

5. The downloaded subtitle will be saved to the same location as your video.

Next, let’s check out how to use an online tool to extract subtitles.

How to extract subtitles using an Online Subtitle Extractor?

There are many online tools to extract subtitles. For this article, we will be using Animaker Subtitles to extract subtitles. Animaker is an online video creation platform that allows users to create animated videos, presentations, and lots more.

Among its suite of tools, Animaker Subtitles is the tool we will be using to extract subtitles. Animaker subtitles is an AI-powered subtitle generator that allows you to transcript your videos easily & efficiently. Things you thought would take several hours can be achieved in minutes using Animaker subtitles.

Get started by creating an account on Animaker subtitles or login to Animaker.

Once you have logged in, click on Create > Subtitle.

Here, you can upload your own video, choose one from your previously exported videos, or from the massive collection of stock videos in the Animaker library.

Up next, click on the Auto Subtitle button. This will use AI to generate subtitles automatically and add the timestamps for your video.

This is how the generated captions look.

You can edit them it in case of any changes, or go ahead and download the subtitles by clicking on Download > Download subtitles.

As simple as that; you can extract subtitles using Animaker Subtitles easily!

Animaker subtitles can help you extract the subtitles from your videos quickly, and the best part is that it can understand 20+ major languages. With this tool, you can eliminate the need for manual transcription of subtitles and get it done in minutes.

If you want to learn more about subtitles, how to create them, and how they work, check out our other articles –

How to make subtitles – The Ultimate Guide
Closed captions vs Subtitles: Do you know the difference?
10 Best Fonts For Subtitles To Make Your Videos Stand Out

Hope this article, we have explored several methods to extract subtitles from a video. Hope this article helps you. If you have any doubts, feel free to drop them in the comments below.

How to translate subtitles in less than a minute! [3 different methods]

Subtitles are a great way to make your videos accessible & reach a wider audience. This is because they help improve your videos’ overall quality by providing additional context and clarity.

If you’re looking to translate your subtitle into multiple languages, you can do it manually or use online subtitle translator tools that will help you automatically translate your subtitles into 100+ languages.

This article will show you how to translate subtitles easily and efficiently.

1. How to translate subtitles with an online tool?
2. How to translate subtitles on YouTube?
3. How to translate subtitles on Notepad?

1. How to translate subtitles with an online tool? [Animaker Subtitles]

There are a number of benefits ways for translating subtitles. There are a number of benefits to using an online subtitle tool like Animaker Subtitles. Firstly, it’s a quick and easy way to get your subtitles translated into 100+ languages and reach a wider audience. And secondly, with AI & Machine learning, Animaker Subtitles provide accurate and fast translations for your subtitles.

So, let’s see how you can translate subtitles using Animaker Subtitles. But before that, learn how to make subtitles by reading this article – How to make subtitles (The Ultimate Guide)

Now that you know how to create your own subtitles using Animaker Subtitles, let’s check out how to translate subtitles.

With Animaker Subtitles, just like how there are different ways to make subtitles, there are a few different ways to translate subtitles as well. Let’s check out how –

Automatic Translation – With the power of AI & Machine learning, adding & translating subtitles for your video is pretty simple. You can save a lot of time by avoiding the manual translation of subtitles. Let’s see how you can automatically translate subtitles using Animaker Subtitles.

– To get started, create a new subtitle file from the dashboard by clicking on Create> Create Subtitles.

– Upload your video from your computer. Alternatively, you can also select a video from my exports or select one from your library.

– Once you have uploaded the video, click on “Auto Subtitle” option

– Once you click on the “Auto Subtitle” button, it will take some time to add transcription & time stamps for your video automatically. Once done, go ahead and click on “Translations” on the left menu.

– In the subtitles tab, click on “Add a new language”

– In this tab, there’ll be three options –

A. Translate from Original – If you select this option, you can simply select the language you want to translate. In a few seconds, you will have your subtitles translated automatically and ready to use.

B. Translate the subtitles manually – If you want to get the maximum accuracy, then this option is right for you. So let’s see how to translate subtitles using Animaker Subtitles manually.

C. Upload Translated subtitles – If you have a file with pre-translated subtitles, you can use this option to upload your subtitles and easily add subtitles to your video.

As simple as that, you have your translated subtitles now. All you have to do is download your subtitles by clicking on Download > Download subtitle file.

Alternatively, if you want the video with subtitles hardcoded in it, you can simply select the first option, Download Video.

Now, let’s see how we can translate subtitles on YouTube.

2. How to translate subtitles on YouTube?

When it comes to translating subtitles on YouTube, there are two ways you can do it –

(1) From the Youtube Player (As a Viewer) – If you are watching a video, you can do this using the YouTube Player itself. Follow the below steps to translate subtitles on YouTube.

– First, find a video you want to translate subtitles.

– Select the option “Subtitles/CC.”

– In the YouTube player, find the gear icon in the bottom right corner and click on subtitles.

– Click on the “Auto-Translate” tab.

– Select the language you want to translate to.

Next up, let’s check out how you can make use of YouTube’s feature to translate subtitles manually.

(2) From the Youtube Studio (As a YouTube Channel Manager) – This is a process that involves a few steps but allows you to have more control over the translation. To manually translate the subtitles on YouTube, follow the below steps.

– Head over to YouTube Studio and select the video you want to add translated subtitles for.

– In the video menu, on the left side, click on the “Subtitles” option.

– In the Subtitles option screen, click on “Add language” and select the language you want to add subtitles.

– Once you click on “add” and select the language, you will see the different options to add subtitles. Click on the language you want to translate to. Once you select, you will see a screen like this –

Here, you can choose the desired option and add the translated subtitle to your YouTube video.

i) Upload file: If you have a subtitle file in hand, you can simply upload the file here or any other translated subtitle file from your computer.

ii) Type manually: If you want accuracy, then you can manually add timestamps for your subtitle and add the text accordingly.

iii) Auto Translate: To use the Auto-Translate feature, you must add subtitles to your video in your native language. Once you have done this, the auto-translation will be available, and will use YouTube’s speech recognition feature to create subtitles for your video in other languages automatically.

In this next section, we will be checking out how to translate subtitles on Notepad using Google Translate.

3. How to translate subtitles on Notepad? [using Google Translate]

Creating and translating subtitles using Notepad is super simple and straightforward.

Subtitles are nothing but formatted text, so while creating a subtitle, you just have to follow the format as in the image below, then you are good to go.

If you want to learn more about how to create subtitles manually using Notepad, check out this article, and you’ll be set – How to create an SRT file? [The easy way]

Now that you know the basics of creating a subtitle using Notepad, translating subtitles manually is pretty simple. You can make use of free services like Google Translate or DeepL translator to get the translated version of the subtitles. Then, create a new subtitle file & transcript it according to the time stamps.

Here’s how a translated version of a subtitle would look –

Wasn’t that pretty simple? Translating subtitles has its own advantages that enhance the viewing experience and broaden the reach of your content. Here are some reasons why translating subtitles is beneficial –

Global Accessibility – Subtitles make your content more accessible to people who speak other languages, which can help you reach a wider audience and ensure that your message is conveyed accurately.

Increased Viewership – Studies have shown that videos with subtitles are being watched more than the ones without subtitles. This is because subtitles make it easier for people to understand the content, even if the viewer’s native language is different.

Cultural Understanding – Subtitles can help people from different cultural backgrounds understand each other better. This is mainly because they provide a literal translation of the dialogue and the context, and help to understand the overall message better.

Improved Search Engine ranking – Apart from the perspective of the audience, subtitles can also help your videos rank better on search engine results pages (SERPs). This is mainly because Google and other search engines index the text of subtitles, which in turn can help your videos rank higher for the relevant search terms.

In conclusion, translating subtitles can be a great way to reach an audience, increase your viewership and improve your search engine ranking. By following the tips in the article, you can ensure that your translated subtitles are effective and help you reach your target audience.

Animaker Subtitles makes it easy for all subtitle tasks, from Subtitle creation, Subtitle Animation, Subtitle Translation, and many more.

If you have any questions, feel free to drop them in the comments section below.

Diversity Animation: Everything you need to know

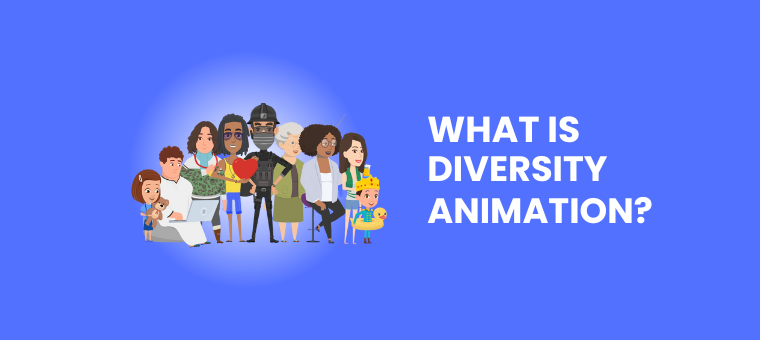
We all love watching animated movies, don’t we?!

Thanks to nostalgia or quirky effects, animation as a medium has the power to captivate audiences of all ages and backgrounds!

So watching cartoons and animated movies has always been great!

But in how many movies have you noticed diverse characters? Not many, right?

Here are some facts, in this 78-year history of Walt Disney Animation studios, only 11 out of 54 movies featured non-white main characters. That’s a bit too low, right?

Ever since the beginning, Animation studios have fallen short in representing a diverse range of characters and perspectives. In fact, the majority of these diverse representations emerged only in the past two decades, starting with Pocahontas in the year 1995.

This illustrates the need for greater efforts to ensure diversity and inclusion in the animated film industry as a whole.

The issue of diversity and inclusion in the world of animation has not been adequately addressed, both in the films themselves and in the workplace.

But before we dive into more details, let’s understand the meaning of diversity animation.

What is Diversity Animation?

Diversity animation refers to the inclusion and representation of various voices, identities, cultures, and perspectives in the world of animation.

The process of diversifying the animation starts by featuring characters, storylines, and themes that reflect the diversity of our world. By including different races, ethnicities, genders, sexual orientations, disabilities, and socioeconomic backgrounds, diverse animation aims to break stereotypes.

It helps create a more realistic and inclusive portrayal of the human experience, from fostering empathy to understanding the connection among audiences.

Why is Diversity important in Animation?

Animation as a medium has the power to captivate audiences of all ages and backgrounds.
Diversity in animation promotes representation, cultural understanding, empowerment, and inclusion in an equitable society. By featuring diverse characters and inclusive storytelling, animation opens doors to a world of diverse communities.

Moreover, embracing diversity in animation meets market demand, which means it attracts broader audiences and boosts profitability too. So, prioritizing diversity and inclusion creates a significant impact in the world of animation.

How can Animaker help its users to create Diverse Animations?

Before we check out how Animaker can help users to create diverse animations, let’s check out what Animaker is. It is a cloud-based video making software that helps users create professional-quality videos without needing any prior animation experience. It offers a wide range of features that can be used to create diverse animations like –

Body types – Animaker allows users to create characters with a wide variety of body types, including thin, average, and plus-size characters. This helps create more inclusive animations that represent a wider range of people.

Age groups – Animaker allows to create characters of different ages, right from children to adults, allowing users to create animations that are appropriate for a variety of audiences.

Different skin colors & Outfits – Animaker allows you to create characters with a variety of skin tones. From light to dark skin tones, this app helps to create animations that are more representative of the world’s population.

Moreover, Animaker’s character customization allows users to dress their characters in a variety of outfits. Be it formal, casual, or region-wise outfit, Animaker has it all. This helps to create animations that are appropriate for different situations and regions.

Animal characters – Animaker takes it a step further and allows users to add animal characters to their videos with over 20+ options to choose from.

These are a few of the ways that Animaker contributes to the world of diverse animations. By using these features, users can create animations that are more inclusive and representative of the world around them.

That’s not it. Here are some additional tips for creating diverse animations –

Think about your audience – While creating an animation, think about the audience you’re trying to reach, their interests, and their needs. Create your animations accordingly.

For example, If you are creating an animation for children, you have to ensure that the children’s characters are diverse in terms of their body type, skin color, and culture.

Be Intentional – When it comes to diversity in animation, don’t just add it for the sake of it. Make sure the diversity in your animation is intentional and meaningful.

For example, if you are creating an animation about a diverse group working together, you should add more details, like how their perspectives, inputs, and experiences help them to achieve their goal, rather than just a scene of diverse people working together.

Be Respectful – The most important point while creating a diverse animation is that you have to be respectful of the people you are representing. Avoid stereotyping and negative portrayals as much as possible.

This would avoid making generalizations about people based on their race, ethnicity, gender, and other identity factors. By following these tips, you can create animations that are visually appealing and meaningful.

If you’re looking to create your own animated character, we have just the thing for you. Try Animaker’s Avatar Maker! You can create 1 Billion+ unique character combinations. It’s fun & it’s free!

Additionally, here’s an in-depth article that shows the users How to create Animated Characters? [In five simple steps].

You can also watch this video tutorial –

We hope this article helped you understand diverse animation and how to create one. If you have any questions, feel free to drop them in the comments below.

15 Creative Social Media Video Ideas to make your brand stand out

Social Media has transformed into an essential part for businesses and individuals to showcase their products, services, and talents. With so many options available to use for promotion, social media videos have proven to be highly effective.

Videos possess a unique ability to captivate and engage the audience in a unique way, thereby making it an ideal medium for communication. Moreover, it is evident that video content is rapidly becoming a dominant form of media on social media platforms.

In this article, we will see 15 creative social media video ideas to turn your thoughts into inspiring content.

1. Behind the scene videos
2. Customer testimonials
3. Product demos
4. How to videos
5. Influencer collaborations
6. Q&A Sessions
7. User-generated content
8. Animated explainer videos
9. Event Coverage
10. Day in the Life videos
11. Live videos
12. Giveaways and contests
13. Announcements and Reveals
14. Breaking news & trending topics
15. Funny meme & humorous content

1. Behind the scene videos

BTS or Behind the Scene videos gives the audience a perspective of what’s going on behind the scenes of their favorite brands. These types of videos can be highly engaging and entertaining for audiences as they offer an exclusive view into the behind-the-scenes of how the brands work, a funny video about their employees, or anything at all.

Overall, BTS videos offer a personal and exclusive touch. This method can be a powerful and engaging way to build a community and build brand loyalty.


Here’s an example of a Behind the Scenes video. While we all have seen the creative side of Starbucks, we don’t know what’s going on behind the scene. As you can see from the above example, the BTS of these campaigns gives a third-eye perspective of what’s going on behind the lens. This kind of social media video can give your audience a refreshing insight into the creative process of Starbucks. While this video has been created by a Video Creator, he shares his own version of creating a short commercial for Starbucks.

2. Customer testimonials

Customer testimonials are an effective way to showcase customer satisfaction with your product or service. It is technically user-generated content where the customers share their feedback and opinion about your product or brand, which is converted into an easily accessible form, i.e., video.

Having customer testimonials can help build trust and credibility with potential customers who are considering purchasing your product or service. Usually, when a general non-customer audience sees positive reviews from other customers, it allows them to feel more confident about choosing your brand.

This example of Zoom sharing their customer testimonial of a user about how seamless it is to integrate Slack with Zoom gives the user a real-life use case, emphasizing the ease of use and efficiency it provides the users.

3. Product demos

Product demos are a type of video content that showcases a product’s features, benefits, and overall usefulness. These videos can help customers to understand how a product works and how it can solve problems.

By incorporating product demos into their social media content, businesses can create attention-grabbing and engaging content that will retain customers viewing the content for longer periods of time. Moreover, it can also lead to a better understanding of the product for potential customers and can increase the probability of converting them into a customer.

Product demos can help build trust among potential customers and boost engagement with a brand’s social media profile.

When it comes to product demos, it can show the true potential of a product, app, or software. By combining a product demo with a tutorial, Apple showcases the true potential of the iPhone’s camera capabilities and captures the attention of iPhone users by teaching them how to shoot with light and shadow. This not only acts as an informative video for iPhone users, but it will give ideas to the general audience on how the device can be used, its potential, etc..

Here’s another great example of a product demo:

4. How to videos

How-to videos are nothing but video content that demonstrates step-by-step instructions to do something. These videos are both engaging and informative to watch as it provides value to your audience and helps them to solve a problem or learn a new skill.

Overall, how-to videos can be a great way to create engaging social media content that provides value to your audience and helps to establish your brand as an authoritative source of information.


View this post on Instagram


A post shared by Animaker (@animakerhq)

In this example, Animaker, a cloud-based video editing platform, takes its audience on a journey by providing various tips and tricks around video editing. By doing this, they don’t constrain their audience limited to Animaker users but target a general audience as well. By offering tutorials, guides, and insightful content, Animaker position itself as an authority in the field of video editing.

Here’s another how-to video from Animaker that teaches users how to place videos inside different objects –

5. Influencer collaborations

Influencer collaborations are getting popular these days, where brands and social media influencers collaborate. These collaborations are designed to promote the brand’s product or service through the influencer’s social media accounts as sponsored posts.

This type of collaboration helps the brands to reach new heights and audiences as they spread the word, increase brand awareness, and more. When an influencer posts about a particular product, brand, or service, their followers are more likely to trust and engage with the content than if the brand had posted directly.


View this post on Instagram


A post shared by Virat Kohli (@virat.kohli)

In this example, a popular cricket athlete, Virat Kohli, collaborated with a brand called Herbalife to promote their nutrition & other products. With Instagram’s collaborate feature, the entirety of Virat Kohli’s followers (245 Million) will be able to see this post tagged along with Herbalife’s Instagram profile. This allows the brand to get immense exposure and helps to reach the right target audience.

6. Q&A Sessions

Q&A Sessions are a great and interactive way to engage with your customers on social media platforms, mainly to address queries asked by the audience about the product or service. This not only helps to cover the general topics but also helps to address and cover the FAQs by the audience in a public manner.

This kind of social media video helps the general public to know more about the product and spread awareness about it. This form of content is also popular on Instagram, where they have a dedicated Q&A sticker that allows viewers & followers to ask questions.

When it comes to any popular Content Creators or companies, there will be many questions around them. It can be anything right from general questions like their age, their background, etc. to deep questions that revolve around what they do. Usually, these questions are covered by other content creators other than the Brand, or YouTuber to leverage the search volume. But when the brand or the content creator themself answer these questions via a Q&A video, it becomes popular and trending among the follower base. In this example, one of the most subscribed YouTuber PewDiePie answers the questions from his audience with his wife, Marzia. Pewdiepie is a popular Swedish YouTuber who is known for his funny gaming content and react videos.

7. User-generated content

User-generated content is the simplest way to create content. User-generated content is nothing but the content generated by your loyal followers & customers about your brand, product, or service.

If your product is popular among the general users, there will be organically generated content that you can reuse by giving them credits. Additionally, you can also conduct events & giveaways to users who create content around your brand to win a special prize. This helps & motivates your users to create such videos.

In this example of user-generated content, over the promotion of the brand, this YouTuber showcases the unique feature of the keyboard and creates hype among their audience. This not only promotes the brand indirectly but also has an opportunity to become viral. From the brand’s perspective, this content can be repurposed and published on their social media channels for promotional purposes.

8. Animated explainer videos

For beginners, an explainer video is a type of content that is designed to communicate a brand’s product or service. Not just that, it can also be used to walk through a particular process and how to do it or even use it for training purposes.

These kinds of Animated explainer videos can be good for marketing purposes as they are preferred by general audiences. This is mainly because most of the people who are consuming video content prefer to watch short & animated videos over long texts.

Apple showcased its path toward carbon neutrality using a simplistic yet stunning Animated Explainer Video. It showcases their commitment to sustainability and builds a positive brand reputation. This helps to attract consumers who are environmentally conscious and promotes their ethical practices.

9. Event Coverage

Event coverage is a highly effective marketing technique that ensures consistent exposure across various social media platforms and channels. With the clippings from an event, you can build hype, tease the prizes they can win, and lots more. Additionally, you can treat the non-attendees with content exclusive to registered users and share them via social media live streams, private YouTube videos, etc. Creating a FOMO (Fear of Missing Out) is one of the most powerful techniques in marketing. Sharing these events on social media can create a FOMO for your audience.


View this post on Instagram


A post shared by Animaker (@animakerhq)

In this video, Animaker showcases its participation in Devlearn, a place to explore what’s new and what’s next in the world of learning and technology. This kind of post creates hype among its users with the anticipation of new and improved features from Animaker and with event coverage like this, it not only creates a sense of curiosity but also a commitment to evolving and delivering a better experience to its users. Additionally, this marketing strategy also attracts new users who may be enticed by upcoming features and improvements.

10. Day in the Life videos

A Day in the Life is a popular social media video category that allows the audience to get a different perspective on the brand rather than just being bombarded with promotional posts. In terms of marketing, the day-in-the-life videos also help to build trust with your audience with transparency, eventually helping to grow more followers and eventually convert them to potential leads.

This video showcases the day in the life of a Japanese Game Planner. These kinds of videos are considered to be extremely popular due to their authenticity and relatability. They also act as a medium to provide behind the scene, tell compelling stories and educate them. Showcasing such real experiences helps create a trustworthy relationship with the audience.

11. Live videos

At present, almost all social media platforms allow users to live stream, and this comes in handy for sharing any sort of content or information in real time. This helps to cover all aspects right, from the marketing perspective to building a personal relationship with your audience.


View this post on Instagram


A post shared by Insta360 (@insta360)

In this Instagram live, Insta360 collaborated with a Pro BMX athlete to showcase their lineup of action cameras. This not only acts as a way of promoting the product but also provides a real-life demonstration of the camera’s capabilities. Additionally, the collaboration with a pro-BMX athlete adds credibility and expertise to the live video. This interactive live session helps to engage with the audience by allowing them to ask questions and gain firsthand insights into the product’s performance.

12. Giveaways and contests

Everyone loves to win free stuff or a goodie. That’s why giveaways and contests are one of the easiest ways to gain engagement and leads for your brand. With this single event, you can create multiple posts around the giveaway, like a teaser post, reveal post, announcement post, etc., and gain more traction to your profile.

In this giveaway video hosted by @Thatsdax, all you have to do to win the giveaway is like a specific video, comment on it, and share it. This method of marketing is an effective way to increase the brand or the channel’s visibility and engagement. Hosting a giveaway and setting specific requirements such as liking and commenting encourages the audience to interact and participate. Moreover, this method leverages the power of social media algorithms as increased engagement boosts the video’s visibility and reach.

13. Announcements and Reveals

When the big day arrives, there’s no better way to unveil the surprise than to announce it big to your social media followers. If you are announcing something big, a normal text-based announcement is going to be long and boring to read. This is where a good and short social media video comes into action. According to reports, “Viewers retain 95% of a message when they watch it in a video compared to 10% when reading it in text..”.

In this video made by Apple, they announce their all-new MacBook Air 15 by teasing its features & brand new design and creating anticipation and excitement. This type of marketing is centered around announcements to create buzz, control the narrative, and generate media coverage that increases the brand’s exposure.

14. Breaking news & trending topics

With social media and smartphones being so accessible, the majority of adults get their breaking news and trending topics through these platforms. Moreover, with newsjacking becoming common these days, there are many brands that create social media videos and posts around breaking news & trending topics. Leveraging breaking news and trending topics can be highly beneficial & effective if you are looking to improve your social media presence.

It allows businesses to capture the attention of the audience and engage with a wider audience. By aligning breaking news, trending & viral topics with their company, brand or social media profile can increase brand visibility and reach.

In this example, the host talks about how hologram technology can be the future of video calls. Certainly a clickbait title, but filled with facts, right? In this video, they showcase a device that allows users to communicate with another person in 3D perspective, giving a sense of physical presence. Tapping into a niche or topic that has the potential to go viral can attract widespread interest and engagement.

15. Funny meme & humorous content

Funny memes and humorous video content can play a significant part in your social media video marketing strategy. This is mainly because brands can leverage humor to engage with their audience. This not only helps to attract the general audience but also helps to increase brand awareness and even promote their products or services in a casual manner.

This example takes us through a relatable journey where we have adapted technology into our day-to-day life and how it starts to backfire. It reminds us of the importance of finding a balance between technology and reality and being cautious of technology’s downside in a humorous way.

Phew! Hope these social media video ideas would’ve sparked some sense of ideas and inspiration.

In conclusion, social media video marketing is a great way to engage your audience and leverage your brand. By using these social media video ideas, you can create engaging and compelling content that resonates with your audience and that helps to grow your business.

Got any questions? Have other ideas that can be added to this list? Please add them to the comments below!

How to make videos for Instagram [Beginner’s Guide]

In today’s social media landscape, video content is king, and Instagram videos are becoming an increasingly important marketing tool for businesses and individuals.

Moreover, with the rise of platforms like TikTok, YouTube Shorts, etc., short-form video content has become a primary focus for brands and influencers. Therefore, it’s crucial to understand the process of creating engaging short videos that captivate audiences and drive results.

By understanding the essential steps in the video creation process, you can take your Instagram content from good to great and grow your following and engagement.

So, it doesn’t matter whether you’re an individual looking to grow your brand (or) a business looking to reach a wider audience – this guide will provide you with the knowledge and tools needed to create engaging Instagram videos that resonate with your audience.

So, without further ado, let’s dive in and check out how to make videos for Instagram.

There are four main ways you can create videos for Instagram –

1. Make Instagram Video via Post
2. Make Instagram Video via Reels
3. Make Instagram Video via Stories
4. Make Instagram videos via Animaker

Let’s dive into each method and check out how to create Instagram videos. But before we dive in, let’s check out a few things you need to know about Instagram videos –

An Instagram video can be in any aspect ratio.

Video aspect ratio instagram

  • For square posts, the recommended dimensions are 1080px by 1080px with a 1:1 aspect ratio.
  • For landscape videos, the dimensions are 1080px by 566px with an aspect ratio of 1.91:1.
  • For vertical videos, the aspect ratio can be 1:91:1 or 9:16 with a minimum resolution of 720 px.

Additionally, here’s the length of every Instagram video type.

If you want to learn about the length of every type of Instagram video, read – Instagram Video Length Guide – Everything you need to know

1. How to make Instagram Video via Post

To make an Instagram video via post, follow these steps.

1. Open the Instagram App and tap on the “+” icon in the middle of the screen.


2. Under the “Post” option, select a video from your gallery or tap on the camera icon.


3. Once you have selected the video, click on next.


4. In this step, you can add filters, text, stickers, background music, trim, etc.


5. Once you have added the things you want, click on next, add a caption, hashtags, and location for your Instagram video, and you’re done!

Once you have published your video, it will be visible to your followers.

Next up, let’s see how to create an Instagram reel.

2. How to make Instagram Video via Reels

For beginners, reels are short, vertical videos that can be up to 90 seconds long. To create an Instagram Reel, follow these steps:

1. Open up Instagram and click on the “+” icon in the center of the screen.


2. Select the “Reel” option. This screen will open up the camera. You can record a reel here or select a video from your gallery by tapping on the gallery icon in the bottom left corner.


3. Once you have added the video, you can edit the video further by clicking on the “Edit video” button.


4. In the ‘Edit Video’ section, you can also add different elements like music, filters, stickers, font, GIFs, etc. Once you are done editing the video, proceed to the next step by clicking on “Next.”


5. Here, on this screen, you can add captions, hashtags and tag people, and when you’re ready to publish, you can do it by clicking on the “Share” button.

Next up, let’s check out how to make Instagram stories.

3. How to make Instagram Video via Stories

Stories are nothing but temporary posts that disappears after 24 hours. It can be a photo, video, or live video that is shared in a vertical format to be viewed by your followers. In an Instagram story, you can add text, stickers, filters, and lots more to make your stories more interesting.

1. Open the Instagram app and tap on the “+” icon under Your Story or swipe right to access the Instagram camera quickly.


2. Under the Instagram camera, ensure it is set as “Story”.


3. Now, you can either take a photo or record a video of up to 60 seconds.


4. Once done, you can add stickers, polls, gifs, emojis, draw, and lots more to make your story interesting


5. Now, to share your story, tap on the “Your Stories” icon in the bottom left corner of the screen

Next up, let’s check out how to create eye-catching Instagram videos in minutes using an Instagram Video Maker tool.

4. How to make Instagram videos via Animaker

Animaker is a cloud-based video animation tool that allows users to create stunning Instagram videos without any prior experience. It offers a wide range of features, including a library of characters, props, and backgrounds, as well as tools for creating custom animations. With this, you can take your Instagram video game to the next level. To create an Instagram video using Animaker, follow these steps –

1. Head over to Instagram Video Maker and signup or log in to Animaker.

2. Once you are in the dashboard, in the search bar, depending on the type of Instagram video you want to create, search for “Instagram Video” or “Instagram Story”.


3. In this screen, you can see thousands of Instagram Video Templates that you can easily edit and download.


To learn more tips & tricks about video creation with Animaker, check out this in-depth article on How to make video edits?

4. Additionally, once you have edited the video, you can easily change the dimensions of the video by clicking on File > Resize. With this, you can turn an Instagram story into an Instagram post and vice versa.

Here’s an in-depth guide on how to create Instagram videos using Animaker –

Are you looking for ways to enhance your reels? Here’s how!

We hope this article helped you understand how to make videos for Instagram.

In conclusion, there are many ways to create Instagram videos. You can use the inbuilt tools provided by Instagram to create videos or use third-party tools like Animaker to create better videos with advanced animations.

The downside of creating videos within the Instagram app is the limitations of features. With Animaker’s Instagram Video Maker, you can make any kind of video, right from Instagram Stories to stunning animated Instagram videos.

If you have any questions, feel free to drop them down in the comments.

How to edit an SRT File 101 [4 Different Ways]

SRT File, better known as a SubRip file, is a plain text subtitle format used to add subtitles to a video. These files contain the time code and the text for the subtitles.

Undoubtedly, SRT files are one of the most popular formats of subtitle files and are supported by most players across different devices.

The main highlight of the “SRT Subtitle” format is that it is open source, and anyone can create or edit it easily.

You can learn more about how to create subtitles here: How to create subtitles [The Easy Way]

Overall, SRT files are pretty simple and one of the most straightforward subtitle formats to be added to videos. These files are supported by most of the video players and can be created using any text editor, and are even easier to edit.

Before we dive into editing the SRT files, we have to ensure that the format of the SRT subtitle has to be maintained throughout the file. Here’s the proper format of the SRT subtitle file. In each line, an SRT file contains the following information –

HH MM SS MS Subtitle format

In this article, we will be showing you how to edit an SRT file in four different ways –

  1. How to edit an SRT file in Windows
  2. How to edit an SRT file on Mac
  3. How to edit an SRT file on YouTube
  4. How to edit an SRT file using Animaker Subtitles

Without any further delay, let’s jump right into learning how to edit an SRT file in Windows.

1. How to edit an SRT file in Windows?

If you use a Windows computer, the most straightforward pre-installed application, ‘Notepad,’ is enough to edit SRT files. To edit an SRT file in Notepad, follow the below steps –

1. Right-click on your .SRT file and select “Open With,” and In the list of applications, select “Notepad.”

Open SRT files with notepad

2. Make the desired changes and ensure the format isn’t changed.

3. Save the changes by pressing Crtl + S or File > Save.

Next, let’s see how to edit an SRT file on Mac. The steps are pretty much the same, but here’s the step-by-step guide.

2. How to edit an SRT file on Mac?

Just like how you edited the subtitles in Windows, the pre-installed application “TextEdit” is sufficient to customize subtitles on Mac. Here are the steps:

1. Right-click on the SRT Subtitle file and Open the .SRT file using “TextEdit.”

2. Make the desired changes to the SRT Subtitle file.

3. Save the SRT file.

Wasn’t that easy?

Now, if you already have the video uploaded on YouTube, you can add subtitles to it immediately without re-uploading it. Let’s see how to do it.

3. How to edit an SRT file on YouTube?

If you didn’t know, the CC or Subtitles you see on YouTube are mostly automatically generated and often have many errors. It’s best to edit the subtitles to give the best experience to your audience. Follow the below steps to edit SRT subtitles on YouTube –

1. Sign in to YouTube and head over to YouTube Studio.

2. From the left menu, select Subtitles.

3. Select the video you want to edit the subtitles.

4. By default, there will be an automatically generated subtitle. Click on Duplicate and Edit to edit the automatically generated subtitles.

Otherwise, you can create a new subtitle file by clicking on “Add Language,” selecting the language, …

and manually typing the subtitles.

5. To edit an existing SRT file, use the Upload File feature. Upon uploading, you can easily edit the SRT subtitles file on YouTube.

Also read: How to Subtitle YouTube videos [Step-by-Step Guide]

Now, let’s jump to the easiest way of editing an SRT file!

4. How to edit an SRT file using Animaker Subtitles?

While all of these methods require manual work, be it manually opening the subtitles and making the changes or going to YouTube to customize your video’s subtitle, it all takes some effort.

But this step will take you to another level where you can save time and automatically edit & create beautiful subtitles for your videos. Wonder how? Follow the below steps!

1. Signup or log in for a free account on Animaker Subtitles, the world’s fastest AI-Powered Subtitle Generator.

2. Upload the video you want to add/edit subtitles for.

3. If you want to add subtitles, click on the ‘Auto Subtitles’ option to add the subtitles automatically.

4. Alternatively, if you want to add the subtitles manually, use the option ‘Manual Subtitle’ to type the subtitles manually

5. If you have an SRT file that you want to edit, then you can use the ‘Upload a subtitle file’ option and upload the subtitle file from your computer.

6. Once you have added the subtitles, you can go through and make necessary changes like editing the subtitles, merging the subtitles, changing the duration of the subtitles, and more.

7. Once done, you can download the subtitles by clicking Download > Download Subtitle file >.

PS: Apart from downloading in.SRT format, Animaker subtitles allow you to download the subtitle file in different formats like – .ASS, .VTT, and . SBV.

As you can see from the above steps, editing SRT files are pretty straightforward. Moreover, If you want to learn more about creating, editing, and more, you can. In that case, check out other articles we published:

We hope this article helped you to learn more about SRT Subtitles files and how to edit them quickly & effortlessly. If you have any questions about this article, please drop them down in the comments below.

How to create an SRT file? [The easy way]

The SRT file format is one of the most popular subtitle formats, and they support a wide range of video players. The main reason why everyone prefers SRT subtitle formats over other formats is that this format is developed as a DIY solution for captioning video content. When it comes to creating an SRT file, it might sound daunting, but in reality, it’s not rocket science.

What is an SRT File, and why should you use it?

An SRT file or a SubRip File is a plain text file that contains the timecodes and the text for subtitles in a video. The SRT File is made up of a series of lines containing the following information –

  1. The start time of the subtitle line
  2. The ending time of the subtitle line
  3. The text of the subtitle line

The start and the end times of the subtitle are in the following format:

HH:MM:SS,MS

Here the “HH” denotes hours, “MM” denotes the minutes, “SS” denotes the seconds, and “MS” denotes the milliseconds.

Here’s an example of an SRT file –

1
00:00:00,000 –> 00:00:05,000
This is the first subtitle.

2
00:00:05,000 –> 00:00:10,000
This is the second subtitle.

SRT files can be easily accessible and opened in most video players. It’s so simple that all you have to do is save the SRT subtitle file in the same folder as the video, ensure that the subtitle file name and video file name are the same, and then open the video in a player that supports SRT files. The video player will automatically detect & load the subtitles and display them on the screen.

How to create an SRT File?

As mentioned above, creating an SRT subtitle file is very easy and straightforward. There are two ways to create an SRT file –

  1. Offline – Using a text editor
  2. Online – Using a subtitle generator

Offline – Using a text editor

Creating an SRT file is pretty simple. To create an SRT file, all you need is a text editor.

Here’s how you can create SRT files.

If you are using a Windows machine, open Notepad. If you are using a Macintosh, then open text edit, and follow the below instructions.

1. Type 1 in the first line, this number denotes the first line of the subtitle. Press enter and go to the next line.

2. In this line, write the start and the end timecode in the specific format “HH:MM:SS,MS” (Hours:Minutes:Seconds,Milliseconds).
For example, this is how your subtitle would look now –

1
00:00:00,000 –> 00:00:05,000
This is the first subtitle.

3. Once you are done typing the first subtitle, go to the next line and type 2 to start the second subtitle. Follow the above steps for each subtitle you want to create.

4. Once done, save the notepad file as <filename>.srt and click on save.

Now that you know how to create an SRT file yourself, you would have realized how tedious it is! What if I say there’s a way to create SRT files automatically?

Mindblown right?

Read on!

Online – Using a subtitle generator

You don’t have to go through the struggle of entering the precise duration and the subtitle line without any mistakes to create the perfect SRT file. You can let a tool do the job for you.

Yes, there are a number of ways you can automatically create SRT files online, and the easiest way is to use an Online SRT generator tool. For this purpose, there are a number of online tools, but I promise to give you the best tool in town – read “Animaker”.

Yes, did you know that you can automatically create subtitles for your videos using Animaker?

Animaker’s AI-powered subtitle generator can transcribe your video into text and add subtitles to your video automatically. With this, you can make your videos more accessible to people who are deaf or hard of hearing or to people who are watching your videos in a language they don’t understand.

There are a couple of ways you can create an SRT file using Animaker Subtitles –

  1. Automatic Subtitles
  2. Manual Subtitles

Automatic Subtitles

(1) To use Animaker Subtitles, simply head over to Animaker Subtitle Generator and signup for a free account.

(2) Once you are in the subtitle dashboard, simply upload your video to Animaker. Alternatively, if you have already exported in Animaker before, you can select the video from the My Exports tab. Else, if you have already uploaded a video to Animaker, you can choose it from the My Library tab.

(3) Once the video is uploaded, click on the “Auto Subtitle” button. Now, Animaker will transcribe your video and add subtitles to your video automatically.

(4) Once the subtitles have been generated, you can make necessary adjustments and changes if needed.

(5) Finally, download the subtitles by clicking on the download button. Click on Download subtitle and then on Download to save the SRT subtitle file to your computer.

Moreover, Animaker Subtitles also allows you to download subtitles in different formats like .VTT, .ASS and .SBV.

Simple, right? Now, let’s check how to create an SRT file by adding subtitles manually to your video.

Manual Subtitles

(1) Follow the first 2 steps from above and click on the “Manual subtitles” button.

(2) This will open up a tab where you can enter the subtitles text and the timestamp for each subtitle. By default, the duration of each subtitle is set to 2 seconds, but it can be adjusted according to your convenience.

(2) Follow the same steps for the rest of the video.

(3) Once you are done, click on download to download the SRT subtitle file to your computer.

If you want to know more about adding subtitles, here’s an article that explains step by step: How to make subtitles – the ultimate guide.

Now that you know how to create subtitles manually and automatically, let’s see the benefits of creating an SRT file.

What are the benefits of creating an SRT File?

When it comes to using an SRT file, there are lots of benefits and advantages. Here are a few of the most important reasons –

  1. Easy to create and use – The SRT Subtitle files are plain text files. This means you can create them using any text editor or online tools like Animaker Subtitles to create subtitles.
  2. Widely accessible – SRT Files are supported by most video players like VLC, Windows Media Player, etc. This means you can use SRT files to add subtitles to your videos on any device.
  3. Multi-language support – SRT can support multiple languages. This means that you can use each line to tag a language code and show them simultaneously. This can be very helpful in targeting the global audience.

Now that we know the benefits, here are a few tips that will make your subtitles stand out from the rest. 

Tips for creating an SRT Subtitle file:

  1. Font Size – When it comes to SRT files, the font size should be large enough to be easily readable to the audience. This also means that the size should not be so large that it takes up space on the screen. Ideally, a good font size for an SRT file is around 18-23 Pixels.
  2. Easy to read – Subtitles are meant to be readable, so ensure the text used is easy to read with a clear font and a good contrast between the text and the background. While choosing a font, avoid using one with too many colors or a font that is hard to read. If you want some suggestions, check out this article on – Best fonts for subtitles.
  3. Avoid Abbreviation – Abbreviations and acronyms can be difficult to understand, especially for people who are not familiar with them. It is always best to avoid abbreviations and acronyms in SRT files.
  4. Proofread before publishing – Before you publish your SRT file, ensure that there are no mistakes or errors. This will help to ensure that your subtitles are accurate and easy to understand.

Hope this article helped you understand how to create SRT files easily and effortlessly.

If you have any questions, please feel free to drop them in the comments down below.

13 How to video ideas to grow your YouTube Channel

In our current technological world, video marketing is undoubtedly one of the most powerful methods of marketing. It can be used to educate, entertain, and persuade viewers with its audio-visual medium by grabbing the attention of viewers and holding their interest.


Here are a few reasons why video marketing is the most effective –

  • It can be more engaging than text, images, or written pieces of content.
  • It can be used to tell stories and connect with viewers.
  • It can be used to build trust. When people see you, they have a better connection.

But before you get into creating a video, you need to find a niche first. With so many topics to choose from, it can be hard to know where & how to start.

Similarly, when you plan on making YouTube videos, it also has to be something you are passionate about. Not just that, you must also ensure that there’s some audience for the topic.

If you are struggling to find a niche to make videos about, then you should consider exploring the “How-to” niche.

A “How-to” niche is a topic that focuses on teaching people how to do something. This can be anything from a cooking tutorial to fixing a leaky faucet.

How-to niches are a great way to get started because there’s always a demand for information on how to do things. People are always looking for ways to learn new skills and improve their lives, and how-to videos can provide exactly the information they need.

Now that you have an idea of what the “How to” niche means, and how to find the right niche for your videos, I’ve made things easier for you.

I have curated the top How to video ideas with examples. Read on!

  1. DIY and crafts
  2. Home Improvement
  3. Cooking and baking
  4. Beauty
  5. Pet care
  6. Technology
  7. Business tips and ideas
  8. Education
  9. Parenting
  10. Travel
  11. Lifestyle
  12. Finance and investing
  13. Fashion

Please note: The data below is as of May 2023.

1. DIY and crafts

“DIY and crafts” is one of the best “How to” video idea because they offer the audience a new way of learning a skill, thus helping them save money and express their creativity. Whether you want to fix a broken door or create your own bookshelf, there’s someone searching for their query. Overall, If you’re looking for a fun, rewarding, and affordable way to learn new skills and express your creativity, then DIY and crafts are the perfect “How to” video category for you.

Here’s an example of a DIY and Crafts video, which explains the step-by-step process of building your own birdhouse. With over 652K views, this video is for DIY lovers and covers a very specific audience who want to build their own Birdhouse at a very minimal cost.

2. Home Improvement

Home-Improvement as a category is all about how you can save money, improve your home’s value, and how to troubleshoot things yourself. There are thousands of people searching for different queries related to home improvement. So whether you are a seasoned DIYer or trying to be a handyman, this can be a perfect “How to” video category.

Here’s an example of a Home Improvement video. It is a simple tutorial about fixing a leaky faucet, something pretty common in our households. This video is about 3 minutes long and has over a million views within just 5 months of publishing the video.

3. Cooking and baking

Cooking and baking are one of the most popular hobbies around the world. People of all ages enjoy watching cooking and baking videos. Cooking videos are very pleasing to watch and enjoy, even if you don’t actually want to cook the dish. Since these videos are often very visually appealing, people are engrossed to such videos. This reason makes it a great category to attract a wide audience.

Here’s an example of a Cooking and baking video. This video is an aesthetically pleasing baking video with over 9.8 million views, takes you through the process of making a classic vanilla cake. You can take these kinds of videos a step further by adding your own creativity and explaining in an interesting way.

4. Beauty

Beauty is one of the most popular topics on the internet. There are always people who are looking for ways to look and feel their best, and YouTube is one of the biggest platforms that provide them with that information. If you are looking for a great niche to start your YouTube channel and have an interest in this niche, then beauty is a great option.

Here’s an example of a Beauty video. When it comes to makeup, there is a cluster of topics you can cover. This video is like the fundamentals of makeup, where it shows the correct order of makeup application. This targets the newbie or amateur audience who are willing to learn the basics of makeup. Also, the video has also fetched over 1.8 million views.

5. Pet care

Pets are a part of the family for many people. They are not only the best companion but also are part of your life by providing love and support. This is why pet owners are constantly looking for ways to improve the lives of their pets. They want to ensure their pets are happy, healthy, and well-cared for. So, this niche has a huge demand on YouTube. Millions of people watch videos related to pet care every day. And this is yet another reason why you should start a pet care niche channel.

Here’s an example of a Pet care video. If you have a pet cat, you’d know how difficult it is to bathe it. This video takes you through a step-by-step process on how to bathe your cat, how to prepare your cat for a bath, and lots more. If you search for how to bathe a cat, this video comes in the top results and has clocked over 3.1 Million views.

6. Technology

In this current world, technology is constantly changing. There are new devices, softwares, and applications that are released every day. People are always on the lookout to learn new things about new technologies. They want to know how to use it, troubleshoot it, and get the most out of it. If you are looking for a way to build a large following on YouTube by sharing your savvy thoughts, then technology is a great option.

Here’s an example of a Technology video. A business needs a website, and this video takes you through the step-by-step process of how to make a website. With over 16 million views, this video clearly proves the potential of technology niche videos on YouTube.

7. Business tips and ideas

Business skills are some of the essential skills that everyone should learn. Especially if you want to start your own business, having a good understanding of Business is essential. Other than that, there are many reasons why one should understand the nuances of Business. It helps the audience understand the backbone of the economy and plays a vital role in our lives.

Here’s an example of a Business tips video. While starting a business can sound like an impossible task, with proper guidance, you can also get through. This video has clocked over 195K views and takes you across a unique method called the “Castle method” to build your business and guides you in 5 steps.

8. Education

Education is one of the most important things in life. It is essential for everything right from personal growth to career development. This niche has a large and ever-growing audience of all ages and backgrounds. So, if you are thinking of starting a YouTube Channel, the education niche is a great place to start.

Here’s an example of an Education video. This video has 12K views and talks about how to create animated presentations. We all know traditional presentations are boring, but this video takes a step ahead and teaches the audience a fun way to create presentations.

9. Parenting

Parenting is a lifelong journey that’s full of challenges and rewards. Parents are always looking for ways to improve their parenting skills and make sure they are raising their children in the best possible way. If you are an experienced parent who’d like to share their thoughts with the world, then this niche can be a good way to start, mainly because of the huge demand for parenting content on YouTube.

Here’s an example of a Parenting video. Becoming a parent is a lifetime commitment and needs a lot of learning. If you are going to become a parent, learning the basics of parenting is very important. This video, with 514K views, is one such video that talks about potty training for babies.

10. Travel

Travel is a broad niche where you can cover a wide range of topics like travel tips, advice, personal stories, experiences, and lots more. This is a great niche for people who love to travel and explore new places. ravel can be a great way to relax and de-stress. It helps people to escape the everyday grind and get away from it all. So apart from just creating a channel to share content, it can also be used to highlight the benefits of travel.

Here’s an example of a Travel video. Planning a trip requires a lot of planning. But sometimes, even with extreme planning, there can be things that miss out. This video has over 246K views and talks about the experiences of a traveler who guides the audience on how to plan like a pro by sharing various travel tips and hacks.

11. Lifestyle

Lifestyle videos are one of the popular niches on YouTube, as people are constantly looking for ways to improve their lives and lifestyle. Moreover, when it comes to lifestyle as a niche, it is broad, and you can cover a wide range of topics. This also means that there is a large potential audience for your videos.

Here’s an example of a lifestyle video. This video covers a generic topic, “How to organize your home,” and with over 1.6 million views, this video takes you through a journey of different tips you can use to make your things organized.

12. Finance and investing

Finance and Investing is one of the important topics that everyone should know about. This not only helps you with better financial decisions but also helps you to manage, plan, and reach your financial goals. The sky’s the limit when it comes to creating videos around this niche because you get to share about different financial concepts, strategies, products, and your own experiences.

Here’s an example of a Finance and investing video that talks about Managing expenses and how important it is to build your wealth. This video explains a unique concept of the 50-30-20 rule that will help you to create a budget and where your money goes. This video has helped over 3.1 million people understand the concept.

13. Fashion

Fashion is a universal language that everyone can understand. It’s a way to express ourselves, our personality, and our style. And it’s a niche for people of all ages. This means that there’s a large audience for fashion videos, and they are constantly looking for new trends, inspirations, and tips on how to dress better. If you are someone who loves fashion, then the fashion niche can be a great way to connect with your audience, and share your knowledge.

Here’s an example of a fashion video. Fashion can be hard sometimes. Deciding what to wear, how to wear it, and where to wear it is important when it comes to fashion. This video is a detailed dress code guide that helps you eliminate style confusion and has helped over 108K people to dress better.

Starting a how-to niche can be a great way to share your knowledge and help others. With a little effort, you can build an audience and establish yourself as an expert in your field.

Here are a few tips to make the whole process easier –

  • Before starting to make a video, ensure that you choose a niche you are passionate about and knowledgeable in. This will make it easier for you to create engaging content and informative content.
  • Do prior research and ensure you have a good understanding of the topic. This will help you to provide valuable and relevant information to your audience.
  • Create high-quality content and invest in a good camera, microphone, and other relevant things that will elevate the quality of your content.
  • Promote your videos by sharing them on social media, friends, and other video submission sites.
  • Lastly, be patient. It takes time to build an audience and establish yourself as an expert. Don’t give up if you don’t see the results immediately.

Similarly, if you want to get an idea of what kind of Youtube channel to start, here’s an article on different youtube channel ideas!

In the whole process of making a video, editing is the most important & difficult part. To make this easier, Animaker’s YouTube Video Maker makes the whole process easier than ever for even beginners to make a video. It has a simple drag & drop interface with tons of features that will take your video production to the next level with minimal effort.

So what are you waiting for?

Start creating your how-to videos today!


24 Best Animation YouTube Channels to Follow

As someone passionate about animation and who loves exploring new channels on YouTube, I know how overwhelming it can be to find the best channels out there. With so many options available, knowing where to start and whether the channels you find will be worth your time is challenging.

As an open platform, YouTube has emerged as one of the best platforms to showcase and promote creativity in various forms. And animation is one of the most trending ways for storytelling, many animators and animation studios have created their channels on YouTube to showcase their works.

But, finding the best animation channels on YouTube can be overwhelming with the multitude of options available. When selecting the animation channels on YouTube, the choice is endless. This means you can find an animated YouTube channel that matches your energy and sense of humor.

To save you the time and effort of finding the right and the best channels, I did some research and have come up with a guide. Here’s what I did to collate the list.

  1. Look for channels with
    – A high engagement rate on their videos
    – A consistent upload rate
    – A large and active subscriber base
  2. Watch a few videos to get an idea of the content

Whether you’re new to animation or a seasoned fan, this guide will equip you with the knowledge to navigate the YouTube animation community. So, sit back, relax, and read on to discover the best animation channels on YouTube!

Please note – The below-mentioned numbers are as of May 2023.


1. TheOdd1sOut

Robert James Rallison, also known on YouTube as TheOdd1sOut, is an animator and cartoonist who creates animations that discuss his beliefs and life experiences. He refers to the animated characters in his videos as “the marshmallow people” because of their spherical, white appearance. He is also the co-creator, executive producer, and co-star of the Netflix animated series Oddballs.

  • Subscriber count – 19 Million
  • Start Date: Aug 31, 2014
  • Total Views so far: 4.4 Billion views
  • Number of videos: 138 videos
  • Category: Entertainment, Personal experiences
  • Most Popular video – Life is Fun – Ft. Boyinaband (164M Views)

2. Domics

Domics is a hugely popular YouTube channel known for its amusing and engaging animated content. This channel features random skits of funny stories, relatable events, and lots more. The insightful commentary and observations are sure to leave the audience entertained. Several websites, including CBS News, have showcased Domics’ videos.

  • Subscriber count – 7.3 Million
  • Start Date: Aug 13, 2012
  • Total Views so far: 1.2 Billion views
  • Number of videos: 210 videos
  • Category: Personal experiences
  • Most Popular video – Crushes (33M Views)

 3. Ted-Ed

Ted-Ed is a well-known YouTube channel that educates the audience on various topics through its animations. It is becoming a go-to channel to learn about a variety of topics, ranging from philosophy to history. The collaborative efforts of expert educators and animators make learning more effective.

  • Subscriber count – 18.3 Million
  • Start Date: Mar 12, 2012
  • Total Views so far: 3.5 Billion views
  • Number of videos: 2000+
  • Category: Educational
  • Most Popular video: Questions No One Knows the Answers to (28M Views)

4. Jaiden Animations

Known for her animated story-telling videos, Jaiden makes her videos visually stunning and entertaining to watch. From making animations on her personal stories to also gameplay animation videos, Jaiden’s videos are refreshing to watch.

  • Subscriber count – 11.9 Million
  • Start Date: Jul 24, 2014
  • Total Views so far: 2.2 Billion views
  • Number of videos: 123 videos
  • Category: Personal experiences, Humor, Entertainment
  • Most Popular video: I Attempted my First Pokemon Nuzlocke (87M Views)

 5. How it should have ended

This YouTube channel provides hilarious alternate endings to popular TV shows and movies. The witty scriptwriting and creativity combined with awesome animations make the audience look forward to their videos. Whether it is to learn animation or to have a good laugh, this channel is worth checking out.

  • Subscriber count – 10.4 Million
  • Start Date: Mar 7, 2007
  • Total Views so far: 3.2 Billion views
  • Number of videos: 452 videos
  • Category: Entertainment
  • Most Popular video: How Avengers Infinity War Should Have Ended – Animated Parody (48M Views)

6. Cocomelon

Cocomelon is a very popular nursery rhyme YouTube channel that has a massive following. It is one of the most-watched channels that makes nursery rhymes with catchy music and colorful animations. This is a great channel to check out if you are a fan of 3D animation. Parents of kids and infants, beware of this channel! Because once your kid starts watching it, there’s no going back!

  • Subscriber count – 154 Million
  • Start Date: Sep 2, 2006
  • Total Views so far: 159.5 Billion views
  • Number of videos: 906 videos
  • Category: Edutainment
  • Most Popular video: Bath Song | CoComelon Nursery Rhymes & Kids Songs (6.1B Views)

7. Pencilmation

Pencilmation is known for its hand drawn-pencil sketches. The main character, “Pencilmate,” is a childish person who often gets into mischief. Apart from Pencilmate, their videos include many other quirky characters. The imaginative storylines of their videos make them a delight to watch. Most importantly, this kid-friendly channel is consistent with its video uploads.

  • Subscriber count – 20 Million
  • Start Date: Jun 15, 2009
  • Total Views so far: 11.2 Billion views
  • Number of videos: 1.4K videos
  • Category: Edutainment
  • Most Popular video: Pencilmate Needs A Bathroom! (269M Views)

8. Kurzgesagt – In a Nutshell

This YouTube channel provides animated educational content across topics ranging from history to economics and much more. The enthusiastic hosts and the engaging animations make even complex topics easy to learn. This channel is an excellent source to expand knowledge on just about anything and, most importantly, animation style.

  • Subscriber count – 20.5M subscribers
  • Start Date: Jul 11, 2013
  • Total Views so far: 2.2 Billion views
  • Number of videos: 178 videos
  • Category: Educational
  • Most Popular video: The Coronavirus Explained & What You Should Do (88M Views)

9. sWooZie

Adande Thorne, better known as Swoozie, is an animator whose videos garner millions of views for their relatable content. His videos feature different stories, ranging from his personal experiences as a Disney animator to relationship advice.

  • Subscriber count – 7.7 Million
  • Start Date: Feb 9, 2006
  • Total Views so far: 1.4 Billion views
  • Number of videos: 408 videos
  • Category: Entertainment
  • Most Popular video: 2 Girls 1 Cup of ICE (31M Views)

10. Simon’s cat

This YouTube channel is basically a series that brings the mischief of an adorable cat to life through animation. This animated cat has become a global sensation with its delightful style and playful sound effects. This channel is a definite go-to for cat lovers!

  • Subscriber count – 5.9 Million
  • Start Date: Mar 4, 2008
  • Total Views so far: 1.4 Billion views
  • Number of videos: 364 videos
  • Category: Entertainment
  • Most Popular video: Cat Man Do – Simon’s Cat | SHORTS #1 (65M Views)

11. Egoraptor

This channel offers hilarious animated content on well-known game characters like Mario, Zelda, etc. One of Egoraptor’s most popular videos is Zelda’s rap which has garnered over 49 million views. His quick wit, commentary, and animation style are a delight to watch. He is also popular for his work on popular web series called “Game Grumps” and “Sequelitis.” This channel is perfect for animation and gaming enthusiasts.

  • Subscriber count – 2.8 Million
  • Start Date: Mar 31, 2008
  • Total Views so far: 569 Million views
  • Number of videos: 98 videos
  • Category: Entertainment, Gaming
  • Most Popular video: Luigi’s Ballad ANIMATED MUSIC VIDEO – Starbomb (58M Views)

12. Hotdiggedydemon

This channel is known for its satirical comedy, often pushing the boundaries of humor. Their videos include animations of topics ranging from pop culture to societal issues with a bit of dark humor. Their most popular video is called “Luigi’s day out,.” This video was posted almost a decade back, but the animations still look afresh!

  • Subscriber count – 1.9 Million
  • Start Date: May 6, 2007
  • Total Views so far: 414 Million views
  • Number of videos: 92 videos
  • Category: Entertainment
  • Most Popular video: LUIGI’S DAY OUT (45M Views)

13. Harry partridge

Known for its off-beat sense of humor, this channel has a devoted audience, thanks to its original animations and political parodies that are satirical in nature! Their animation style varies from video to video, and it really provides a good insight to those who want to look up different animation styles.

  • Subscriber count – 986K
  • Start Date: Aug 24, 2007
  • Total Views so far: 58 videos
  • Number of videos: 202 Million views
  • Category: Entertainment
  • Most Popular video: Skyrim (24M Views)

14. Little baby bum

This channel focuses on animated educational content in the form of rhymes for young children. The colorful animation style keeps the young audience captivated and also makes learning effective. Whether it is for a young child or a curious animator, this channel is a must-watch.

  • Subscriber count – 40 M
  • Start Date: Aug 30, 2011
  • Total Views so far: 39.2 Billion views
  • Number of videos: 2.3K videos
  • Category: Edutainment
  • Most Popular video: Wheels On The Bus | Sing with Little Baby Bum (2.4B Views)

15. Eddsworld

Eddsworld features animated characters that go on mundane yet fantastical adventures. This channel was started in 2004 by Edd Gould. Even after his passing in 2012, his friends continued making videos on his channel to keep their friend’s legacy alive.

  • Subscriber count – 4 M
  • Start Date: Mar 18, 2006
  • Total Views so far: 872 Million views
  • Number of videos: 89 videos
  • Category: Entertainment
  • Most Popular video: Eddsworld – Fun Dead (109M Views)

16. Meatcanyon

Known for its satirical take on social justice and pop culture, this channel takes popular characters/celebrities and gives them a dark, disturbing touch. The grotesque animation style with edgy commentary makes this channel stand out from the rest of the animated content-creating channels.

  • Subscriber count – 5.5M
  • Start Date: Jan 28, 2017
  • Total Views so far: 884 Million views
  • Number of videos: 149 videos
  • Category: Entertainment
  • Most Popular video: When you wish upon a star (33M Views)

17. Pinkfong

Baby Shark Do do do!! I bet you have heard this before! Pinkfong is the proud creator of this viral song that has garnered over 12 billion views on YouTube! Pinkfong is an educational YouTube channel that covers educational content, like teaching shapes, colors, nursery rhymes, etc., to kids with captivating animations.

  • Subscriber count – 67 M
  • Start Date: Jun 24, 2014
  • Total Views so far: 37.9 Billion views
  • Number of videos: 2.7K videos
  • Category: Edutainment
  • Most Popular video: Baby Shark Dance (12B Views)

18. Cartoon hangover

With a unique animation style, this channel features original animated series, music video parodies, and skits. This channel is known for producing the hit animated TV show called “The Adventure Time.” In addition to their regular content, they also highlight other independent animators, providing them with a platform for diversity in the animation community.

  • Subscriber count –2.2 M
  • Start Date: May 18, 2012
  • Total Views so far: 331 Million views
  • Number of videos: 330 videos
  • Category: Entertainment
  • Most Popular video: Bee and PuppyCat Full Series (19M Views)

19. Looloo kids

Yet another kids channel to the list! LooLoo Kids is a YouTube channel that features entertaining and educational content for young minds. With a cute animation style, this channel has gained a strong following. They provide content in multiple languages, making it accessible worldwide. Their most popular videos include “Five Little Ducks,” “Johny Johny,” etc.

  • Subscriber count – 53.6 M
  • Start Date: Jan 29, 2015
  • Total Views so far: 31.8 Billion views
  • Number of videos: 668 videos
  • Category: Edutainment
  • Most Popular video: Johny Johny Yes Papa 👶 THE BEST Song for Children (6.6B Views)

20. Mondo media

Mondo Media features animated content in a variety of genres but with crude humor. Their popular shows include “Happy Tree Friends,” which features cute woodland creatures. Often seen as controversial, this channel provides edgy content that is quite different from the mainstream animated content that we see regularly on Youtube.

  • Subscriber count – 5.5 M
  • Start Date: Jan 31, 2007
  • Total Views so far: 3.5 Billion views
  • Number of videos: 1.5K videos
  • Category: Entertainment, Humor
  • Most Popular video: Happy Tree Friends – Friday the 13th (110M Views)

21. ExplosmEntertainment

This channel has become one of the most popular destinations for animated content enthusiasts. With its content ranging from pop culture to politics, this channel often is controversial with its edgy humor. Their most popular series is “Cyanide & Happiness,” which features stick figures in absurd situations.

  • Subscriber count – 11 M
  • Start Date: Sep 7, 2009
  • Total Views so far: 3.7 Billion views
  • Number of videos: 1.2K videos
  • Category: Entertainment
  • Most Popular video: Cyanide & Happiness Compilation – #5 (65M Views)

22. Andrei Terbea

This is one of the popular growing YouTube channels. With distinctive animation style and insightful commentary on pop culture topics, their videos provide quality content to their audience. This channel also offers tips on animation techniques and styles. This is a go-to channel for a growing animator.

  • Subscriber count – 2.8 M
  • Start Date: May 1, 2013
  • Total Views so far: 319 Million views
  • Number of videos: 157 videos
  • Category: Edutainment
  • Most Popular video: How KSI Saved Logan Paul’s Career (20M Views)

23. My Story Animated

This channel features animated videos of real-life experiences submitted by the viewers.
From comedic content to heartwarming tales, this channel has become a go-to destination for those looking for uplifting stories.

  • Subscriber count – 17.1 M
  • Start Date: Jan 14, 2019
  • Total Views so far: 809 Million views
  • Number of videos: 1K videos
  • Category: Personal experiences
  • Most Popular video: No one knew I was a famous singer (53M Views)

24. Animaker

This YouTube channel offers a variety of animation techniques and tools for animation enthusiasts to create quality animations without any prior experience. They provide tutorials on how to make awesome videos effectively using their own video-making software, Animaker. Apart from that, this channel also provides great tips about different softwares and tools that make the life of content creators and brands easy! So for all those looking for tools to create great animation videos, following this channel is a no-brainer!

  • Subscriber count – 140K
  • Start Date: Jun 23, 2014
  • Total Views so far: 11.1 Million views
  • Number of videos: 258 videos
  • Category: Educational
  • Most Popular video: How to make animated videos – Tutorial for beginners (3.5M Views)

What an interesting list!

In conclusion, the animation community on YouTube has become more diverse and creative with its content, providing entertainment as well as educating the audience on various topics.

The popularity of animation videos highlights the fact that it belongs to an audience that is not defined by age. It all depends on the creativity and punch with which the content is delivered!

Check out this post on how to make an avatar if you want to make an animated character that will be the star of your new YouTube channel.

I hope you found this list interesting and useful. Feel free to add more such channels that caught your attention in the comments section below!

How to add subtitles to MP4 Videos [Both Online and Offline!]

A subtitle is a textual representation of the audio of a video or a film. Typically, it is positioned in the bottom of the video screen and offers the audience the translation of the audio. They are similar to captions as they provide accessibility tools for deaf or hard-of-hearing audiences. 

Why are subtitles important for a video?

Subtitles are very important and act as a crucial element for a video mainly because they make videos more accessible to a wider audience. For example, people who are deaf or hard of hearing, or those who speak a different language, can benefit a lot from subtitles. With subtitles, anyone can watch the video and understand what is being said. 

Additionally, subtitles also act as a means of enhancing the viewing experience by providing additional context or information that is not apparent from the audio like background noises. Moreover, subtitles also support the accessibility of video content across all devices by making it optimized for the video & user experience. 

How to add subtitles to MP4?

Adding subtitles to MP4 is a simple task. In this article, we will check out different ways you can add subtitles to your MP4 video, both online and offline. 

For Online method, we we will show you how to add beautiful subtitles to your MP4 straight from your browser using a cool subtitle generator. And with the offline method, we will show you four different ways. 

How to add subtitles to MP4 Online using Animaker Subtitles

Animaker Subtitles is an automatic online subtitle generator tool that uses the technology of AI and allows you to add subtitles easily.

Using Animaker Subtitles, you can easily generate subtitles in a jiffy and customise it as your wish!

In fact, it is one of the easiest options among the different ways to add subtitles.

Let’s see how to add subtitles to mp4 using Animaker Subtitles!

Step 1. Create a new subtitle project

Get started by signing up with Animaker Subtitles or simply log in to your account. 

Once you sign up or log in, create a new subtitle project from the home screen. To create a new subtitle project, click on create > click on create subtitle. 

Step 2. Upload your video to Animaker subtitles

Once you click on Create subtitle, a new project will open in a new tab. Here you have to upload your video to Animaker subtitles. Alternatively, if you have used Animaker before, you can choose from an existing media from the library or select one from the exports section.

Step 3. Add subtitles to your video

Once you have added the video to Animaker subtitles, it’s time to add subtitles. With Animaker Subtitles, you can add subtitles to your videos in three different ways. 


– Auto subtitles: By far, this is the easiest way you can add subtitles to your video. With the Auto Subtitles feature on Animaker Subtitles, all you have to do is click on Auto subtitles, give it a few seconds, and it will automatically add the timestamp & the subtitles to your video


– Manual subtitles: This is the traditional way to add subtitles to your video. In this method, you have to manually type in the subtitles, adjust the time stamps, and add subtitles to your video. 

Unlike other methods, you can add subtitles to your MP4 with the highest accuracy, since you are adding them all by yourself. But the drawback is that you must know the timestamps precisely, so that the audio and subtitles are in perfect sync!


– Upload subtitles: If you have a subtitles file for your video, then you can use this option to upload subtitles to your video. To upload your subtitles, click on Upload a subtitle file and select the files from your computer.


– (Bonus)Auto translate subtitles: If you are trying to target audiences from different regions, then this Auto Translate subtitles feature will come in handy. With this feature, you can easily translate the added subtitles to 100+ different languages in a single click. 

Step 4. Customize your subtitles

Once you have added subtitles to your video, you can further customize your subtitles and make it truly yours. Animaker subtitles allow you to do different customizations like –

– Font designs: Animaker’s massive font library has over 150 font options for you to play with and you can upload your font if needed. Additionally, you also get traditional text styling options like font size, font alignment, color customization, and lots more.


– Text prebuilts: The best part about Animaker Subtitles is the text prebuilts. Once you have added the subtitles to your video, you can choose from 15 professional-looking text prebuilts to make your videos stand out from the crowd.

Step 5. Adjust your subtitles

Once you have added the subtitles and customized them, it’s finally time to doing the final set of changes & adjustments to your subtitles. Animaker subtitles allow you to customize every aspect of your subtitles like –

Adjust duration of subtitles – Be it AI subtitles or manual subtitles, there will be areas where you need to manually check the timings of your subtitles and adjust them. You can also adjust the duration of the subtitles in the timeline by moving the ends of the subtitle inward or outward. 

Delete subtitles – If there are parts of the video where your subtitles are misplaced, you can easily delete the subtitles by clicking the trash icon next to the subtitle. 

Add text & Merge Subtitles – If you want to manually add your own subtitle to your video, you can use the Add text feature. And if you have scenarios where two subtitles are misaligned to the video or the gap between two subtitles is too less, you can use the Merge subtitles feature.

Step 6. Download your MP4 video

Once you are done adding subtitles to your video, you can preview the video by clicking on the small play icon next to the download button. 

If everything looks fine, you can go ahead and download the video. Apart from downloading videos, you can also download the subtitle file in .SRT, .VTT, .ASS, .SBV formats.

Wasn’t that so easy? You have successfully learned how to add subtitles to MP4 using Animaker Subtitles!

How to add subtitles to MP4 Offline

In this section, we will look at different ways to add subtitles to MP4 on Mac and Windows. We will be using the most common apps like VLC Media Player, Windows Media Player on Windows. Meanwhile on Mac, we will be using iMovie and Quicktime Media Player

While these are preinstalled apps on Windows and Mac, if they are not available, you can download them using the above links.

Please note: When you are adding subtitles to your MP4 video offline, you can only add premade subtitles that are available in a format that the software supports. 

Method 1: Using VLC

For windows, we will be using the free and open source software called VLC.

Please note, the steps below can be followed  for the mac version of VLC as well.

Before going to step by step tutorial, ensure you have the Subtitle File ready. If not check out this guide on How to make subtitles

Now, let’s see how you can add subtitles to MP4 videos using VLC media player

Step 1: Open VLC. Head over to the subtitle option in the top menu, and click on add subtitle file option.


Step 2: Add the subtitle file from your computer.

Step 3: The subtitle file is added to your MP4 video! As simple as that. 

Now let’s see the second way to add subtitle to your MP4 video. 

Method 2: Using Windows Media Player

In this step, we will be looking at how to add subtitles to MP4 on Windows Media player. If you have a Windows computer, the Windows media player is preinstalled. But if you want to download it, follow this link.

Step 1: Open the MP4 Video file in the Windows media player.

Step 2: Click on the small subtitle icon on the bottom right to add subtitles to your video.


Step 3: Boom! You have successfully added subtitles to your MP4 video in the Windows media player!

Wasn’t that simple? Now, let’s check out how to add subtitles using Quick Time Player.

Method 3: Using Quicktime Player

When it comes to Quicktime player, you can download and use this on both Windows and Mac. To check the supported version, here is more info on Quicktime player download.

When it comes to adding subtitles using Quicktime player, it’s a bigger workaround as the traditional subtitles files (.srt, .ass., etc.) don’t work on Quicktime player. This player uses its own subtitle format called the “.QT”.

If there’s a subtitle file embedded to the video by default, you can easily enable or disable it (Refer Step 3). If not, you have to use a third party application to do that. 

So, let’s quickly learn how to add subtitles to a video using the Quicktime player.

Step 1:  To add subtitles, you need to use a third party application like “Subler”. This app helps embed the subtitles to the Video MP4. 

Step 2: Open the MP4 video on Subler and drag & drop the SRT subtitle file into it. Once you’ve added the subtitle file, press command + S or File > Save as to save the video.

Now, the video is ready with the embedded subtitles!

Step 3: It’s time to enable the subtitles now! Open the MP4 video on Quicktime media player. To enable or disable subtitles in Quicktime player, click on “View” in the menu bar. Here you’ll see the option to enable or disable the subtitles.

Up next, let’s see how to add subtitles to MP4 using iMovie.

Method 4: Using iMovie

In iMovie, there’s no straightforward way to add subtitles to your MP4 Video. But here’s a workaround for it, which is to add subtitles manually. In this method, we have to manually go to the timestamp, add the subtitles manually for each dialogue in the video.

Step 1: Import the MP4 video to your library from your computer. Once you add the video, press ‘Space’ to play the video. To add subtitles to your video, you can add markers to the video by clicking on ‘M’ while the videos are playing. This will make things easier to add subtitles.

Step 2: Once the marker is added, click on “Titles” to add text to your video. For this, we will be using the title called “Lower”. Drag and drop it to the timeline to add it to your video.

Step 3: Once you add the “Lower” title to your timeline, you can double click the text to customize it and add subtitles.

That was easy, wasn’t it?

All these media players allow you to customize and adjust the subtitles further according to your wish.

So, adding subtitles using them and customizing them as per your wish is not a tough job, provided you have premade subtitles ready to be added. Whereas, if you don’t have subtitles ready for adding to your video, it’s going to be tough for you!

******

Adding subtitles to your video has its advantages, right from accessibility to making your content engageable by the audience.

Moreover, we also have a video guide on how to create subtitles easily using Animaker subtitles.

Read more subtitle guides –

How to make subtitles
How to add captions to reels

What are you waiting for?

Get on Animaker subtitles and start creating beautiful-looking subtitles for your videos easily. If you have any questions or doubts, feel free to drop them in the comments section below.

1 2 3 4