
Crop a Video in QuickTime on Mac (With Pictures)

Pragadeesh N - January 27, 2021 - Leave your thoughts. 4 min read
Looking to crop a video in QuickTime on your Mac computer?
While it isn’t possible to crop a video using the basic version (the one that comes pre-installed on your Mac OS), the pro version of QuickTime player allows you to crop videos.
In this article, we’ll show you how to crop a video using QuickTime Pro with step-by-step instructions and pictures.
As a bonus, we’ll also show you how you can use Animaker to crop a video online using Safari or Chrome on your Mac computer.
Note that this article covers how to crop a video, which is about selecting the area of the video you want to use or highlight.
If you want to trim a video to your desired length, you can take a look at our article that provides step-by-step instructions on how to cut a video.
How to Crop a Video with QuickTime Pro
Like we said before, the QuickTime player that comes pre-installed cannot be used to crop a video. You’re going to have to upgrade it to pro for $30 in order to be able to crop a video. If you have QuickTime 7 installed on your Mac, you can go ahead and upgrade it to QuickTime Pro.
Also, you’re going to need Photoshop to create a mask file. Depending on how familiar you’re with Photoshop, creating a mask file in it could take several minutes. Once you have Photoshop installed on your Mac computer, follow the below steps to crop a video using QuickTime Pro:
Step 1: Capture a Frame of Your Video Clip
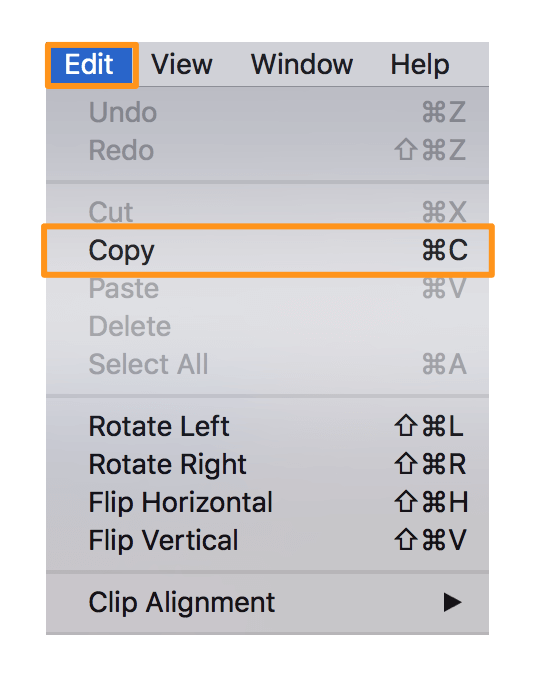
You’re going to need a mask file to instruct QuickTime on how it should crop your video. To create this mask file, you’ll first need a snapshot of a particular frame of the video. To copy the image of a frame using QuickTime Pro, open the video and go to Edit > Copy.
Step 2: Create a Mask using Photoshop
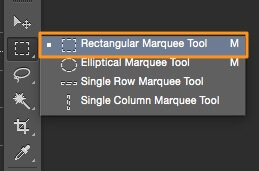
Open Photoshop and create a new project by going to File > New. Then, paste the image you’d previously copied. Now use the Rectangular Marquee Tool to select the area you want to use, and fill the selected area with black color. Now fill the space outside the black box with white color. Finally, save the file in GIF or TIFF format.
Step 3: Apply the Mask
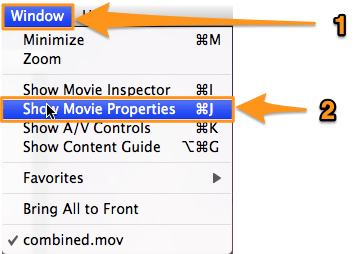
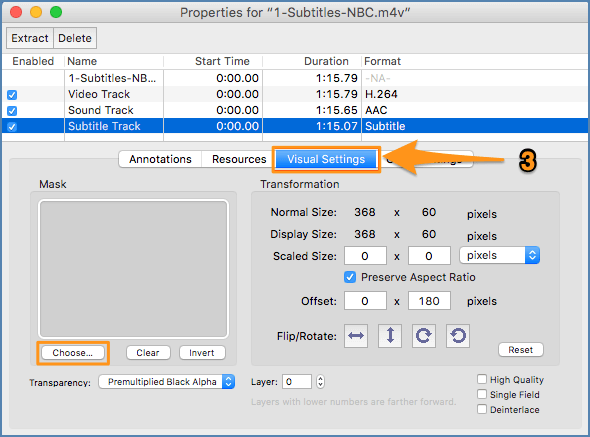
Open QuickTime pro, go to Windows > Show Movie Properties > Visual Settings. Then click on the Choose button to import the mask file.
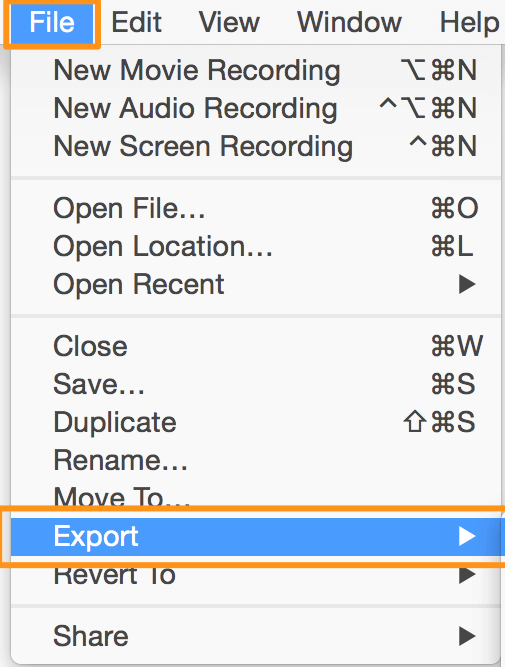
Step 4: Save the Cropped Video
Once the mask is applied to your video, only the selected area shows up. Go to File > Export to save the cropped video to your desired location.
How to Crop a Video The Easy Way On Your Mac Computer
Using QuickTime Pro to crop videos is a hassle. It involves several steps and creating a mask file.
A much easier way would be to use Animaker’s Video Cropping Tool to crop your video. It’s a lightweight online tool that lets you crop videos in 3 simple steps and doesn’t require you to create a mask to crop a video. Follow the instructions below to crop a video using Animaker.
Step 1: First, Login or create a free account. From the dashboard, pick the dimensions or choose a platform you want to crop your video for. You can choose the Horizontal (16:9), Square (1:1), or Vertical (9:16) preset from the Create a video section. Or, you can use the Custom Size button to crop your video to the custom dimensions.


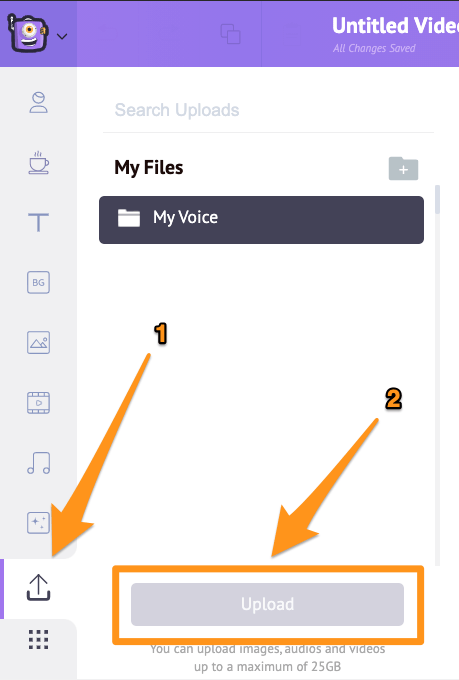
Step 2: Upload the video you want to crop. Navigate to the Upload tab in the main navigation bar and click on the Upload button at the bottom of the tab window.
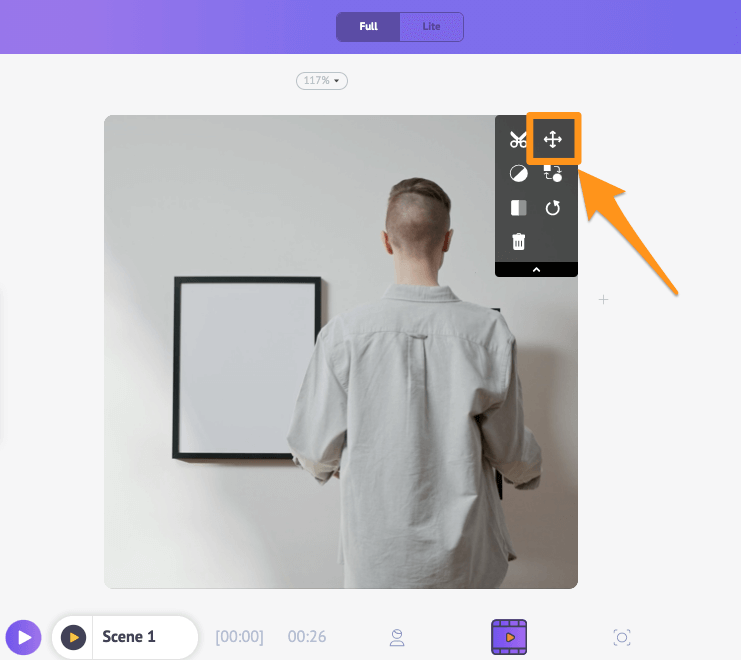
Once the video’s been uploaded, click on the video to set it onto the canvas.

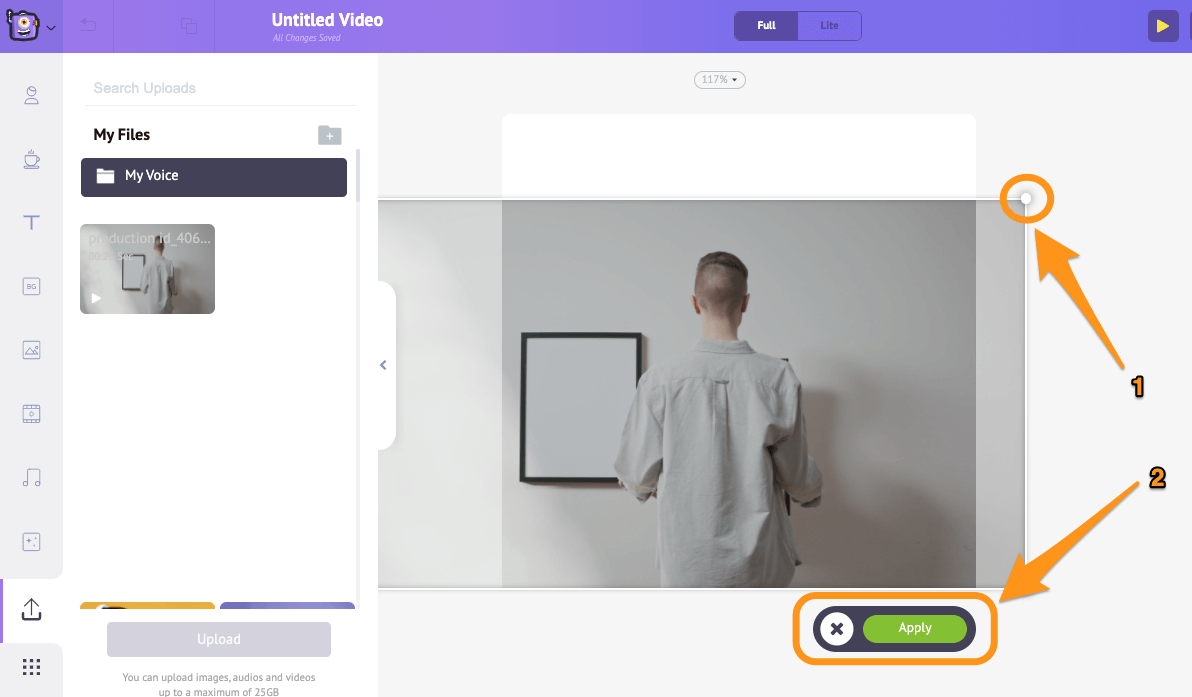
Now crop or resize the video to select the area you want to use. Click on the Crop button in the top right corner of the canvas to start cropping your video. Now hold and drag one of the Crop handles around the corners to scale or shrink it; then reposition it to make it fit the dimensions properly. Once you’re done, click on the Apply button.
Step 3: You can download the cropped video to your local computer by clicking on the Publish button and then selecting Download Video from the resulting dropdown. Or, you can share it directly to various social media platforms from inside the app.

On top of letting you crop videos, Animaker’s online video editor gives you the ability to:
And more! With Animaker’s all-in-one video editing software, you get all the tools you need to edit your videos for your social media channels and the web. No video editing experience is required to use our video editing suite.
Got any questions on cropping a video on your Mac computer? Any tips or tools to crop a video on Mac that you find interesting? Please let us know about them in the comment section below.