How to Add a Voiceover in iMovie on iPhone and Mac

Pragadeesh N - April 21, 2021 - Leave your thoughts. 9 min read
Looking to record and add a voiceover in iMovie on iPhone or Mac?
In this article, we show you how to add a voiceover to your video using iMovie on both iOS and Mac, step-by-step, with pictures.
Here’s what we’ll cover in this article, jump to the section that’s relevant to you:
How to add a voiceover to a video in iMovie on iPhone and iPad
How to add a voiceover to your video in iMovie on Mac
Adding a Voiceover to a Video using the Best iMovie Alternative
How to Add a Voiceover to a Video in iMovie app on iPhone and iPad
You can use the iMovie app on your iPhone or iPad to add voiceovers to your videos. If you don’t have the iMovie app installed on your iPhone or iPad, you can download and install iMovie for iOS.
Once you’ve installed the iMovie app, follow the steps below to add voiceover to imovie on iPhone and iPad:
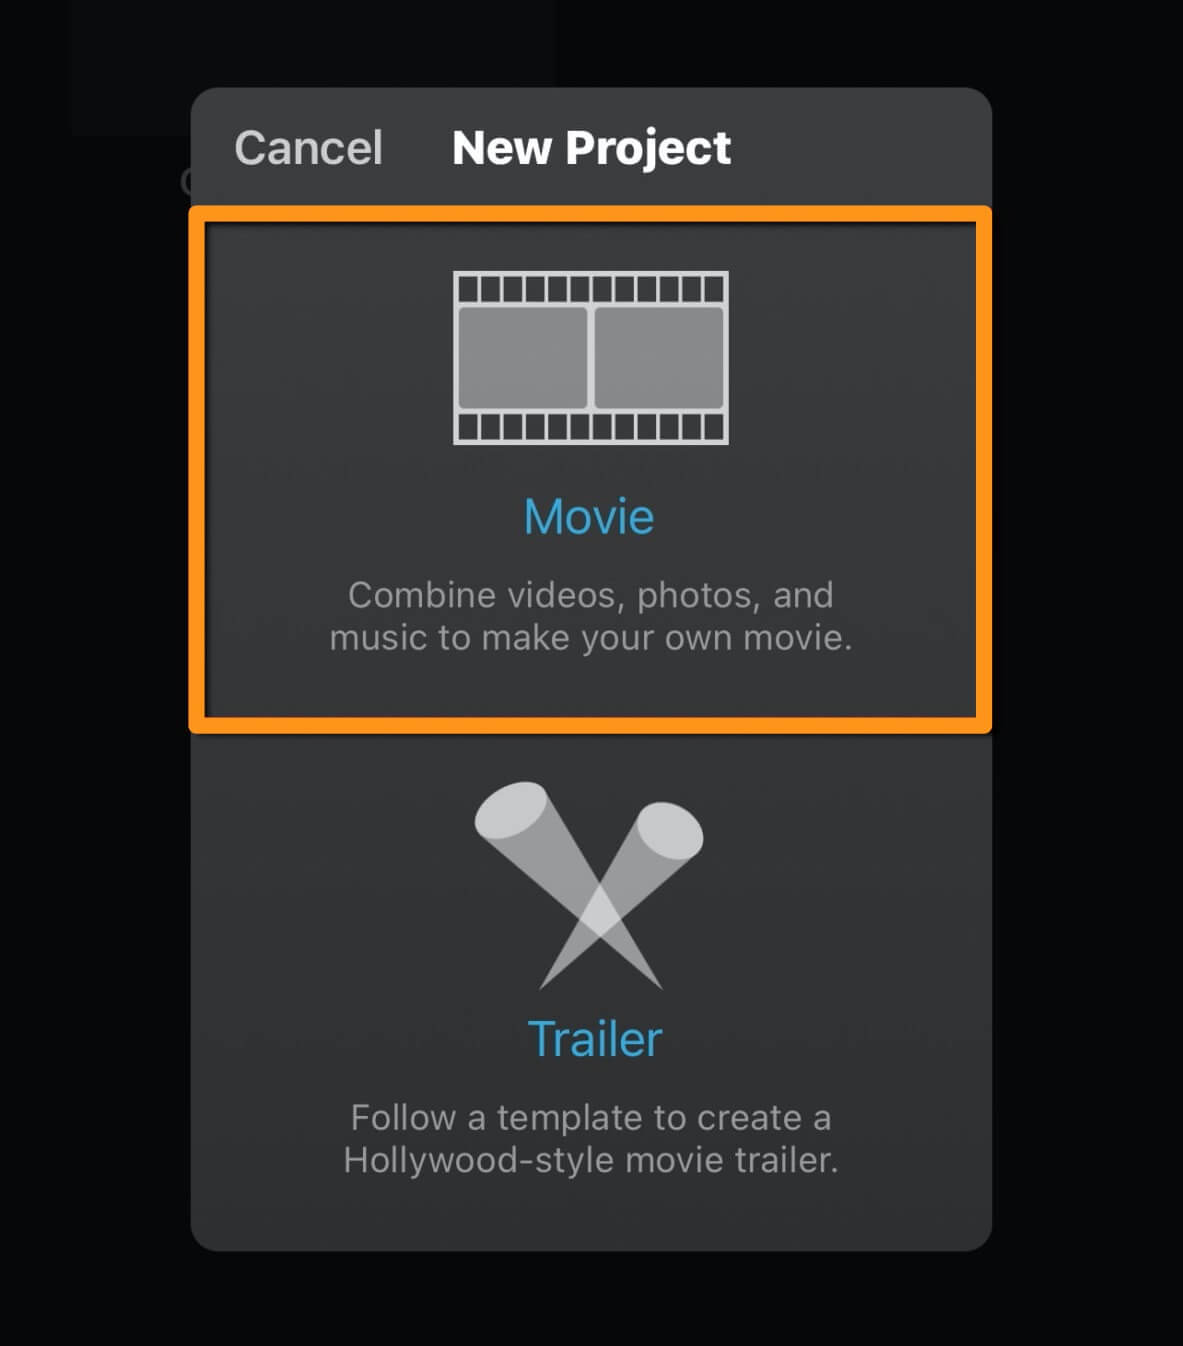
- First, create a new project. Open the iMovie app and tap the Create Project button.

- Select Movie from the popup window.
- Then tap Create Movie at the bottom of the app screen.

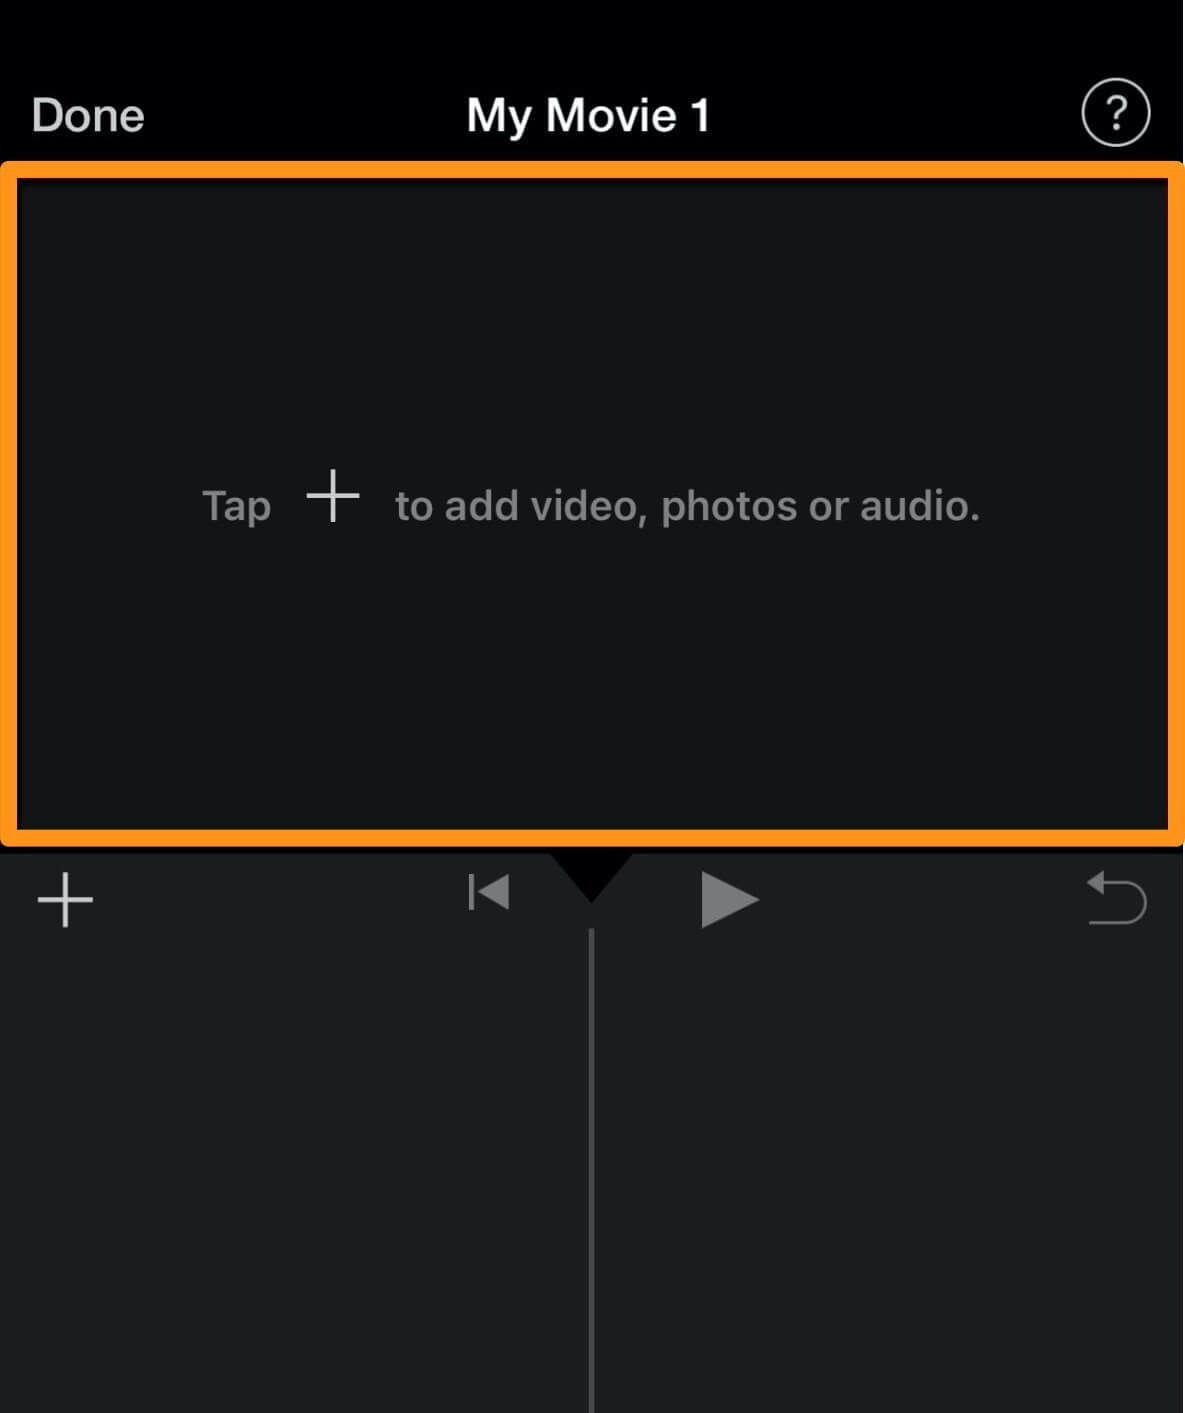
- Now tap on the area that says Tap + to add videos, photos, or audio to import your videos.
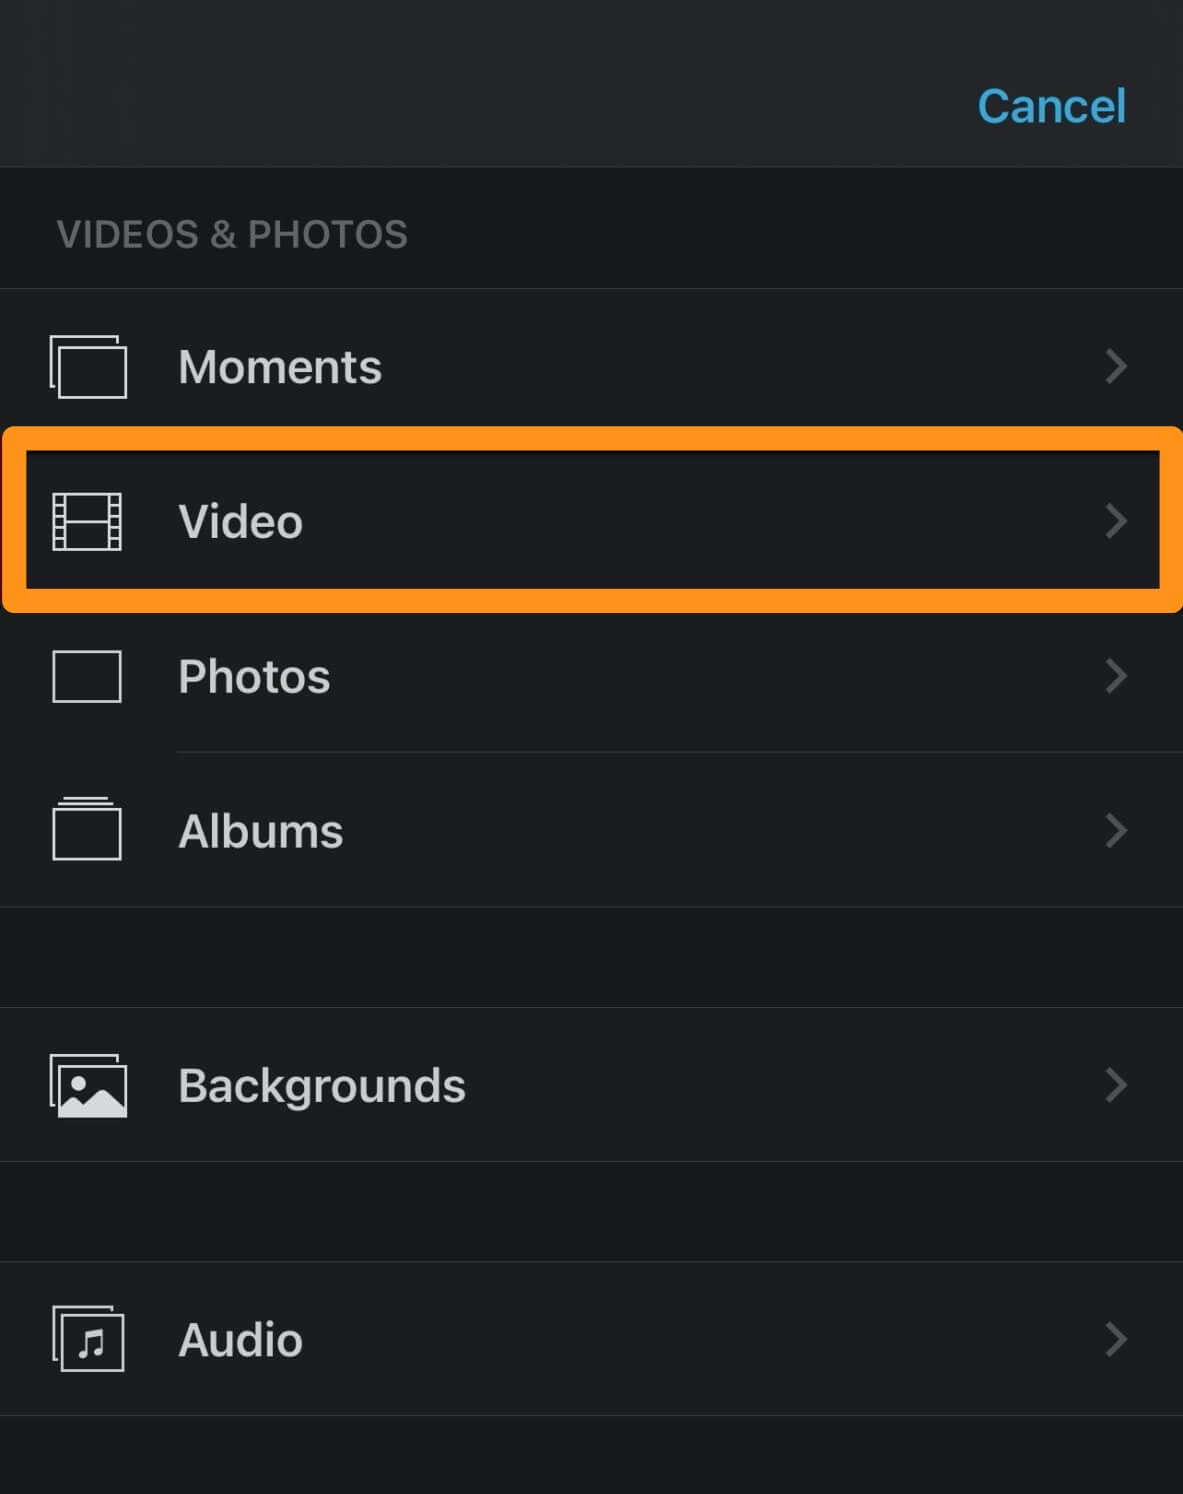
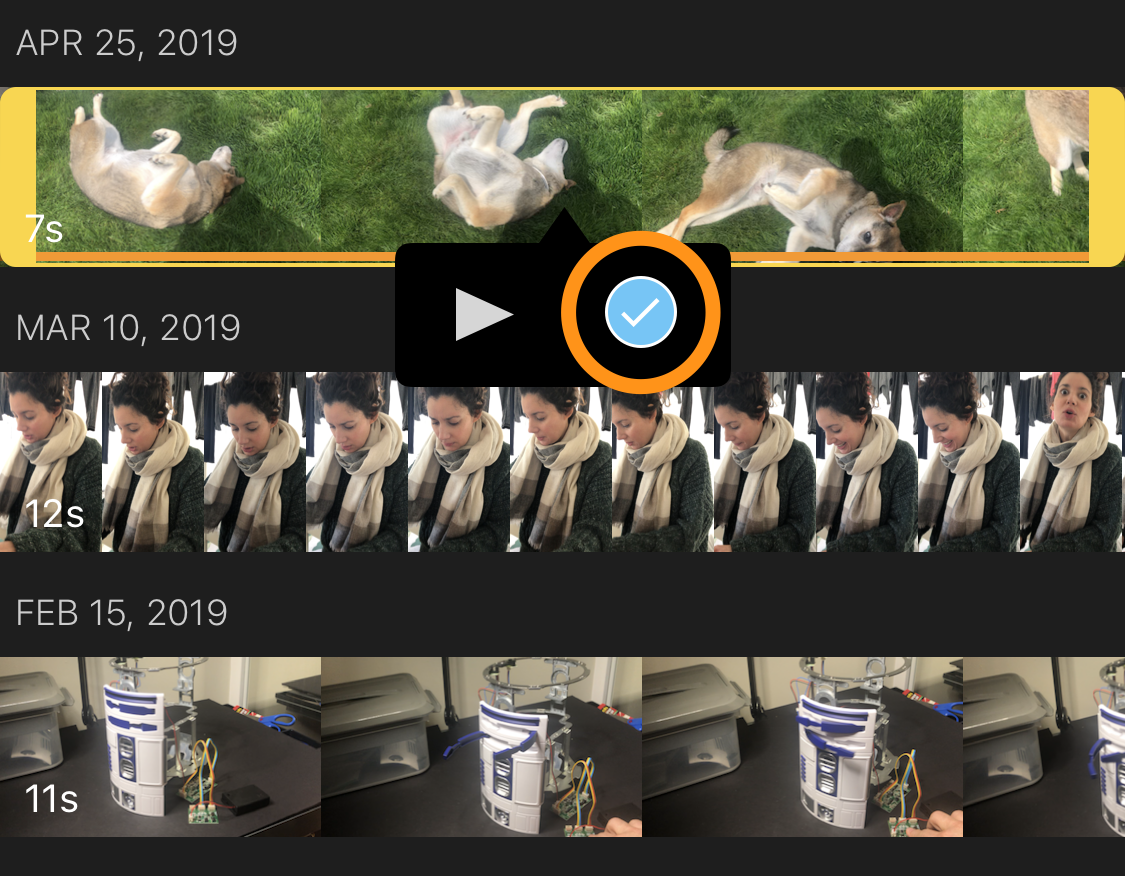
- Now tap Video under the VIDEOS & PHOTOS category.
- Then tap All, tap on the video you’d like to import, and tap the blue round button with the tick mark on it.

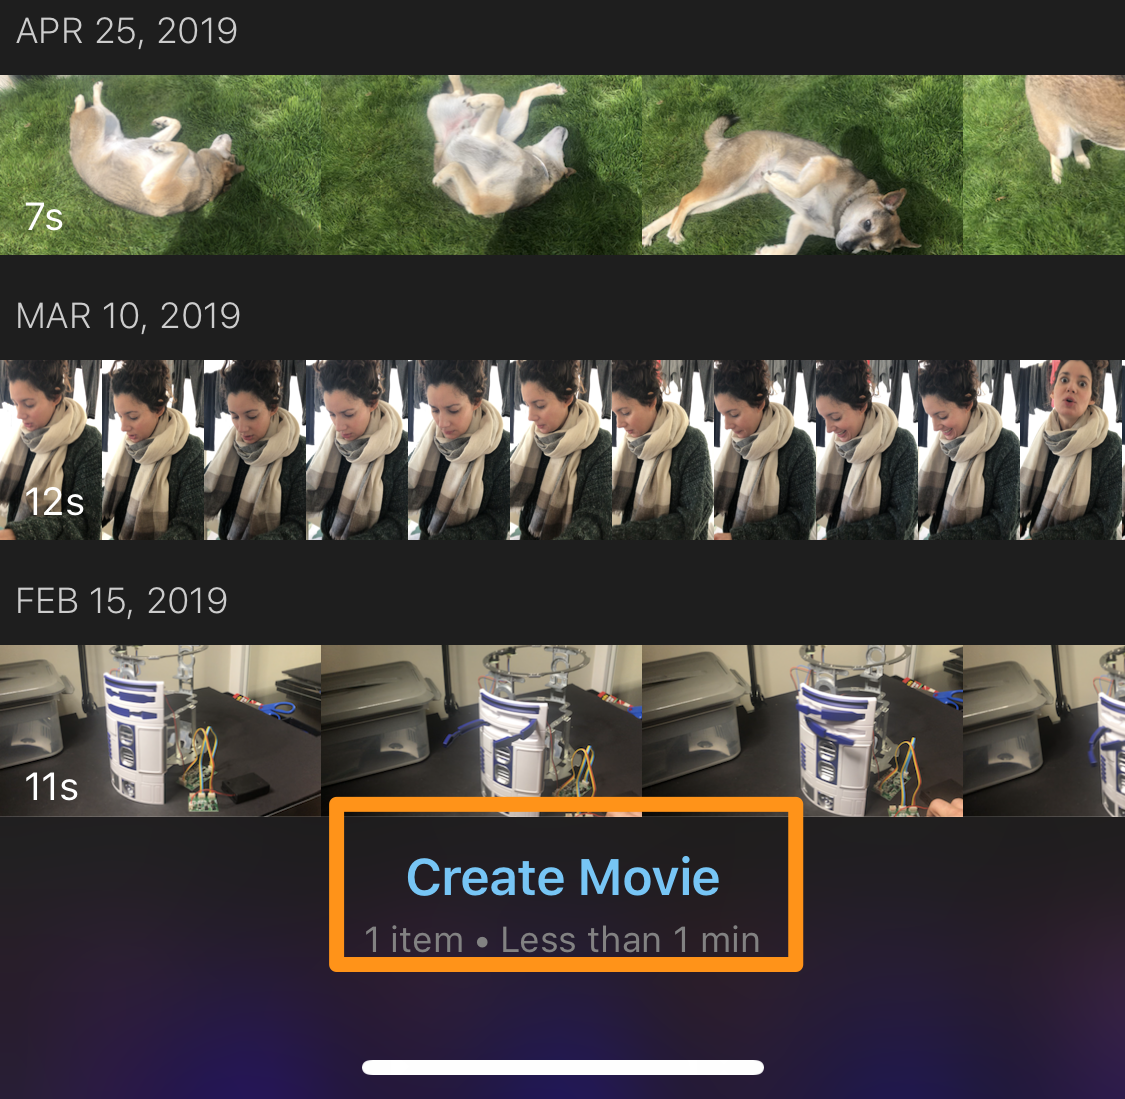
- Once you’re done adding the video clip, tap Create Movie at the bottom of the app screen.
- Now that you’ve imported the video(s), you can now start recording the voiceover. Before you start recording your voiceover, choose where you want your voiceover to start. From the timeline, tap and drag the video(s) to your left to place the playhead where you want your voiceover to start.
- Then tap the plus icon and select Voiceover from the menu.

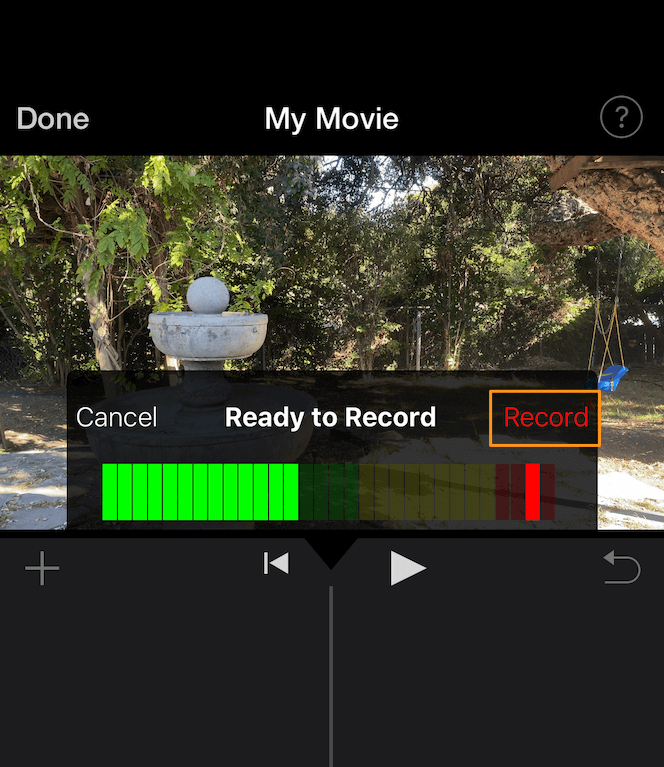
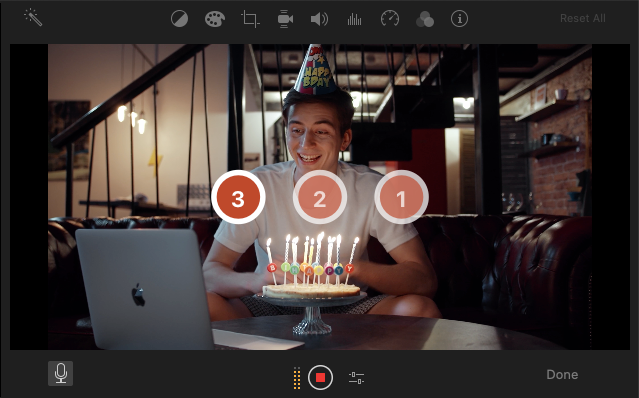
- Tap Record in the top right corner of the Ready to Record popup window. Before the app starts recording, you’ll be given a 3-second countdown.
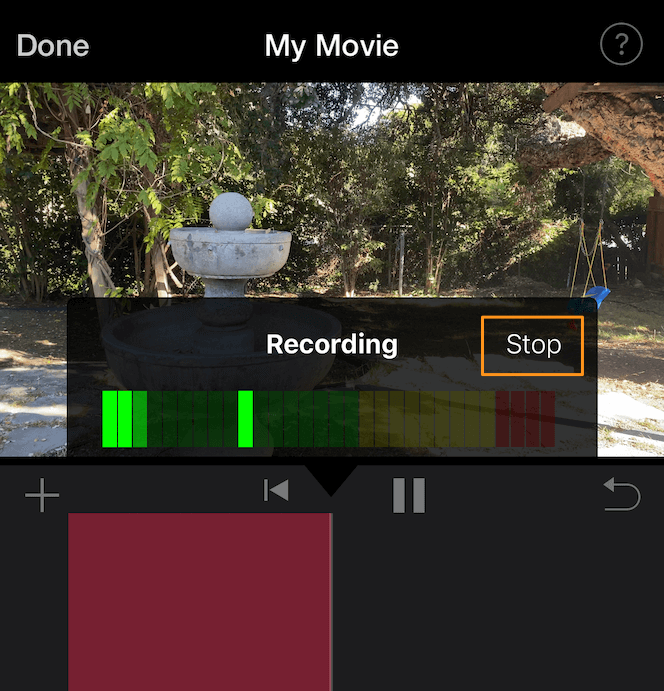
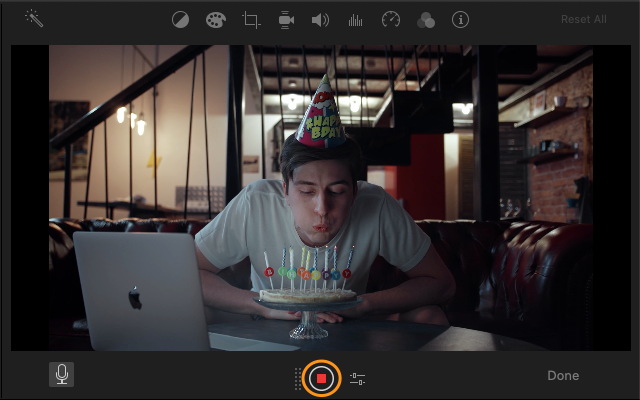
- Once you’re done recording the voiceover, tap Stop from the same location as the Record button.
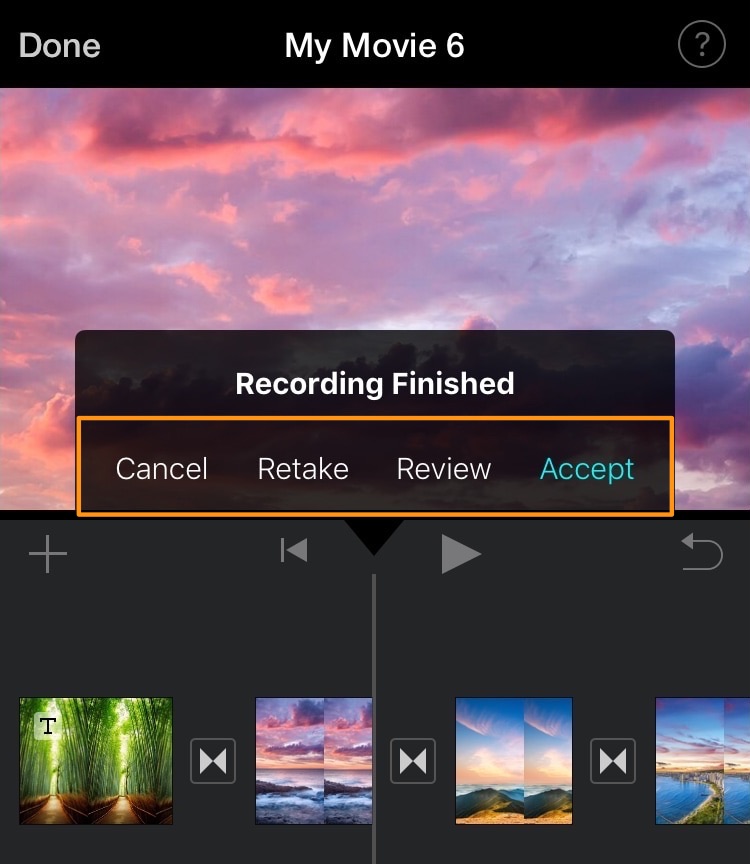
- Once you stop recording the voiceover, you’ll be given the options to Cancel, Retake, Review, or Accept your recording. Tap Accept if you’re happy with how it’s come out. Or tap Retake to have another go at it.
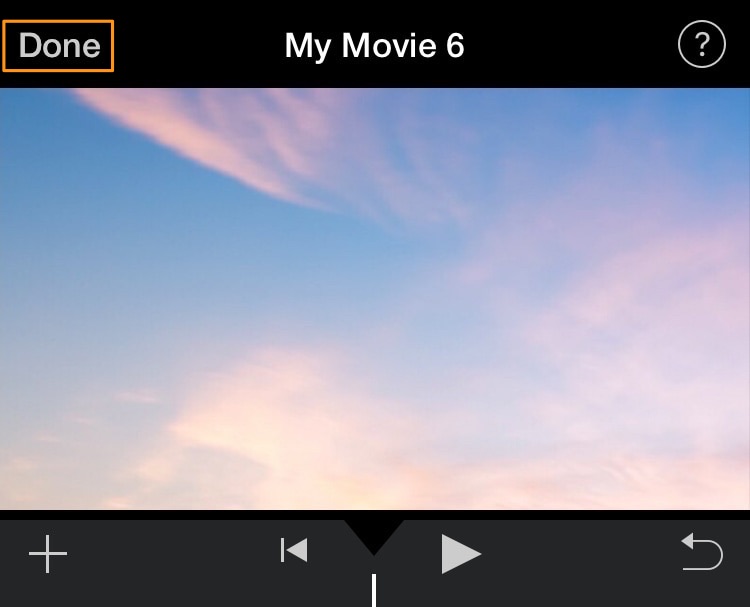
- Once you’re done recording and adding a voiceover to your video, tap the Done text button in the top left corner of the app window.
How to Add a Voiceover to Your Video in iMovie on Mac
iMovie is a free tool that comes preinstalled on Mac OS.
Here are the steps to adding a voiceover to iMovie on Mac:
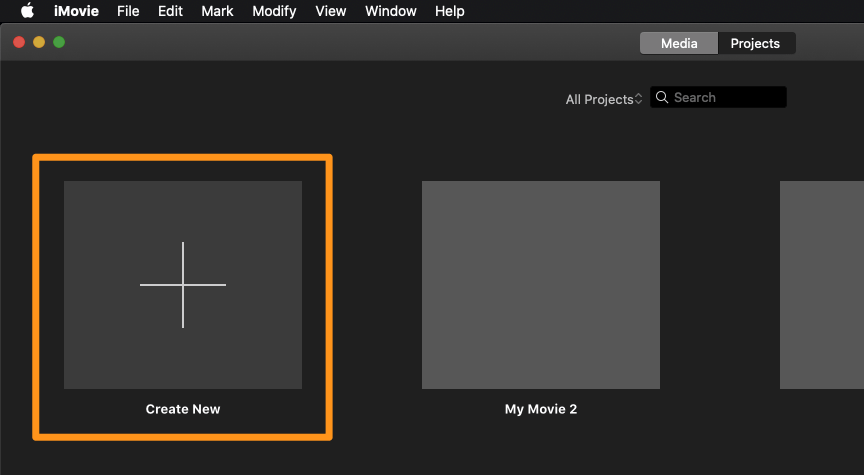
- Open iMovie and click on the Create New button.
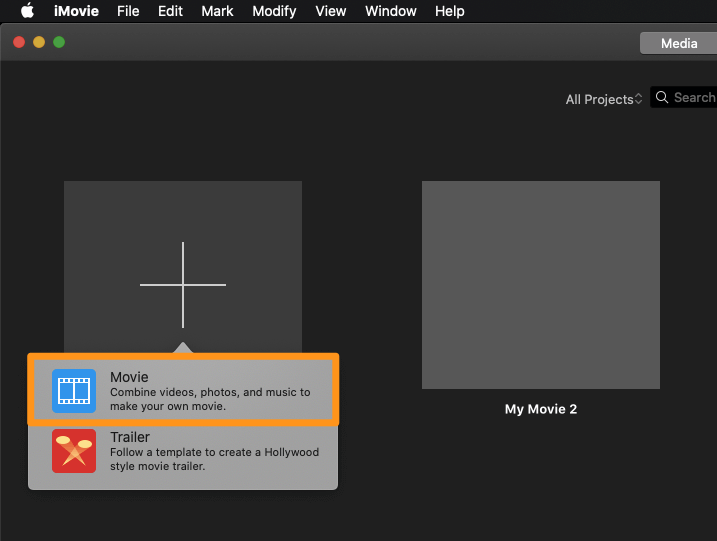
- Now select Movie from the dropdown menu.
- Click on the Import Media button and select the video that you want to import.

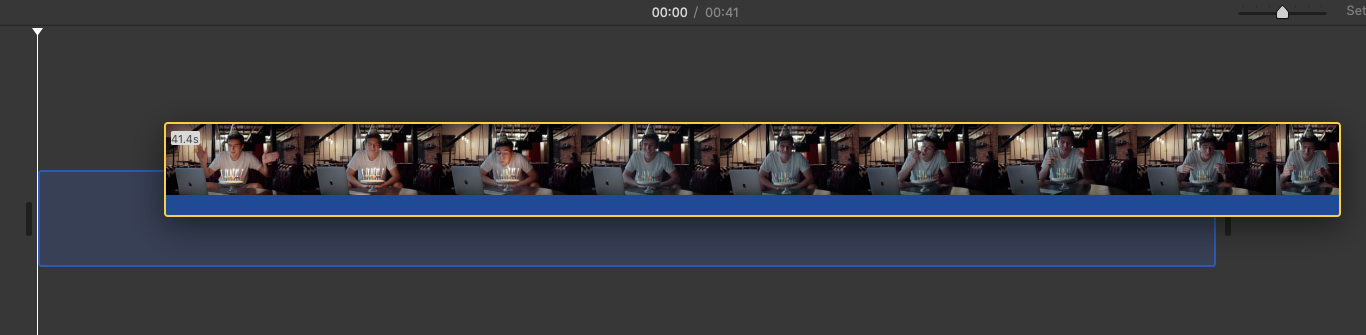
- Once you’ve imported the video, drag and drop it onto the timeline.
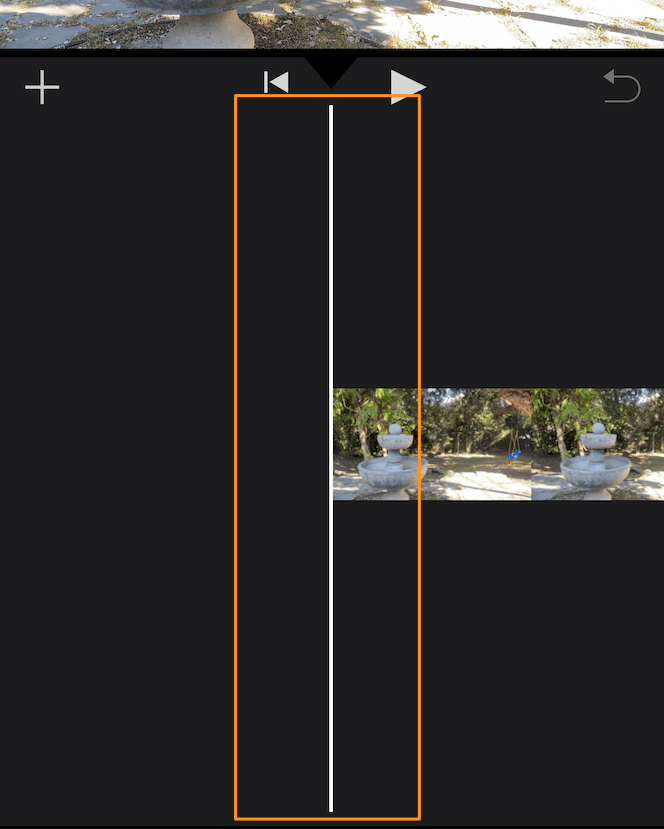
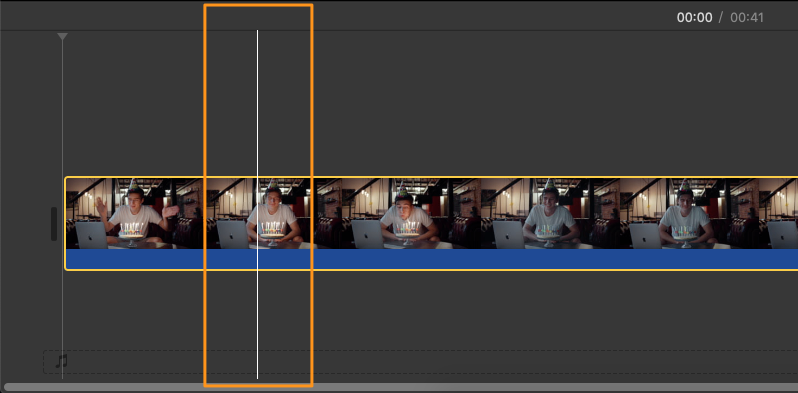
- Now let’s record and add a voiceover to this video. First, from the timeline, place the playhead where you want to add the voiceover.
Determine where you want to place the playhead in the timeline, hover in that position to reveal a white line, and then simply click there. This will move the playhead to that location.
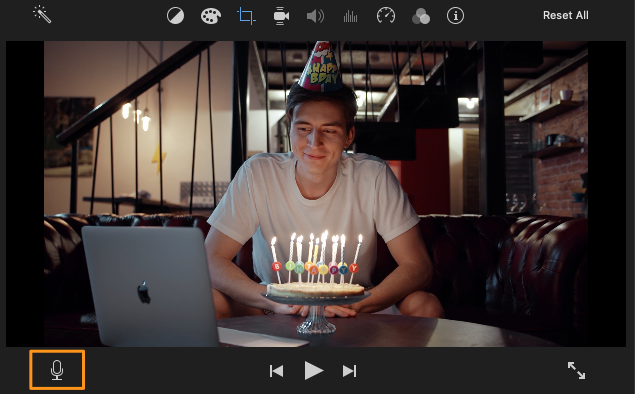
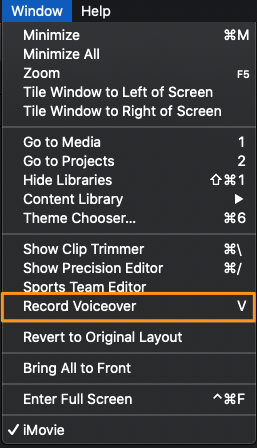
- To record the voiceover, either click on the microphone icon in the bottom left corner of the viewer window or click on the Window menu from the menu bar and select Record Voiceover from the drop-down menu.
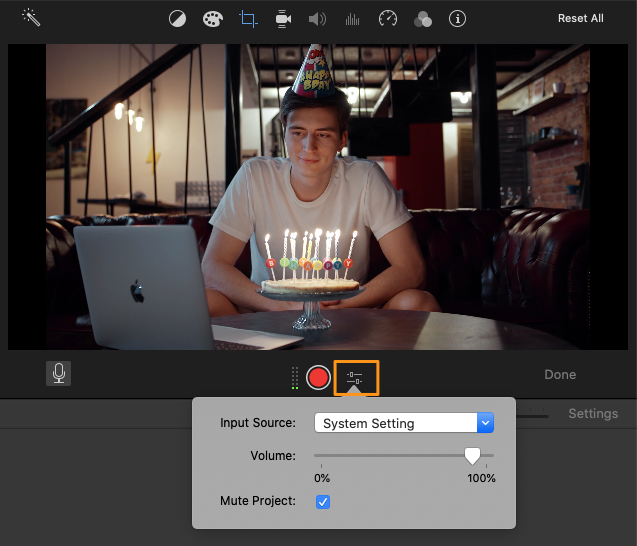
- Click the slider-bars icon next to the recording button to adjust the voiceover settings such as the input source (available microphones) and volume.
- Click the red, round record button to start recording the voiceover.
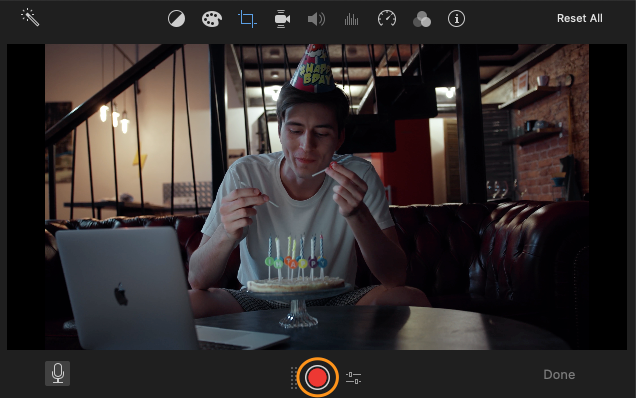
You’ll see a 3-second countdown just like on iOS.
- To stop recording the voiceover, click on the same record button again. You can also stop recording the voiceover by hitting the space key.
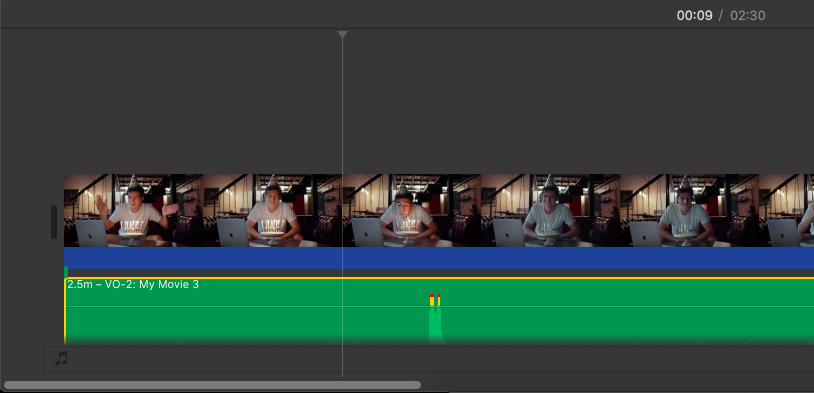
- You’ll now see that a new audio clip has been added to the timeline.
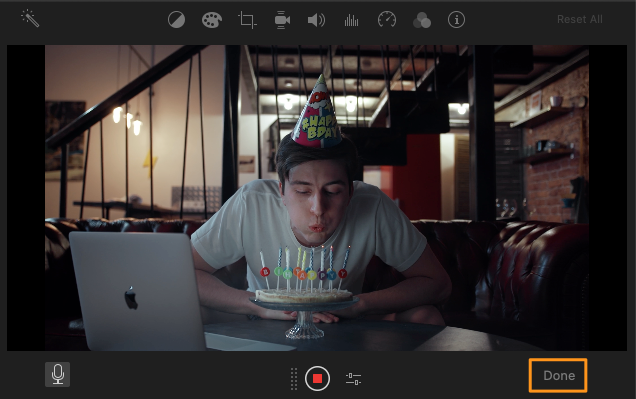
Finally, click Done in the bottom right corner of the viewer window to exit the voiceover mode.
Adding a Voiceover to a Video using the Best iMovie Alternative
If you’re looking for an online tool to add a voiceover to a video, you can use Animaker.
For those who are unaware of Animaker, it is an all-in-one DIY video-making app designed to help non-designers make professional-quality videos from the comfort of their browser.
It just takes 3 simple steps to add a voiceover to your video and download it using our super-simple, free tool.
It works on Chrome, Firefox, Safari, Internet Explorer, etc., and if you use one of these browsers, you can easily add audio files to your videos on your Mac computer.
Here’s how to add a voiceover to a video using Animaker:
Add Voiceovers to Videos in 3 Simple Steps using Animaker
Step 1: Sign up / Log in and Pick the Dimensions
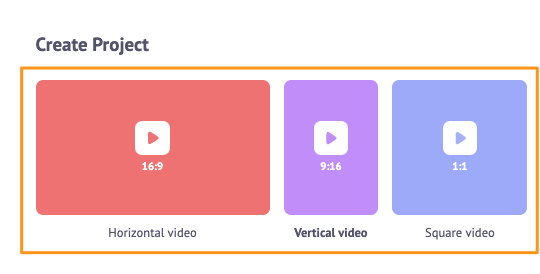
Sign in to your account or create a free account. Then choose the dimensions for your output video depending on which social media platform you’d be posting it on.
You could want your video to be Horizontal, Square, or Vertical in size. Pick one of the premade dimensions from the Create Project section in your dashboard.
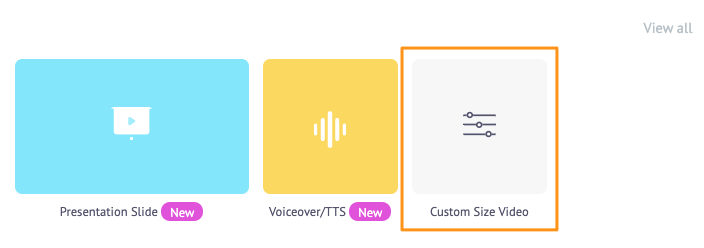
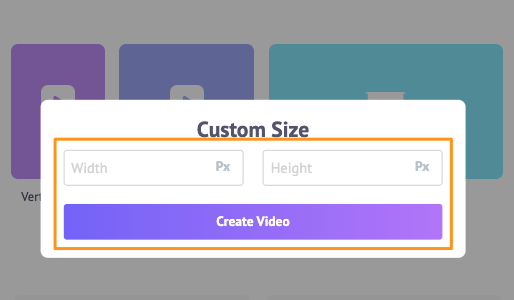
You can also pick your own custom height and width for your video. Simply click on the Custom Size Video button from the same section above. Then enter your desired width and height and hit Create Video.
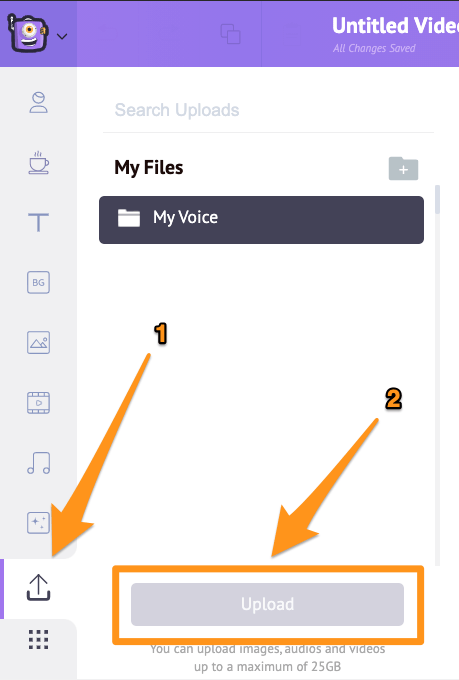
Step 2: Upload Your Video and Add a Voiceover to It
Now upload your video(s). You can upload videos up to 20 GB in size. Navigate to the Upload tab in the menu bar and click on the Upload button at the bottom of the tab window.
Once the video has been uploaded, click on the video to set it onto the canvas.
There are two ways you can create and add a voiceover in Animaker. You can either record your own voice or generate natural-sounding audio narrations using text.
We’ll show you how to create a voiceover using both the former and latter methods.
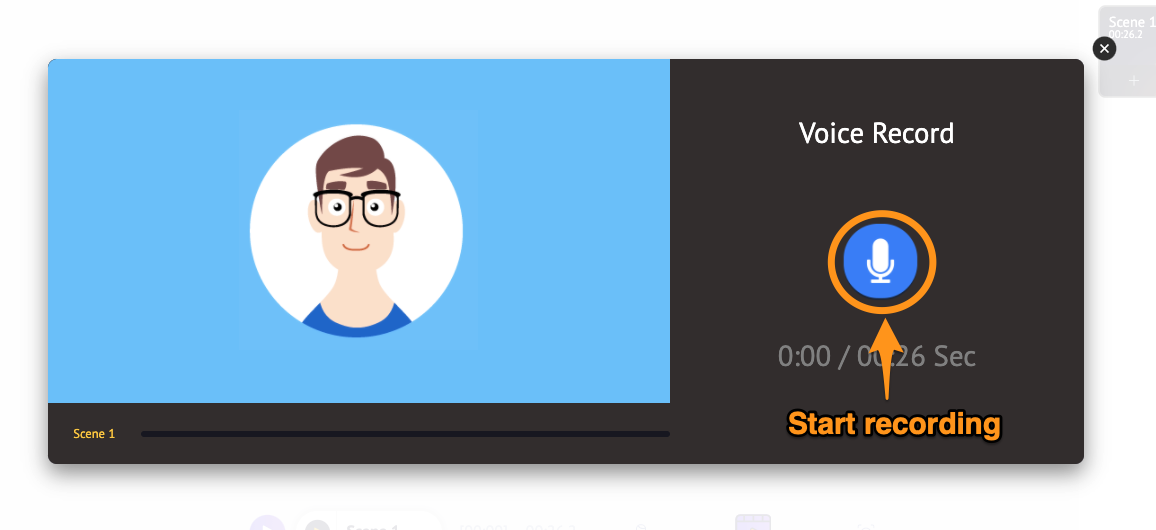
To record your own voiceover, first, click on the video you just set onto the canvas or click on the Video Timeline button right below the canvas. Then click on the microphone icon in the bottom left corner of the app window and select Record Voiceover option from the dropdown menu.
![]()
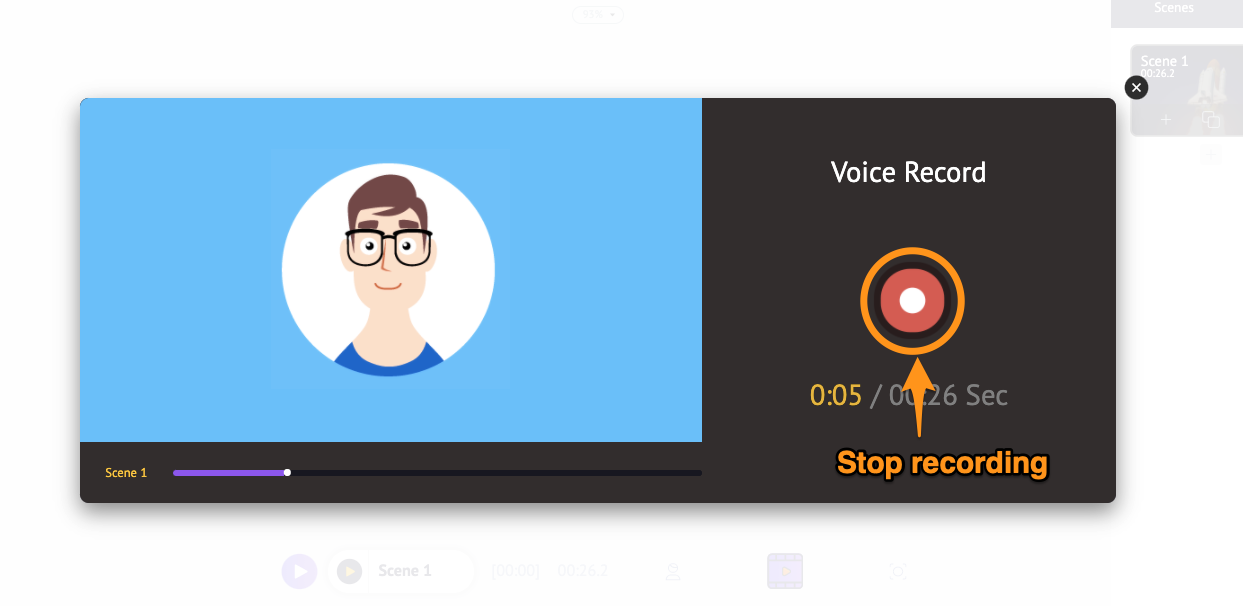
You’ll now see a simple popup window with a button to record your voice. Click on the blue, round button with a microphone icon on it to start recording your voice. Then click on the red button to stop recording.
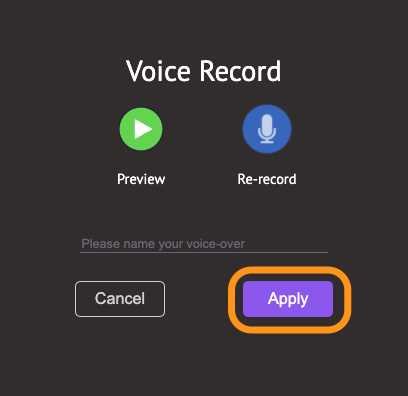
You’ll then be shown options to Preview, Re-record, and enter a name for your voiceover. Click on the Preview button to listen and check if it’s turned out the way you wanted it to. Click on the Re-record button to record the voiceover again and have another shot at it.
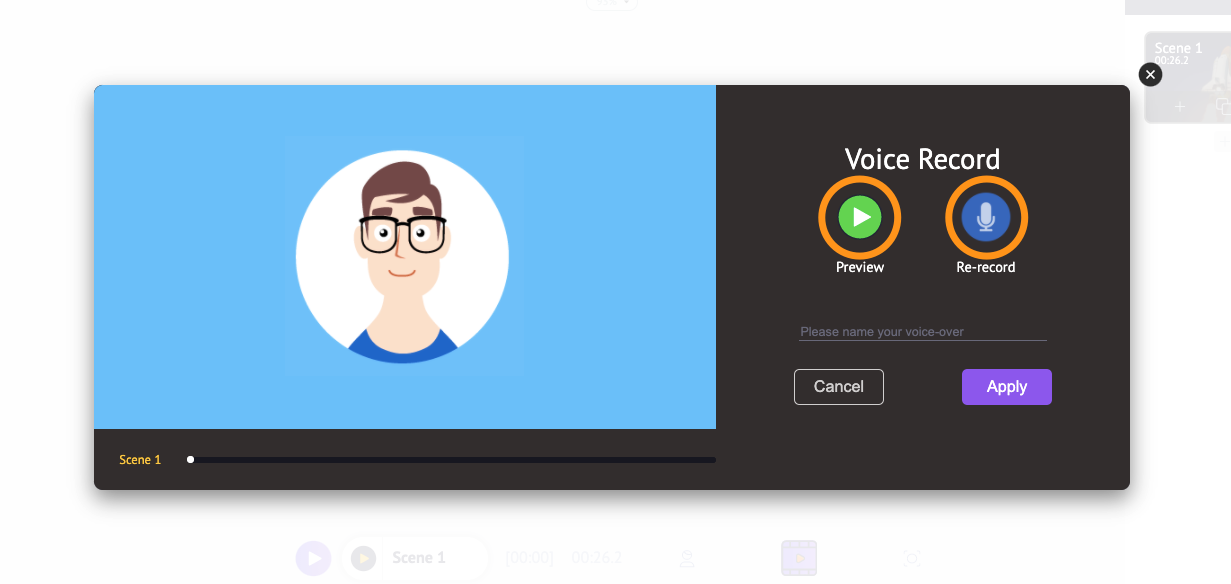
If you’re satisfied or happy with the voiceover, click on the Apply button to add the voiceover to your video or scene. You’ll now see that the voiceover appears right underneath the video layer in the timeline. We’ll show you how to edit the voiceover later in the article.

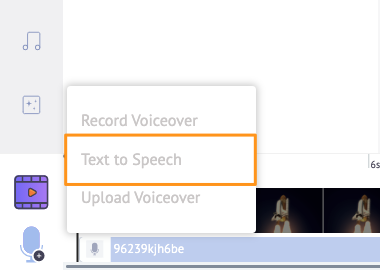
To generate voiceover using text, click on the same microphone icon from the same location but select Text to Speech from the dropdown menu this time around.
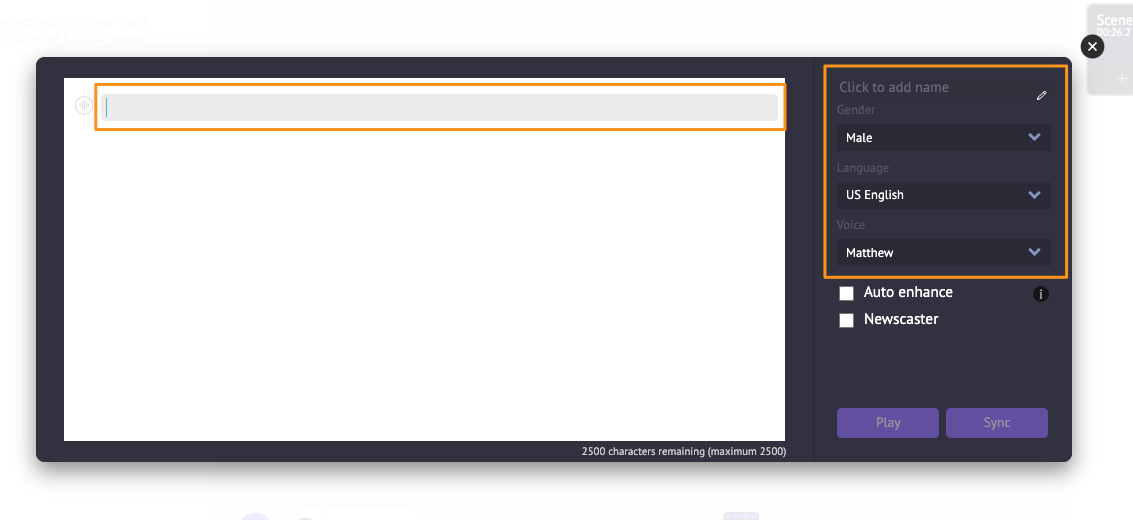
Start entering the text in the popup window that appears next. You can enter a name for your voiceover and pick a Gender, Language, or Voice.
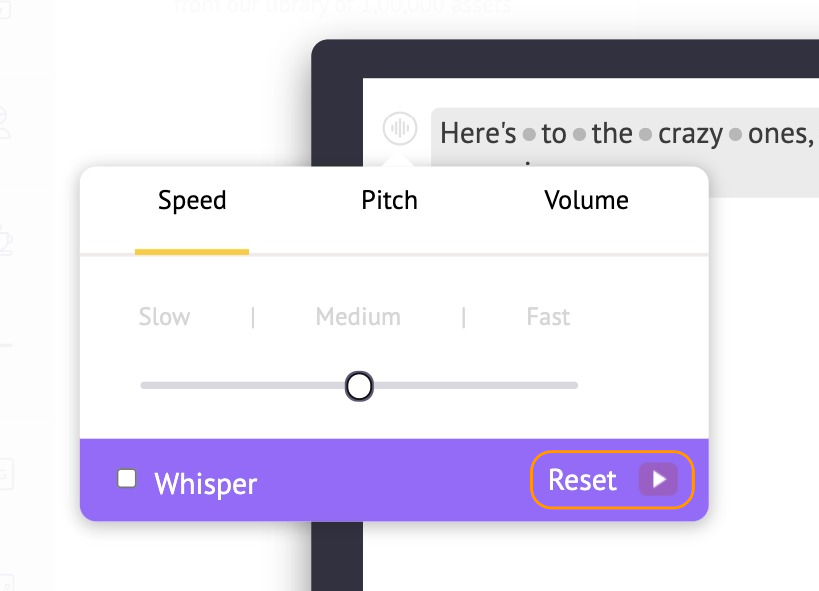
Click on the round button in the top left corner of the popup window to adjust the Speed, Pitch, and Volume of your voiceover.
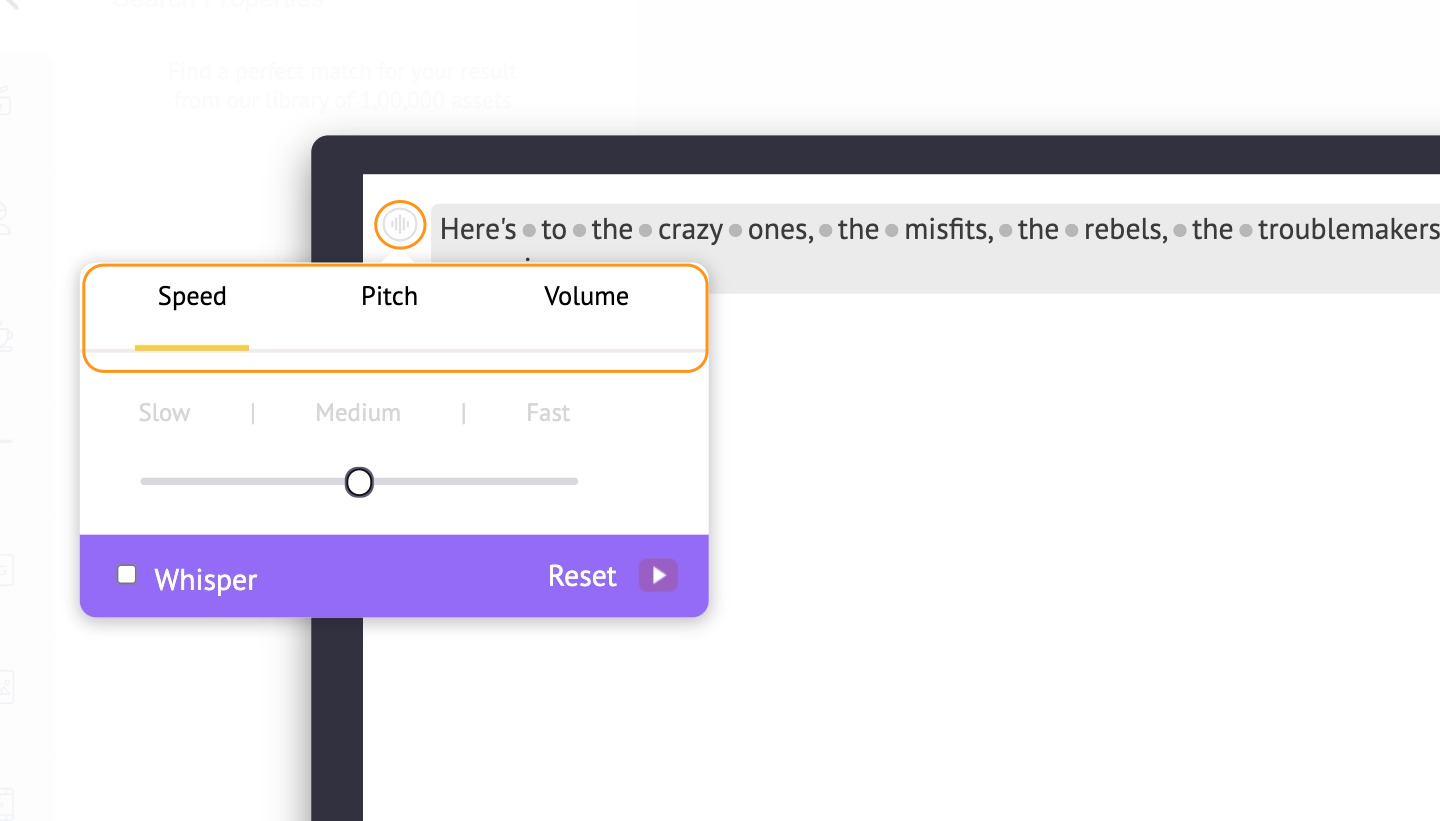
If you’d like to undo all the changes you made, click on the Reset button.
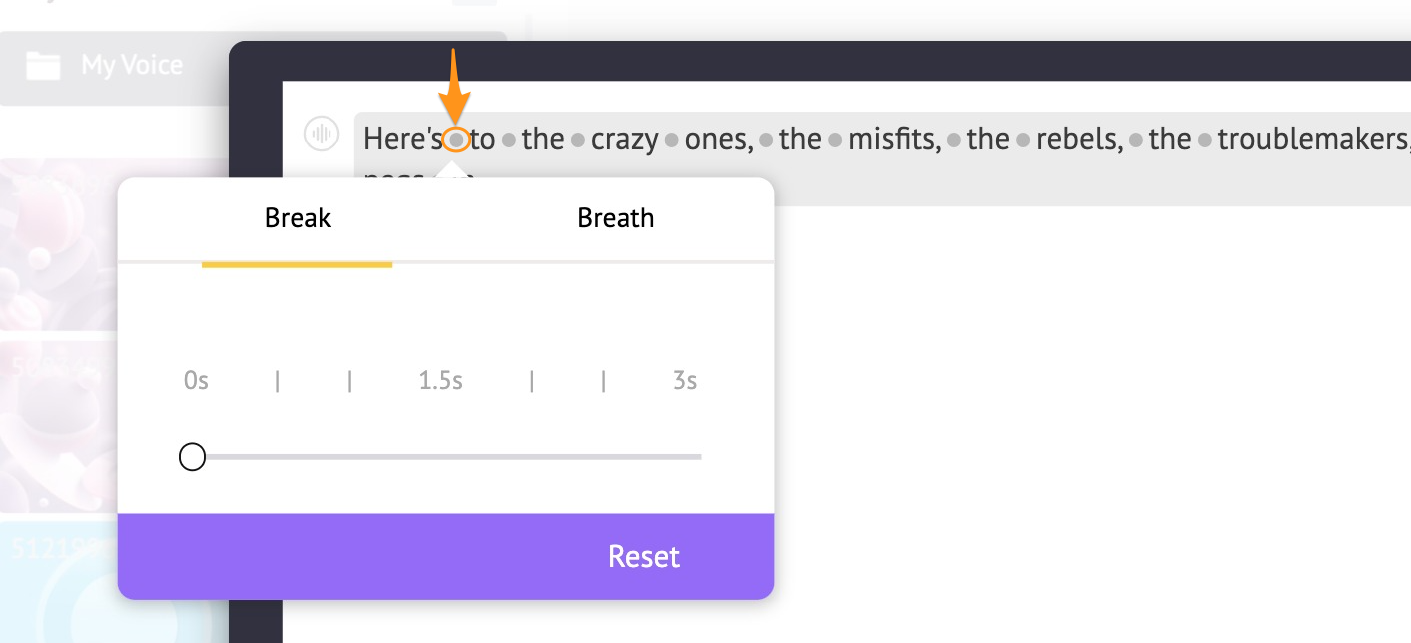
Between each word that’s pronounced, you can add a Breath or Break and determine how long it should last. Simply click on the dot between any two words to add a breath or break between them.
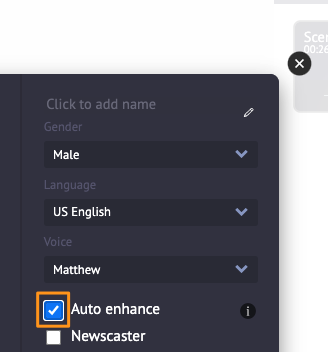
You can also, however, choose not to make any changes yourself and let AI take care of it by using the Auto enhance feature. The auto-enhance feature automatically adds the breath effect, speed, pitch, etc. Tick the Auto enhance checkbox to auto-enhance your voiceovers.
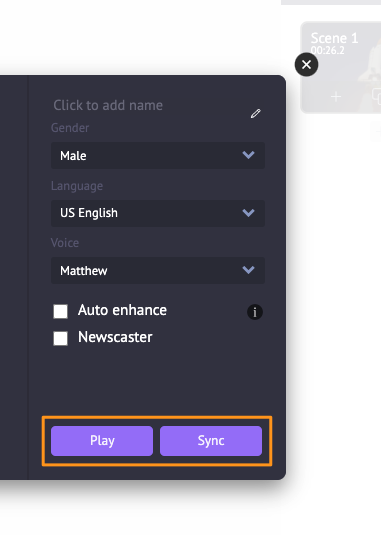
Click the Play button to play and preview the voiceover. And then click on the Sync button to add it to the scene or video.
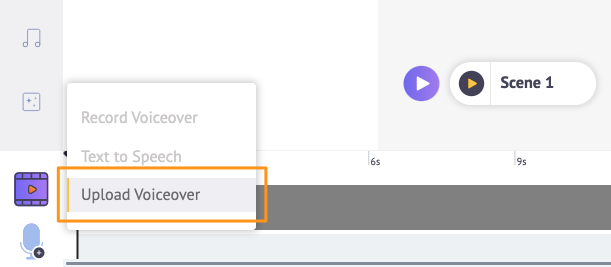
You can also upload your own voiceover (or audio) file to your video. You can upload it just like how you’d upload any other file to Animaker.
Or you can click on the microphone icon in the bottom left corner of the app window and select the Upload Voiceover option from the dropdown menu.
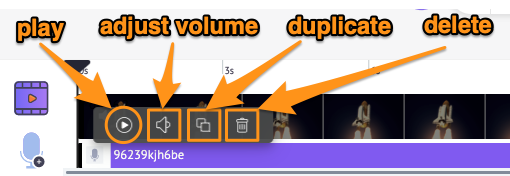
To edit the voiceover, simply click on it from the timeline. This will reveal a tooltip with options to play the voiceover, adjust its volume, duplicate and delete it.
Step 3: Preview and Download the Video
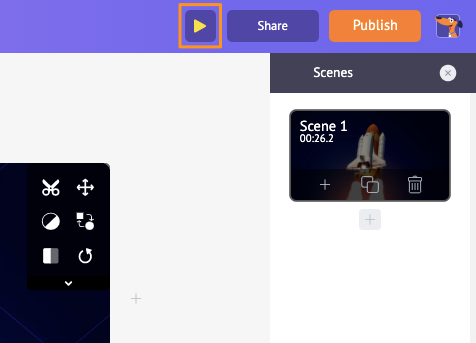
You can now preview your video by clicking on the play button beside the Share button.
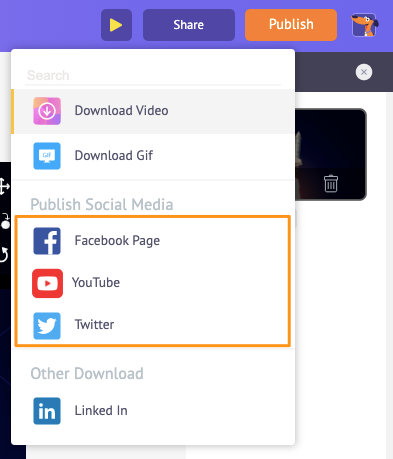
To download the video as an MP4 file, click on the Publish button and select Download Video from the dropdown menu.

You can also share the video directly to various social media platforms from right within the app.
Apart from letting you easily add voiceovers to your videos, Animaker offers all the video editing tools you’d need to edit and fine-tune your video footage.
You might want to explore some related video editing tools that our video editor offers:
- Add music or sound effects to videos
- Add text to videos
- Add filters to videos
- Add emojis to videos
- Add stickers to videos
- Merge or combine videos
- Add pictures to videos
- Add subtitles to videos
- Trim videos
- Rotate videos
- Crop or resize videos
- Flip videos
- Remove audio from videos
- Loop videos
And the list goes on… feel free to check out all our video editing software tools and learn why they’re the go-to tools for marketers, content creators, and people with no video editing experience.
Got any questions about adding a voiceover to a video in iMovie or on your Mac computer? Any interesting tips or tools to add voiceovers to your videos on your iPhone or Mac computer that we haven’t covered? Please let us know about them in the comment section below.