
How to Crop a Video on iMovie (With Pictures)

Pragadeesh N - January 8, 2021 - Leave your thoughts. 5 min read
Looking to crop a video on iMovie?
Whether you are using iMovie on your iPhone, iPad, or Mac computer, we got you covered.
In this article, we show you how to crop a video using iMovie on your iPhone, iPad, or Mac with easy step-by-step instructions and pictures.
As a bonus, we’ll also show you how you can use Animaker to crop a video online using Safari or Chrome on your Mac computer. For those who aren’t aware of Animaker, it is a free online DIY video maker that can be used for anything ranging from simple tasks like trimming and cropping videos to creating full-blown animated videos directly from a web browser.
Please note that this article is about how to crop a video, which is about selecting the area of the clip you want to use or highlight while cutting out the unnecessary parts.
If you’re looking to trim or cut a video to your desired length, you can take a look at our article that covers how to cut a video, or you can use our super-simple trim video tool that doesn’t require you to read or watch a tutorial.
How to Crop a Video in iMovie on iPhone or iPad
Even though the screenshots below demonstrate how to crop a video on an iPhone, the steps are pretty much the same if you were to crop a video using iMovie on your iPad.
Here are the steps to crop a video in iMovie on your iPhone or iPad:
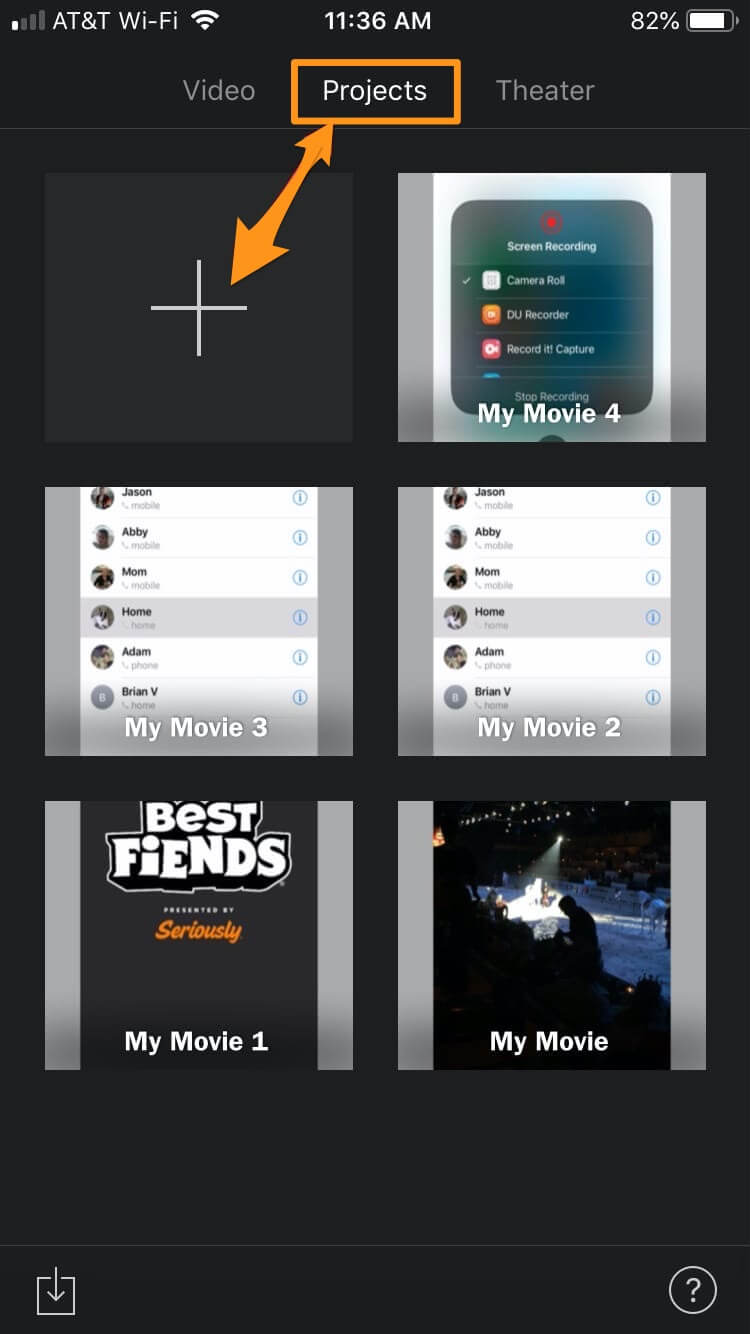
- Open iMovie, tap on the Projects tab at the top, then tap on the button with a plus icon.
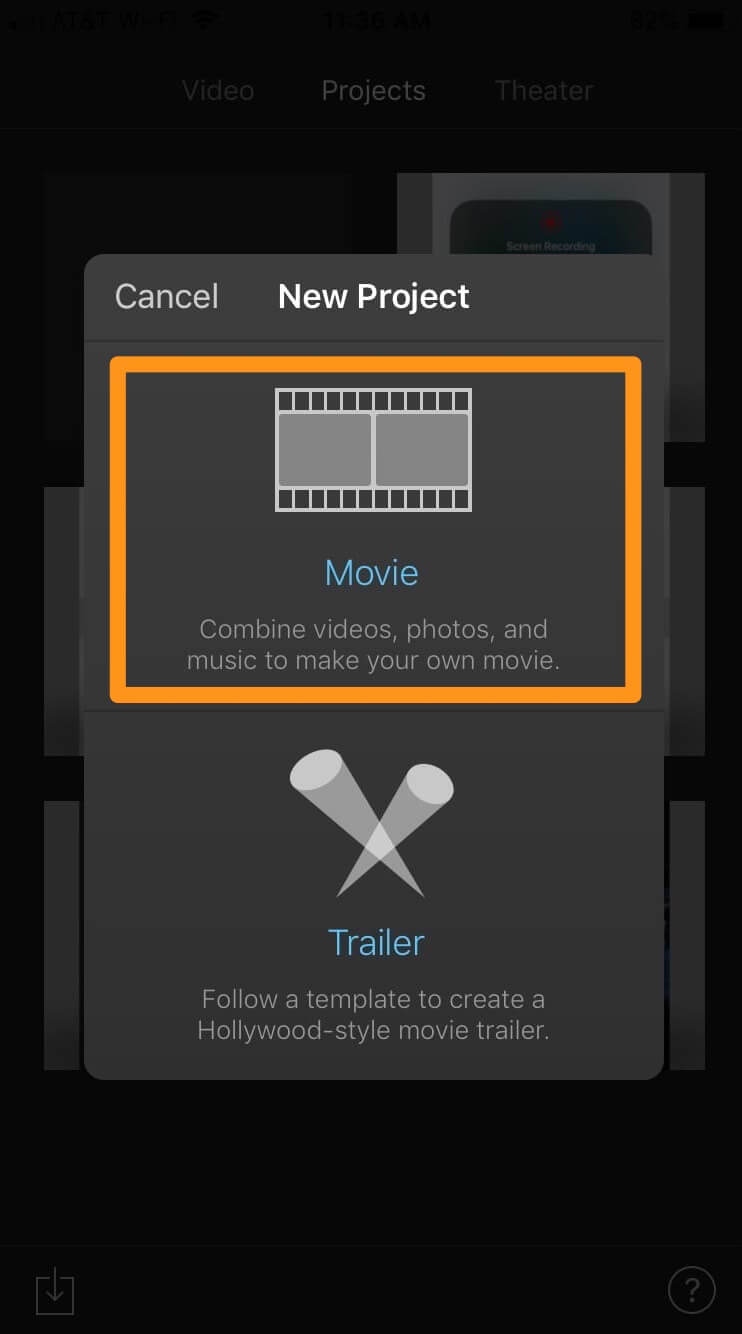
- Now select Movie from the popup window.
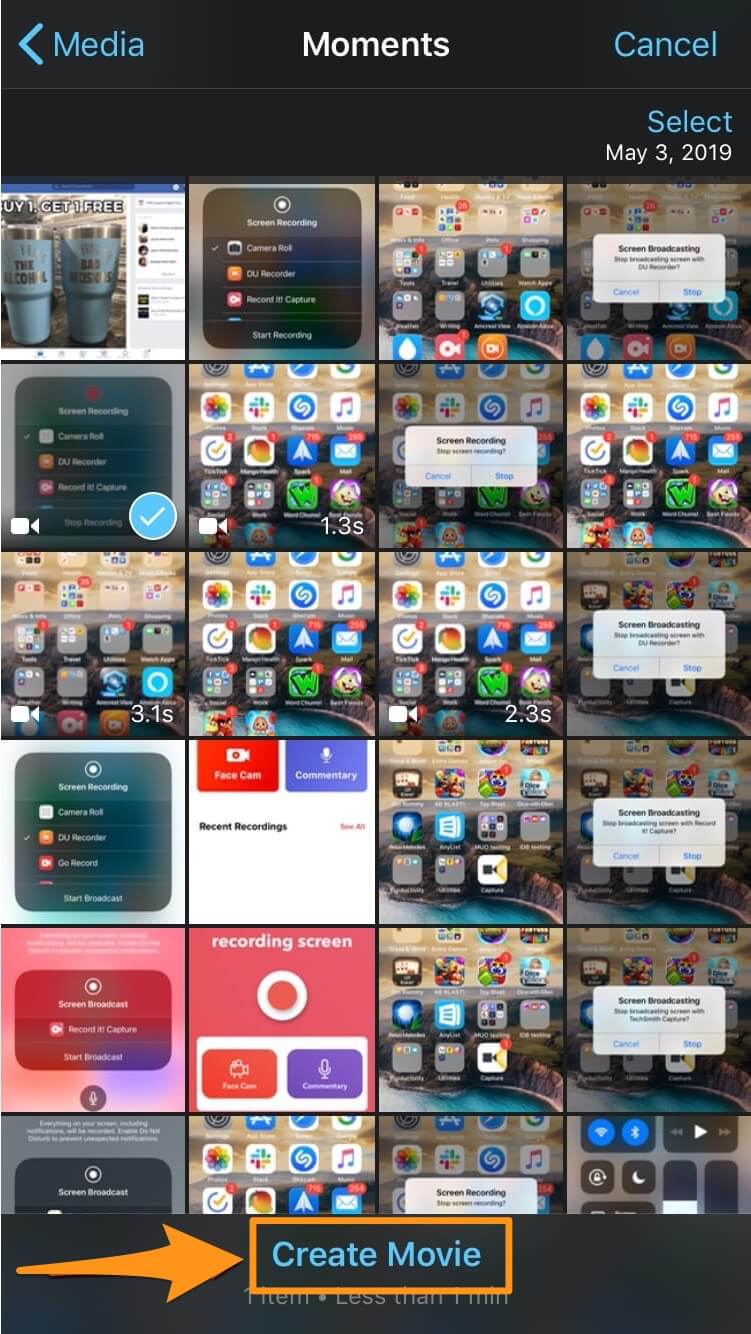
- Select a video you want to crop from your library and tap Create Movie at the bottom of the app screen.
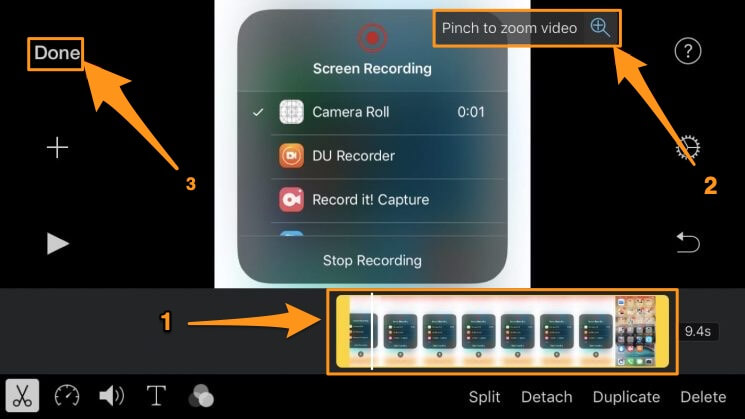
- In the timeline at the bottom, tap the video; this will bring up a button that says Pinch to zoom video—with a magnifying glass icon on it—on the top right; tap this button to start cropping the video.
Now pinch or spread your two fingers to zoom in or out and reposition the video the way you want. Once you’re done cropping, tap the Done text button in the top left corner of the app screen.
How to Crop a Video in iMovie on Your Mac Computer
If you’re on a Mac computer and want to use iMovie to crop a video, follow the below steps:
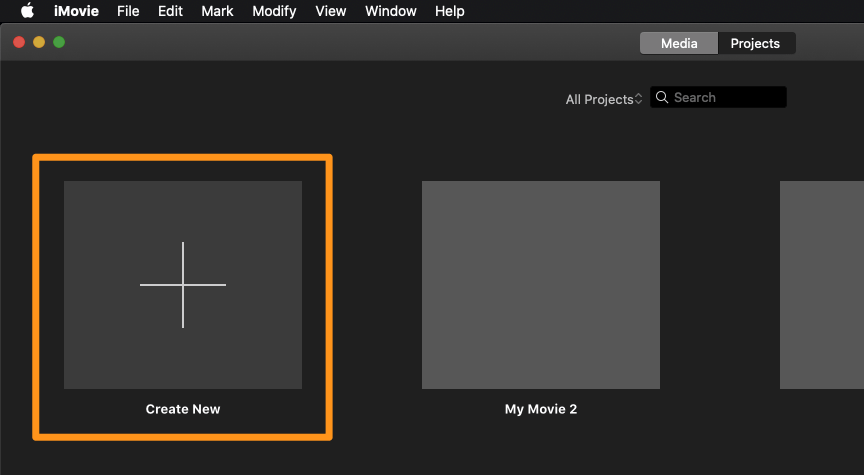
- Open iMovie and click on the button with the plus icon that says Create New.
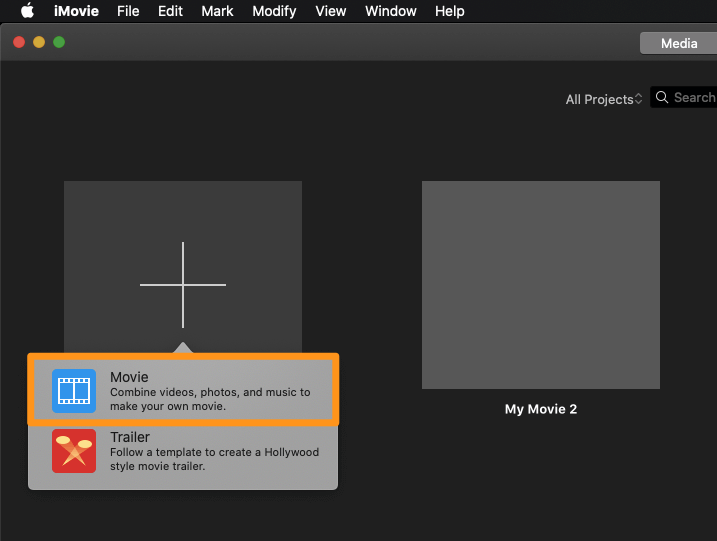
- Now select Movie from the dropdown menu.
- Click on the Import Media button and select the video you want to crop.

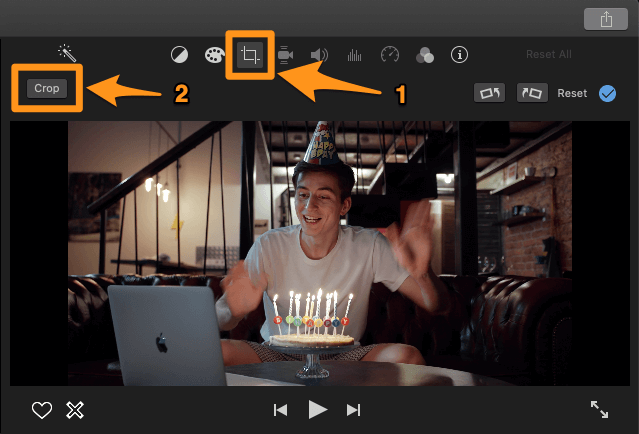
- Once the video’s been imported, click on the Cropping button in the toolbar right above the video player. This will reveal a button that says Crop in the top left corner of the player; click on it to start cropping your video.
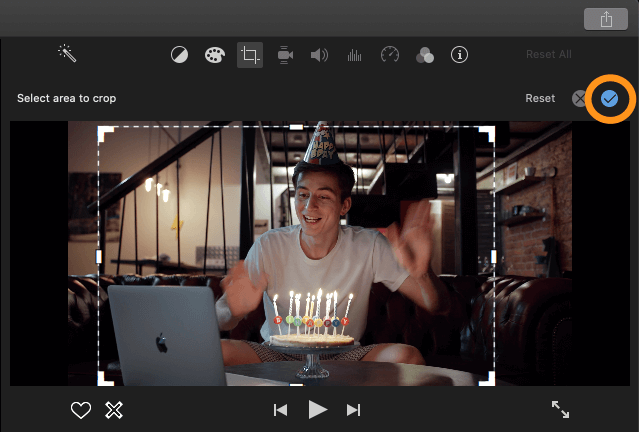
- Now click and drag one of the handlebars to select the area you want to crop.
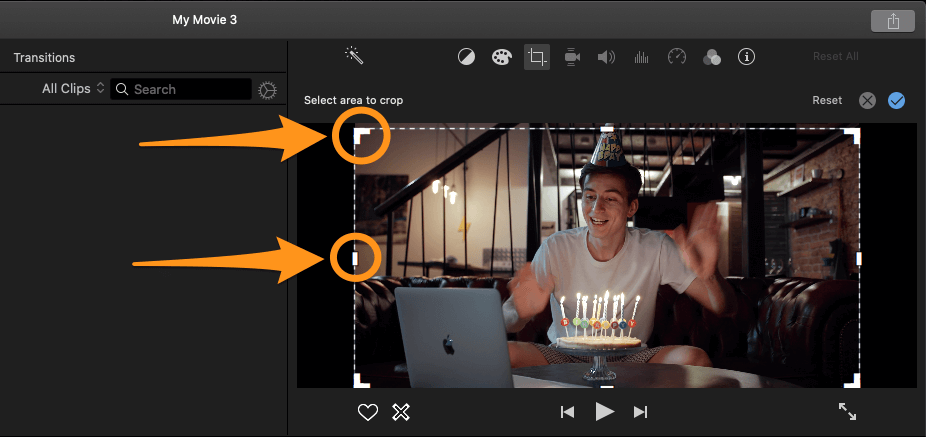
- Once you’re done selecting the part you want to use, click on the blue checkmark button in the top right corner to save the changes you made.
How to Crop a Video Online using Animaker
If you’re looking to crop your video using a simple tool that works in your browser, then it would be worth giving Animaker’s Crop Video Tool a shot.
Not only does it let you quickly crop your video online, but it also helps you crop your video in dimensions that are recommended by most social media platforms out there. To crop a video using Animaker, follow these steps:
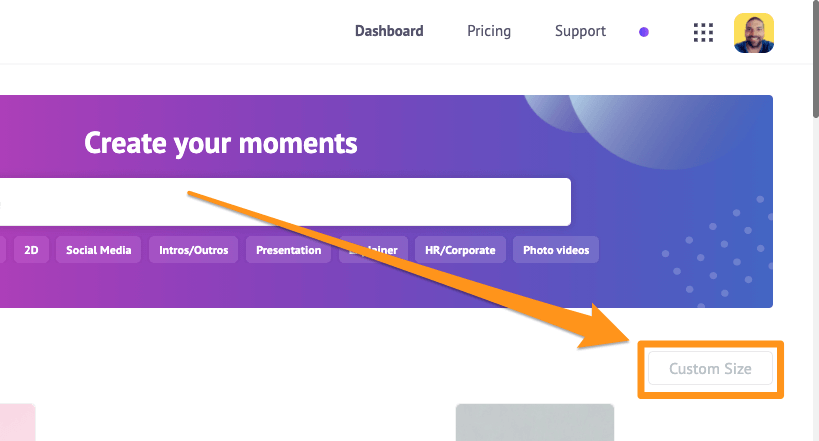
- Sign up or log into the app. Now pick the dimensions you’d like to crop your video to, like square, vertical, horizontal, etc. Do you want your video to be in square dimensions? Then, from your dashboard, pick Square under the Create a video section. You can also use the Custom Size button to crop your video to custom dimensions.

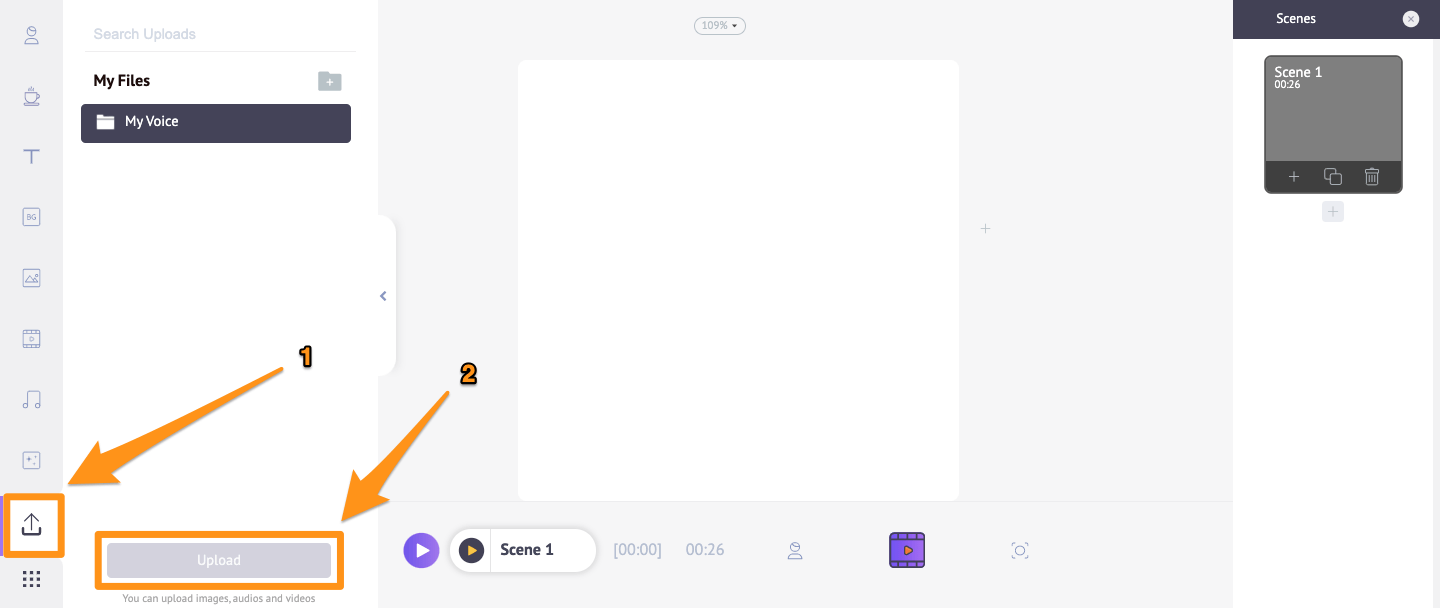
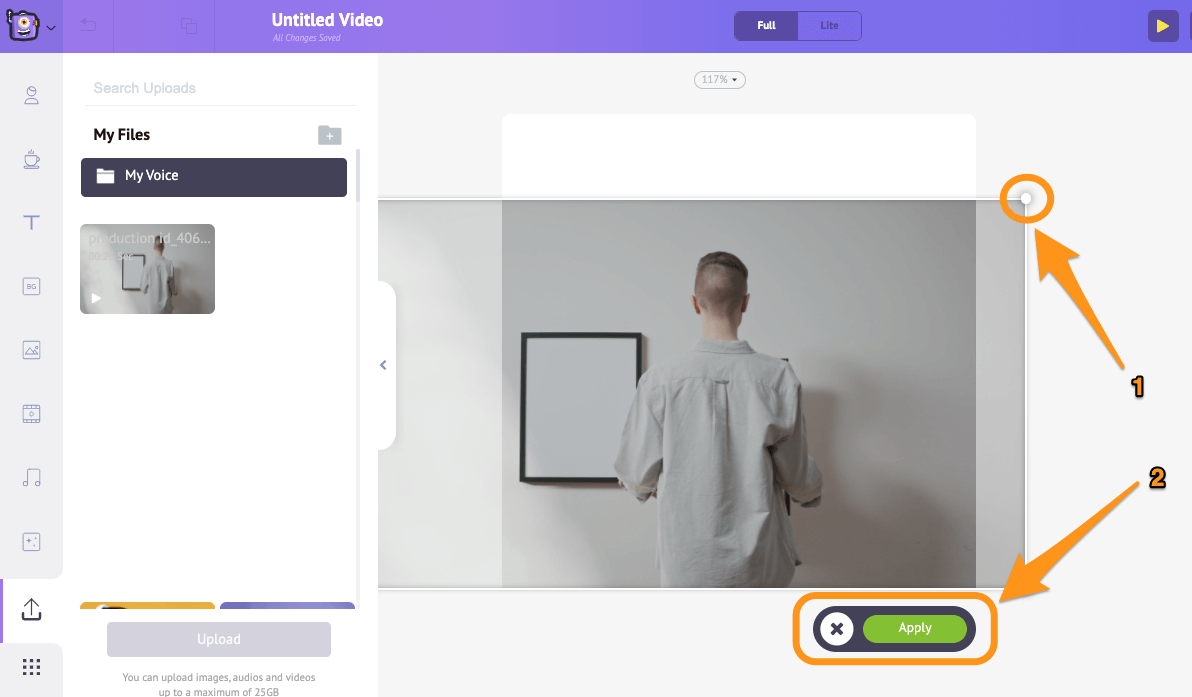
- Now upload the video you want to crop. To upload your video, go to the Upload tab in the main navigation bar, then click on the Upload button at the bottom of the tab window.
Once it’s been uploaded, click on it to set it onto the square, vertical or horizontal canvas, depending on the size you chose in the previous step.
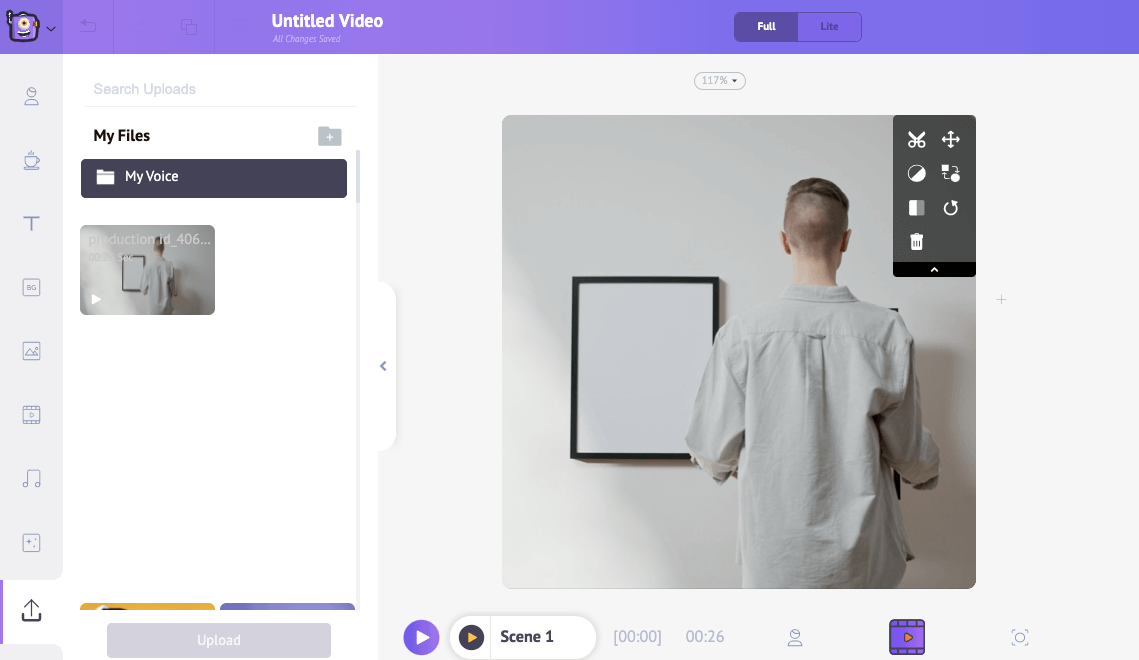
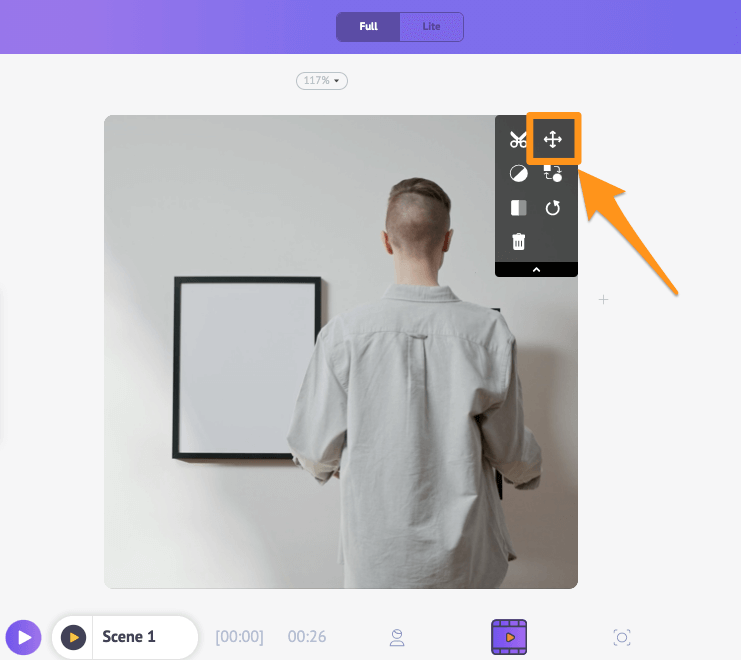
- Click on the Crop button to select the part you want to use. Hold and drag the edges of the selection to scale or shrink it, and adjust its position so it fits the dimensions the way you want it to. Once done, click on the green button that says Apply to save the changes.
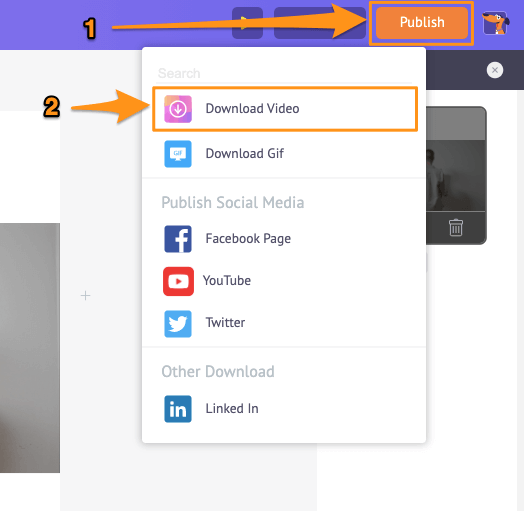
- Now preview the video to see if any adjustments would need to be made. Click on the preview button next to the publish button in the top right corner of the app screen; if everything seems fine, go ahead and click on the Publish button, then select Download Video from the dropdown menu to download your cropped video.

If you’re also looking for other ways to edit your video like trim, rotate, flip, mute, or adjust the video, you can do all that and more using Animaker; just explore the app further. Pretty sure you’d fall in love with its intuitive interface :)
Got any questions on cropping your video? Any tips or tools to crop a video that you find interesting and would like to share with us? Please let us know about them in the comment section below.