How to Hardcode Subtitles? [A Step-by-Step Tutorial]

Shreshtra - September 5, 2023 - Leave your thoughts. - Last Updated: February 16, 2024 10 min read
It is no doubt that the world is getting increasingly interconnected day by day. A huge reason for this is videos. Interesting video content can make people engage, interact, and connect on a different level.
In such videos, there is one unsung hero that helps bring different parts of the world together.
And that is - subtitles.
Whether you are binge-watching the latest series on Netflix or watching your favorite K-pop group’s documentary in theatres, subtitles help bridge the language gap and reach a global audience.

Most of us download subtitle files and add them to the movie/video we are watching. In some cases, this would help. But in most cases, it is better if the subtitles are etched or hardcoded on the video.
What are hardcoded subtitles, do you ask? Read on!
What is a Hardcoded subtitle?
Hardcoded subtitles are a form of text overlay that is permanently embedded into a video. Regardless of the viewer settings or playback platform, these subtitles remain visible and cannot be turned off by the viewer.
One thing to note about this type of subtitle is that once you hardcode, there is no way to edit or remove them.
With no need for an extra file, hardcoded subtitles make it easier for the audience to enjoy the content hassle-free.
Hardcoded vs. softcoded subtitles:
While hardcoded subtitles are a permanent part of the video, a soft-coded subtitle is a separate file that is uploaded to the video player. It can be turned off/on during the video playback.
So, for videos with hardcoded subtitles, the viewers don’t have to go searching for subtitles and take extra time to add them to the video.
Now that you know the basics, let’s learn how to hardcode subtitles.
Shall we get started?
How to hardcode subtitles?
This section will show how to hardcode subtitles online (using an online Subtitle generator app - Animaker Subtitles) and offline (using VLC media player).
- How to hardcode subtitles online using a Subtitle Generator app
- How to hardcode subtitles offline with VLC media player
Let’s jump right in!
1. How to hardcode subtitles online - using a Subtitle Generator app
Animaker is a web application that lets users create fun animation videos. It also has a Subtitle Generator tool, which we will be using to hardcode subtitles.
Read on to find out how.
Step 1: Import/Select a video
Step 2: Add Subtitles
Step 3: Add Styles to the Subtitle
Step 4: Preview and Download your video
Step 1: Import/select a video
Log into Animaker’s Subtitle Generator or Sign up if you’re new!
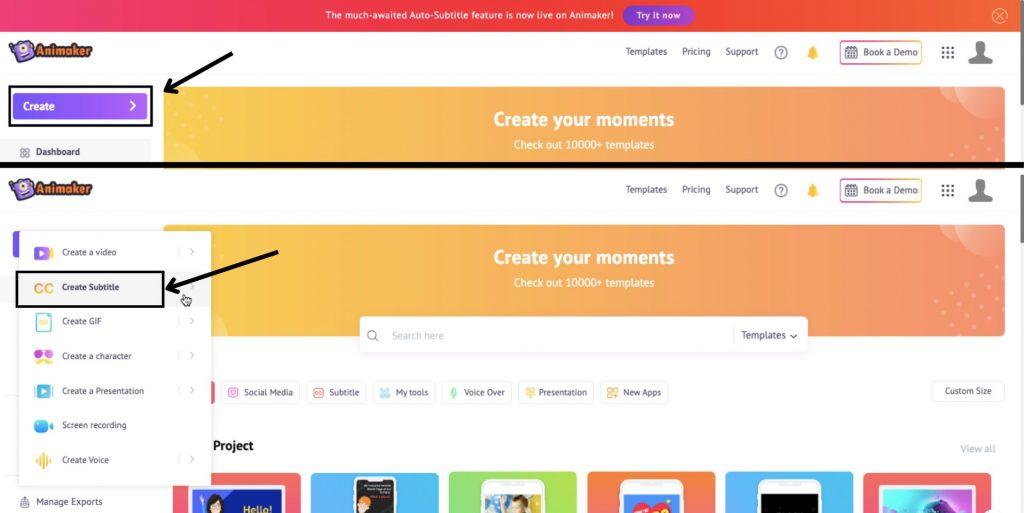
Once you log in, you are now in the Dashboard. Click on Create > Create Subtitle.
You are now in the Subtitle Maker. The next step is to select the video to add subtitles. Here, you will have three options - Upload, Export, and My Library.
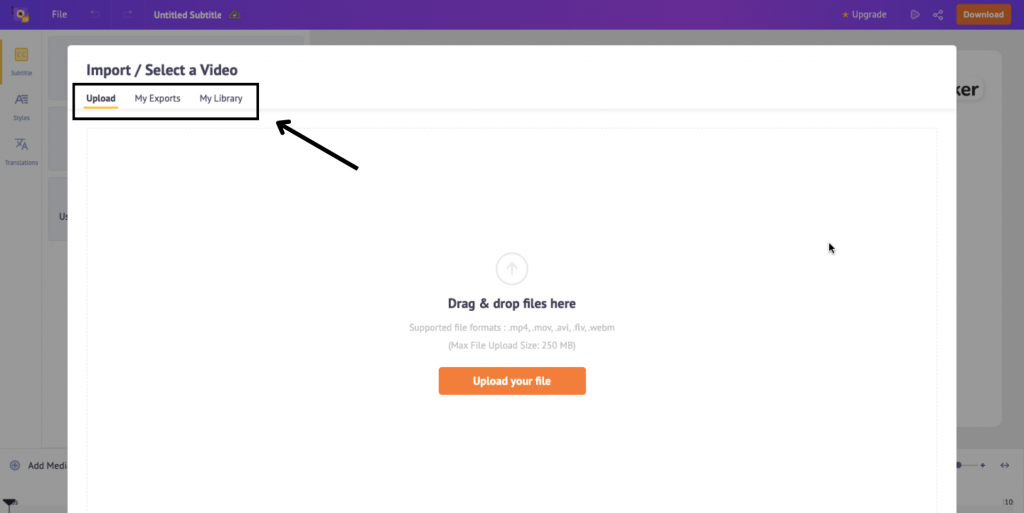
Let’s quickly take a look at each of these options. You can select the Upload option if you want to upload a video from your local folder or the My Library option to choose one from your library if you have already uploaded it to Animaker.
The other option, Exports, is when you have already created and exported a video using Animaker.
I’m going to upload a video from My Library. This is how.
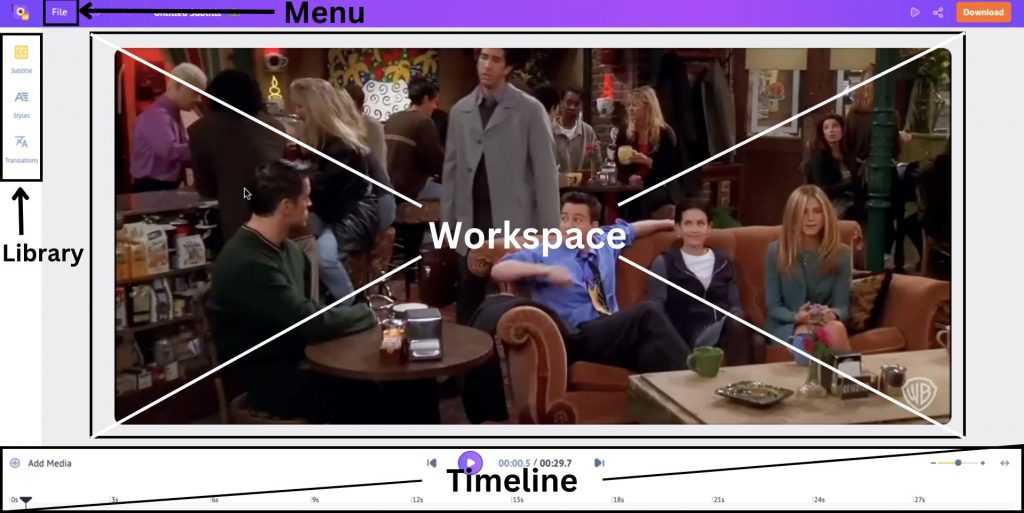
Now that we have added the video, let me tell you about the various sections of Subtitle Maker’s interface.
In the center is the workspace, where the video you work on is displayed. The library is on the left, and the menu bar for additional options is on the top. On the bottom is the timeline of the video, where you can adjust the subtitles to precision if needed.
Step 2: Add subtitles
Now that the video has been selected, it is time to add the subtitles! There are three ways to do so!
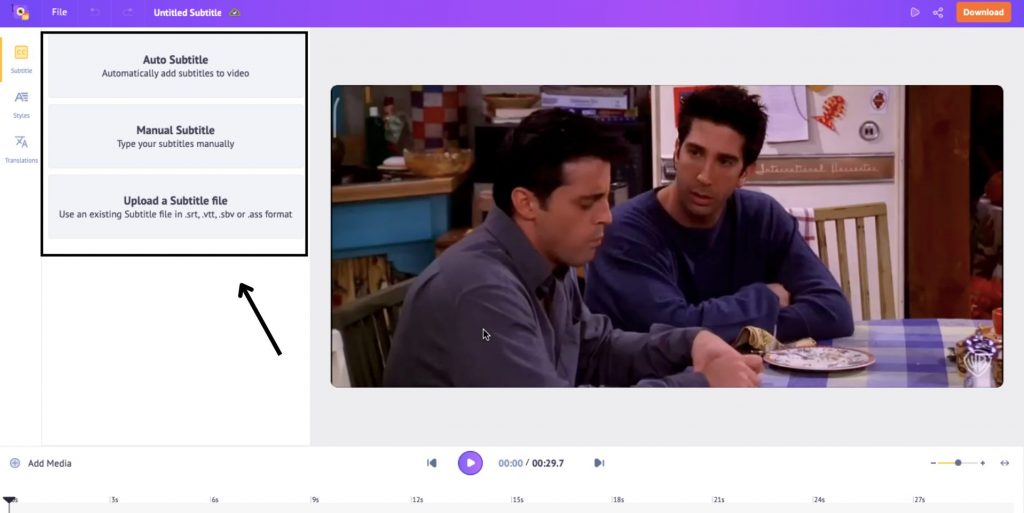
Let us look at each of them in detail.
1. Auto Subtitle
This is the quickest way to add subtitles to your video. Let’s see how to do it.
Click on Auto Subtitle and select the clip you want the subtitles for. Hit generate and sit back while our AI-powered subtitle generator does its work!
In just under a minute, the subtitles get transcribed and added to the video.
On the left, you will see the subtitles with timestamps. You will also notice the subtitles being added in the timeline in orange. If you click on a particular subtitle, you will see the selected subtitle highlighted in dark orange. This way, it is easier for you to locate the subtitle for a particular scene in the video.
If needed, you can make changes to the generated subtitles by clicking on them.
That was so quick and easy, no?
Okay, let’s look at another way to hardcode subtitles.
2. Manual Subtitle
In this method, you will be typing out subtitles. Let’s see how.
Click on Manual Subtitle and select the clip you want to hardcode subtitles for. Once you hit Generate Subtitles, you will see the subtitle tab appear with time stamps, where you can add subtitles manually.
Let’s see how to do so.
Type in the first subtitle, and you will see an orange section added to the timeline. This orange section is a way of knowing when that particular subtitle appears on the video.
You can adjust the timing of the subtitle by either moving this orange section or, for more precision, you can customize the duration in the time stamps. By default, the duration of each subtitle is two seconds.
To add the next subtitle, click on Add New Subtitle Line. You can see that for every subtitle that you add, an orange section for the corresponding subtitle gets added to the timeline.
Just like how we did for the previous subtitle, type in the subtitle and adjust the duration.

You can add subtitles for the entire video similarly.
So far, we have seen two ways of adding subtitles. Let’s now look at the final way.
3. Uploading a Subtitle File
If you have the subtitle file in your possession, this is going to be a simple process.
Click on Upload a Subtitle File and select the subtitle file for the video from your local folder. Choose the clip that you want the subtitles for and hit Generate Subtitles.
The subtitles will now be added to the video. On the left, you have the subtitle bar with the time stamps. You can even edit the subtitle and the duration in the time stamps if there are any syncing issues.
That’s how easy it is!
Now that we have explored the different ways to add subtitles, it is time to add some style.
Step 3: Add Styles to the subtitle
To add some style to the subtitle, click on Styles from the library. Animaker’s library has over 150+ fonts, 15 subtitle presets, and text styling options.
Choose a subtitle preset and you can see the change on the video, on the side. You can then customize the font to your liking. You can also upload a font file if you want.
Below subtitle style, you have multiple text styling options like size, color, text alignment etc.
To take styling to the next level, you can add animations to your subtitles!
To do so, click on the Animation option on the top corner of the subtitle style bar.

Choose one of the options, and now your video has a cool animation to your subtitles!
So far, we have seen how to add subtitles in the English language. But what if you want to make your content globally accessible?
In that case, you can make use of Animaker Subtitles' translations feature. To learn how to translate subtitles using Animaker, check out the link provided.
With subtitles, style and animation added, there is just one more important thing left to do. That is, to download your video.
Step 4: Preview and Download your video
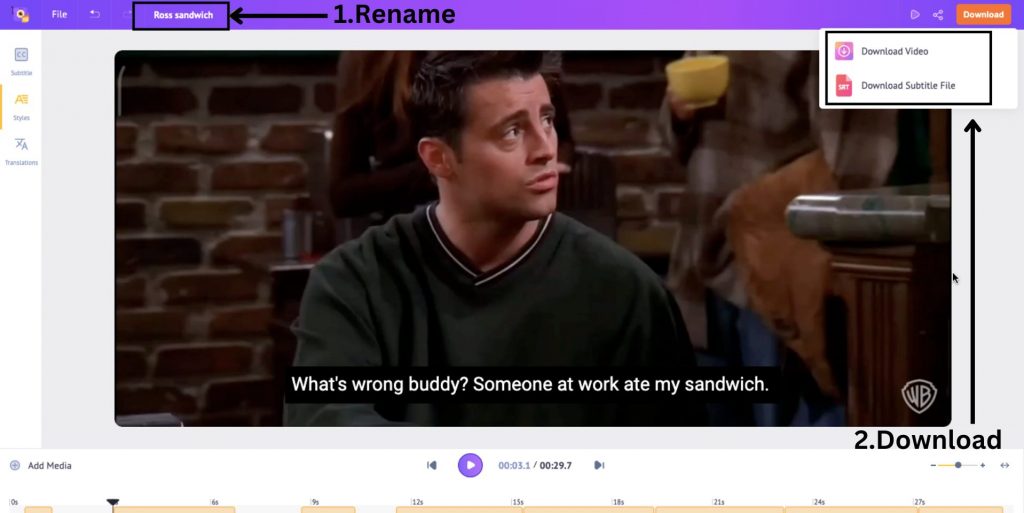
Before you download, you can preview the video to see if everything is A-okay. To do so, click on the Preview button in the top right corner. Let us see how my video has turned out.
My video looks good. If you’re happy with how your video has turned out, you can rename and download the video. You also have the option to download the subtitle file separately.
Hurray! You have successfully hardcoded subtitles to a video using Animaker!
Let us move on to VLC media player to achieve the same.
2. How to hardcode subtitles with VLC media player
In this section, we will see how to hardcode subtitles offline with VLC media player on Mac and Windows systems.
Let’s begin.
Firstly, download the latest version of VLC media player to your device. Then, proceed to read according to your system.
- How to hardcode subtitles on Mac with VLC media player
- How to hardcode subtitles on Windows with VLC media player
How to hardcode subtitles on Mac with VLC media player
Open VLC media player. Choose the Video to hardcode subtitles on. Then, Click on File > Convert/Stream.
When the dialog box opens, click on Open Media to add the subtitle file from your local folder.
If you don’t have a subtitle file and want to learn how to create an SRT file, do check out the link provided.
Once you’ve added the subtitle file, click on Customize > Subtitles.
Check the Subtitles box and make sure the Overlay subtitles on the Video box is checked as well. Choose the subtitle format as “DVB”.
Then click on Save as new profile. Choose a name for the profile. Then, Click on Apply > Save.
You can then browse the folder where you want the video to be stored. Click on Save.
And, that is it! The subtitle is hardcoded in the video.
Next, let us see how to hardcode in VLC on Windows.
How to hardcode subtitles on Windows with VLC media player
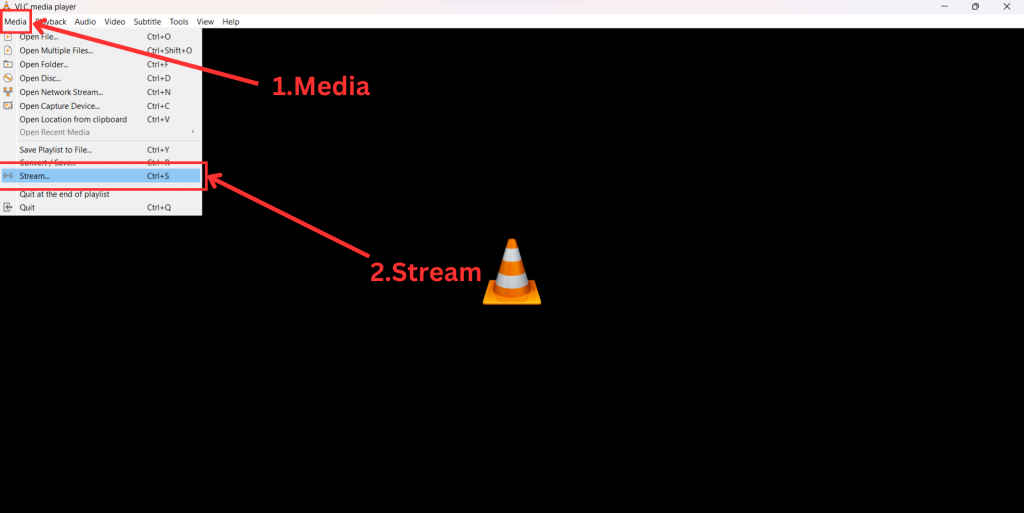
First, click on the Media tab and select Stream.
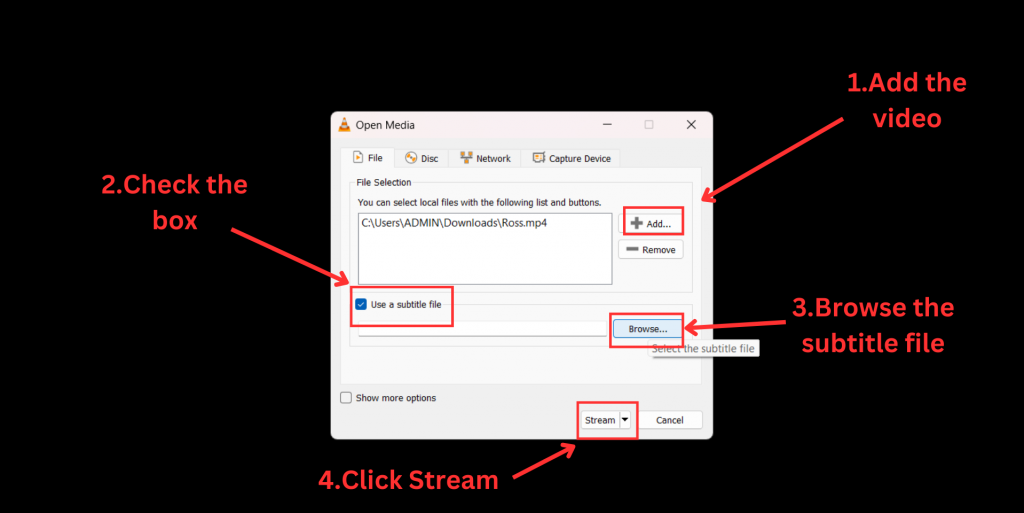
An Open Media panel will appear. To add your video, click on the Add button. Check the “Use a subtitle file” box and then click on Browse to add the subtitle file for the video. Once you have added the subtitle, click on Stream and then click Next.
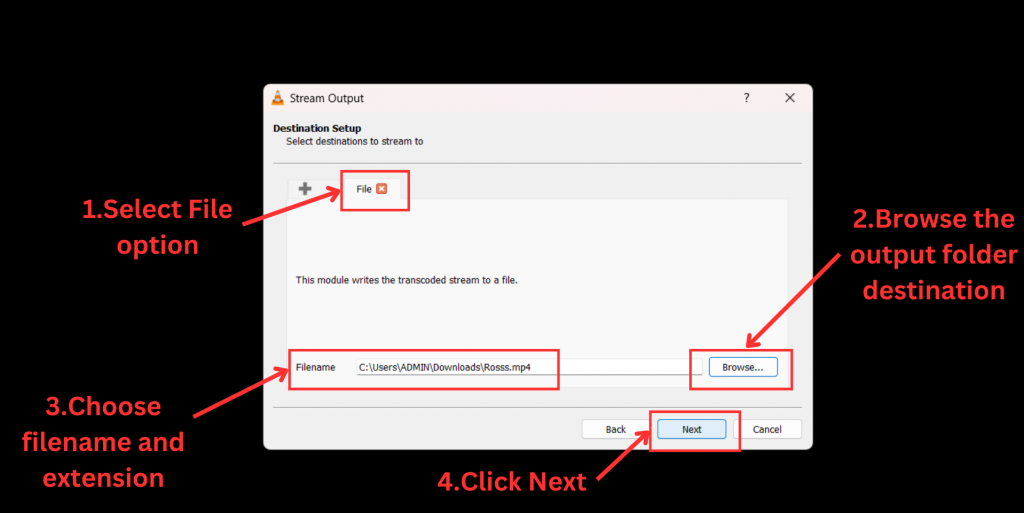
Now you are in the Stream Output panel. Here, click on the drop-down menu, select File, and then click on the Add button.
After that, click on Browse to select the output folder. Choose a name for your video file and choose the desired file extension. Then, click Next.
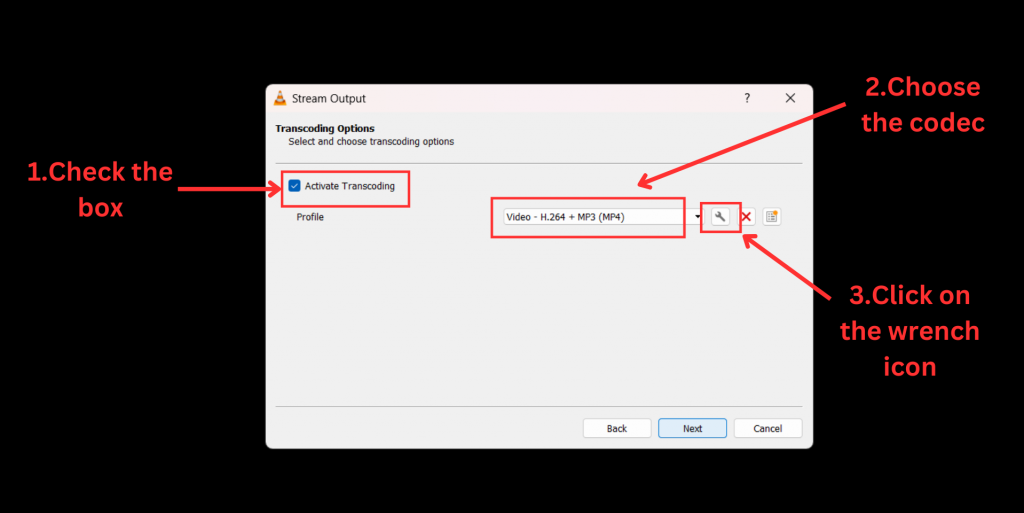
In the transcoding options, first check the “Activate Transcoding” box. Next, choose the codec type. In general, to avoid non-syncing issues, H.264 + MP3 (MP4) is recommended. Then click on the wrench icon.
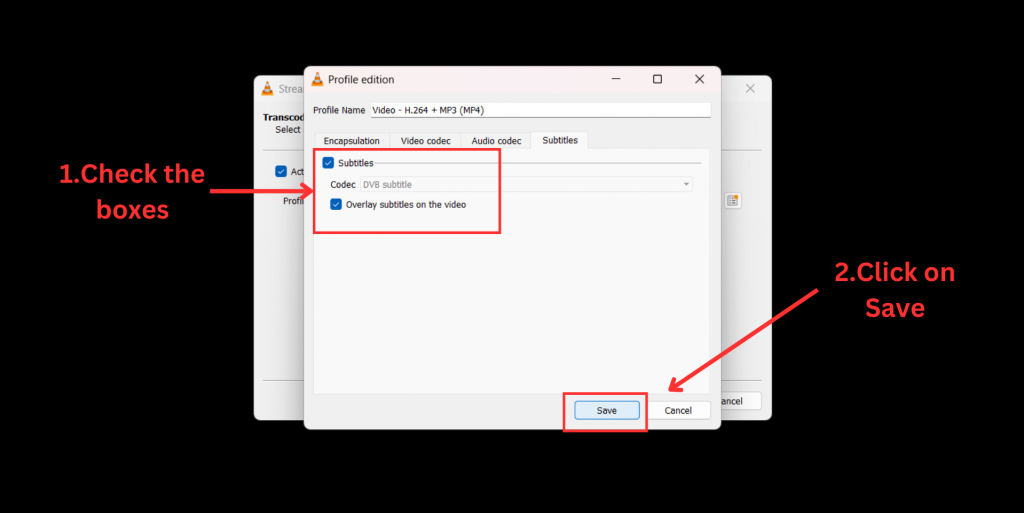
Profile Edition dialog box will now open. Click on the Subtitles tab and check the two boxes. Hit Save, and you will return to the previous window. Then, click Next.
Click on the Stream button.
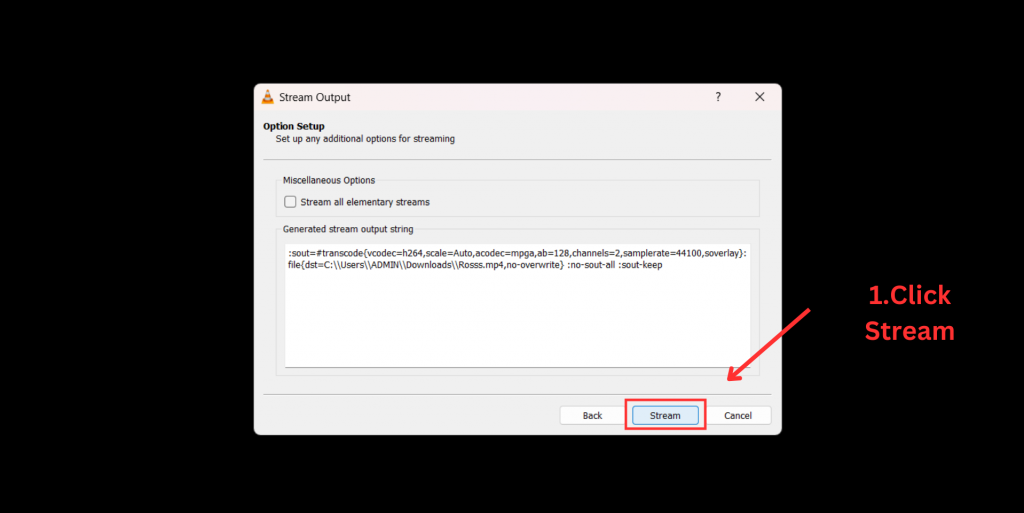
Wait for a while, and you will find the video added to the designated folder. This video will have the subtitles hardcoded into it.
***
Voila! Hardcoding subtitles is not so complicated, right?
The offline methods had a few extra steps, but the online method was quite swift and easy.
Based on your comfort and preference, try using a method of your choice to hardcode subtitles on your videos.
Now that we have seen ways to hardcode subtitles to a video let us see why hardcoding subtitles is preferable over other means of subtitling.
Why are hardcoded subtitles preferable?
- Firstly, there is no hassle of needing a subtitle file.
- Secondly, there will not be any non-sync issues that you might encounter with soft-coded subtitles.
- Lastly, with hardcoded subtitles, there is no worry of compatibility issues as the subtitle is permanently inked to the video.
Need I say more?
Head over to Animaker Subtitles to hardcode subtitles.