How to Animate a Walk Cycle [A Beginner-Friendly Guide!]

Aksara NKR - July 21, 2025 - Leave your thoughts. 7 min read
Our favorite animated characters don’t just move - they strut, shuffle, bounce, and glide with personality.
That unmistakable pep in their step isn’t accidental.
It’s the result of a carefully crafted technique called a walk cycle.
In this guide, we’ll walk you through everything you need to know, starting from the basics, all the way to creating your own walk cycle from scratch.
Here’s what we’ll cover -
- What is a walk cycle animation?
- Four stages of Walk Cycle
- How to animate a walk cycle - Step by Step
Let’s break it all down and get those characters moving!
What is a walk cycle animation?
A walk cycle is a looped animation made up of a sequence of frames that, when played in order, mimic the natural motion of a walking character.
While animating a walk cycle might seem complex at first, it doesn’t have to feel overwhelming.
At its core, it’s simply about moving a character from point A to point B with purpose, rhythm, and style.
Four stages of Walk Cycle
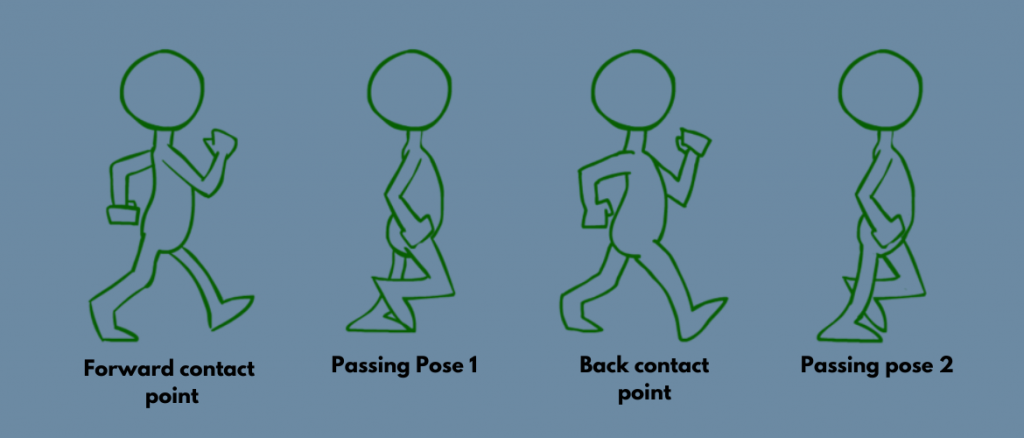
A standard walk cycle is built around four key frames.
- Forward contact point - The character’s front heel hovers just above the ground, while the back foot is mid-step.
- First Passing pose - One leg passes the other as the character shifts weight forward.
- Back contact point - The opposite of the first contact point, with the back foot now leading and firmly on the ground.
- Second Passing pose - The reverse of the first passing pose, as the character moves into the next step.
These four poses form the foundation of a walk cycle and are repeated in sequence to create smooth walking motion.
Here’s an illustration to help visualize each frame -
Without these fundamental frames, a walk cycle cannot be created.
Now, let’s move on to learn how to make a walk cycle animation.
How to animate a walk cycle - Step by Step!
Usually, once the fundamentals of the walk cycle are framed out, additional details like animation timing, walking speed, movement of body parts, etc., are added, resulting in a walk cycle like this…
The above-shown example is a short walk cycle that consists of 4 frames in total. But an intricately animated walk cycle can range above ten frames by adding more detail to the walking style.
Traditionally, animated walk cycle involves drawing each frame by hand - a time-consuming process that requires patience, precision, and practice.
However, with modern 2D animation software, you can achieve the same result much faster. These platforms simplify the process without needing to draw every frame manually.
One such tool is Animaker - an easy-to-use, online animation platform that helps you create walk cycle animations without any prior design or animation experience.

With pre-built character actions, drag-and-drop controls, and customizable animations, Animaker simplifies the entire process.
Instead of drawing frame by frame, you can focus on storytelling and style while the software handles the motion.
In the next section, we’ll walk you through the exact steps on how to animate a walk cycle using Animaker.
Prefer watching instead? Check out this video guide for a quick walkthrough.
Let’s get started.
Head over to Animaker and sign up if you’re new or log in if you’re already a user.
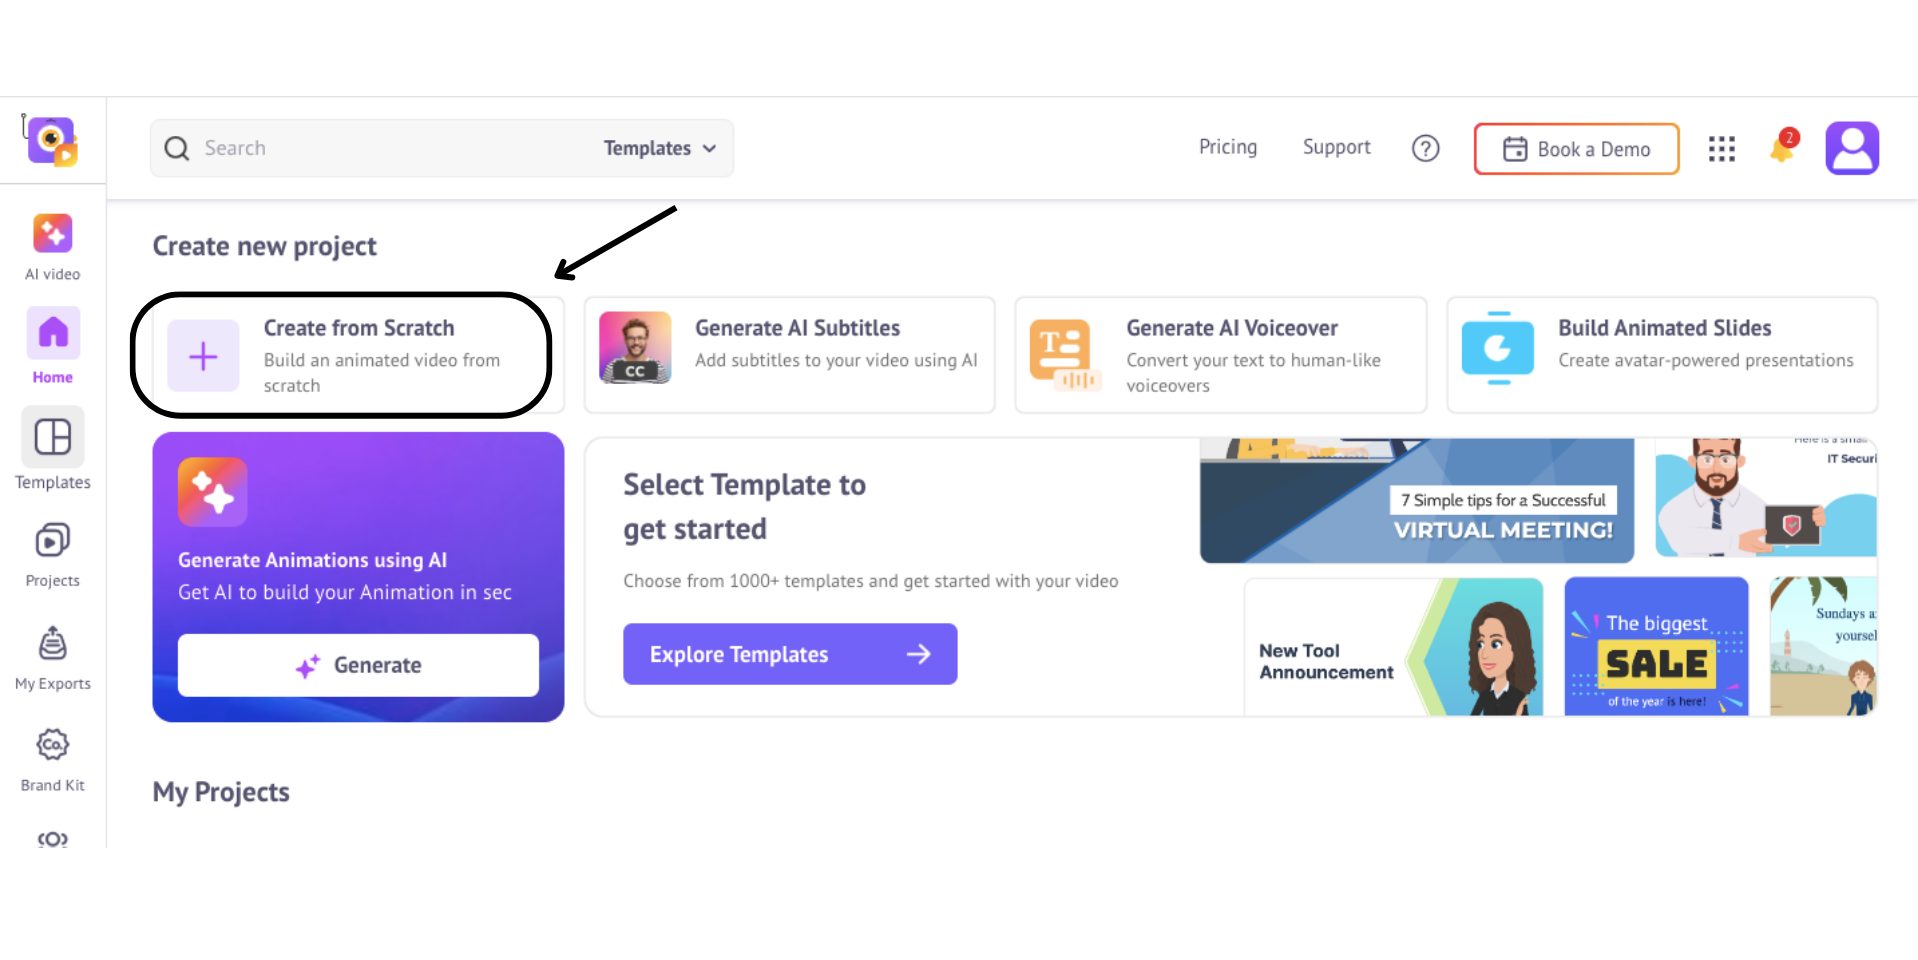
Then, in the dashboard, click on the Create from Scratch button.
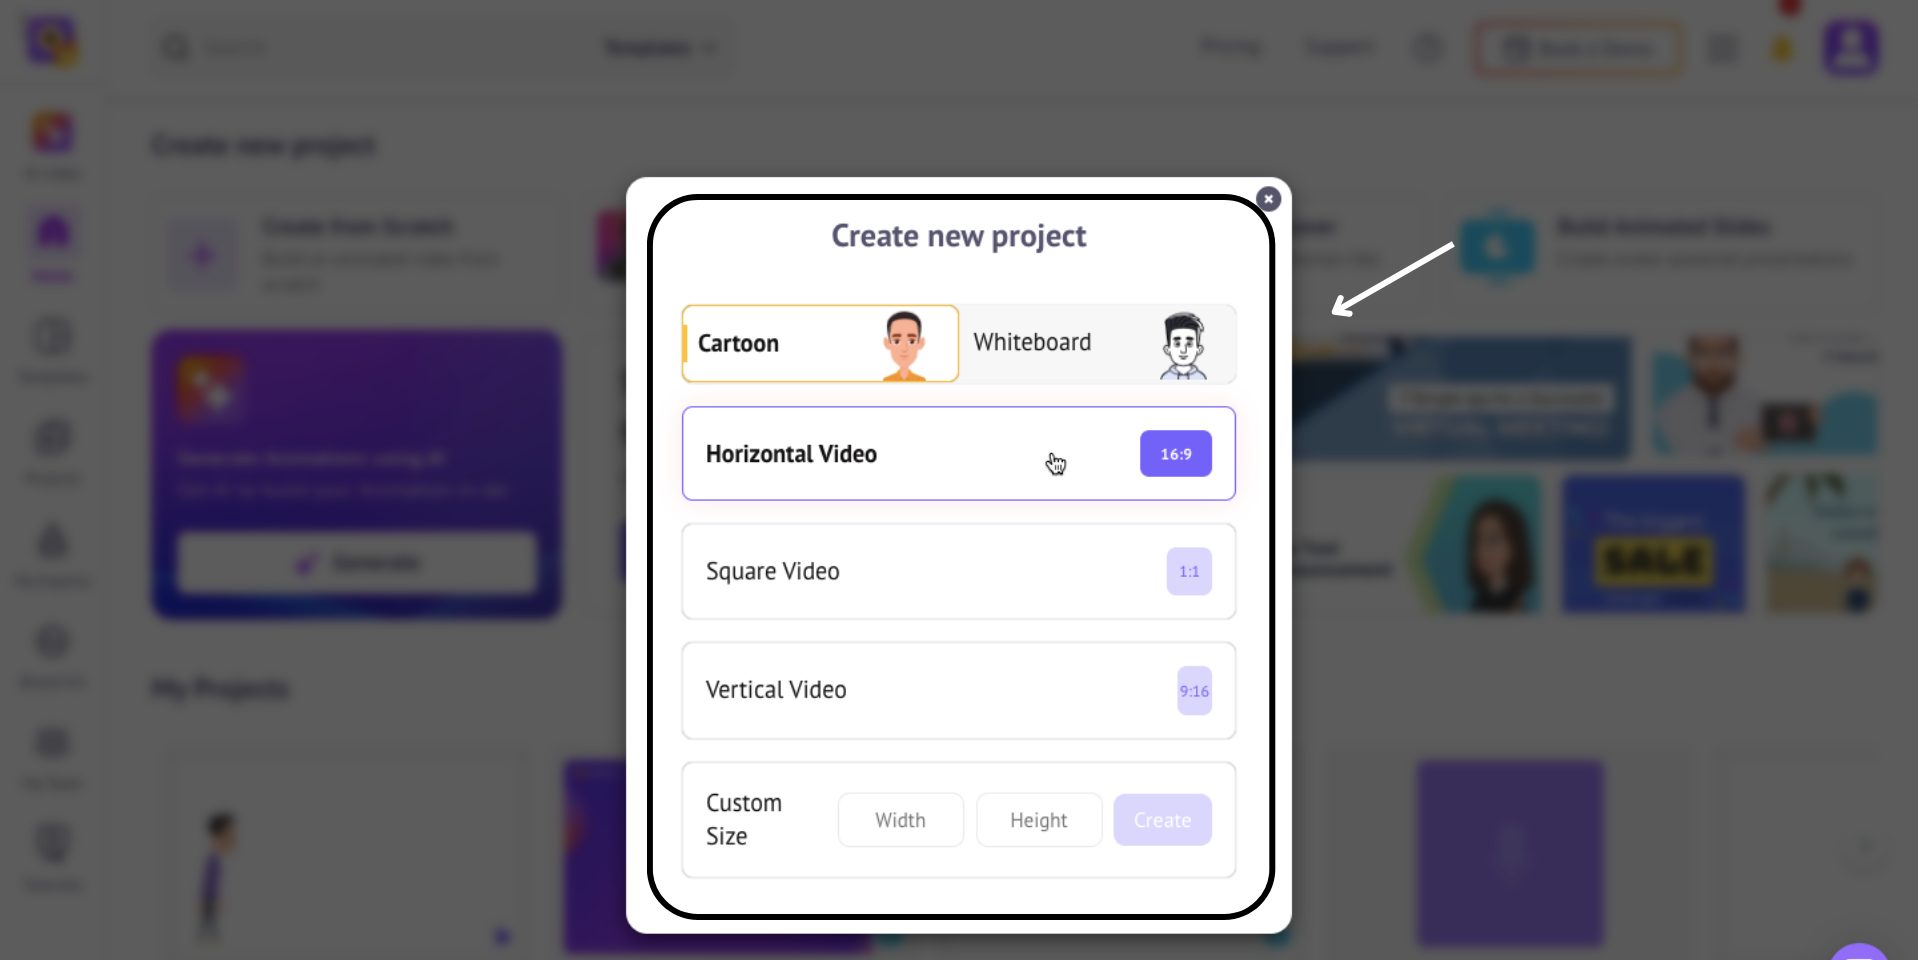
This will open a pop-up with two animation styles and different aspect ratios. Select Cartoon style and choose your preferred aspect ratio.
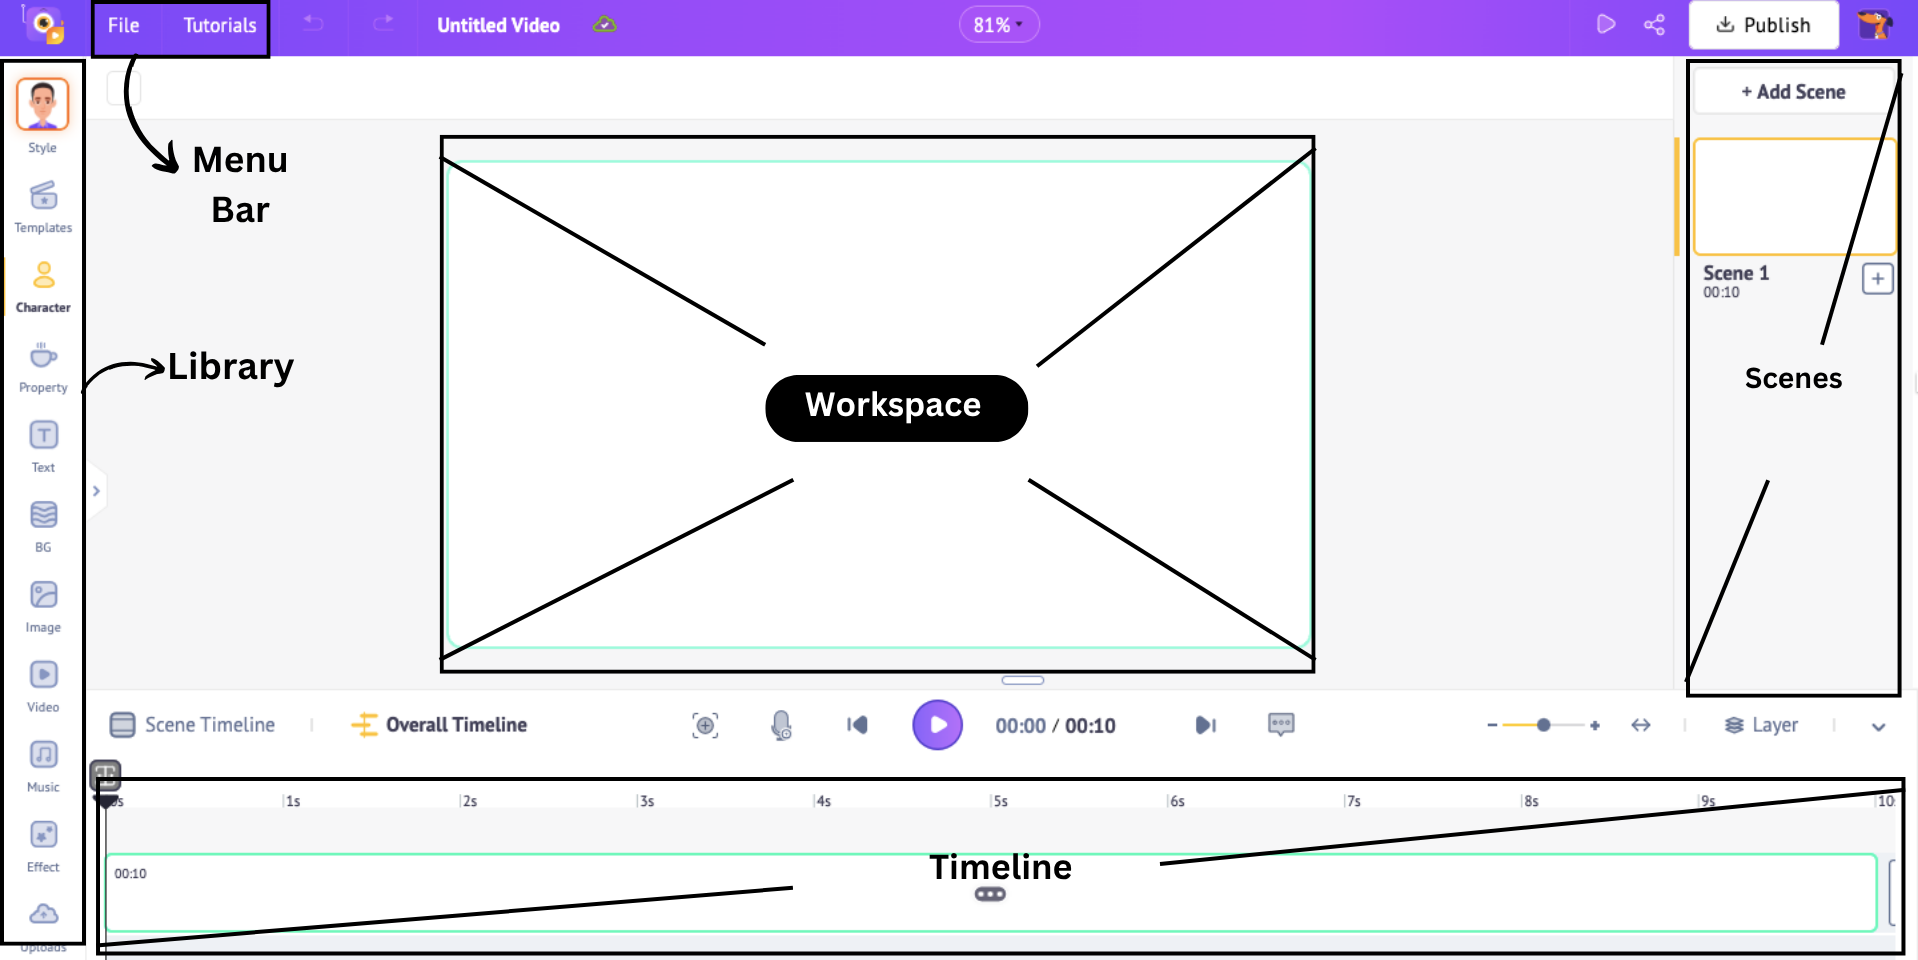
This is how the Animaker app interface looks.
At the center, you’ll find the workspace, where you create and edit your video.
To the left, the library gives you access to millions of assets - characters, properties, backgrounds, and more.
On the right, the scenes panel helps you manage and organize each part of your video.
At the bottom, the timeline allows for precise control over timing and animations, while the top menu bar gives you access to key tools and settings.
Now that you know the interface better, let me show you how to animate a walk cycle.
Add a background
First let's add a background to the scene for our character to walk. To add a background, click on BG and click on a background to apply.
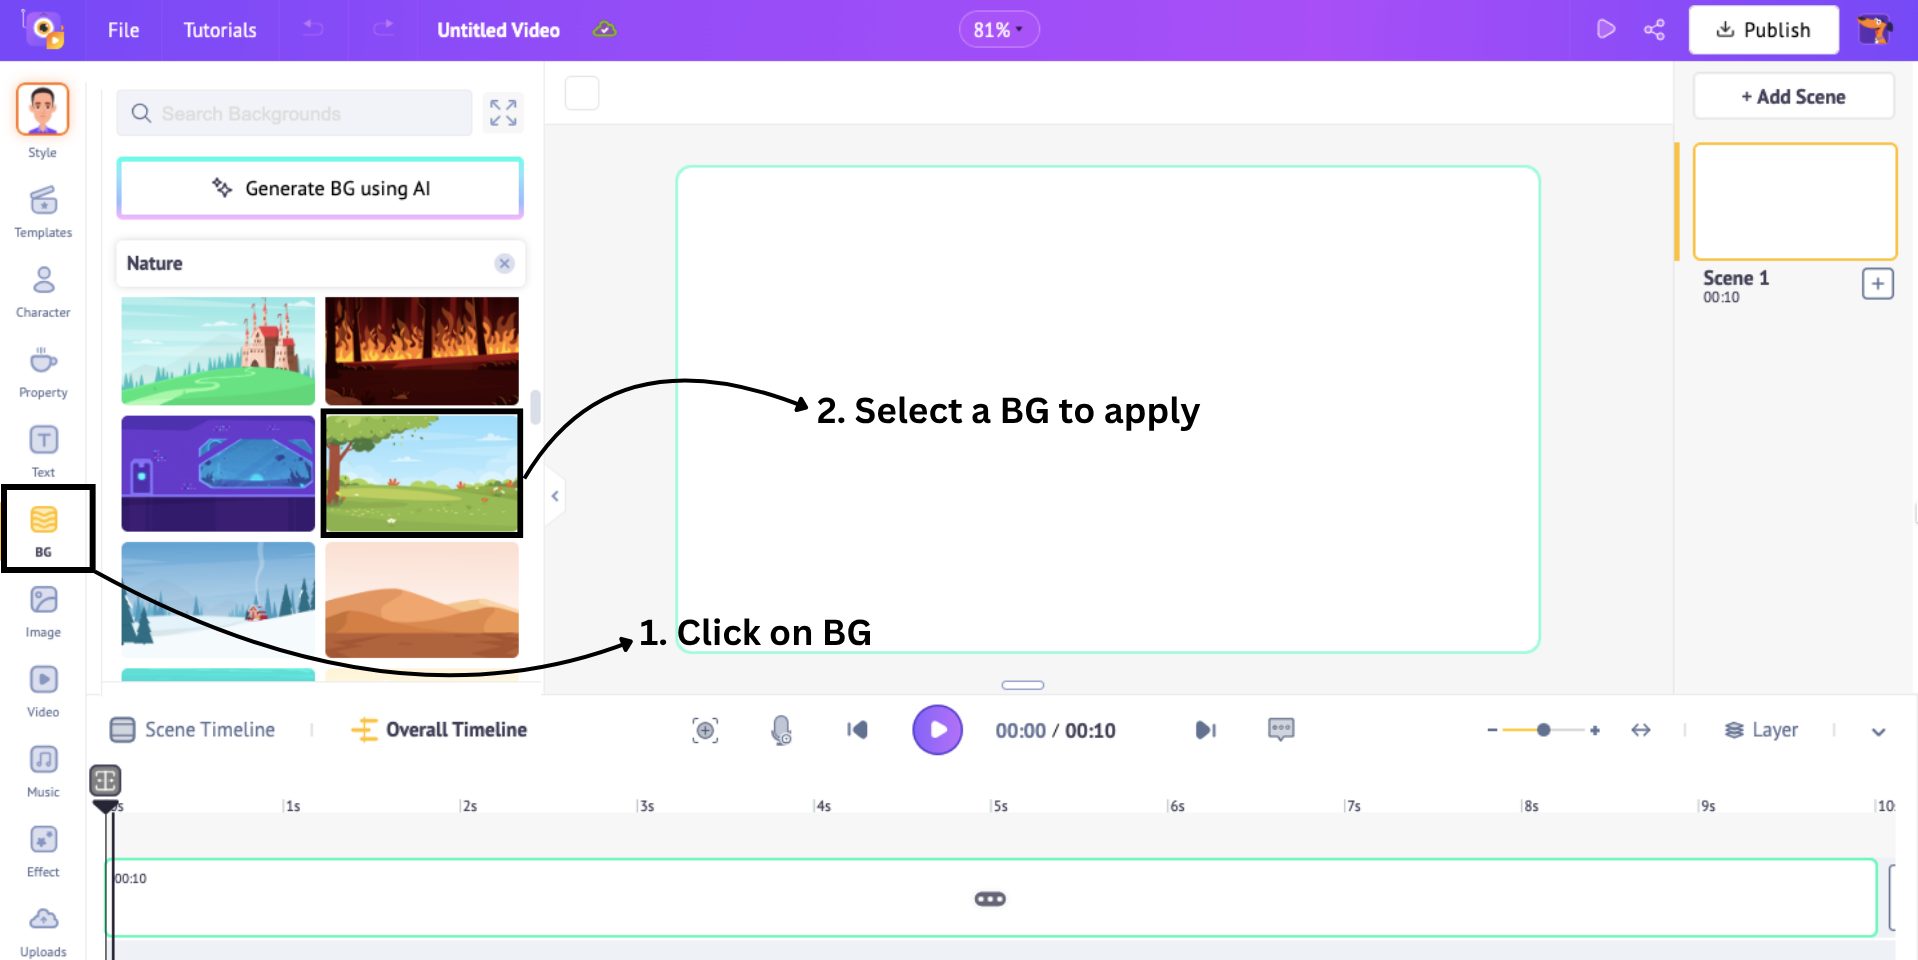
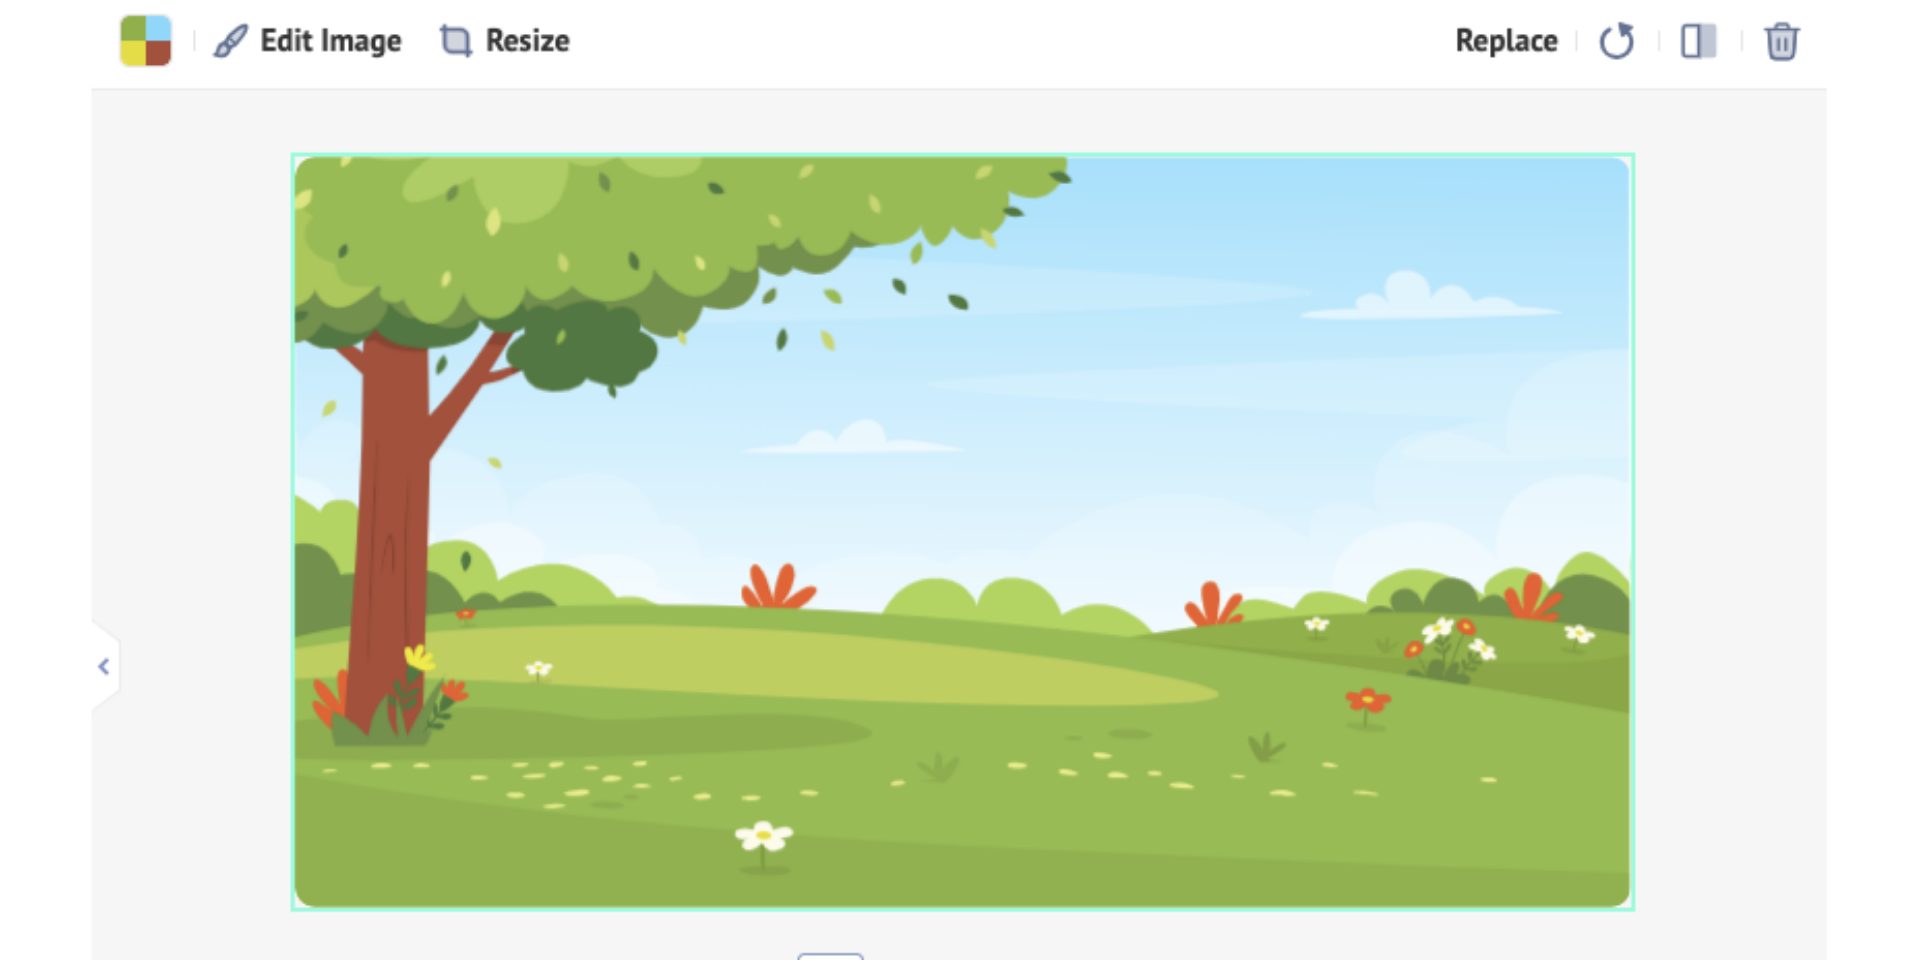
The BG gets applied like this...
Add a Character
Now that the background is set, it’s time to add our character.
Head over to the Character tab in the library
Animaker has 1000+ characters of different sizes, ages, and professions, giving you various options.
You can either select a prebuilt character or create your own animated character.
If you'd like to create a unique character from scratch, check out this quick tutorial -
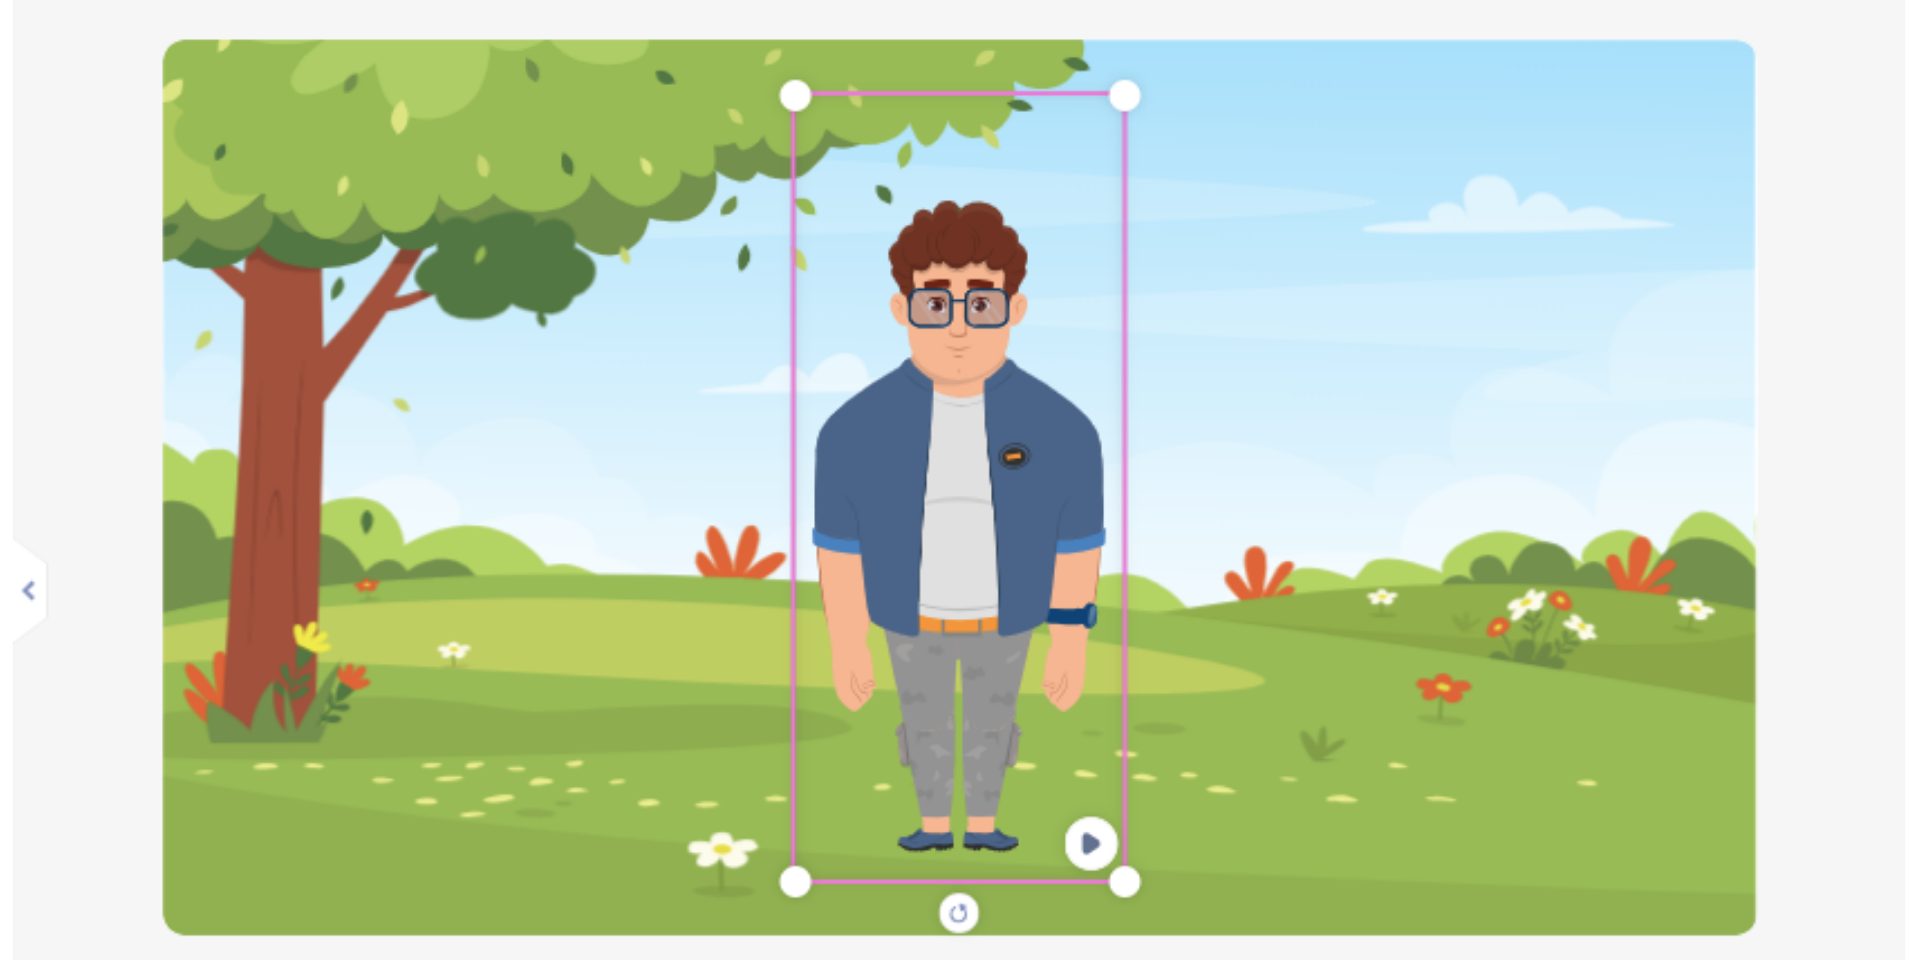
Once you’ve chosen your character, simply click on it to add it to the workspace.
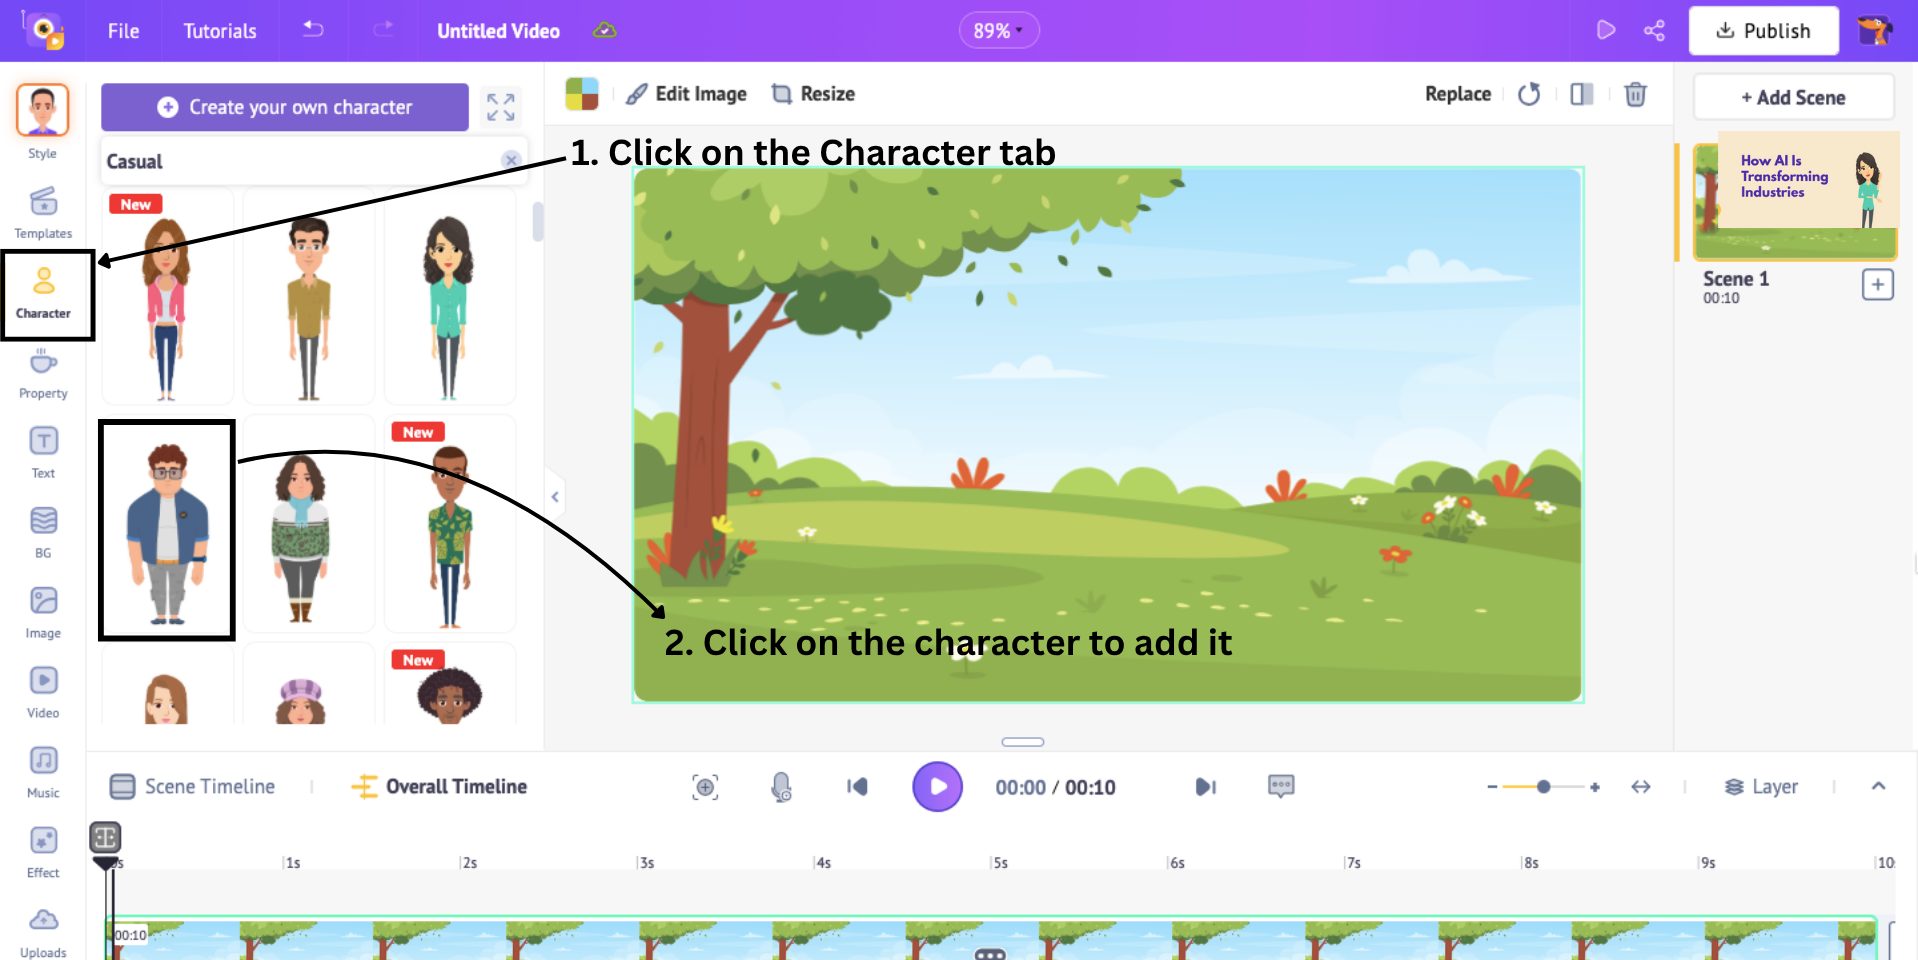
This is how the character gets added to the workspace.
After the character is added to the workspace, click on it. This opens the Actions tab. Here, search for “Walk” in the search bar and select the specific walk action that you want to apply to your character.
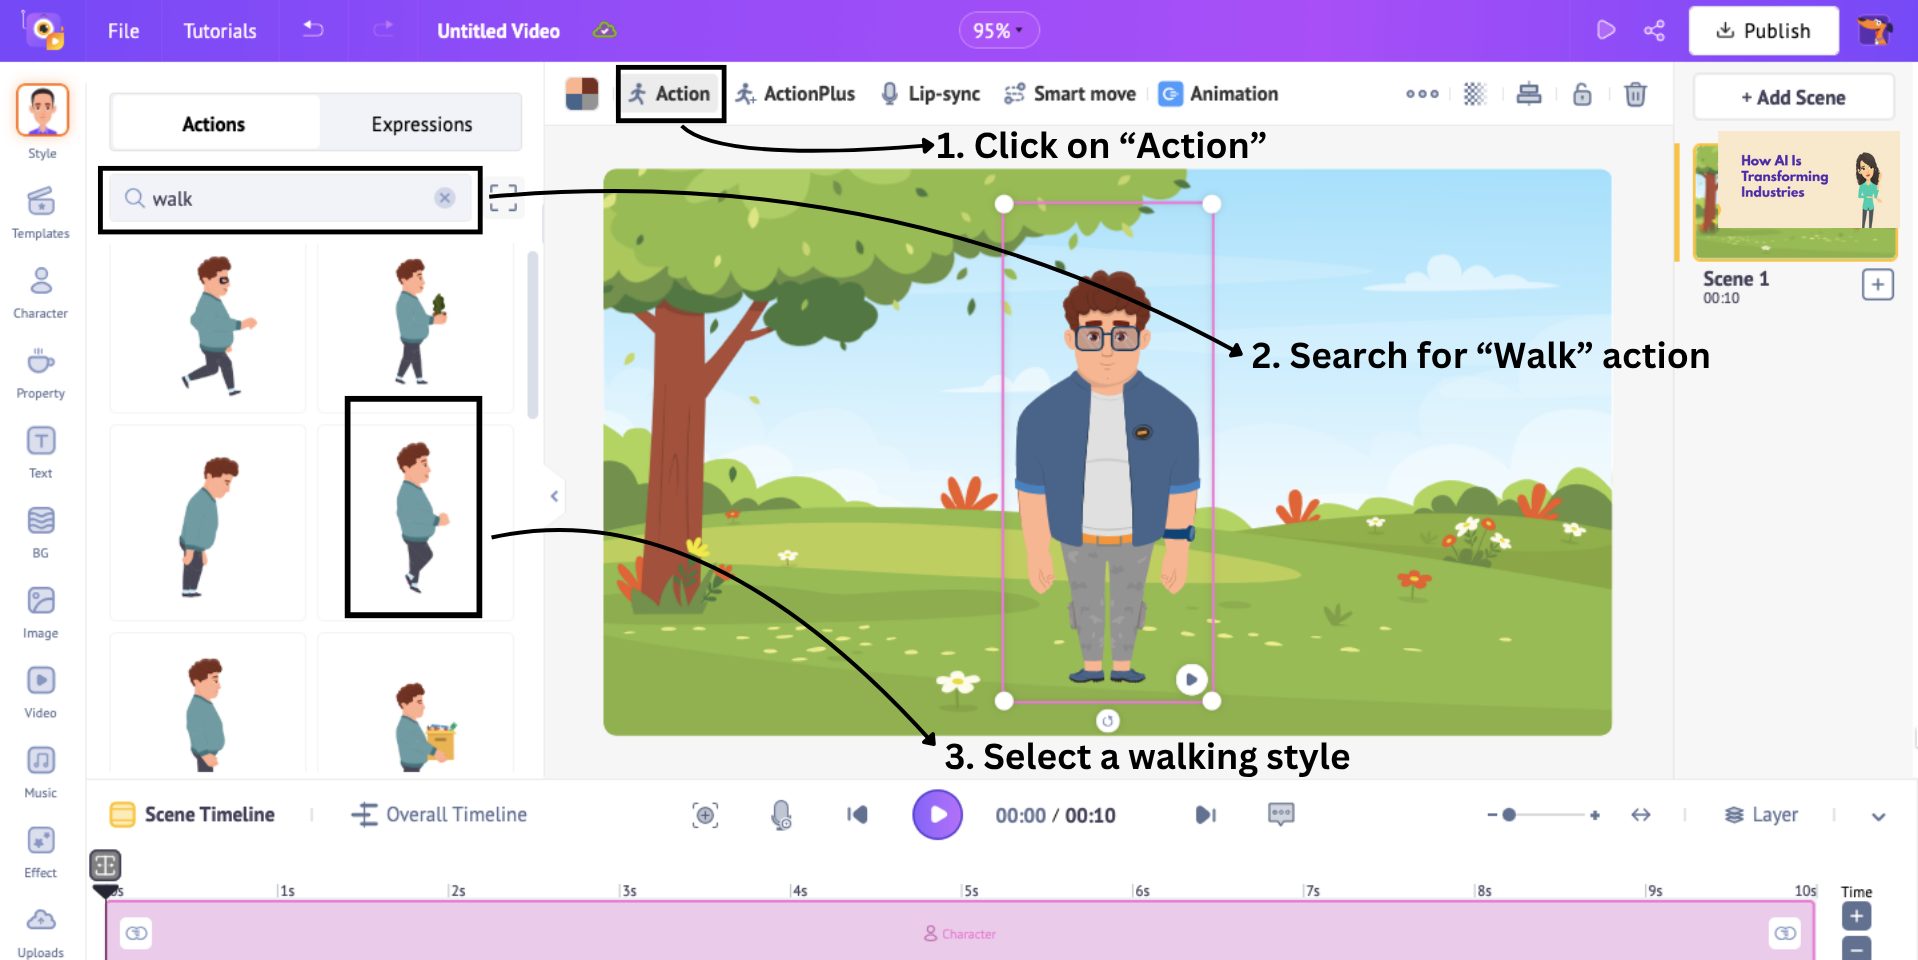
This is how the action gets applied to the character.

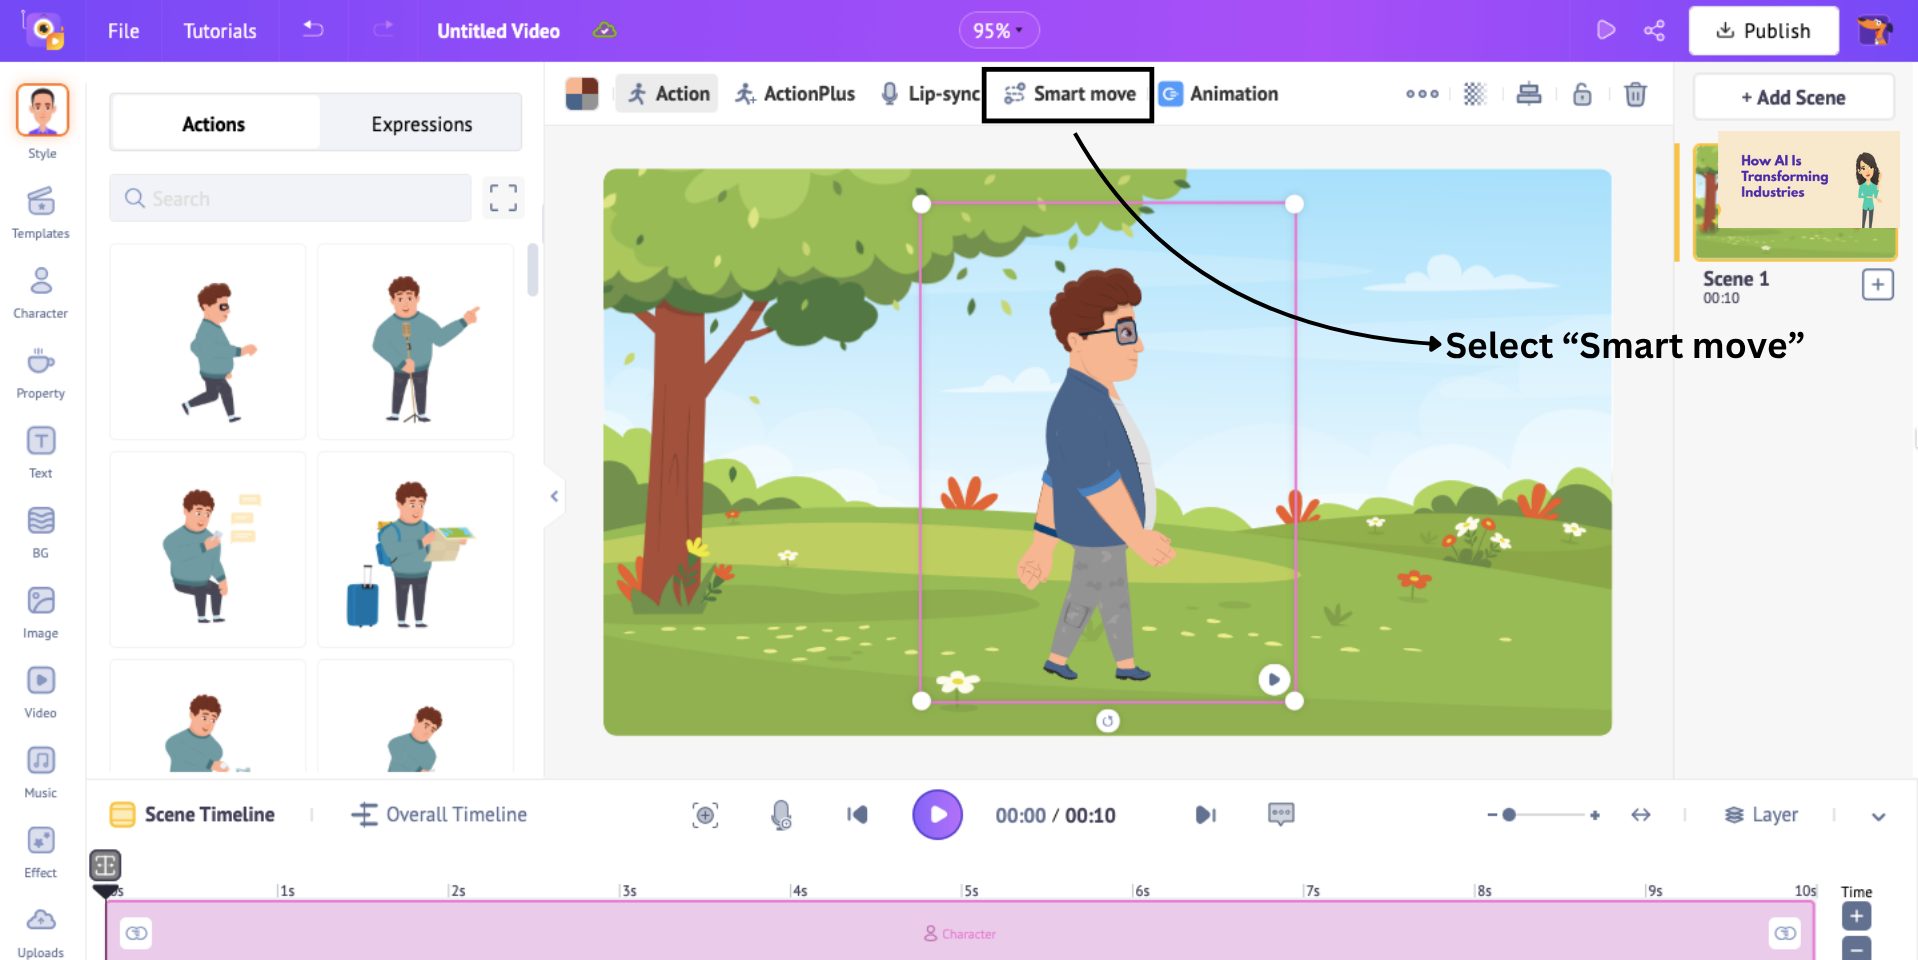
But hey, our character is walking in one spot. To make it look like it is walking from spot A to spot B, let’s add a walk cycle to this character.
Add a walk cycle to your character
To make the character walk across the scene, click on your character and select the Smart Move option from the menu. Using this option, we will make the character walk across the screen.
Once you select the smart move option, you’ll see two instances of the character appear - both in the workspace and on the timeline.
- In the workspace, these represent the starting point (A) and ending point (B) of the walk cycle.
- On the timeline, they define the duration of the walk, from when the motion begins to when it ends.
To make the character enter from the left, drag the first frame outside the left edge of the workspace. Then, in the timeline, position that same frame at the 1-second mark to set the timing.
Here’s a GIF to help you visualize it better -
Next, select the second frame and drag it outside the right edge of the workspace. This sets the character’s exit point, making them walk completely across the screen.
In the timeline, move this frame to the last second to control how long the walk takes. Then click Apply.
Hit Play to see how it turns out.
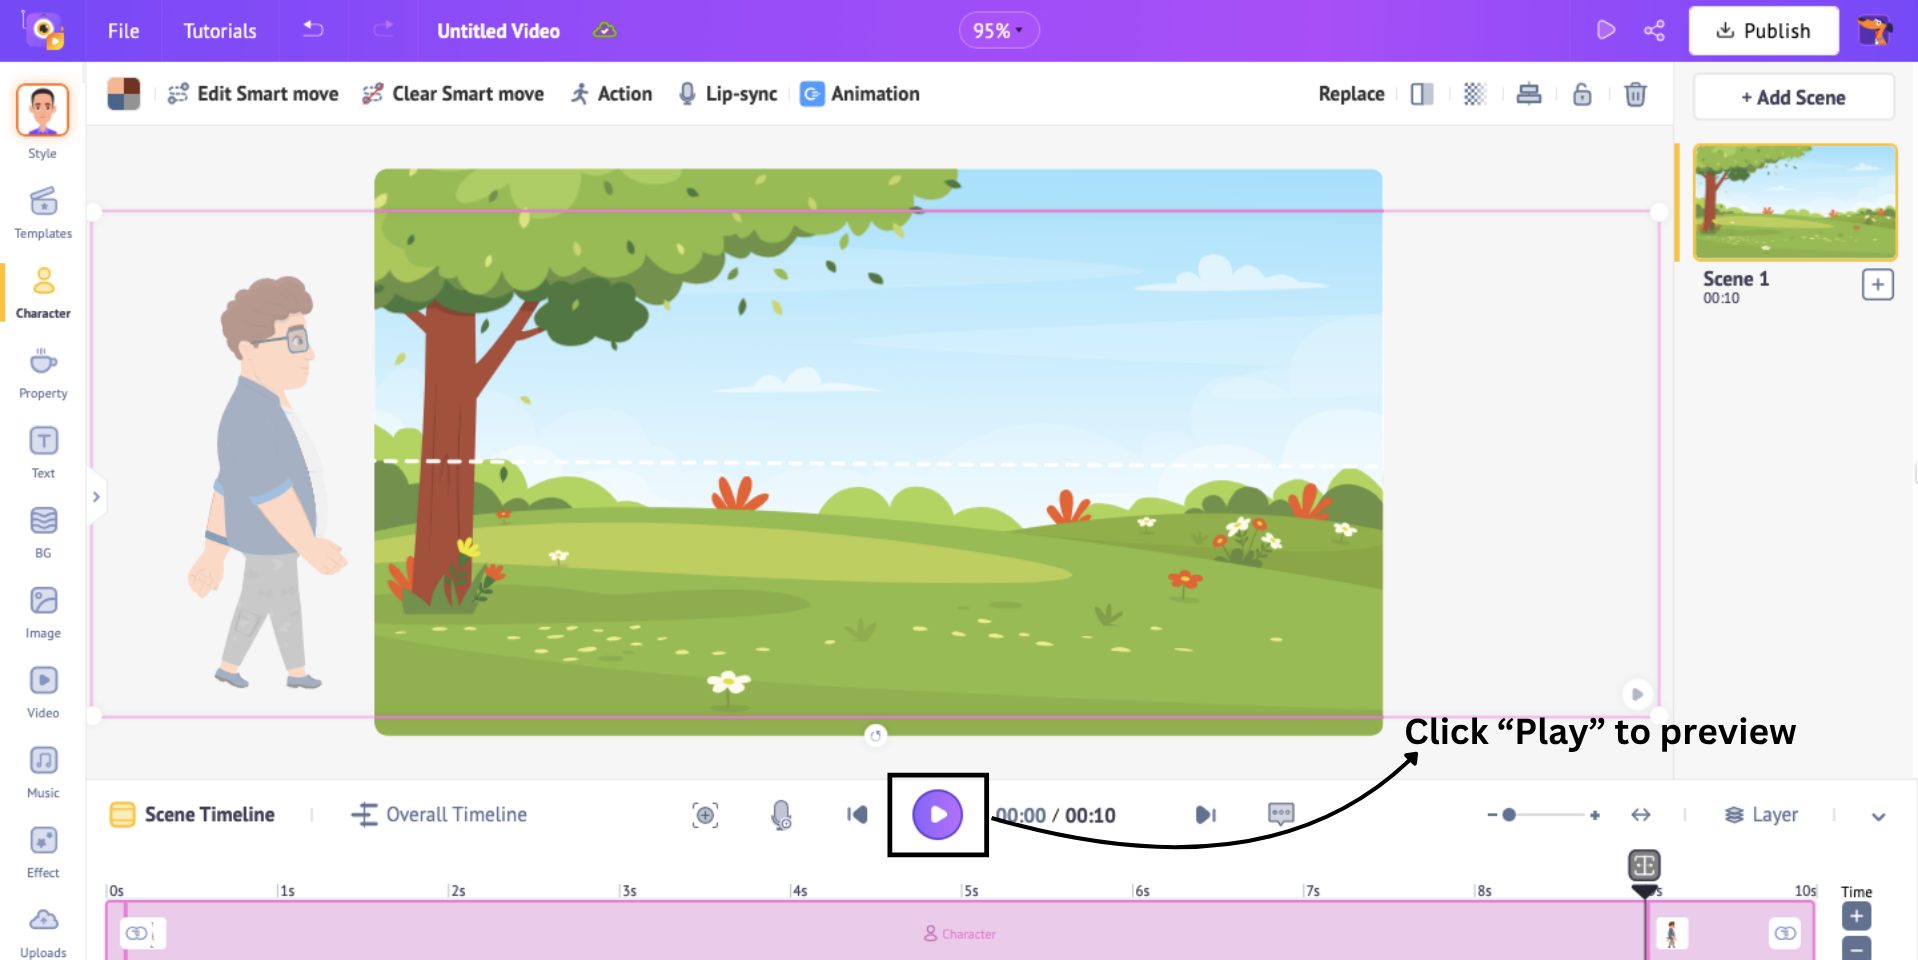
Let’s see how my walk cycle look like.

***
Boom! Just like that, you created your own walk cycle. You can experiment with different characters, speeds, and more.
We hope this guide on how to animate a walk cycle was clear, quick, and helpful.
Ready to make one of our own?
Head over to Animaker now!
Or if you want to dive deeper and learn how to make cartoon videos, complete with characters, voiceovers, scenes and more, check out the link provided.
Animation is just a few clicks away. Let your creativity walk the talk!