
How to Combine Videos in QuickTime in 4 Quick Steps!

Pragadeesh N - March 4, 2021 - Leave your thoughts. 5 min read
Looking to learn how to combine videos in QuickTime player on Mac?
In this article, we show you how to merge or combine videos using QuickTime player on your Mac computer with clear step-by-step instructions and pictures.
Also, as a bonus, we show you a simple way to merge or combine videos on Mac.
How to Combine or Join Multiple Video Clips in QuickTime Player
It’s quite easy to combine videos using the QuickTime player. Here are the steps to combine two or more videos in QuickTime:
- Open QuickTime Player and open one of the video files you’d like to combine or merge. Click on the File menu from the menu bar and select Open File… from the dropdown menu.

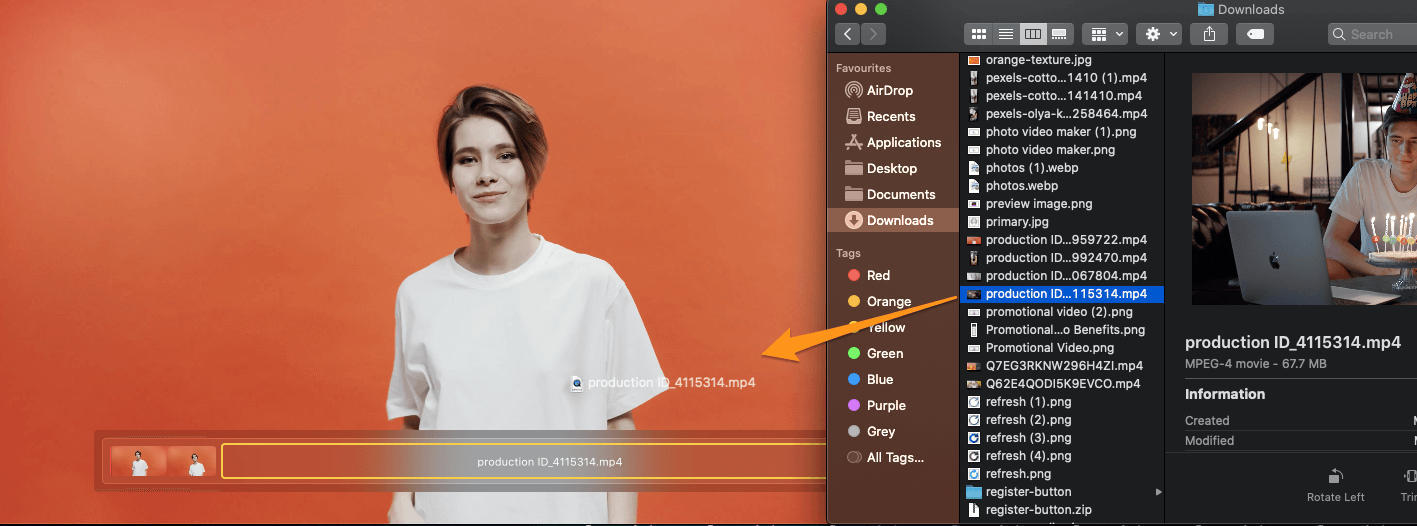
- Now that you’ve opened this video using QuickTime, you can add the other videos that you want to combine with the one you’ve just opened. Simply drag and drop them onto the player window.
- Optionally, you can click and drag the videos to rearrange them in your desired order.

- Now click on the blue Done button in the bottom right corner of the player window to finish merging the videos together.

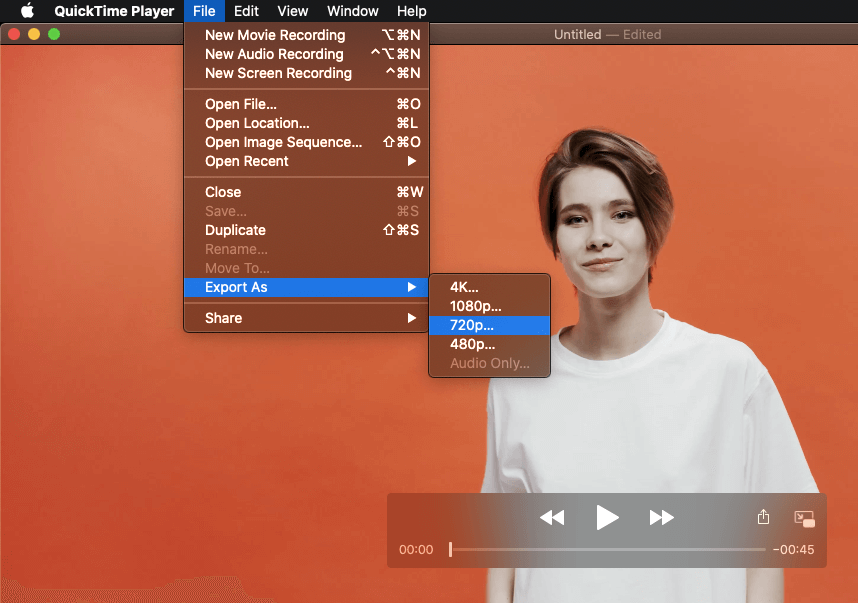
- No, you’re not done yet. To save the video, go to the File menu in the menu bar, then select Export As, and finally, pick the resolution you want to export the video in. You can export the video in 480p or 720p.
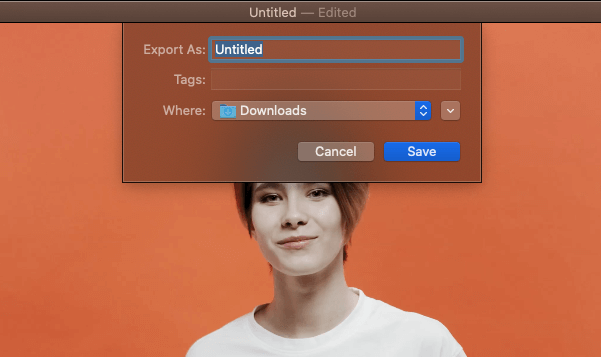
- Then enter a name for your video using the Export as input field and then pick a location to save your video. Finally, click on the Save button to save your video.
The video will be saved in the MOV format. If you’d rather want your video to be in MP4 format, we show you an easy way to combine multiple videos and export the video as MP4 using a simple-to-use tool below.
A Simple Way to Merge Videos on Mac
If you’re a Mac user, you can use Animaker’s video merging tool to quickly merge multiple videos together for free! All it takes is 3 simple steps to merge all your videos using our super-simple video merging tool.
For those who are unaware of Animaker, it is an all-in-one DIY video-making app designed to help non-designers make professional-quality videos from the comfort of their browser.
Our video merging software works on Chrome, Firefox, Safari, Internet Explorer, etc., and if you use one of these browsers, you can easily merge or combine your videos on Mac.
If you want to merge your videos for Instagram, YouTube, or Facebook, then Animaker’s video merger is the best tool for the job. Also, you can merge videos in MP4, MPG, WebM, MOV, and more formats.
Merge Your Videos in 3 Simple Steps using Animaker
Sign up/Log in and Pick the Dimensions
Log into your account or create a free one. Now pick your output video’s dimensions. Do you want your video to be horizontal or vertical or square? Pick one of the pre-made dimensions from the Create a video section in your dashboard.
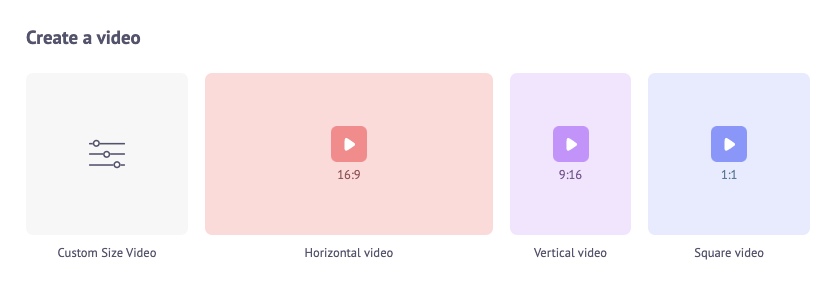
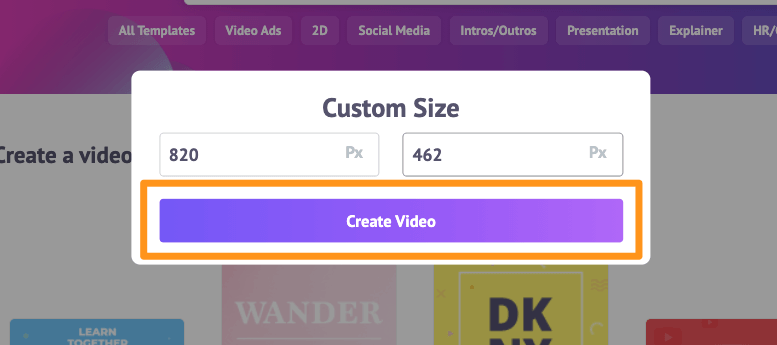
Or you can enter custom dimensions for your video by picking the Custom Size Video option from the same section above. Enter the width and height in pixels and hit Create Video.
Upload Your Videos and Merge Them Together
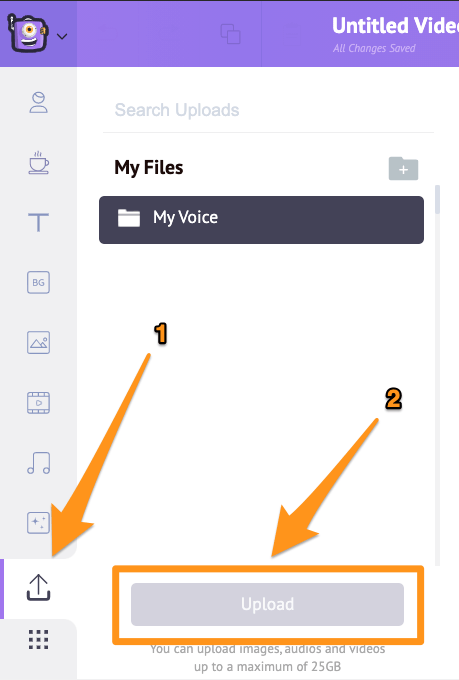
Animaker allows you to upload videos up to 20 GB in size. To upload a video, go to the Upload tab in the main menu bar and click on the Upload button at the bottom of the tab window.
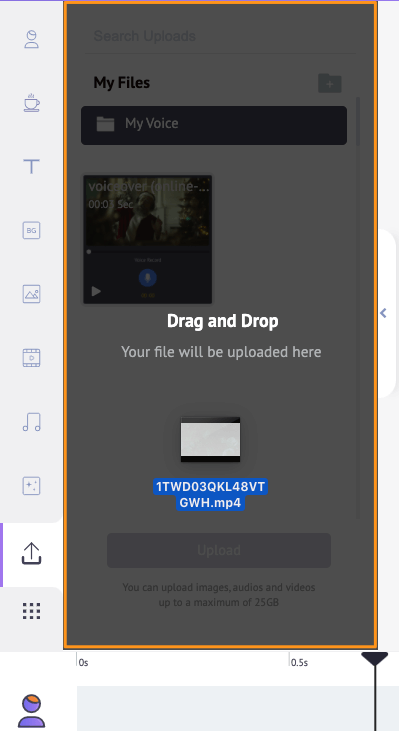
Alternatively, you can simply drag and drop your videos onto the area shown below.
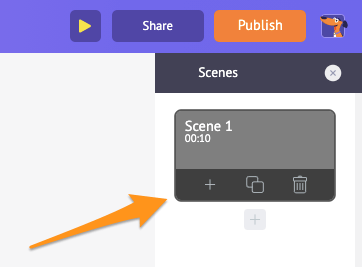
In the Scenes section, you can see that a scene has already been added to the project.
You can set the uploaded video onto the scene. To do that, simply click on the video in the Uploads section and it will be set onto the scene.
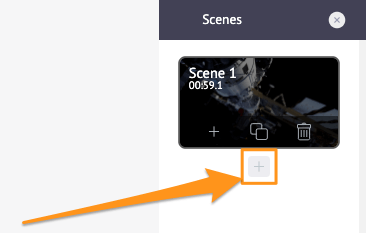
Now add a new scene for each video. To add a new scene, click on the plus button at the bottom of the scene.
Now click on another uploaded video you’d like to add to this new scene. Repeat the same process for other videos you’d like to add and merge together.
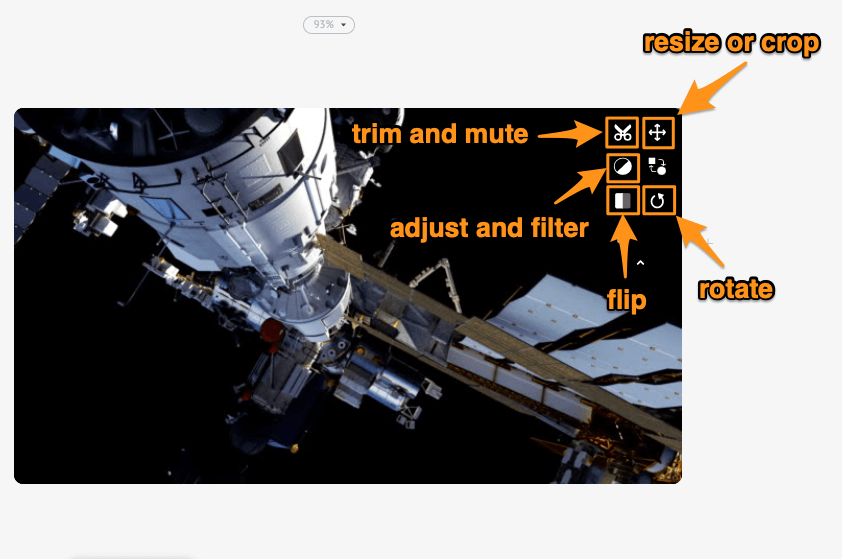
Optionally, you can fine-tune the video footage you just added. You can trim, resize or crop, rotate, flip, mute, and adjust the brightness and contrast of your video files.
You can also add music, transitions, images, emojis, shapes, stickers, GIFs, etc.
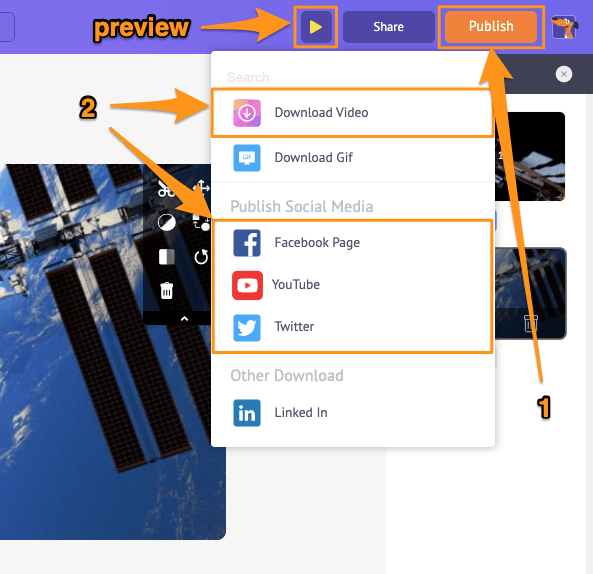
Preview and Download the Video
Once you’re done adding all your video files and fine-tuning them, you can preview the video by clicking on the play icon beside the Publish button. You can download the video to your local computer by clicking on the Publish button and then selecting Download Video from the resulting dropdown menu. Or you can share it directly to a social media platform from within the app.
Using Animaker’s online video editor, you can:
- Trim videos
- Rotate videos
- Flip videos
- Remove audio from videos
- Adjust video brightness, contrast, etc.
- Add filters to videos
And the list goes on… feel free to check out these video editing tools and learn why it’s the go-to video editor for marketers and content creators.
Got any questions about merging or combining your videos in QuickTime or on your Mac computer? Any interesting tips or tools to combine videos on Mac that we seem to have left out? Please let us know about them in the comment section below.