How To Create Training Videos? [In Just 3 Steps!]

Shreshtra - July 3, 2024 - Leave your thoughts. 16 min read
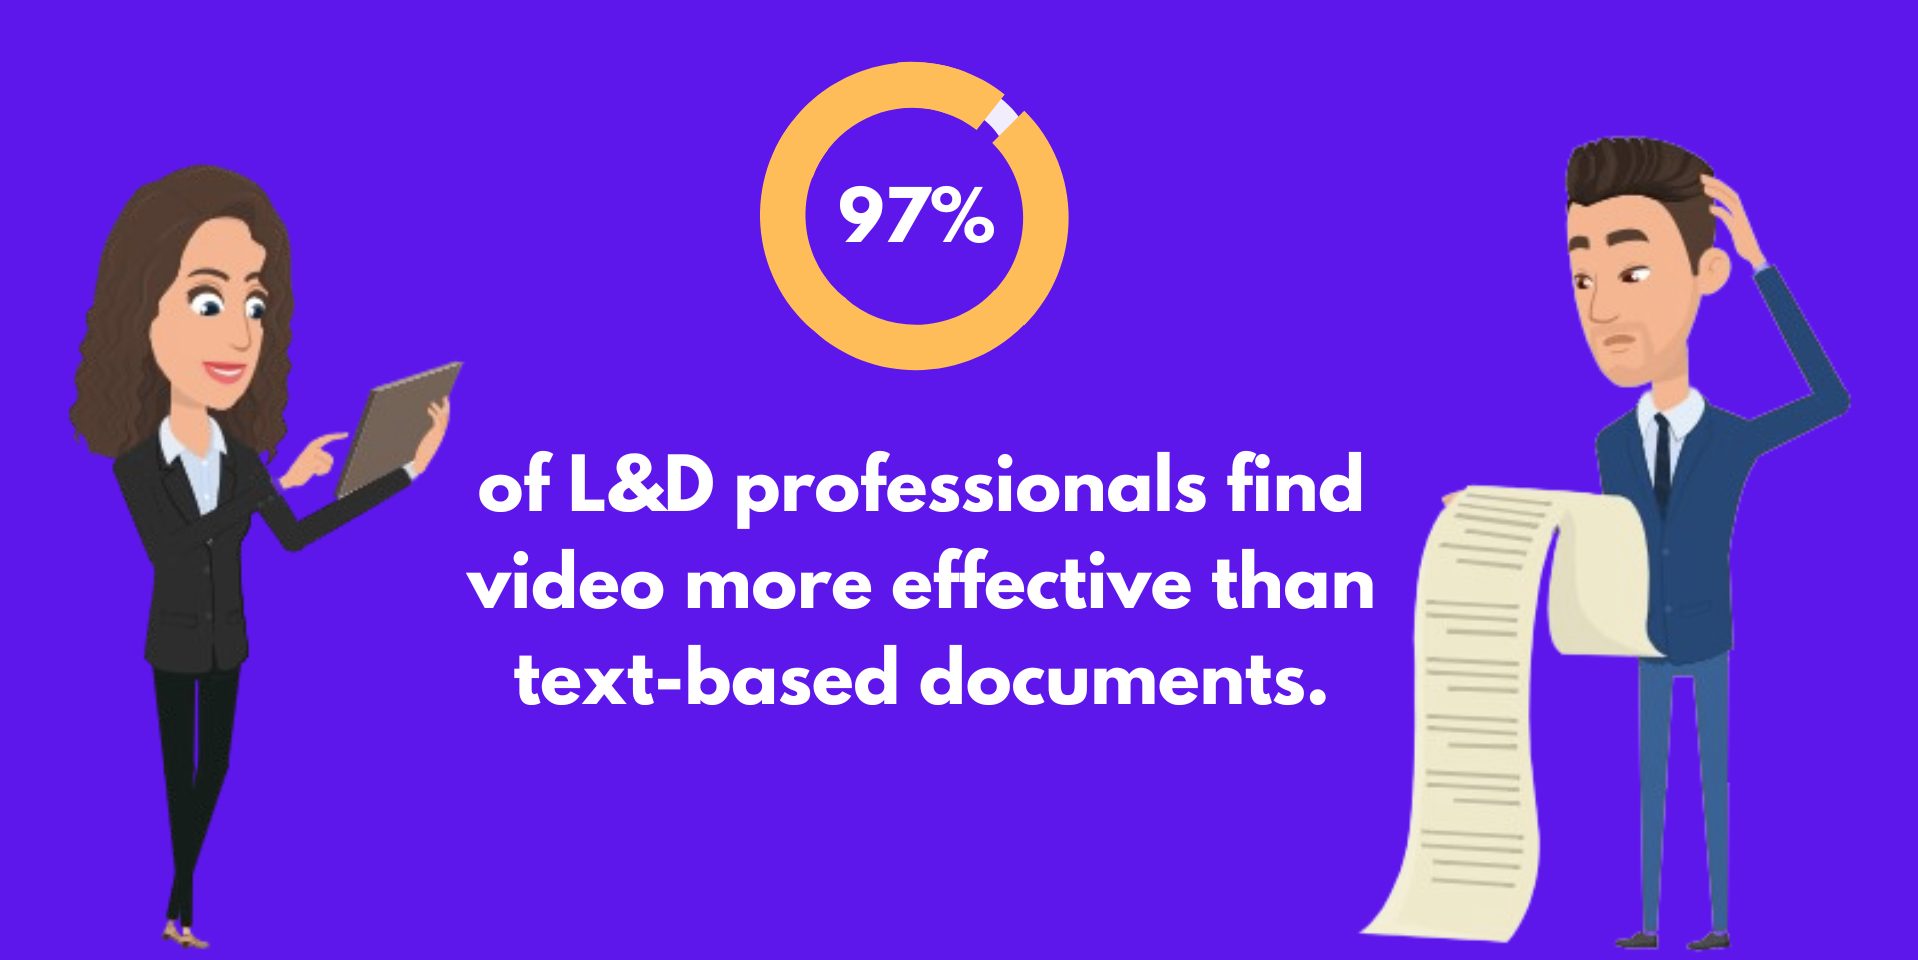
Amidst the rapidly evolving landscape of professional development, the surge in video-based learning has captured the attention of L&D managers worldwide.
Corporate companies have started using training videos to train their employees and customers on various topics, from product tutorials and safety procedures to customer service techniques and corporate policies.
The goal of a training video is to train the viewer in a particular skill or share knowledge on a particular topic that helps solve problems and become more efficient at their work.
These training videos offer a convenient and engaging way to distribute information and ensure consistency in training across different branches or departments.
In this article, we will look at
Without further ado, let’s get started!
Why create training videos?
In the age of TikTok and Instagram reels, this generation's attention span has shrunk to one-fourth of the average.
Employees lack the attention span and patience to read long text-based documents. Now, they expect training to be provided in a short, snackable format that they can consume at their convenience on any device of their choice.
Videos are the perfect format for presenting your content in the most interesting way, thereby ensuring maximum reach and retention.
Furthermore, training videos offer the flexibility to revisit content as needed, allowing employees to learn at their own pace.
This on-demand access supports continuous learning and skill development, which is crucial in today's fast-paced work environments.
These reasons make training videos essential for modern corporate learning and development.
Now, let’s explore the different types of training videos.
Types of training videos
Training videos come in many types. Here are some of the most commonly used training video types:
Animated training video:
These videos with animated visuals simplify complex concepts in an easily understandable format. They use visual imagery, like animated characters and icons, to bring the concepts to life.
Here’s a great example of an animated training video -
Screen Recording Video:
Screen recording videos are useful for creating tutorial and demo videos, especially in the software industry.
Typically, these videos use a screen capture tool like Vmaker to capture a product demo displayed on the screen. At the same time, a narrator provides a voiceover to explain the process for easy understanding.
Here is an excellent example of a screen recording video for training employees on how to use the tool -
Micro video:
Micro videos are short videos that visually represent a single concept or process. They are often grouped to explain complex concepts.
Micro videos, which can be animated or live, help break down concepts into smaller parts, making them easier for the learners to understand.
Here is an example of a short video about employee happiness -
Instructor-led video:
Instructor-led videos are the digital equivalent of traditional classroom training.
These videos feature a teacher or an expert delivering training content to the audience on camera.
Here is an example of an instructor-led training video -
Now, out of these different types of training videos, animated training videos are highly effective because they capture attention through colorful visuals and dynamic content.
Not only do they simplify complex information, but they also enhance retention by using engaging storytelling techniques and visual metaphors that make the material more memorable.
If you’re wondering about the difficulty of making animated videos, don’t worry. There are many tools available these days that can help create animated videos effortlessly.
One such tool is Animaker. It is a web-based AI-powered platform for creating professional-quality animated videos easily.
Animaker’s 150M+ asset library contains animated characters of different ages, sizes, and professions, as well as animated actions, properties, icons, and more.
Moreover, the tool’s AI-powered features, like AI voiceover and AI subtitle generator, make video creation so much simpler!

So, let’s see how to create training videos with Animaker.
How to create training videos?
Creating a training video involves three key steps.
Step 2: Create the training video
Step 3: Download & Distribute the training video
These three steps will guide you through the process of creating effective training videos, from concept to distribution.
Let’s begin!
Step 1: Create the script
Creating a well-structured script is the foundation of an effective training video. Here's how to do it:
- Identify Objectives: Clearly define what you want your learners to learn by the end of the video.
- Audience Analysis: Understand who your audience is and what their needs are. Tailor your language, tone, and examples to fit their background and expectations.
- Research and Gather Content: Collect all the necessary information and resources for the training. Ensure that your content is accurate and up-to-date.
- Engaging Language: Use simple, conversational language to keep viewers engaged.
- Visual Cues: Include notes on visual elements that will accompany the narration.
As mentioned earlier, the script is crucial for a training video. Even if you have impressive visuals, your video is bound to be ineffective without a good script.
Therefore, it is advisable to spend half of your time developing an interesting script before creating your video.
Once you have your script ready, let’s create a training video.
Step 2: Create the training video
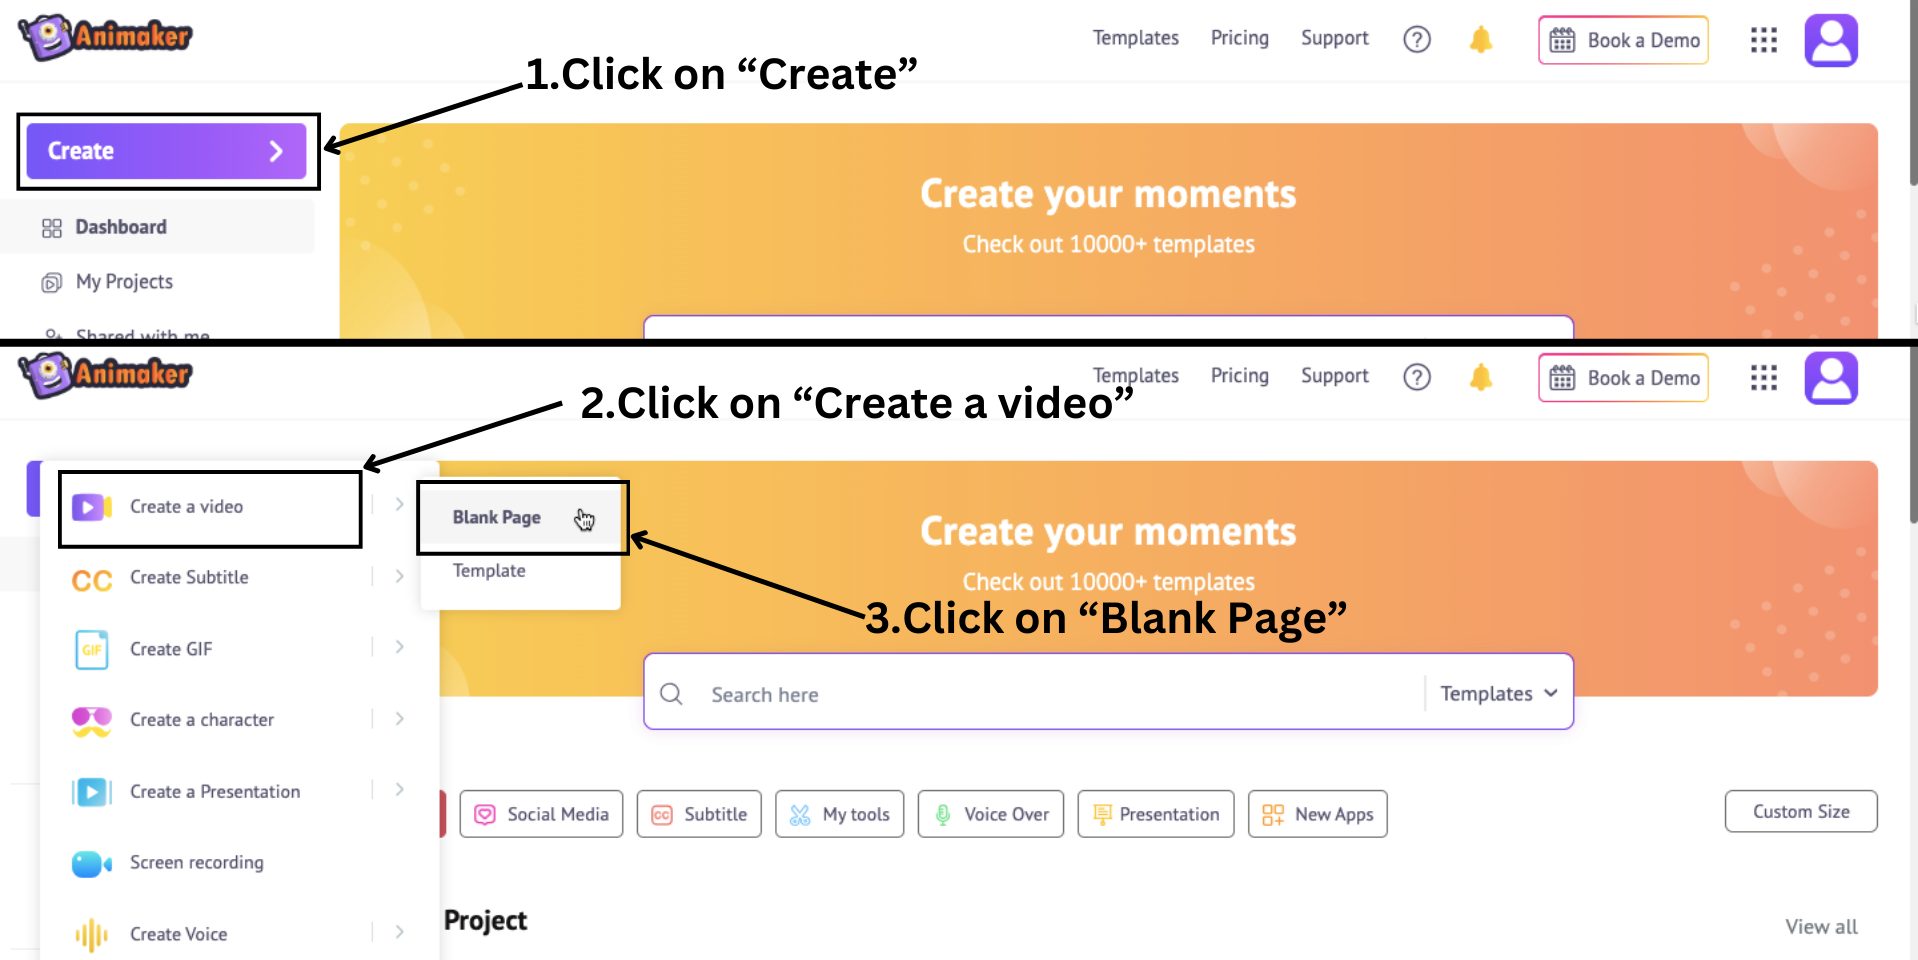
This is where you use Animaker. Firstly, login or sign up to Animaker.
You will be taken to the dashboard.
To create an animation video from scratch, the first thing you need to do is click on Create > Create a video > Blank Page.
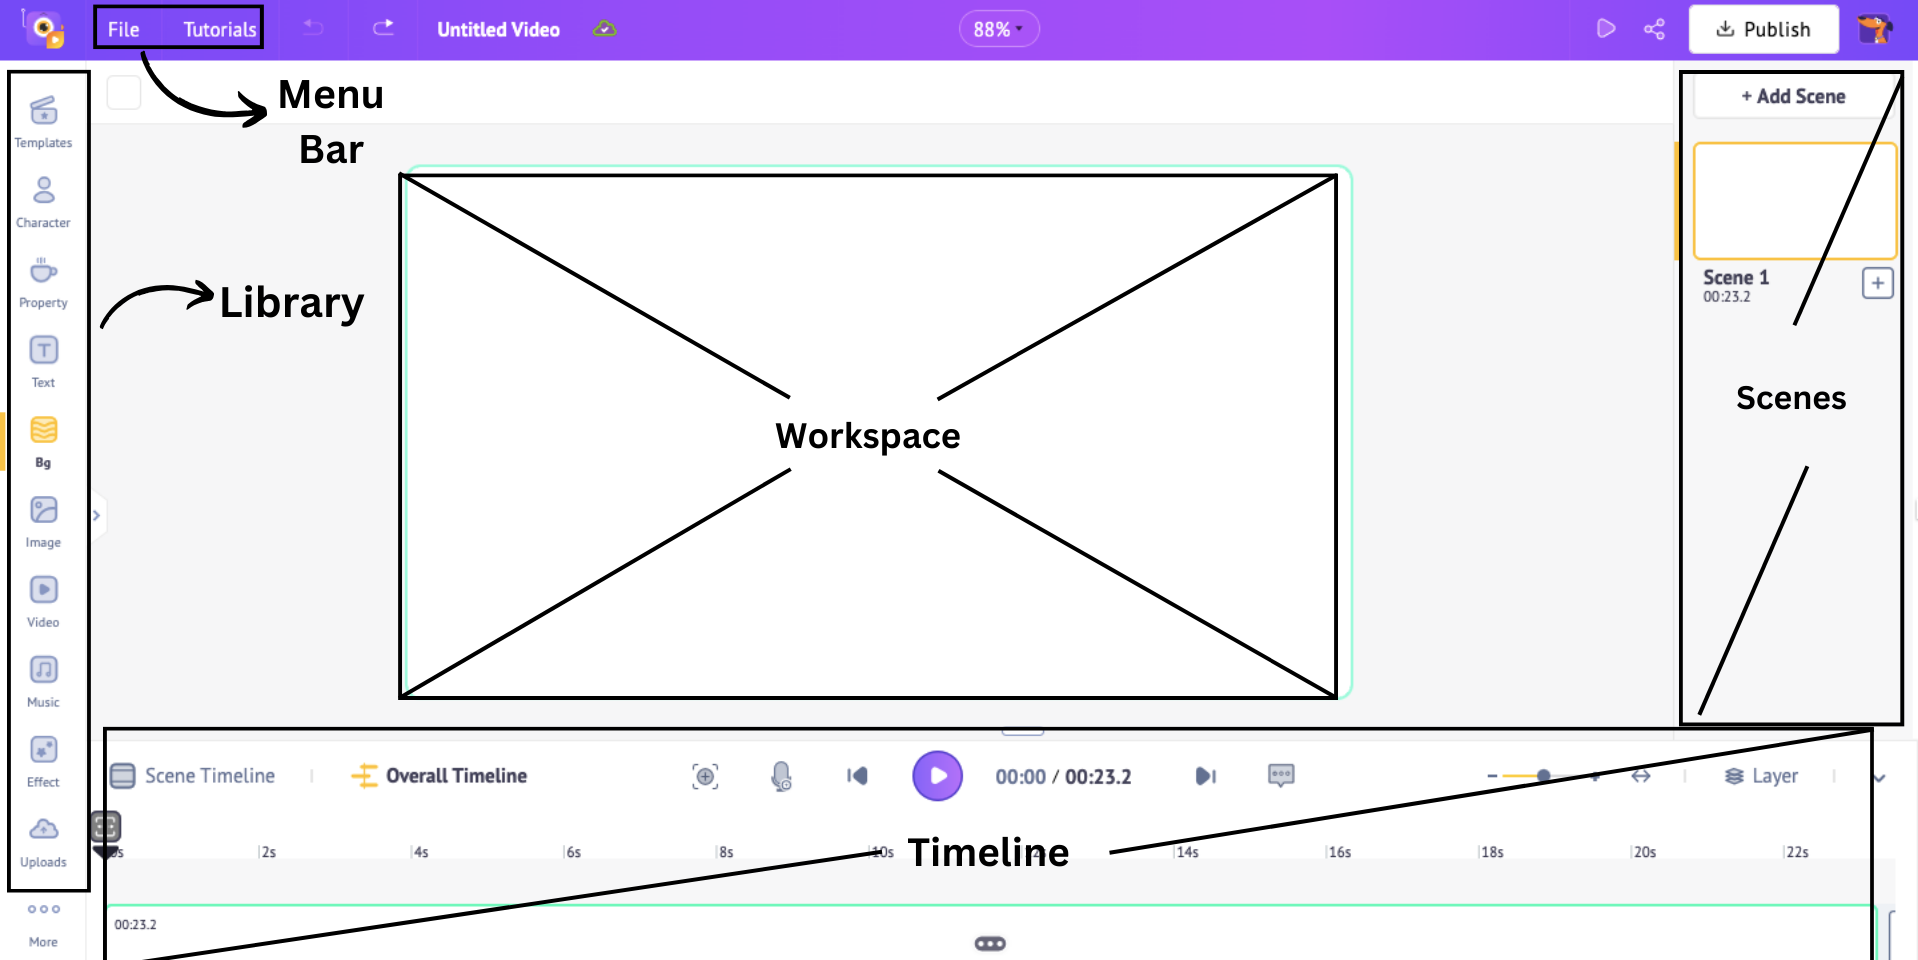
This will open a blank project. Let me give you a quick tour of the project window.
The workspace is located in the center of the screen, where you can create and edit your video. On the left lies the library with millions of assets, and on the right is the scenes section where you can manage and organize your scenes.
Above the workspace is a menu bar with additional options and tools, and the timeline is located at the bottom, where you can precisely adjust your video and its assets.
Now that we know the interface better, let’s start adding elements to create our training video.
Animaker's library contains over 150M+ assets, including animated characters, property and icons, 2D backgrounds, text, and more.
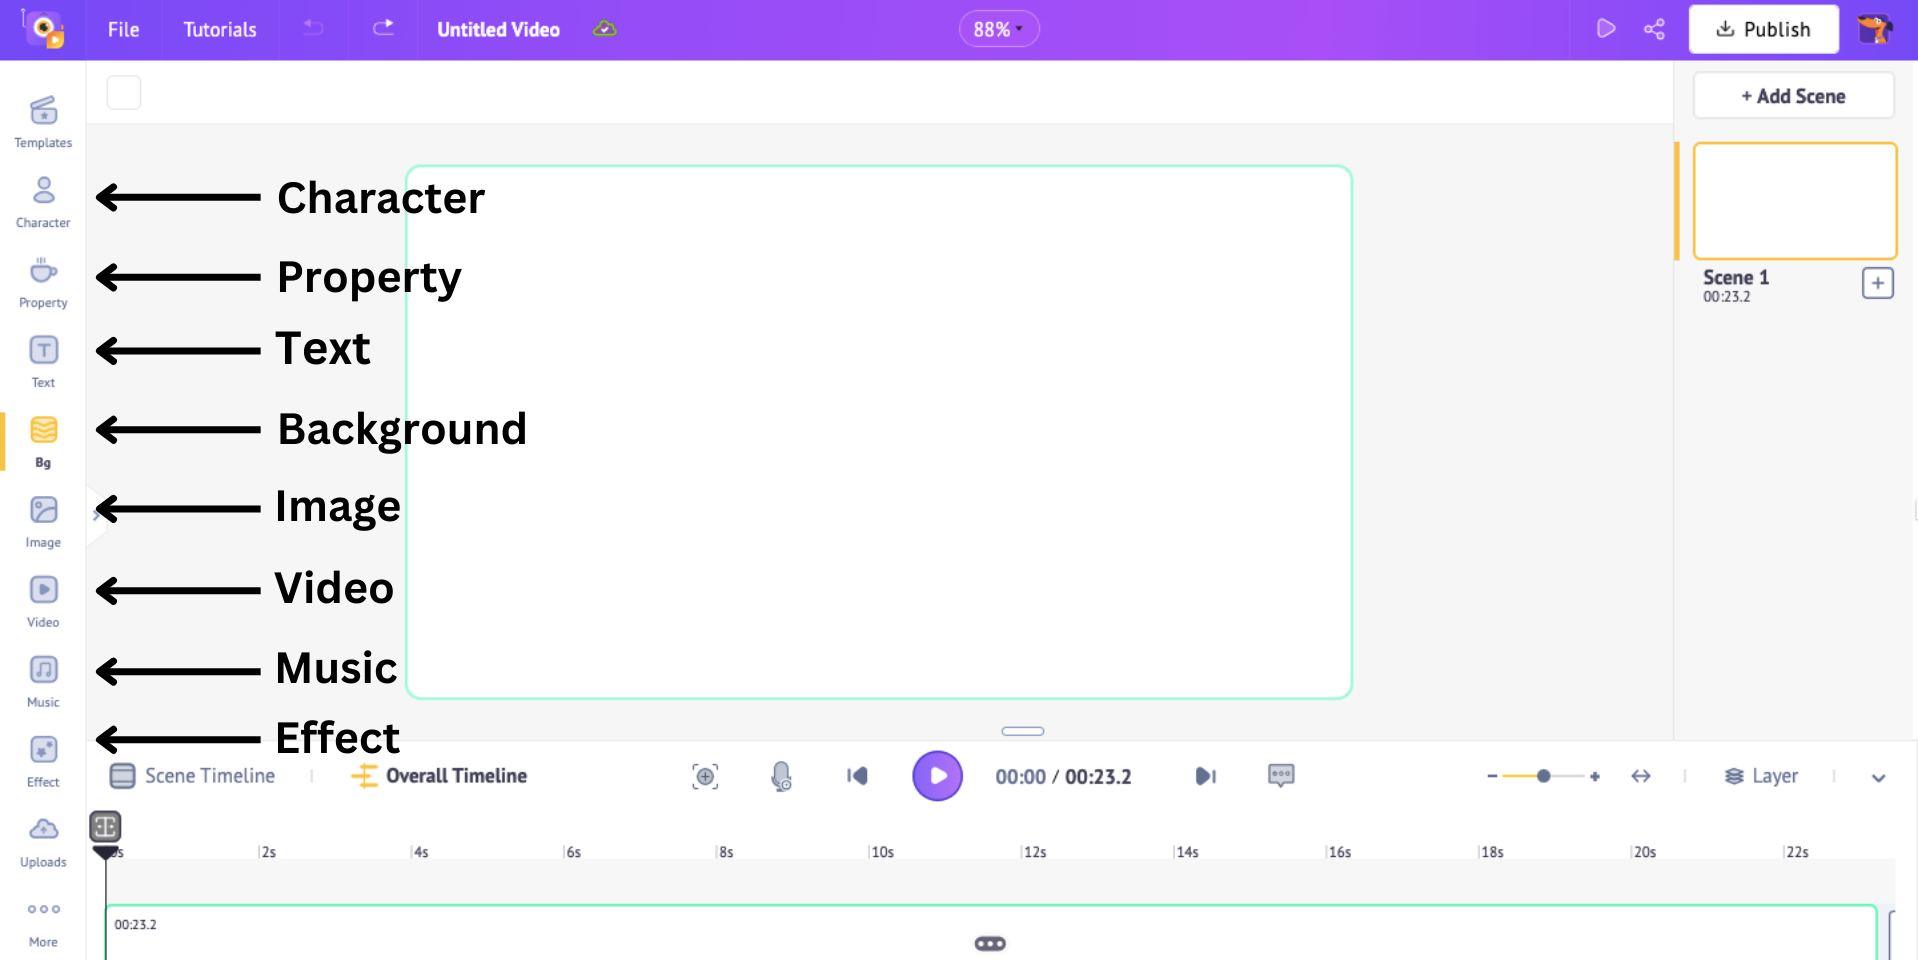
From these many options, we will explore how to add the following elements to our video -
I’m going to make a training video about Sales Techniques and Negotiation. So, let's see how to make a video with these elements.
Background
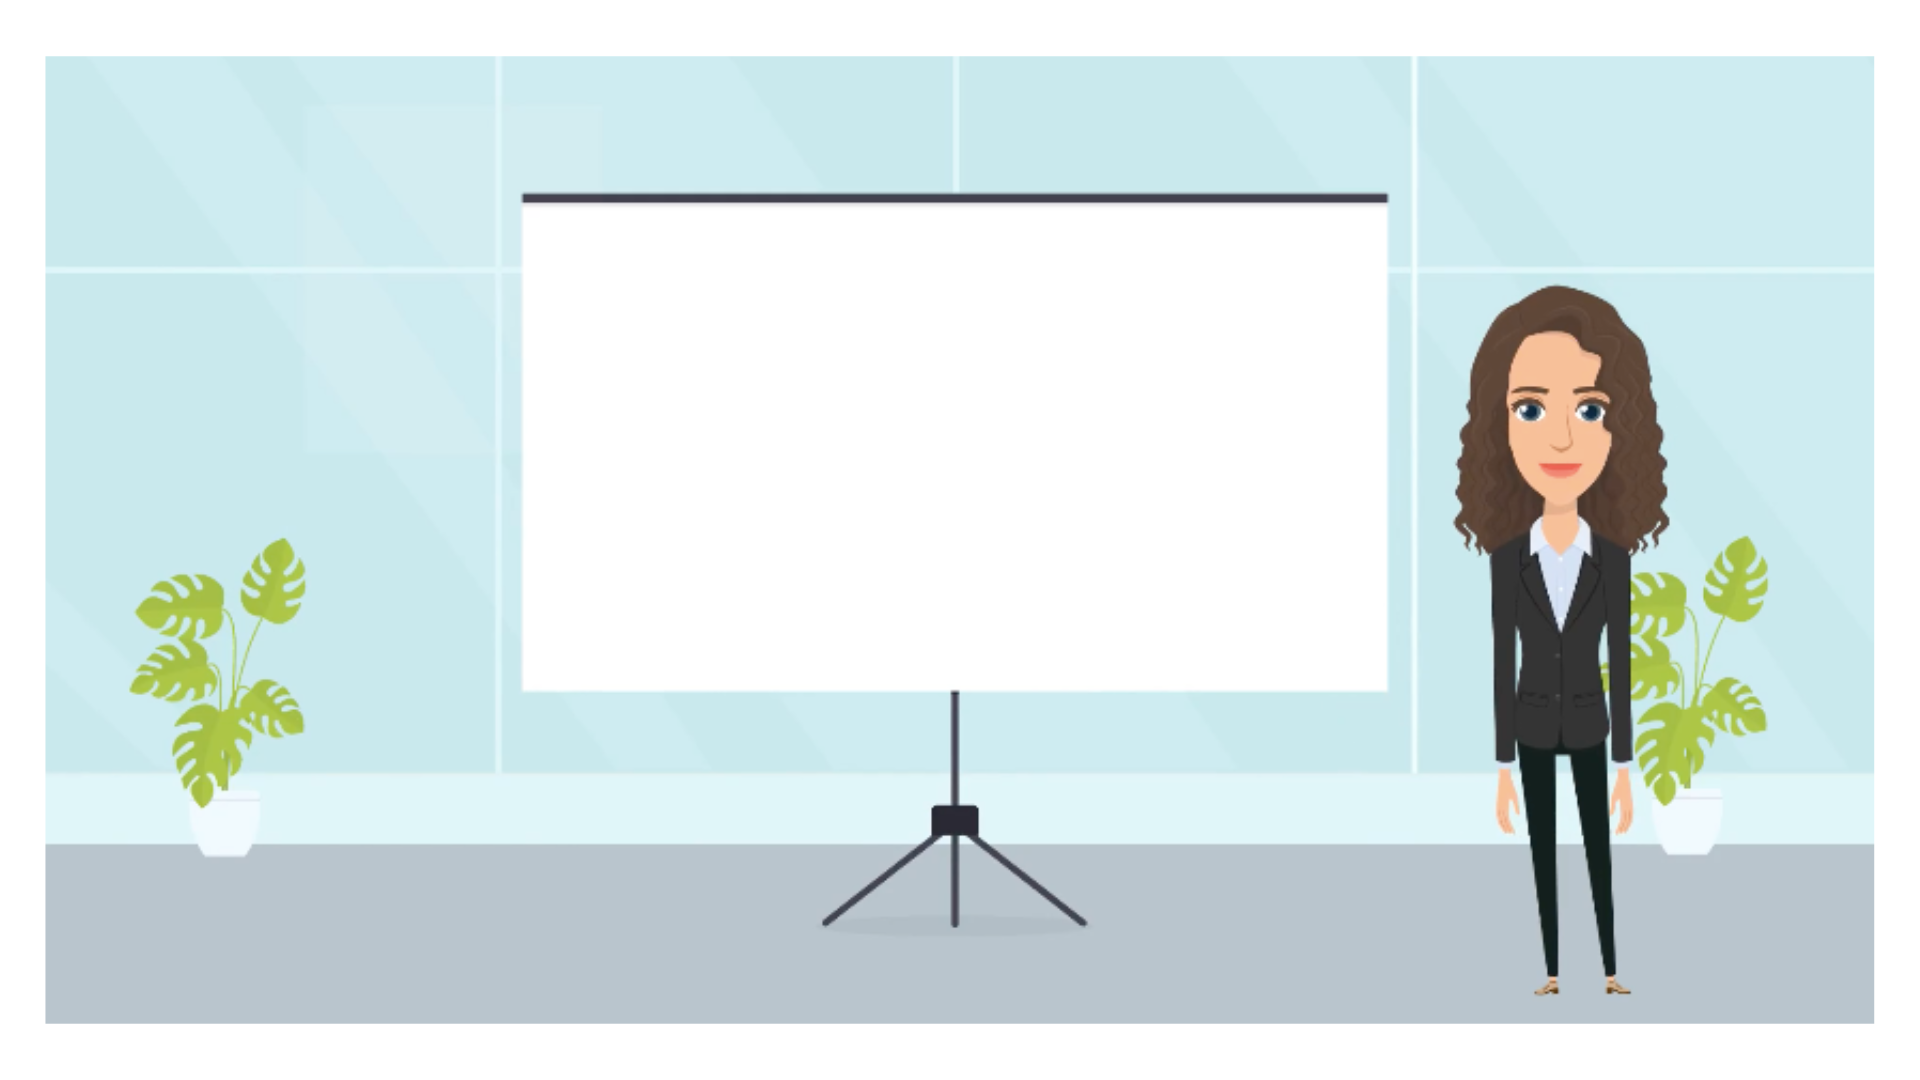
The first element we will add to the scene is a background. Click on the "Bg" option in the library to access over 500+ animated backgrounds. Select a background to add to the scene.
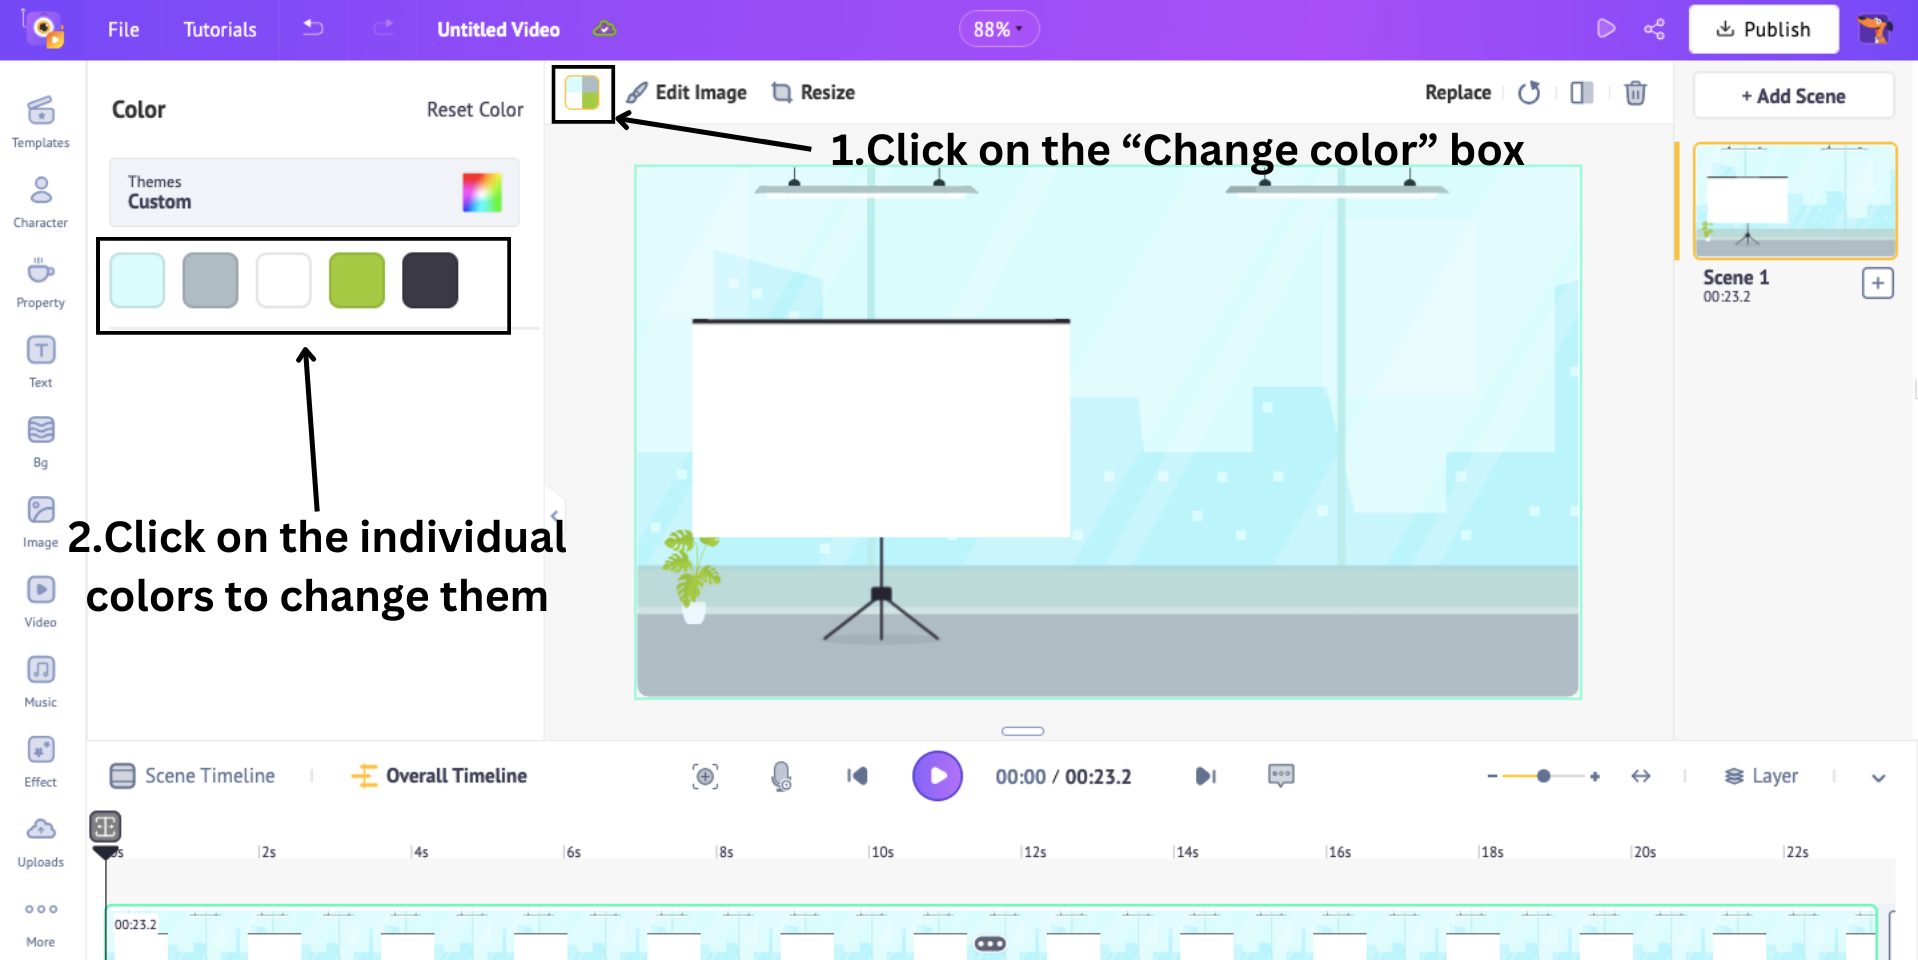
The best part is that you can customize the colors of your chosen background to match your brand's theme.
To do that, click on the Change Color box above the workspace and then click on the individual colors to change them.
If you didn’t find the perfect background from the collection, you can generate it using AI. To do that, click the Generate BG using the AI button and select options to generate your background.

This is how you add a 2D background to the scene. There are also other ways to add background, such as solid, gradient, Image, and Video. Click on the link to learn how.
Characters
Characters are the main element that makes your eLearning content engaging and fun.
Animaker has 1000+ characters of different sizes, ages, and professions, giving you various options.
To add a character to a scene, click on the Character section in the library and select one from the collection.
Remember we said you can create a character yourself? To do that, click on the Create your own character button.
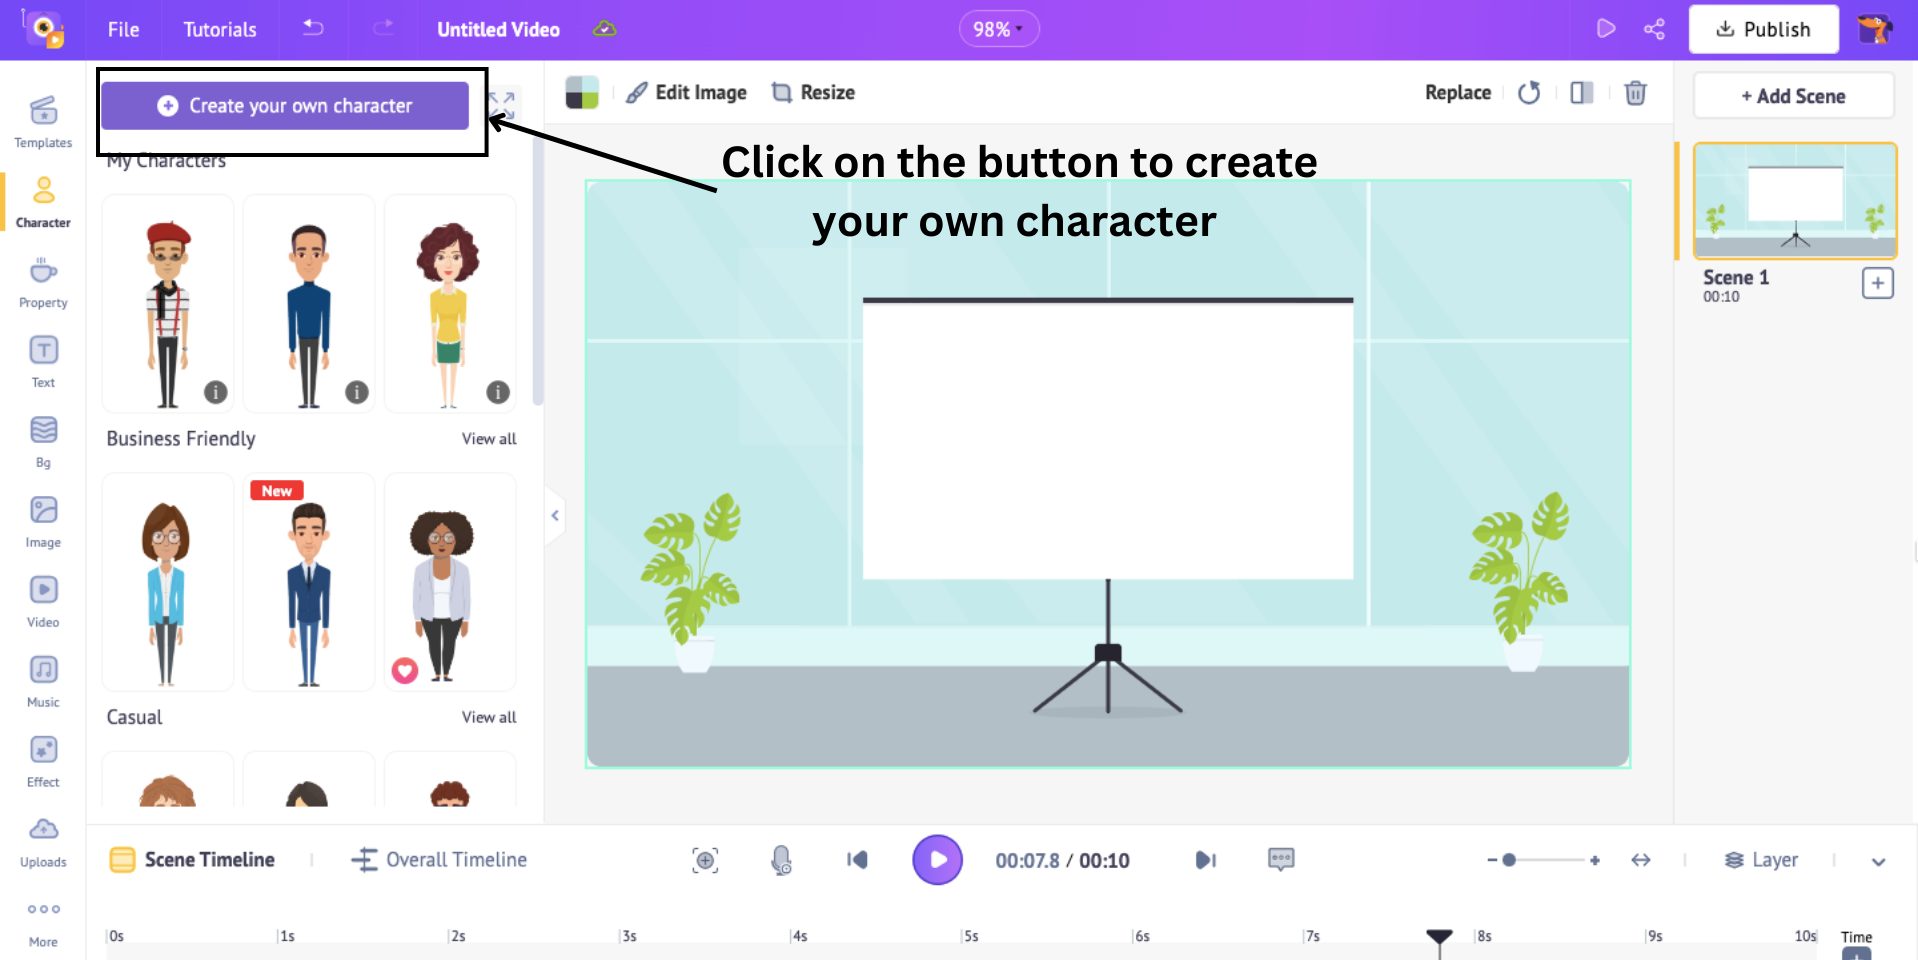
This will open the character builder tool.
The best part about this tool is that you can build characters of any age, size, profession, and ethnicity.
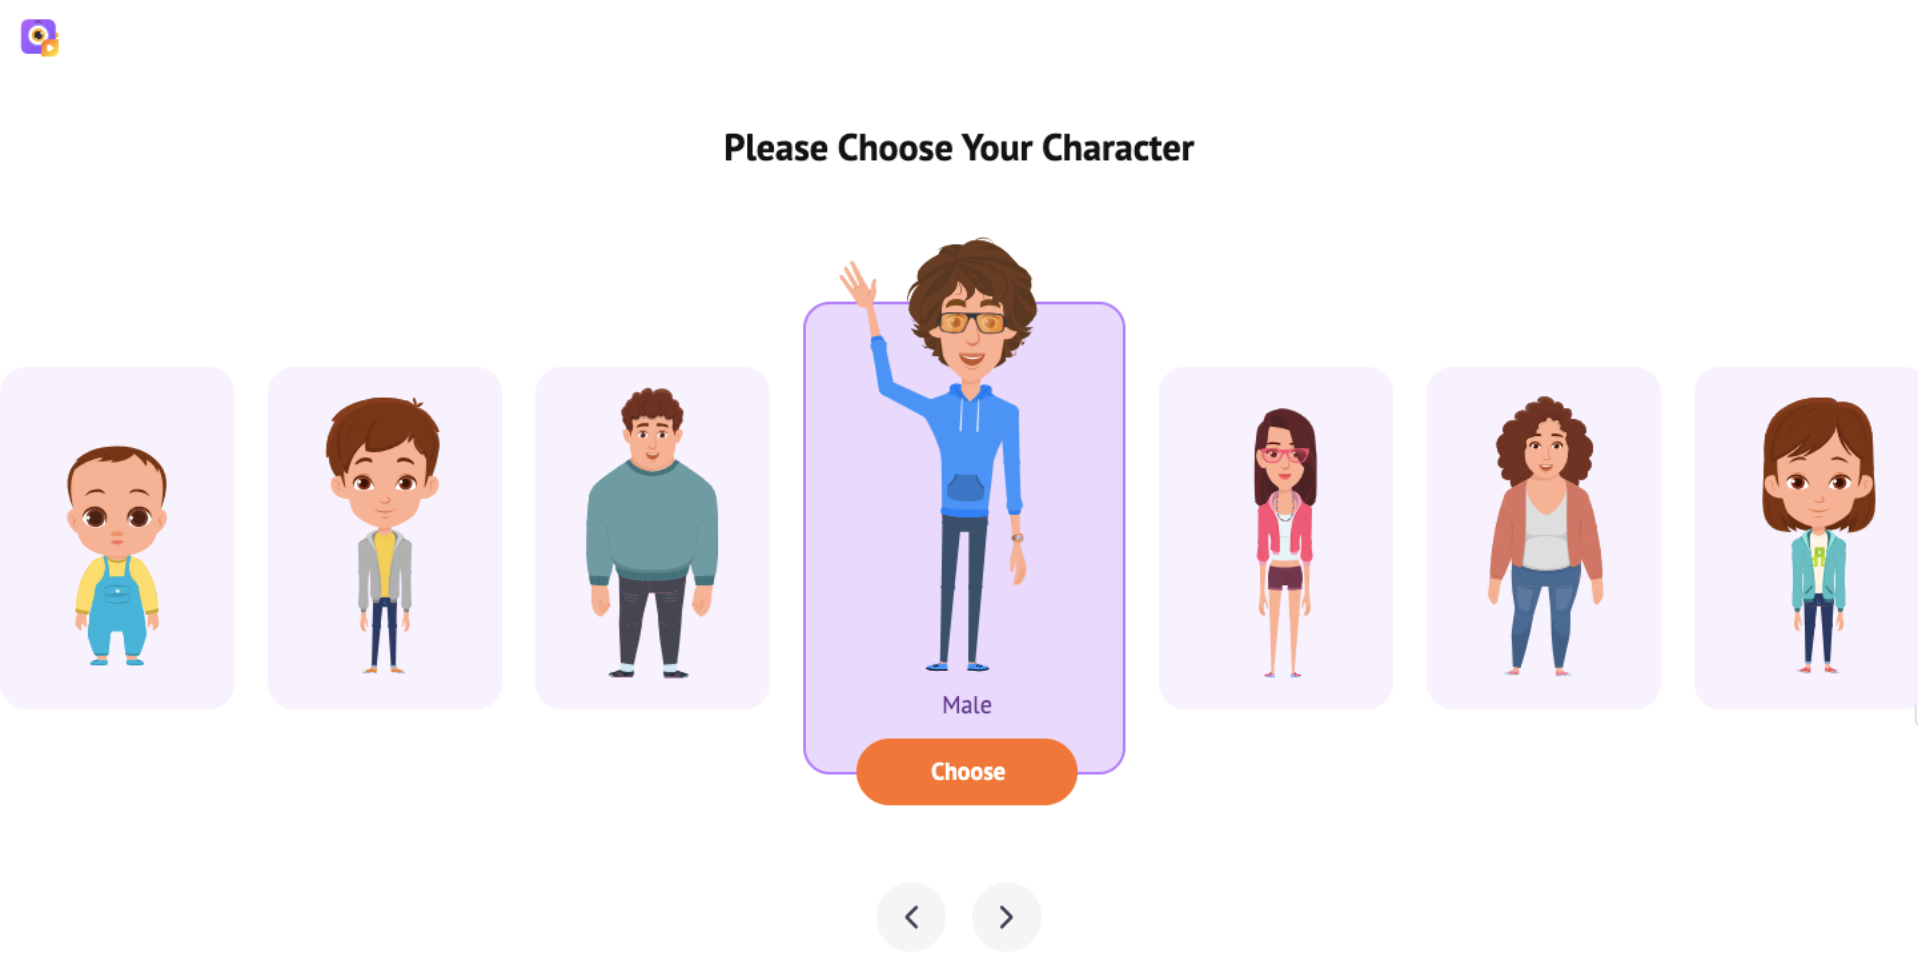
All you need to do is choose a base avatar and start customizing. You have a lot of customizable options like skin tone, hairstyle, eyes, outfits, accessories, and more.
![]()
To learn how to create your custom character in detail, check out this video tutorial -
The custom character you create is saved in the My Characters section, along with the prebuilt characters in the Character library. You can click on the character to add it to the scene.
If you notice, two things happen when you add a character to the scene - a pink section appears on the timeline, and a panel opens on the left.
The pink section represents the duration of the character's appearance in the scene.
To control the character’s appearance in the scene, you can adjust the ends of the pink section across the timeline.

The left panel contains 1000+ actions and 20+ expressions to add to your character. You can browse through the list or use the search bar to find a particular action.
Give your character an action and an expression that is appropriate for the introduction scene.

Here, I have my character wave at the audience. This is simple, but with Animaker, you can do much more.
You can add multiple actions to a character, therefore animating them!
Let me show you how.
Click on the character and select the Action-Plus option.
Here, you can see the first (waving) action. Click on the “+” symbol to add the second action from the list.
I’m choosing my character to point at the white screen while talking. Once you add the second action, you can see that it overlaps with the first action in the scene.
Now, on the timeline, the two actions appear in the pink section, showing when each action appears in the scene. You can control the timing between the actions by adjusting their positioning on the timeline.
Then, click on the tick symbol on the character and click Apply.
Let’s view our animation by clicking on the play button.
It looks better, isn’t it?
This is a quick animation made with just two actions. Similarly, you can add multiple actions to achieve a result like this -
See? Animation with Animaker is pretty easy!

Okay, let’s continue with the next element.
Voice
Our character looks beautiful. But wouldn’t our e-learning content look great if we made the character talk with the audience instead of using a boring narration?
So, let’s add voice to our character to make our video more engaging.
To add voice, click on the character and click the Lip-sync option. You will see three options for adding voice to the character.
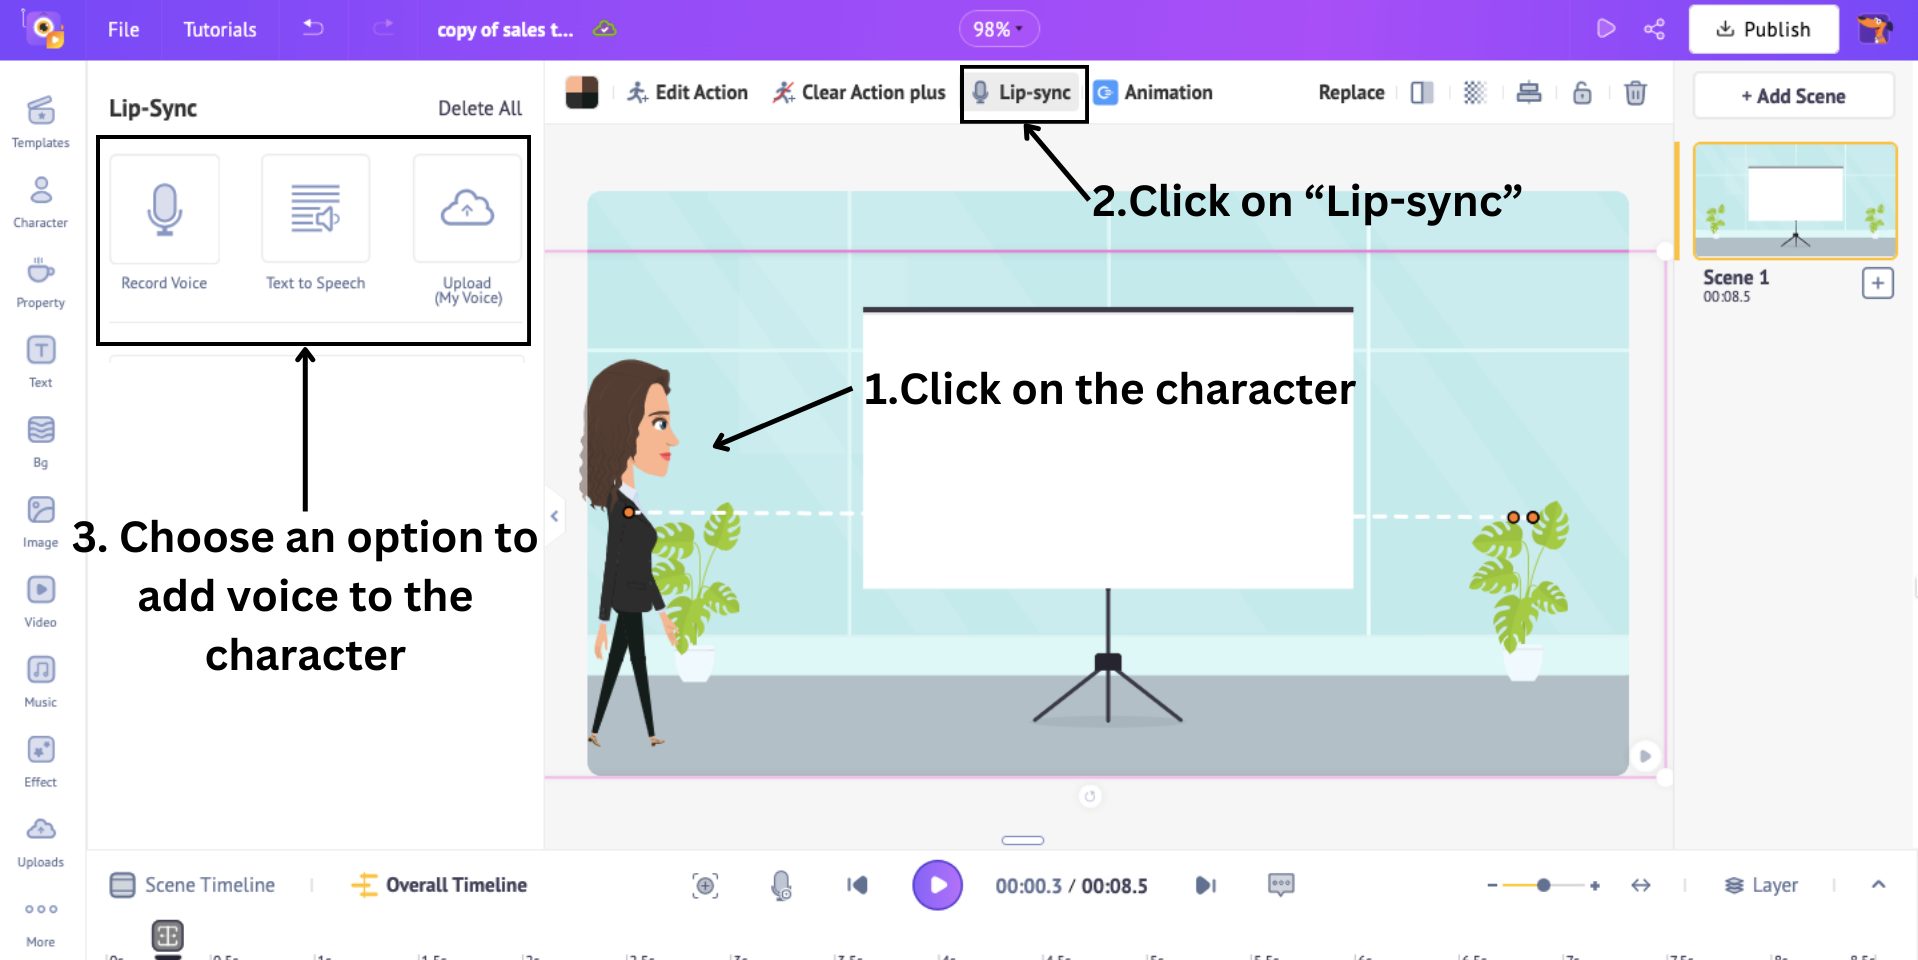
- Record Voice - Choose this option to record directly and add to the character.
- Text to Speech - Choose this option if you want to add AI voiceovers to the character
- Upload - Choose this option to upload an audio file and add it to the character
Here, I’m going with the Text to Speech option.
This AI-powered feature is awesome, as it can create high-quality AI voiceovers in seconds, eliminating the need for waiting around for voice actors or expensive recording studios.
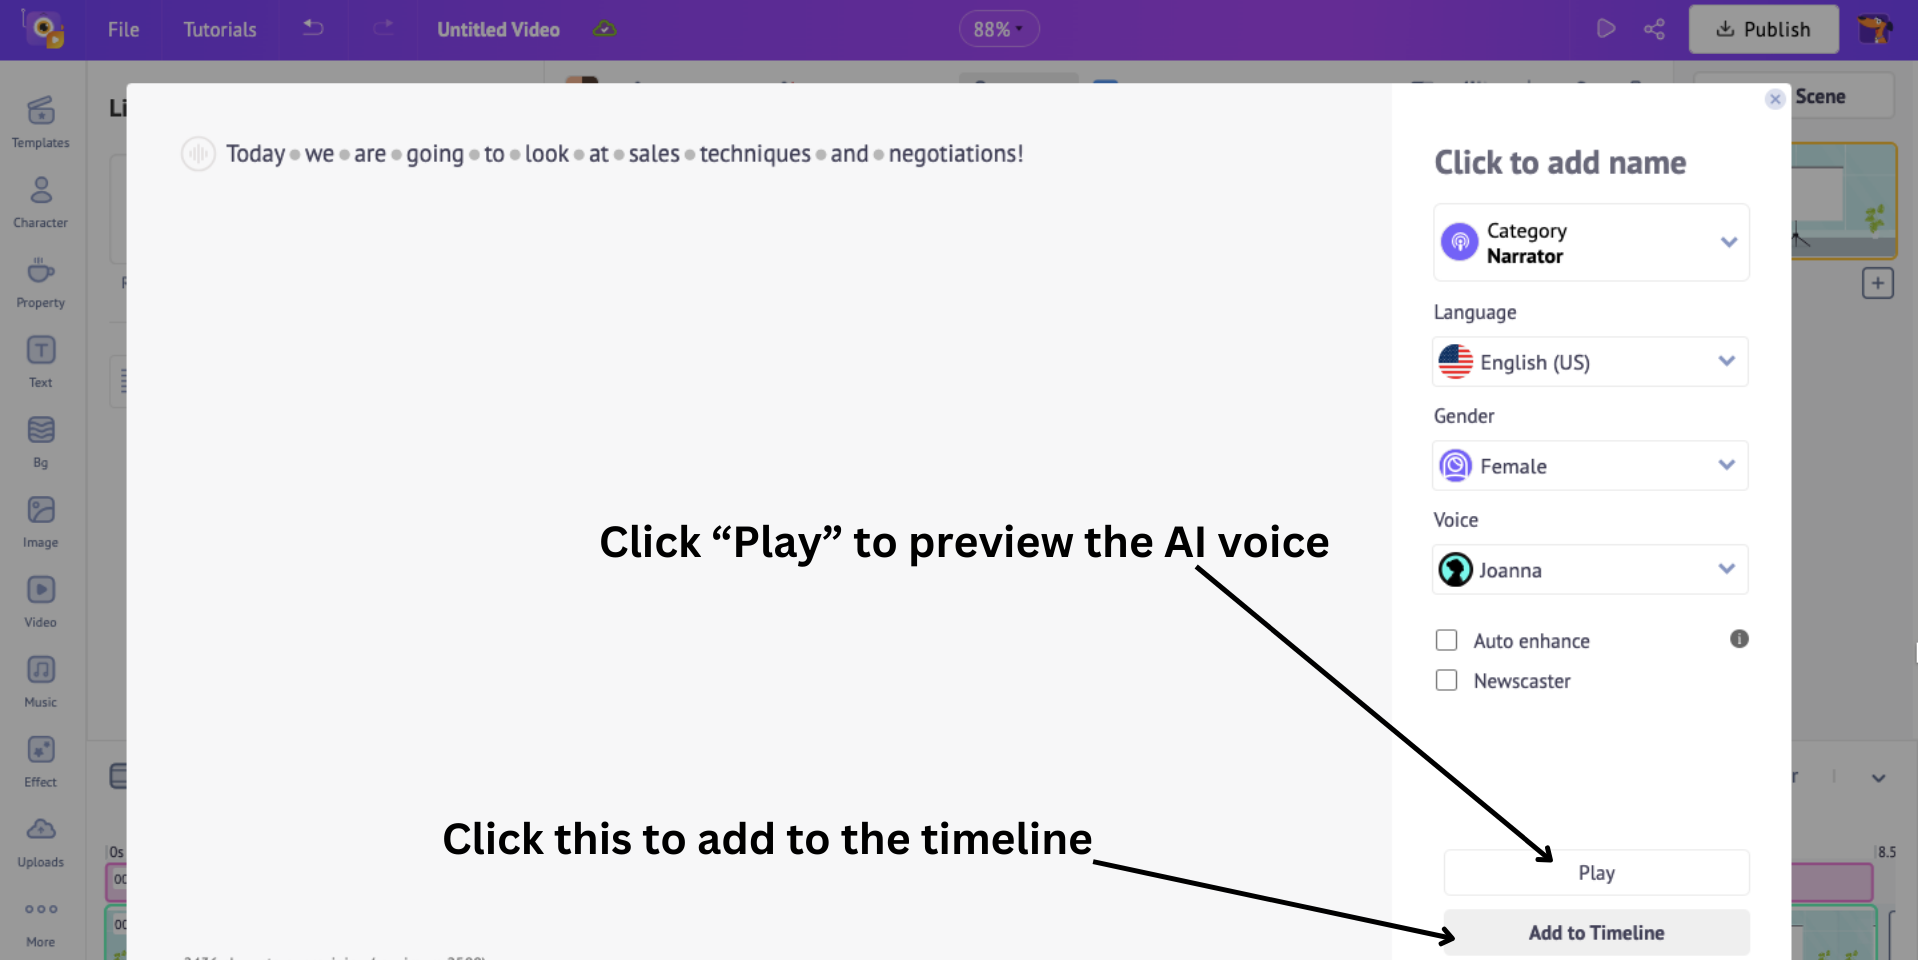
To use this option, click on it, and you will see a pop-up window where you can type in the lines from your content.

Once you type in your script, you can select options like category, language, gender, and voice to generate an AI voice.
Click on Play to preview the AI voice, and Add to Timeline to add the voice to the character.
Once you add the voice to the timeline, you can adjust the generated voice’s position on the timeline by moving the voice across the timeline.
This is how we easily add an AI voice to the character. My favorite part about this feature is that the character automatically lip-syncs to the voice, giving it a natural look!
Looks great, right?
Let’s move on to the next element.
Property
Properties are objects, shapes, and illustrations that add detail to the scene.
To add a property, click on the Property option in the library.
Here, you will find 90K+ icons and properties, including shapes, buildings, furniture, grids, etc.
I’m going to search for a table to add to the scene. Once you select a property, resize and position it in the scene.
When a property is added, a blue section appears on the timeline. This indicates the duration of the property in the scene.
You can control the property’s visibility by adjusting the corners of the blue section. But since this is a table, I’ll have it throughout the scene.

And that is how you add a property to a scene! Let’s look at the next element.
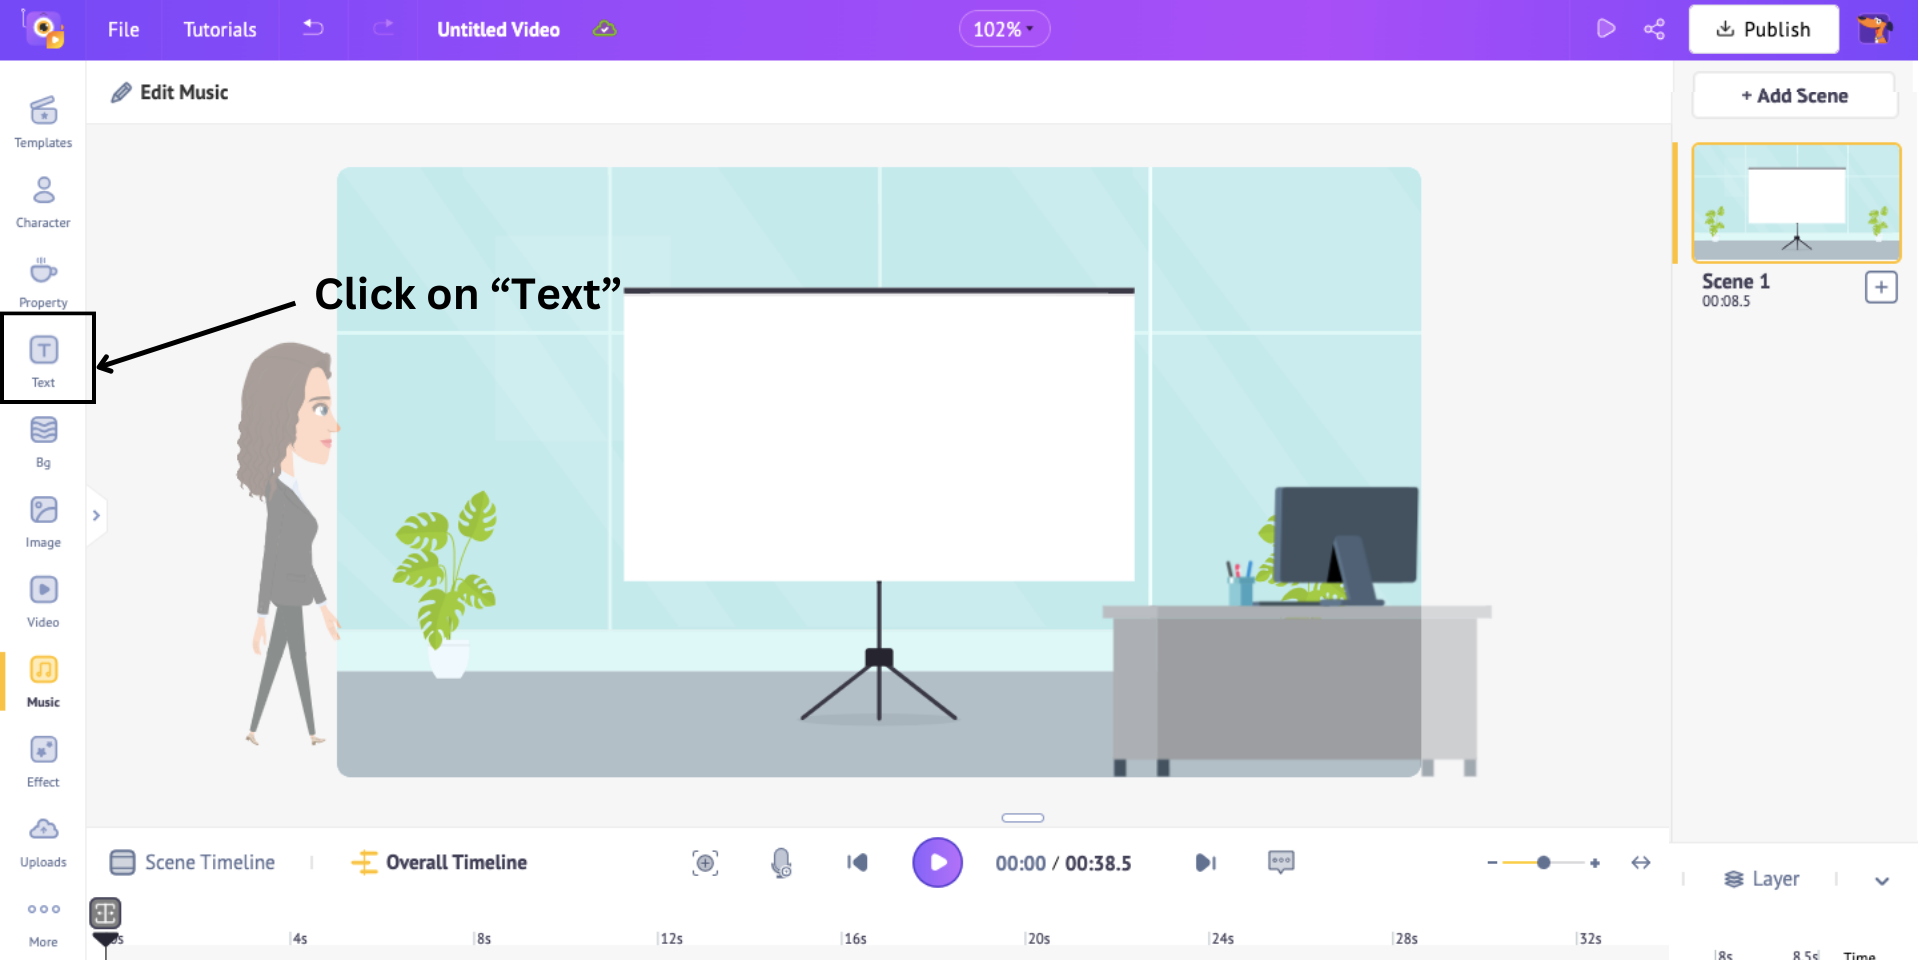
Text
So far, we have added a background, character, and property. Now, it is time to add our script.
To do that, click on the Text option from the library.
This will open a panel with two types of text boxes – Pre-builds and Plain.
Pre-builds have pre-added design, font, and animation effects, while Plain text boxes require designing from scratch.
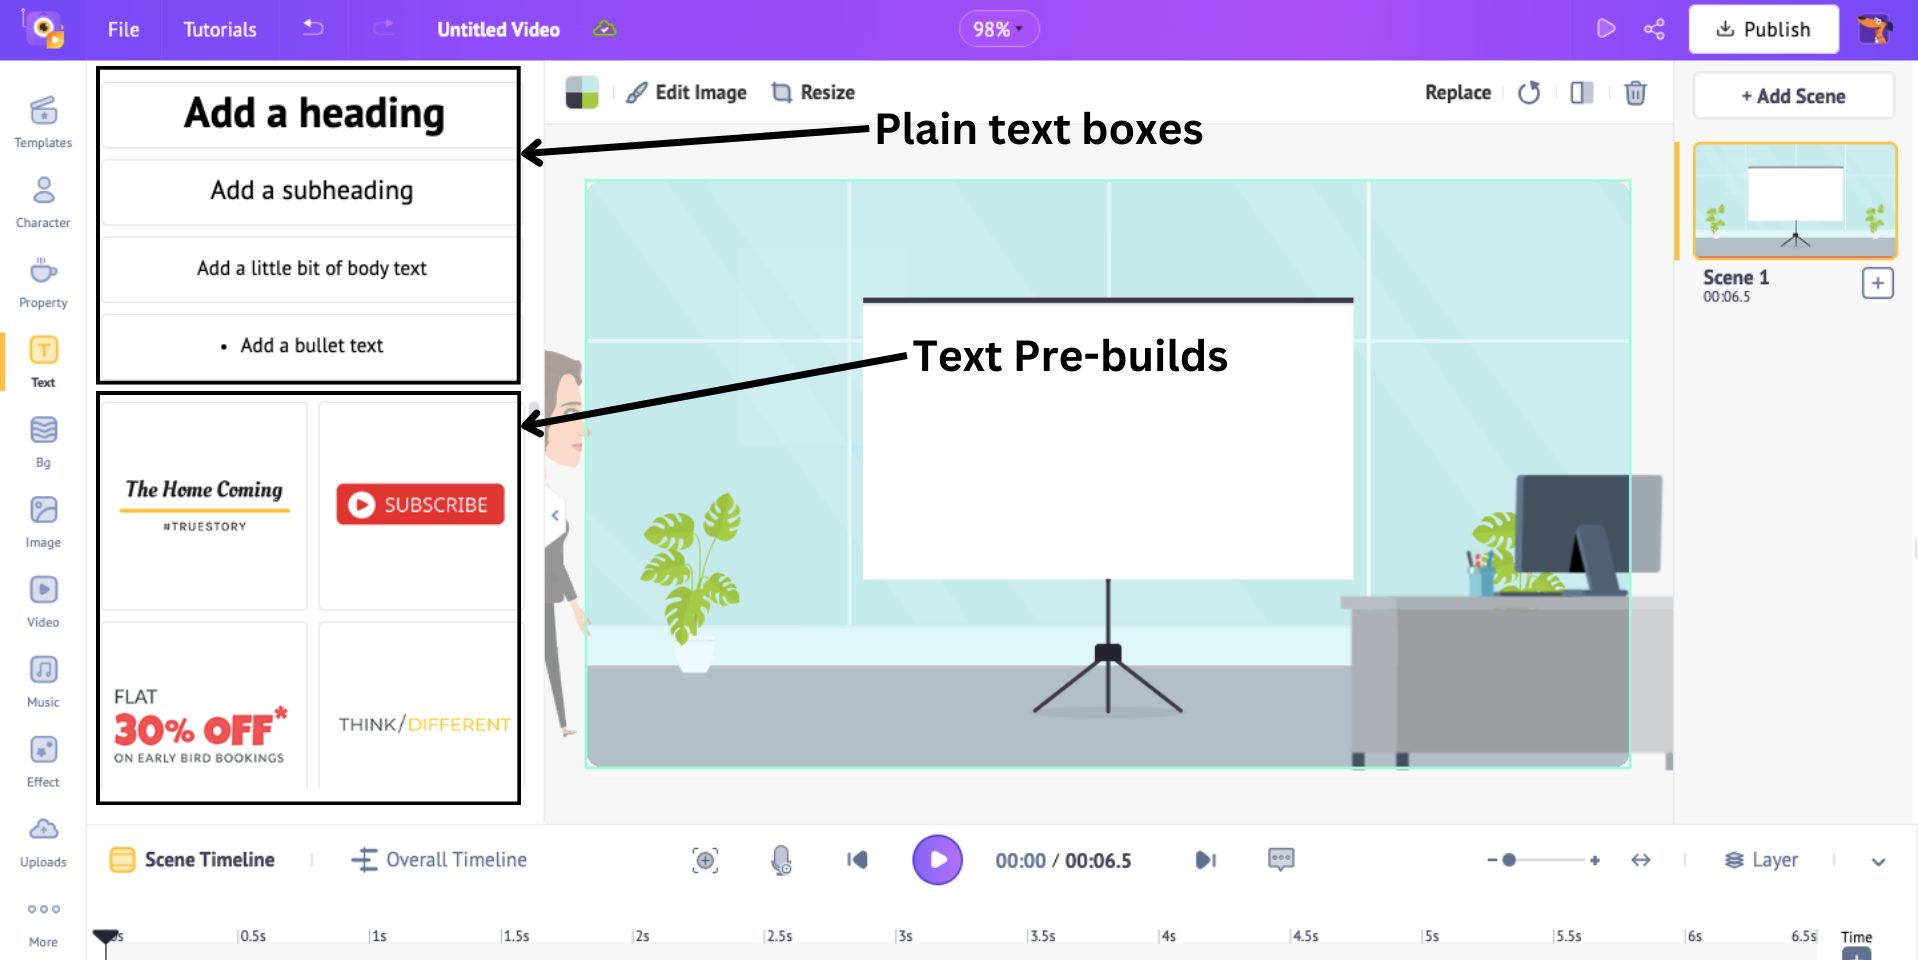
Choose a text box and position it in the scene. I’m choosing a plain text box. Then, type in the title of your content.
When you start typing, you might notice a new panel appear on the left. This is the Edit Text panel, which has many editing options. You can change the text font, size, and more.
By default, the text color is black. To change it, click on the “Change Color” option above the workspace.

Just like with the previous elements, when you add text, a new colored section appears on the timeline. Here, an orange section indicates the text's duration in the scene.
Adjust the ends of this section to control when you want the text to appear in the scene.

After all the editing, the text looks good. But we can make it even better by adding animations to it!
To do that, select the text box and click on Animation. This will open a list of 35+ enter and exit animation effects to choose from and add to your text.
After selecting the desired effects, you will notice two highlighted sections appear on either end of the orange section on the timeline. These sections indicate the duration of the effects.
To adjust the duration of the animation, simply drag the inner corners of the highlighted sections.
This is how you add text to a scene.
Our scene is now complete after adding a background, character, voice, property, and text.

This is only the first scene of the video. To add a new scene, click on the three dots on the scene tab on the right. It will open two options: Add Scene and Duplicate.
Choose Add Scene if you want to create a new scene from scratch, or choose Duplicate if you want a new scene with all the previous elements in it.
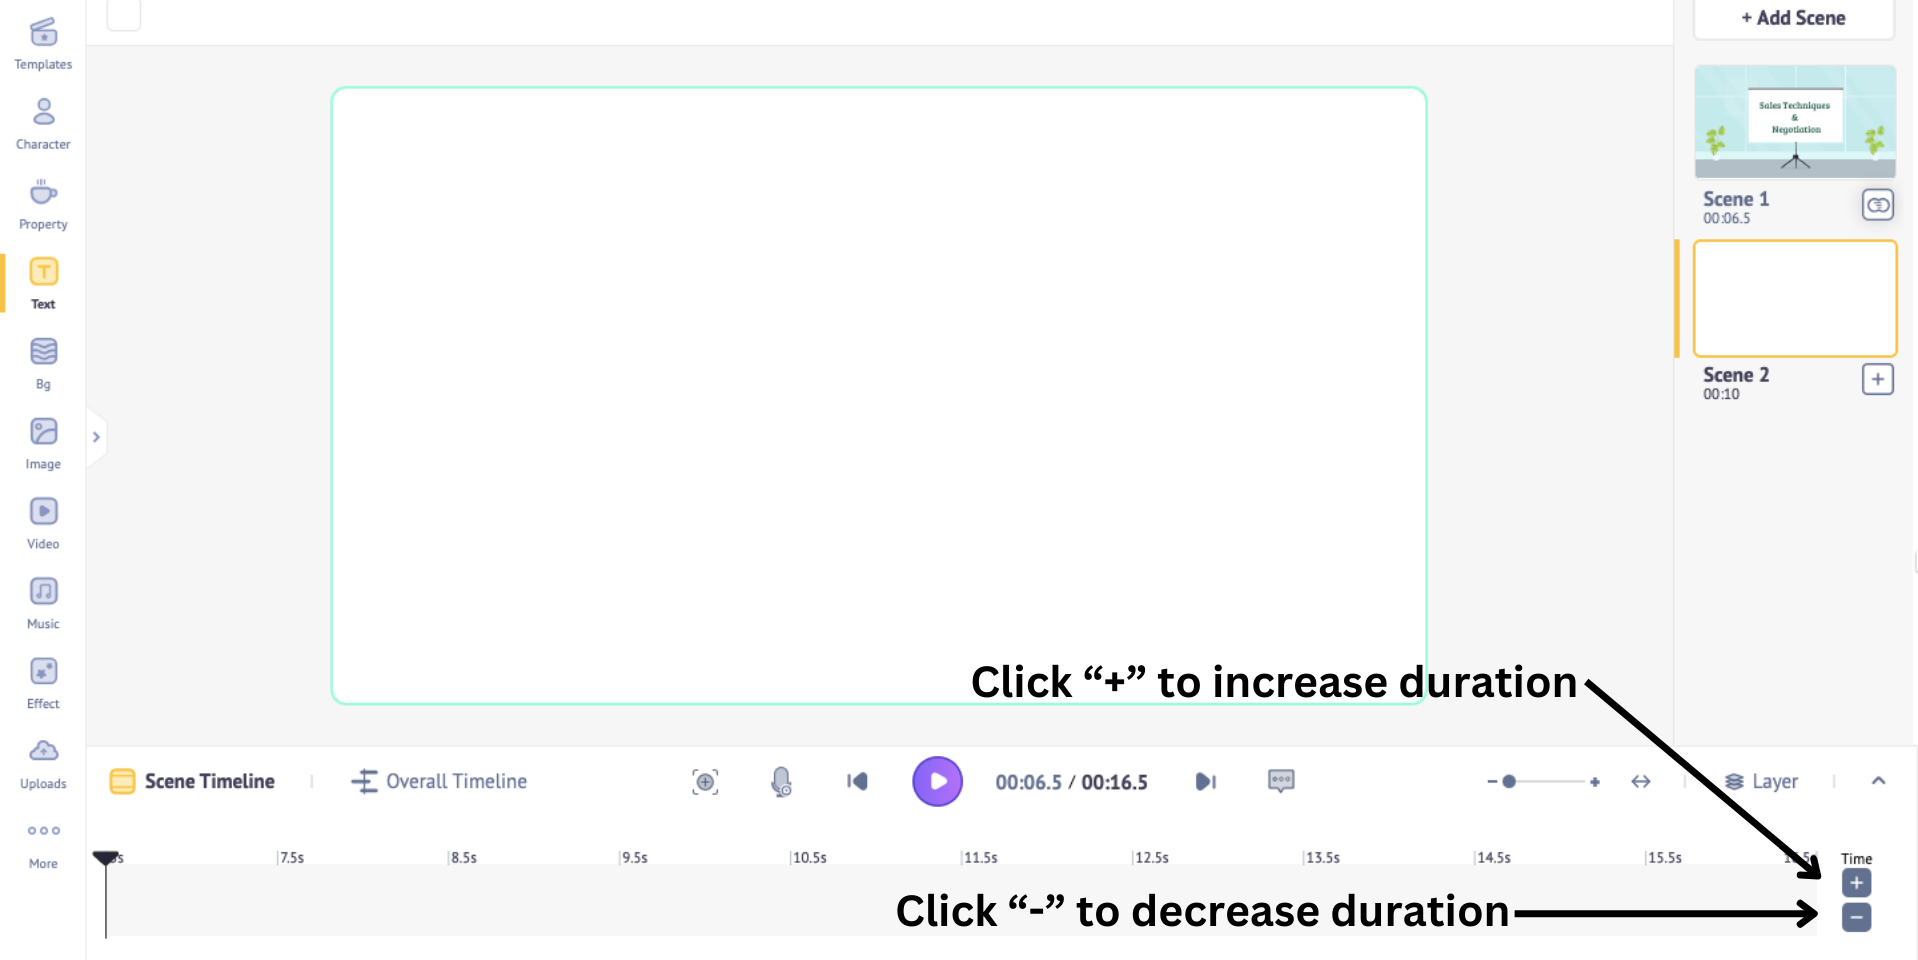
Note that every scene’s duration is 10 seconds by default. You can always adjust the scene’s duration by clicking on the “+” and the “-” signs in the bottom right corner to increase or decrease the duration.
Now that you know how to add elements, create more scenes similarly, adding lines from your eLearning course.
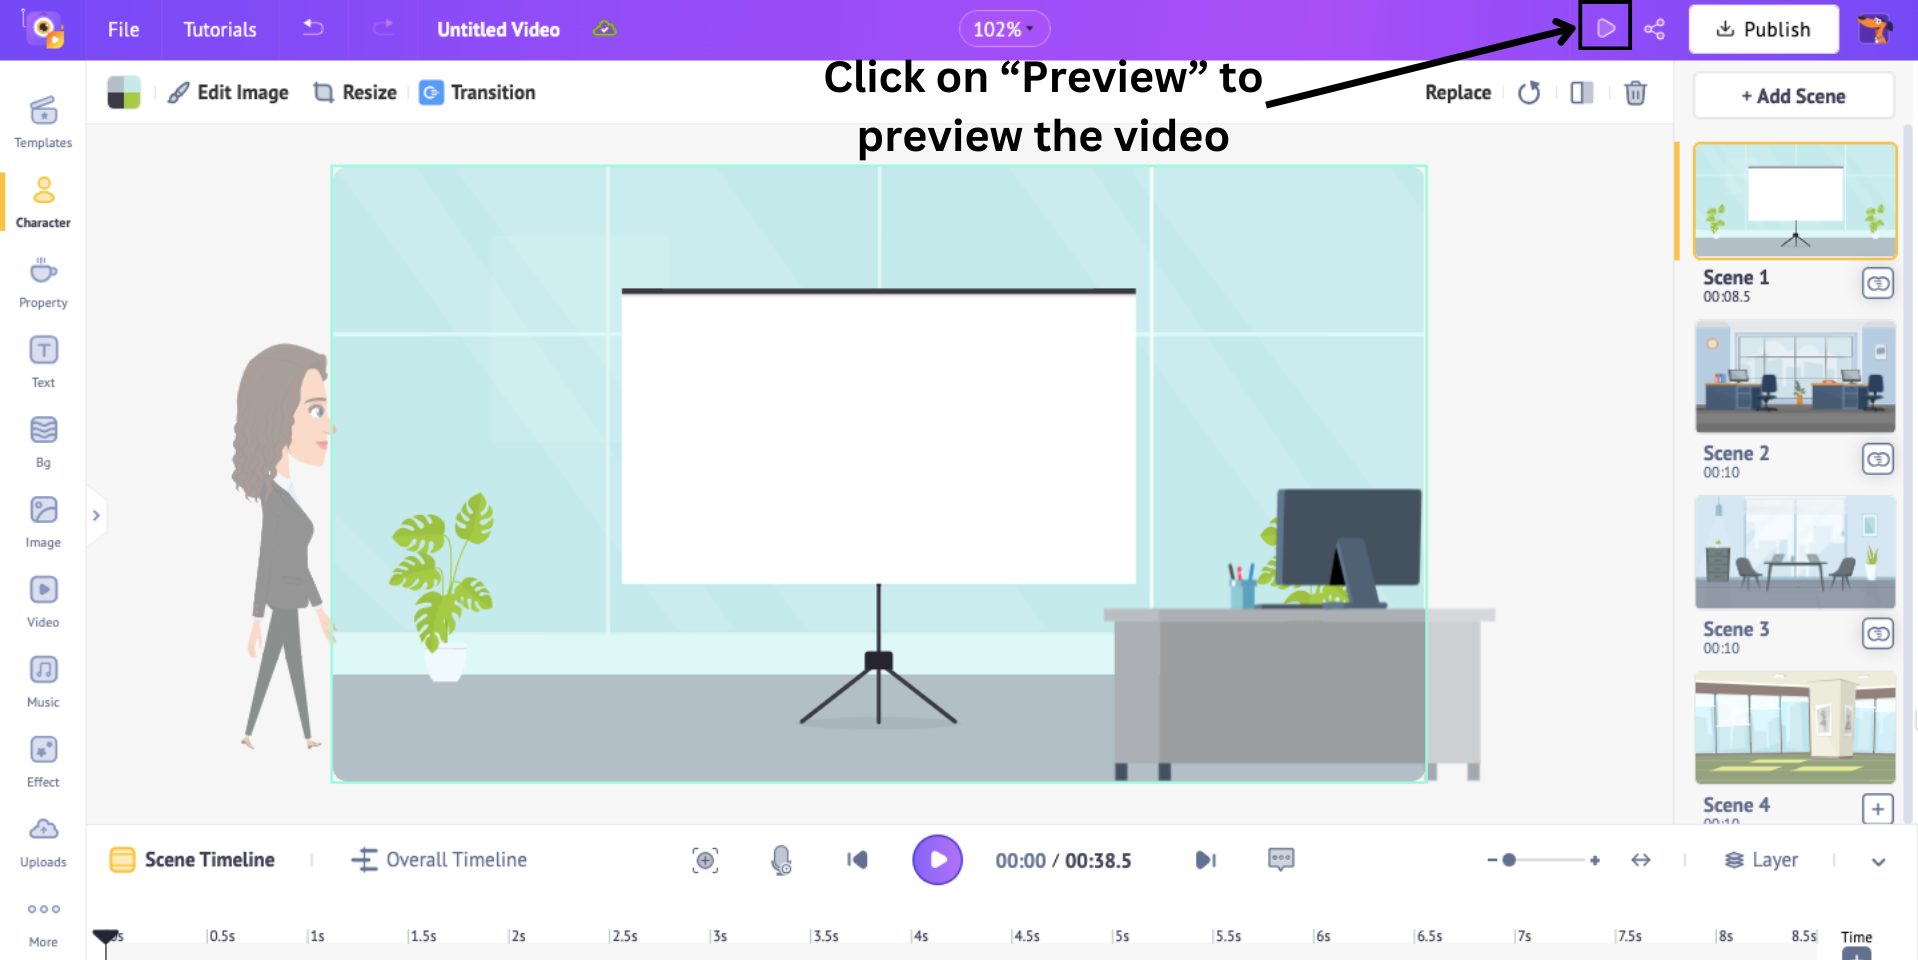
Once you have created multiple scenes, preview the video by clicking on the Preview button at the top.
When you play the video, you might notice that the change between the scenes seems abrupt.
This is because there are no transition effects between the two scenes. Smooth transitions are vital for logical flow between scenes.
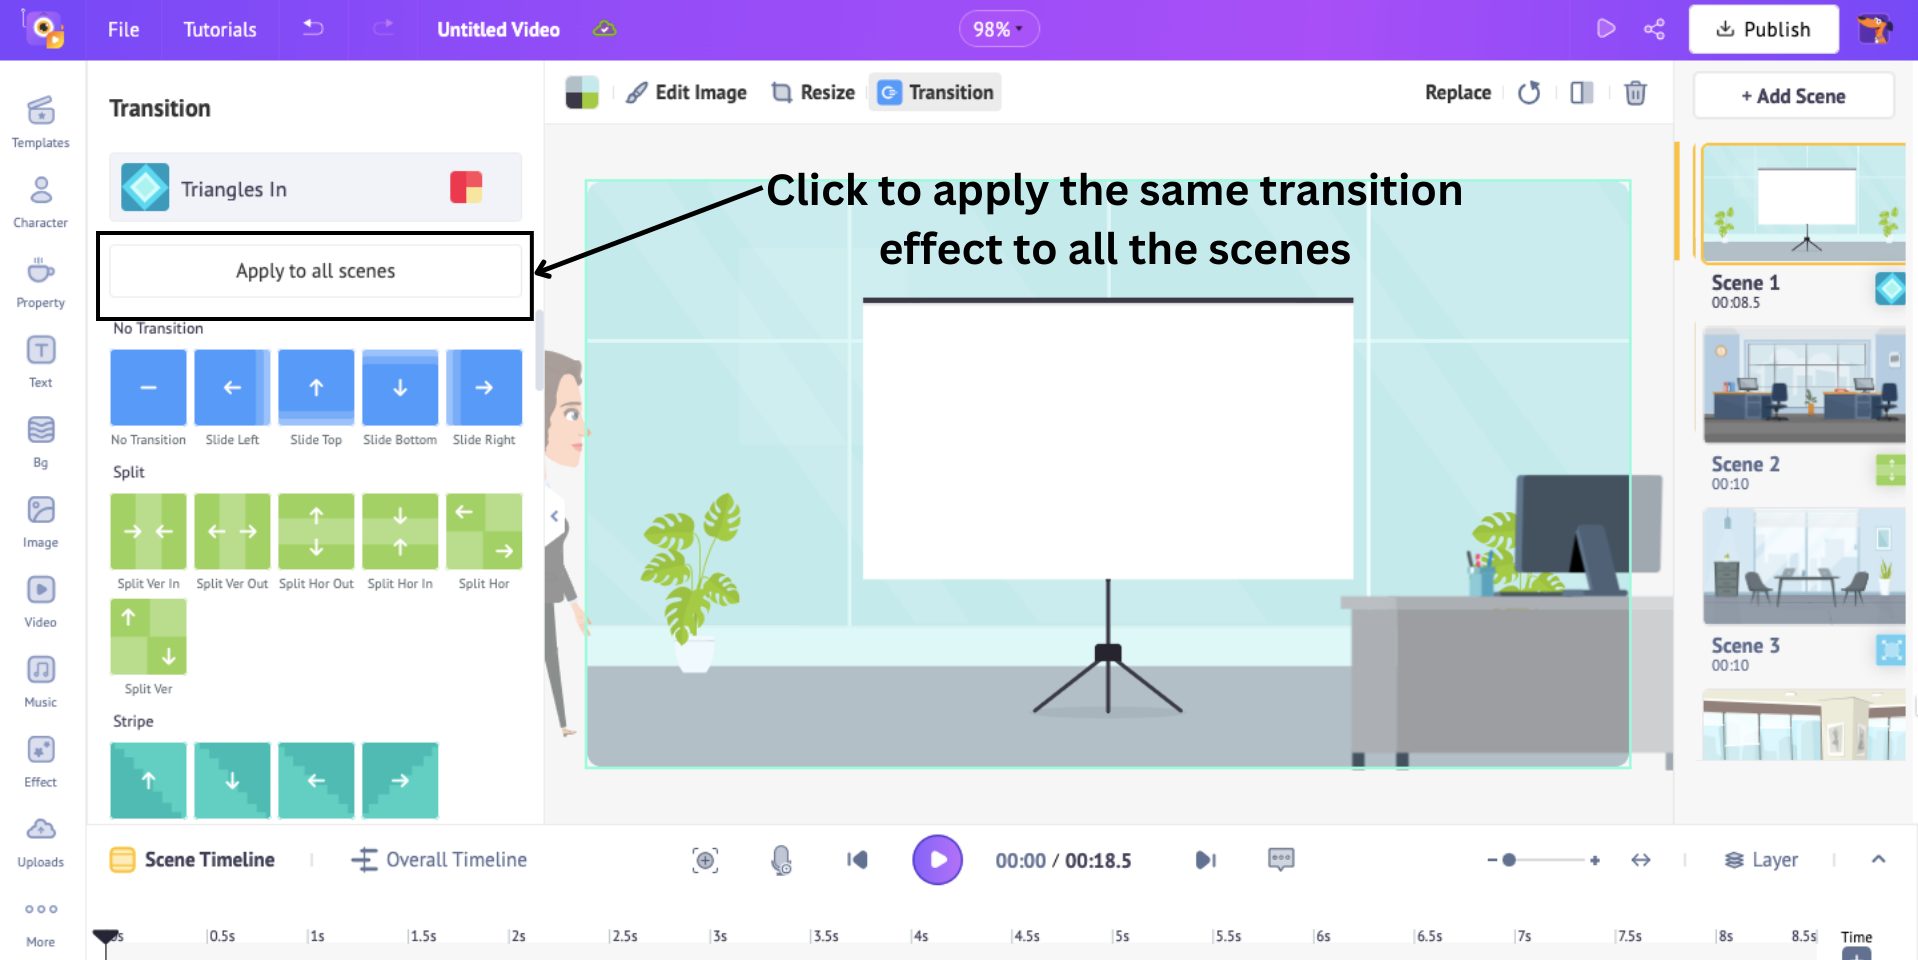
To add transition effects, click on the Add Transition effect button below the scene tab on the right.
This will open a list of nearly 100 transition effects. Click one to apply to the particular scene.
If you want the same effect for all scenes, you can click on the Apply to all scenes option.
Once you’re done making all the scenes, it is time to add one final element to the video.
Music
Music plays a huge role in videos by shaping the mood, tone, and emotional impact of the visuals.
So, it is necessary to choose the right music for your video. To add music, click on the Music option from the library and click on the Expand library option.
This will open a plethora of 30,000+ music tracks for you to choose from. You can preview a track by hovering your cursor over the track.
Click on a track to add it to the video.
Alternatively, if you want to upload your own music track, click on the Upload option in the library.
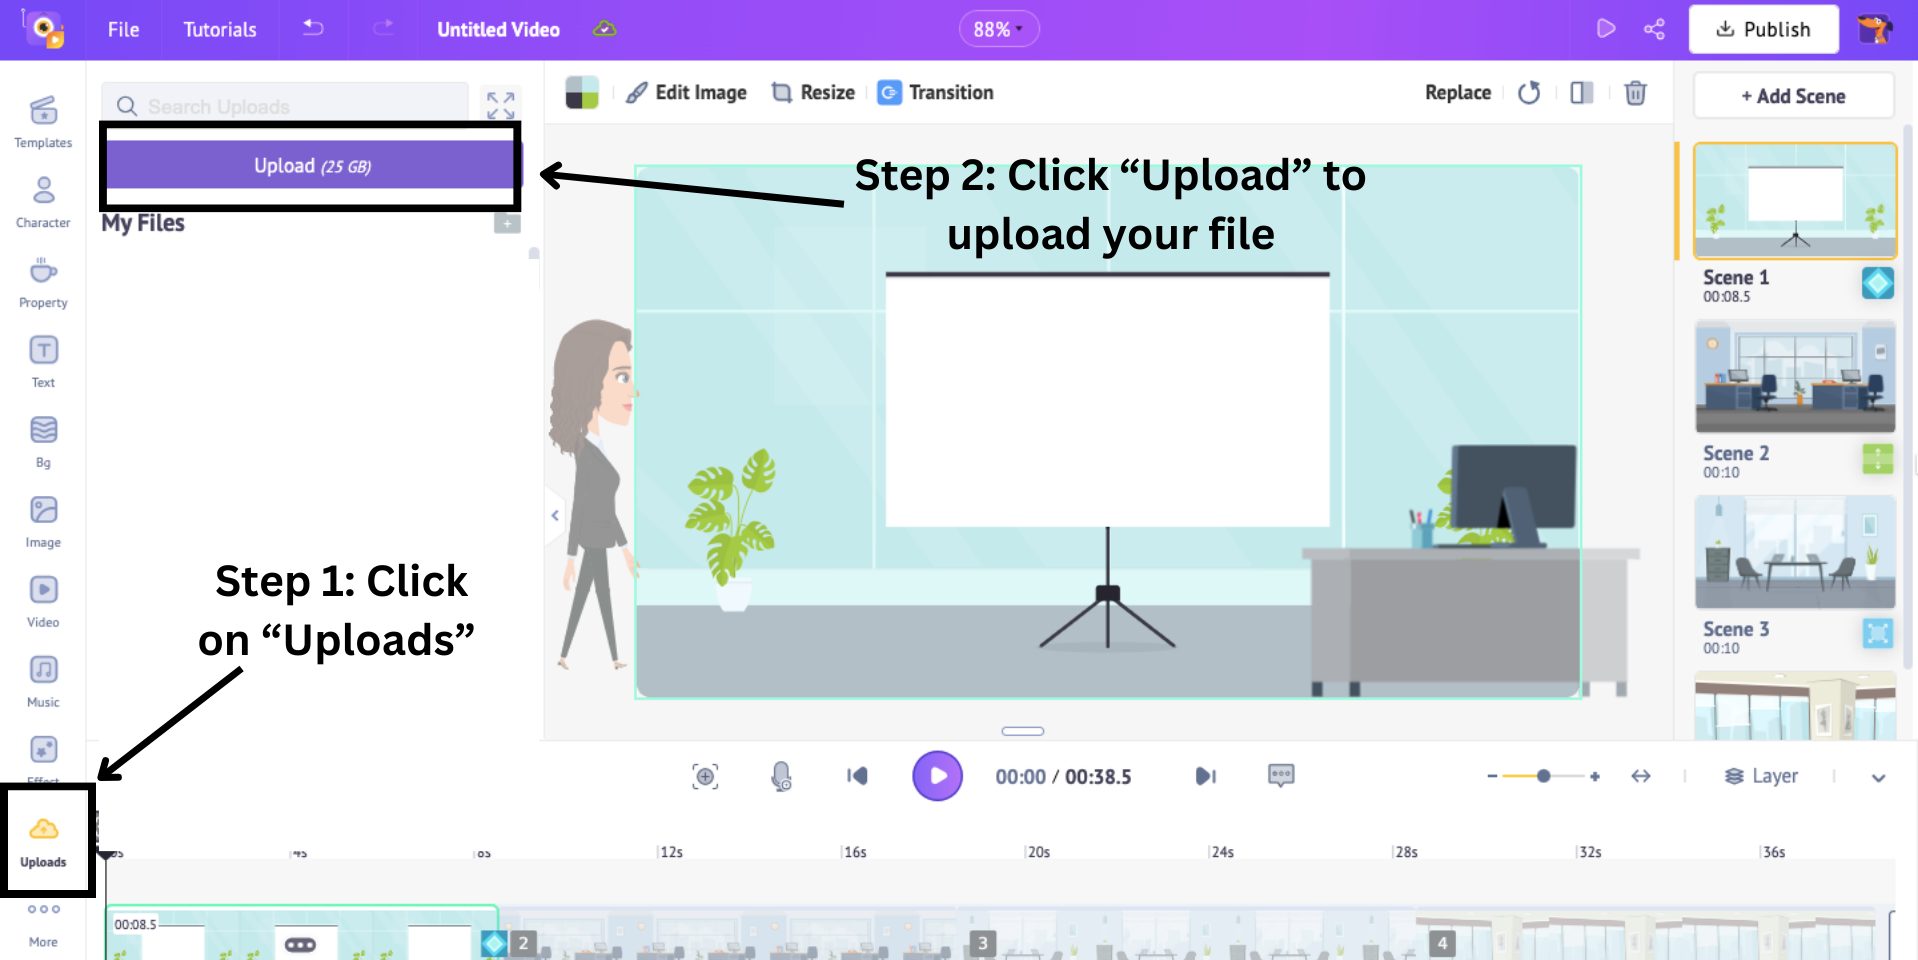
Your uploaded track gets stored in the uploads folder. You can add to the scene by clicking on it.
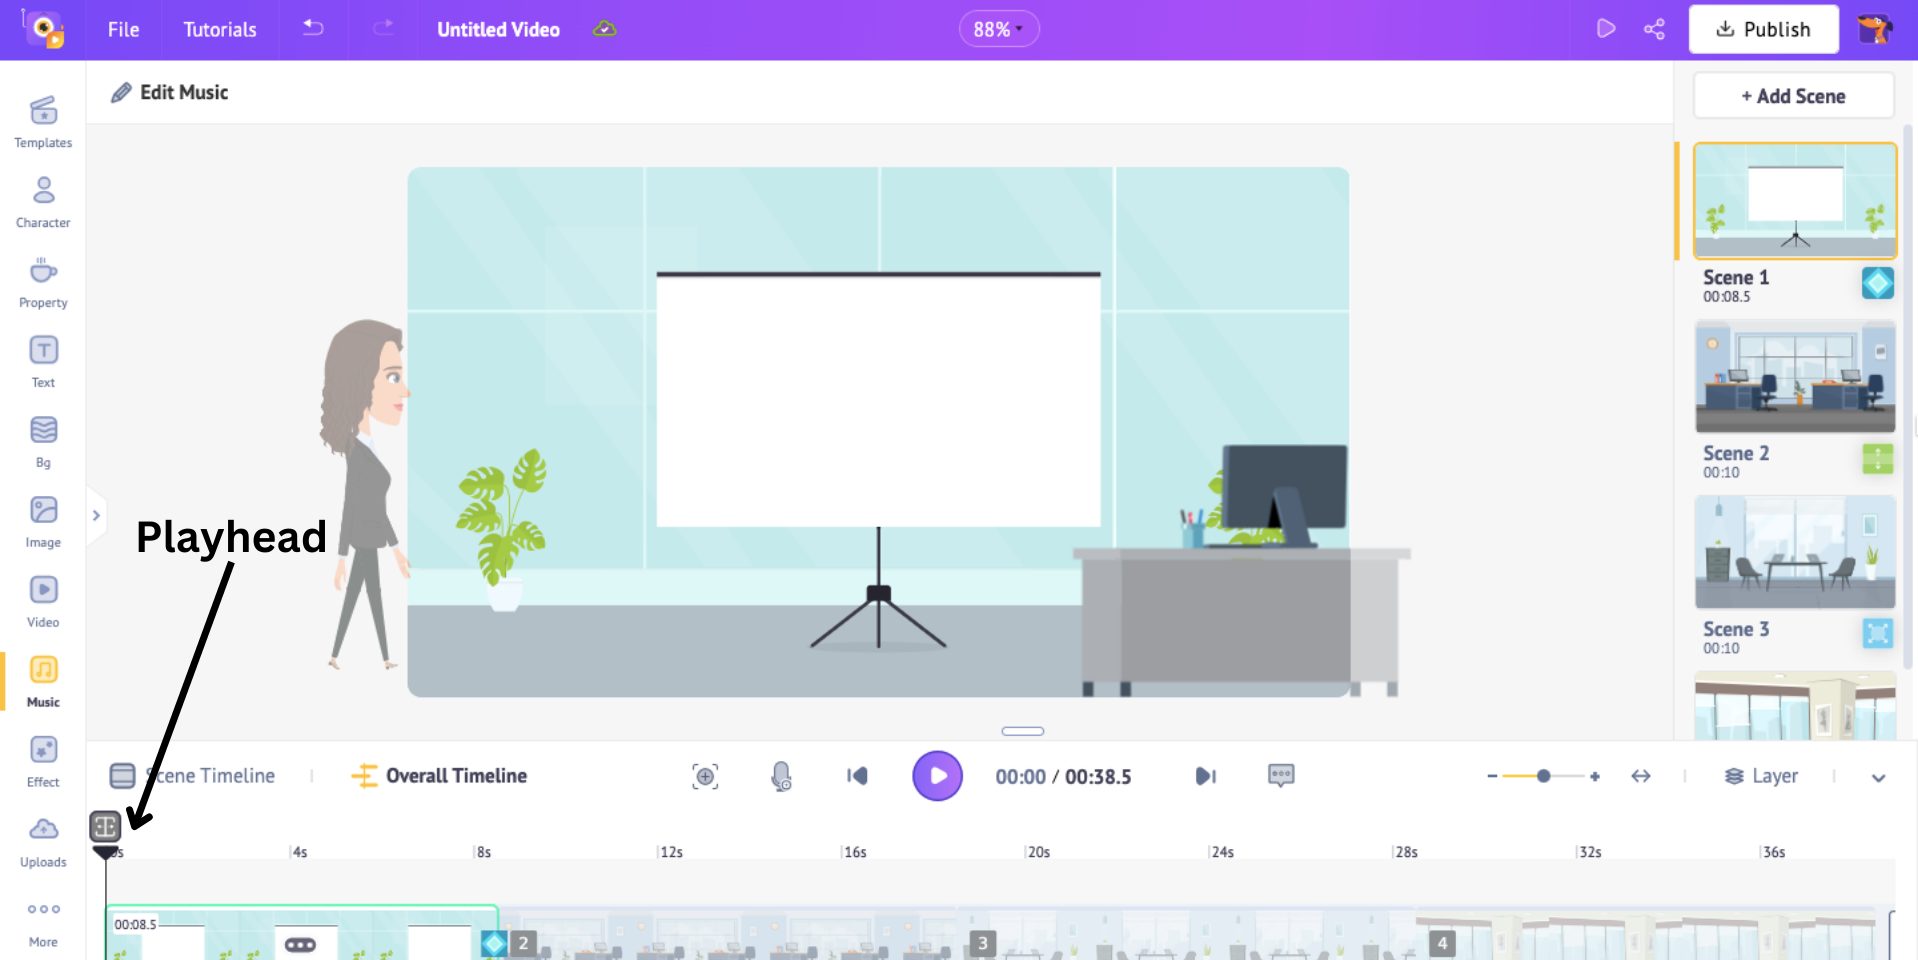
Note: The music is added from where the play head is located on the timeline. If you wish for the music to start at the beginning of the video, make sure the play head is located there.
And that is how you add music to the video!
Now that we saw how to add all these elements to the video, there’s only one more step left.
Step 3: Download & Distribute the training video
With all the scenes created, use the preview button to view the video from the beginning. If you are satisfied with your video, then click on Publish > Download Video.

Here, choose the resolution and format of the video, and then click Download.
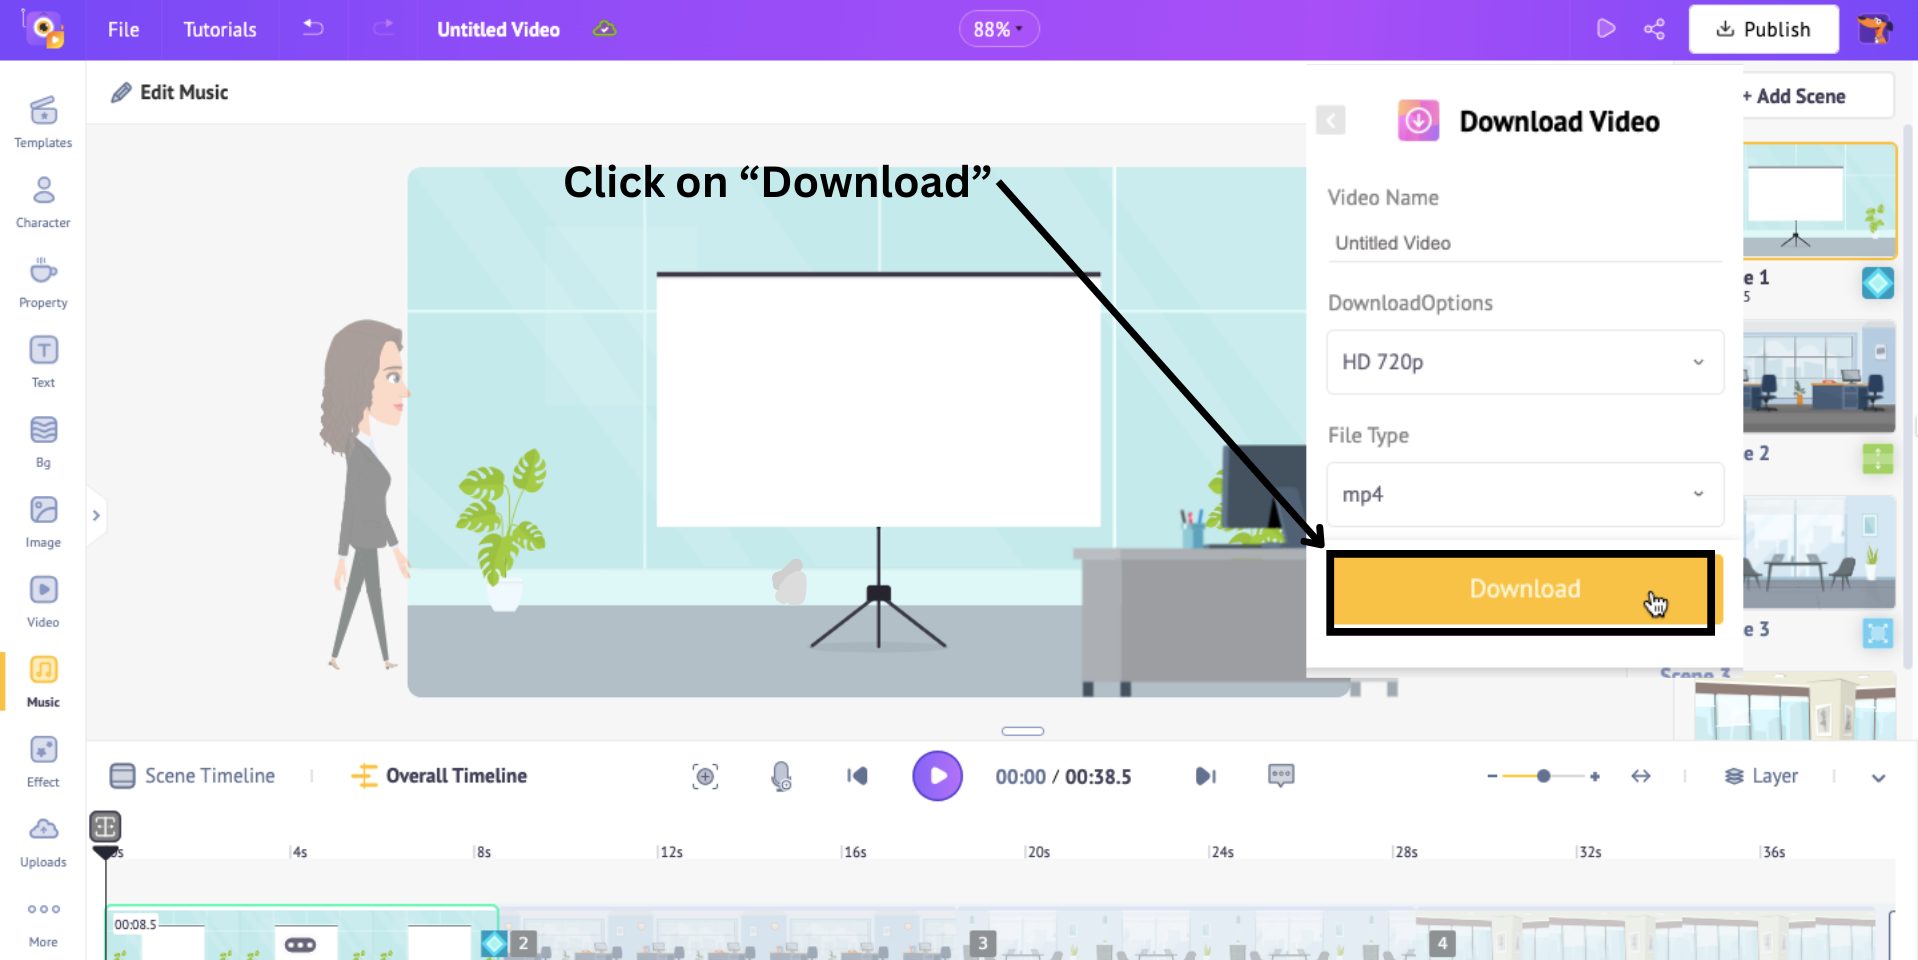
The video will begin to render, and you can download it from the Exports page.
This is how easy it is to create an animated training course with Animaker!
While your training video has great storytelling and animation, you can add interactivity to this course to encourage the learners to actively participate. This ensures that the learners follow the course.
To add interactive elements to your video, you can use course authoring tools like Articulate Storyline.
With Animaker’s animation and Articulate Storyline’s interactivity, I have created this short, interactive training course on Sales Techniques and Negotiation. Check it out!

Were you able to select the correct answers in this training course?

To learn how to integrate interactivity using Articulate Storyline in detail, check out the link provided.
Now that we've made our training course engaging, the final step is to host and distribute the video.
Hosting makes the video available for employees and users worldwide on any device.
For general use cases, YouTube provides great hosting. However, businesses may require a more customized service with additional hosting and distribution options for employee training.
To share your training videos, you can use Learning Management System (LMS) tools like Docebo, TalentLMS, etc.
***
Training videos are one of the most effective ways to train employees.
With powerful video creation tools like Animaker and course authoring tools like Articulate Storyline, creating effective training videos has become easier and more affordable than ever before.
The steps provided in this article are just the beginning. The world of training videos is waiting for you! Get started right away!
P.S.: If your L&D team requires personalized training videos for effective training, click on the banner below. Our experts at Animaker will help you out!