How To Make Animated Videos With AI? [Save Time & Money!]

Shreshtra - July 9, 2025 - Leave your thoughts. 9 min read
Animated videos have become a go-to tool across industries - whether it’s for training employees, educating students, promoting products, or simplifying complex ideas.
Visuals have been proven to increase retention rates by up to 65%, making animated videos an effective way to deliver messages that stick.
From breaking down complex topics to capturing audience attention, animated videos do it all.
The best part? Now, with AI, anyone can create professional-looking animated videos with no design skills or editing experience needed.
Today, there are AI animation tools that make the entire video creation process simple and fast.
In this guide, we’ll show you how to make animated videos with AI using one such tool called Animaker.
What is Animaker?
Animaker is a powerful AI animation generator packed with 150M+ assets, including diverse characters, actions, 2D backgrounds, and royalty-free music.
Its AI-powered features, like Animaker Voice for human-like voiceovers, Animaker Subtitles for instant captions, make animation fast, effortless, and beginner-friendly.
So, let's see how to make animated videos with this powerful platform!
How To Make Animated Videos With AI?
To get started, visit Animaker and sign up or log in.
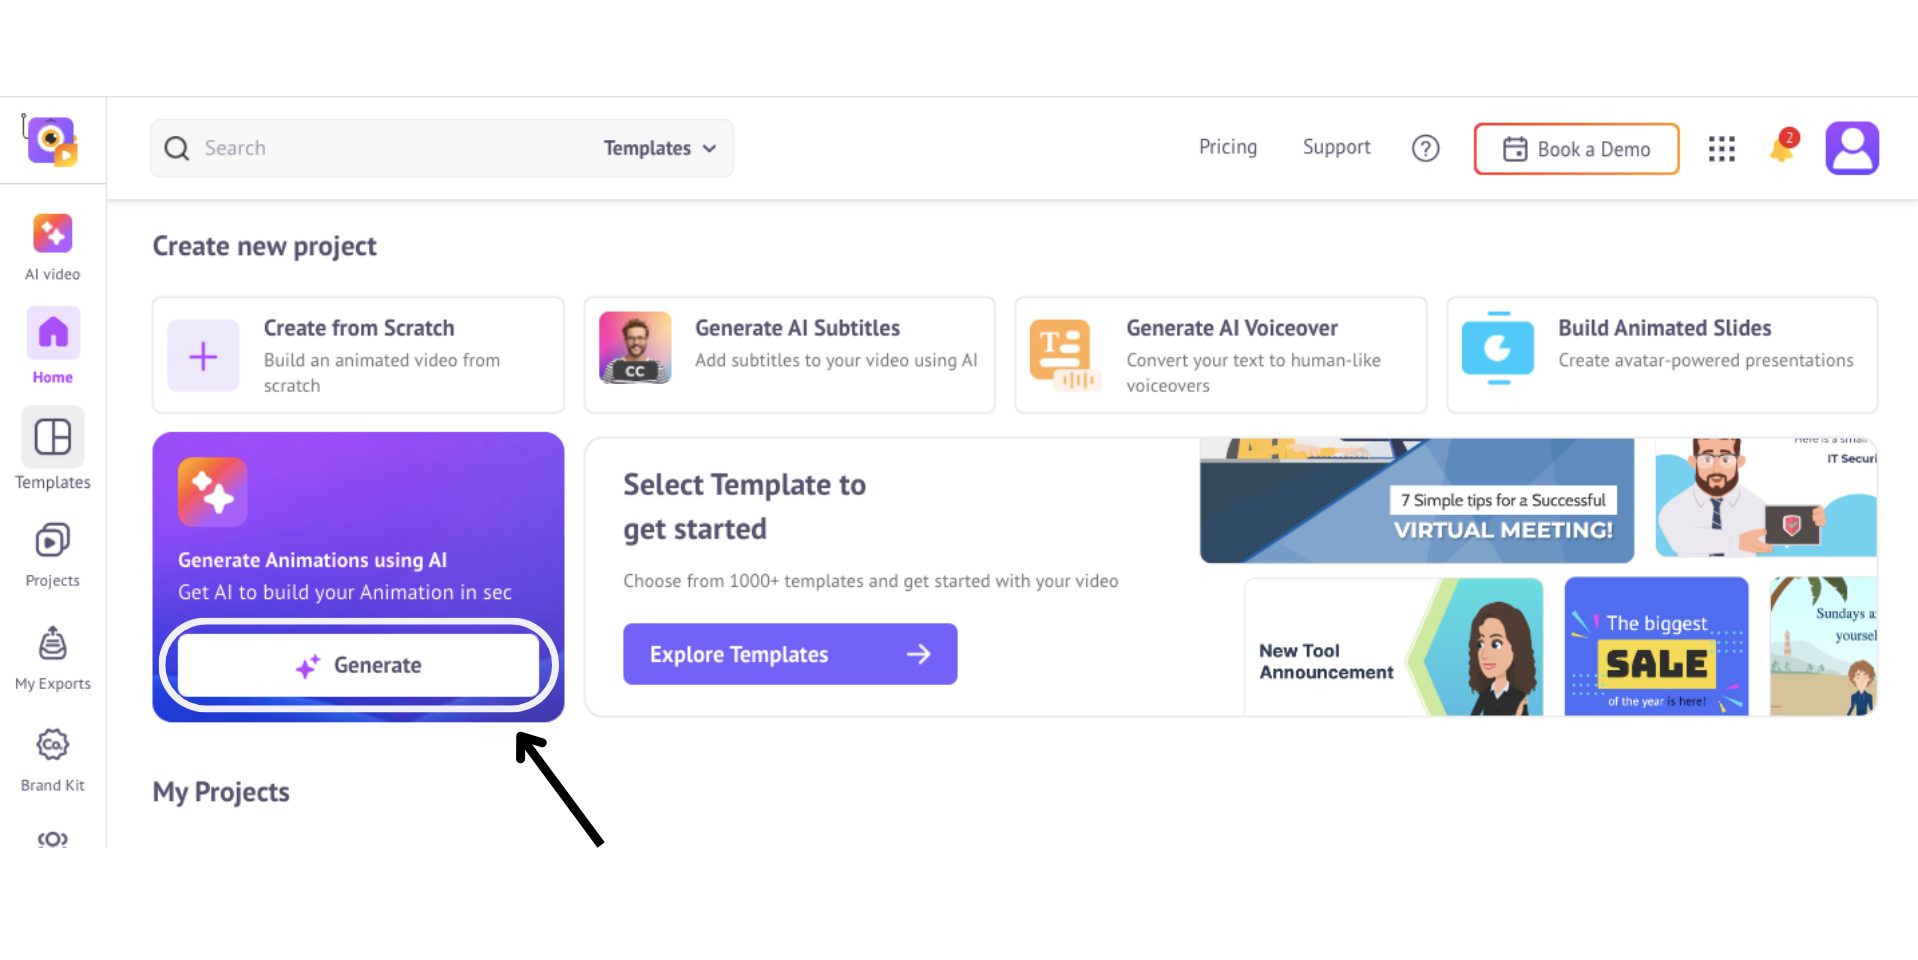
If you’re an existing user, you will be taken to the dashboard. Here, click on the Generate button to launch the AI video creation workspace.
But if you’re new to Animaker, you’ll be taken straight into the AI video-making window right after signing up.
From here, it takes just four simple steps to turn your idea into a fully polished video - all powered by Animaker’s AI.
- Step 1: Enter the Video Prompt
- Step 2: Customize video settings
- Step 3: Generate & Edit
- Step 4: Download the video
Let’s dive in!
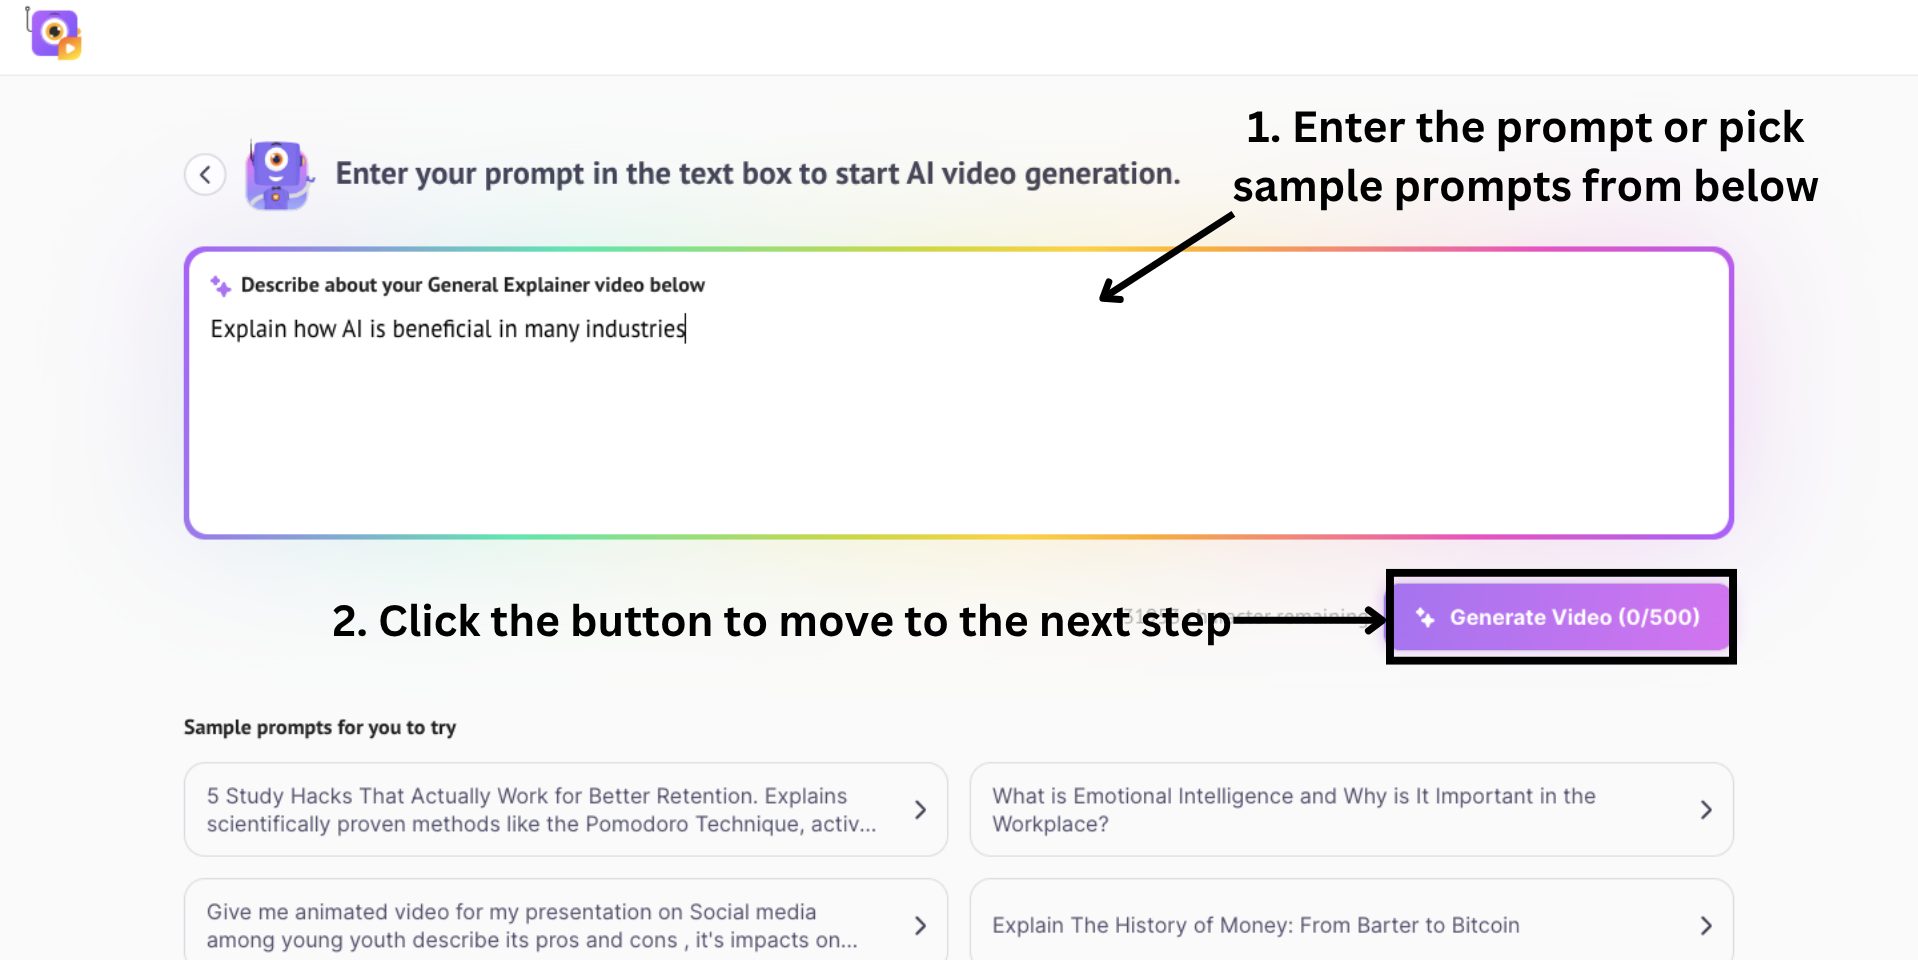
Step 1: Enter the Video Prompt
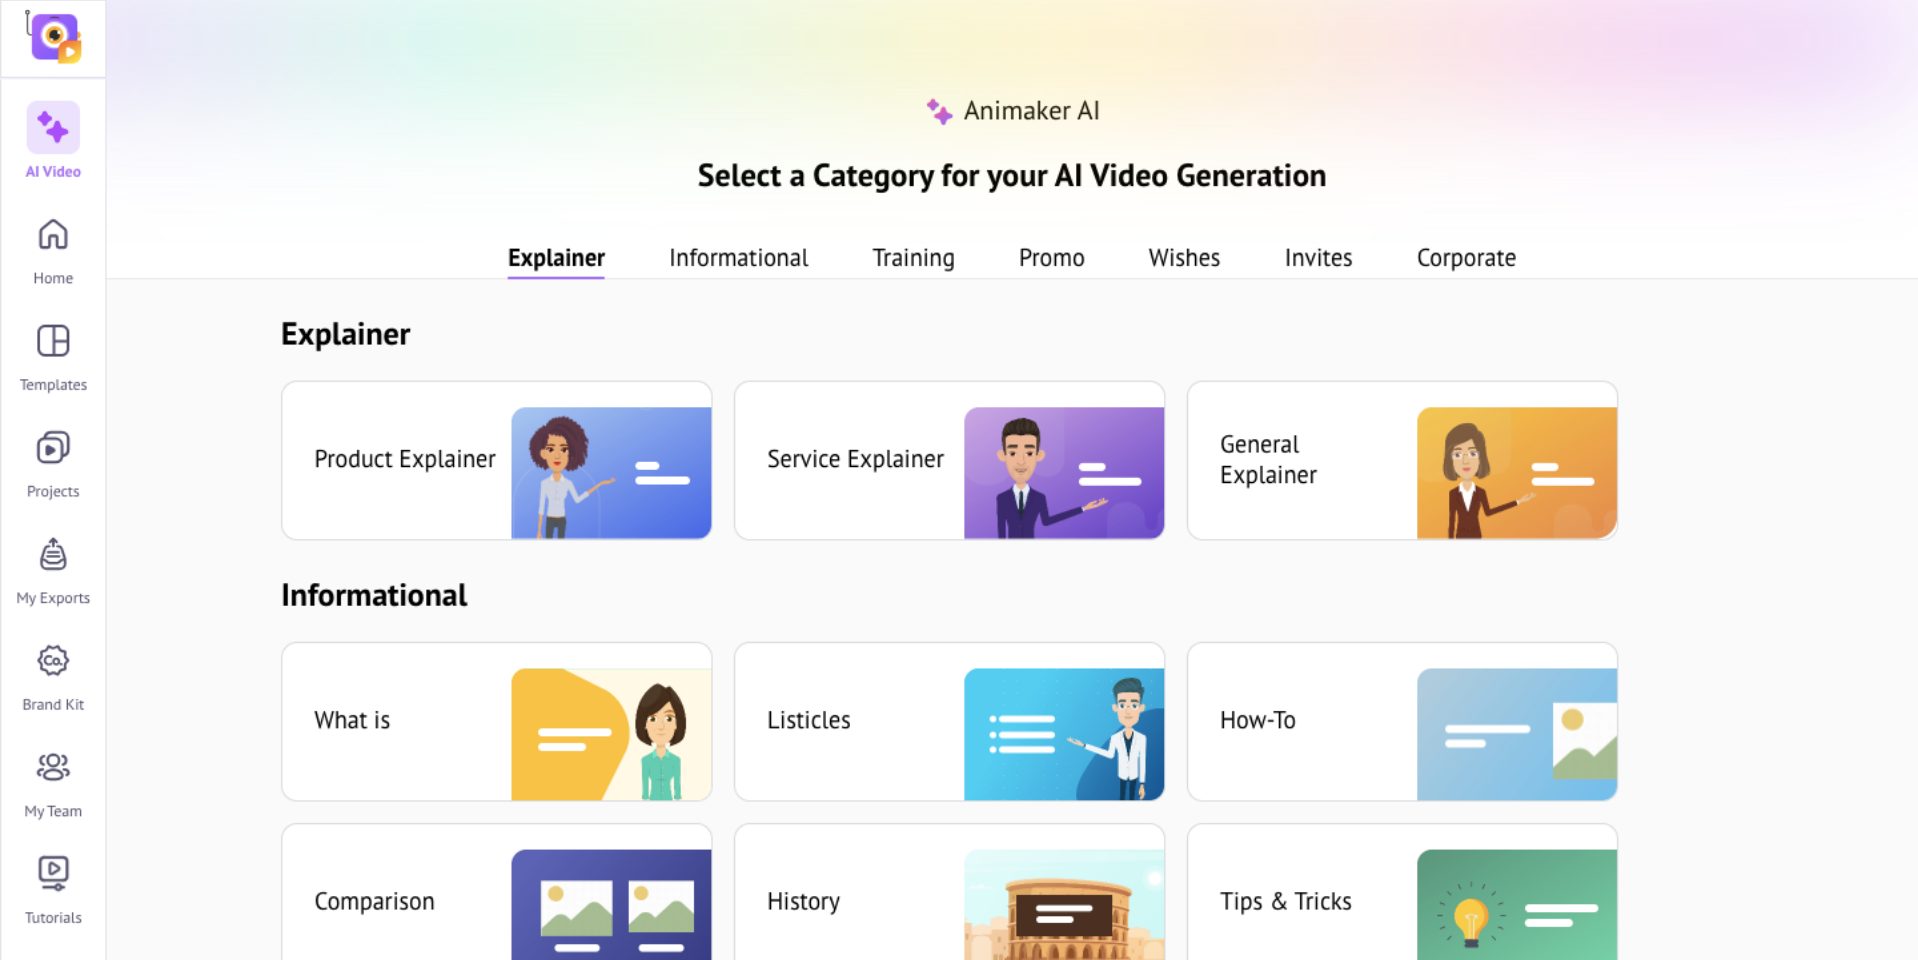
Start by selecting your video category. With over 30 pre-defined categories, Animaker makes it easy to generate videos tailored to your specific needs.
Here, I’m choosing “General Explainer.”
Next, type your own prompt or pick one from the suggested examples.
Once done, click Generate Video to proceed to the next step.
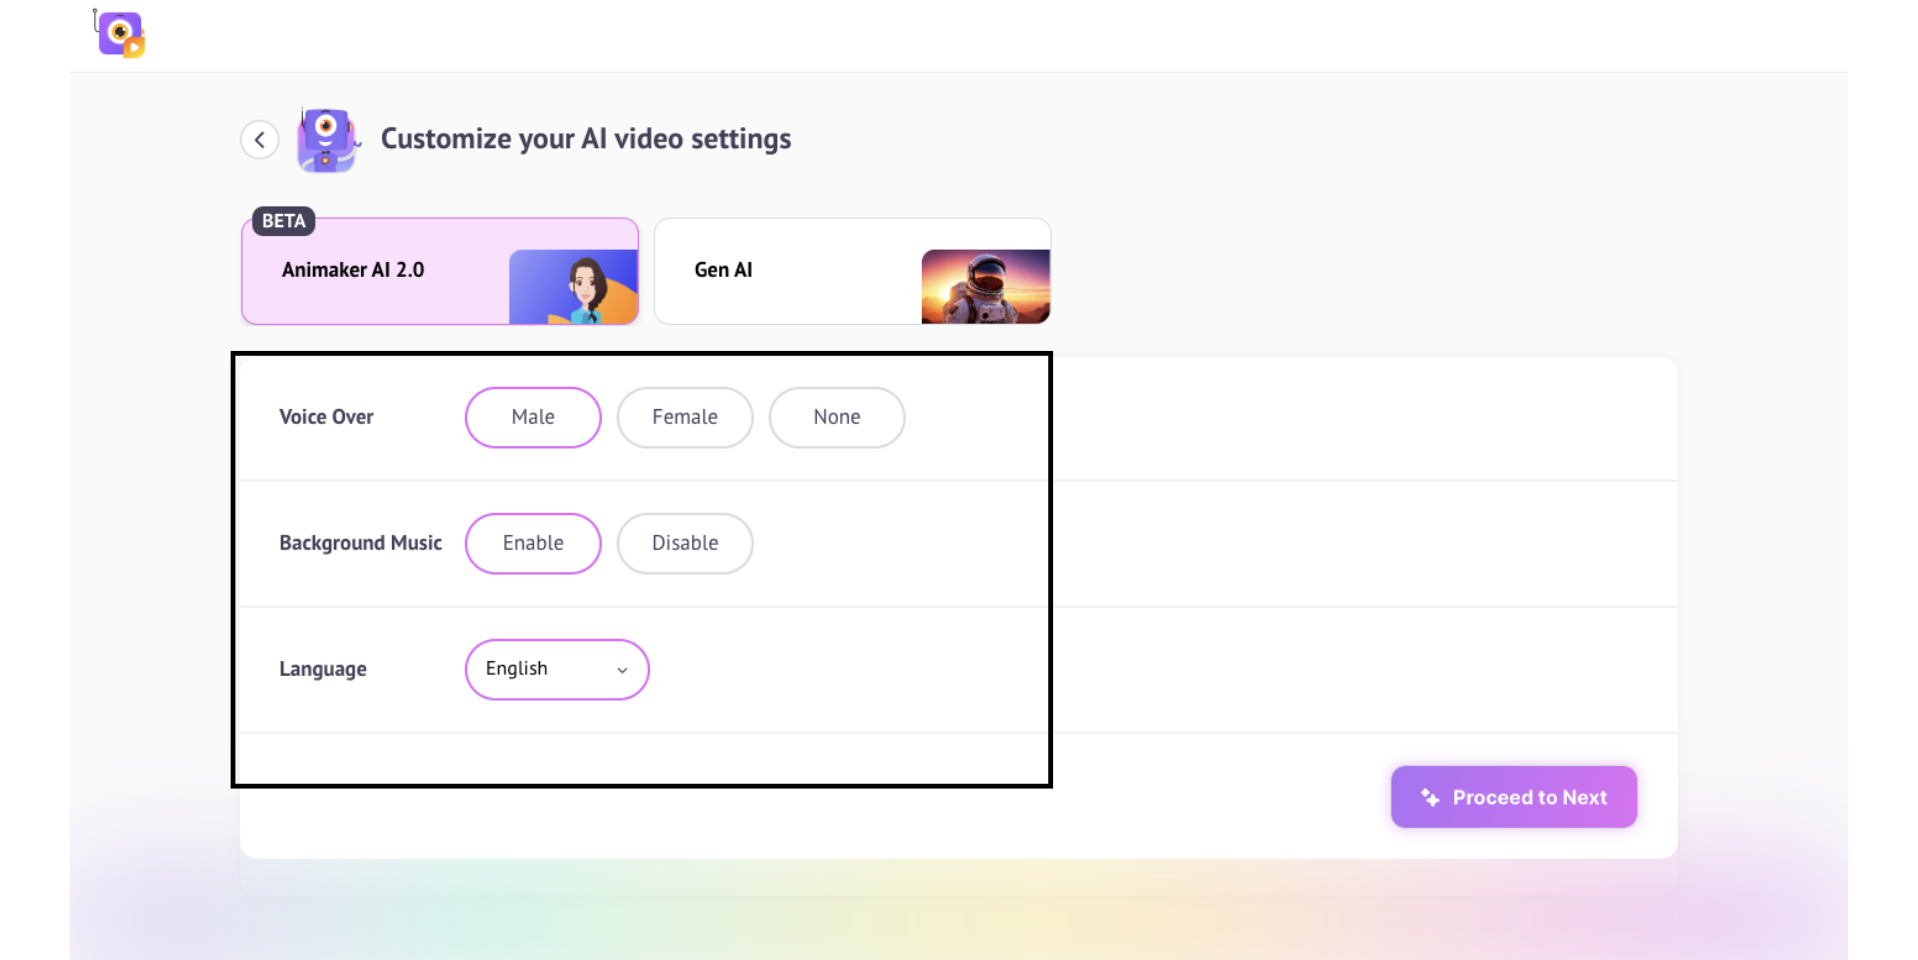
Step 2: Customize video settings
Now it’s time to set up your video.
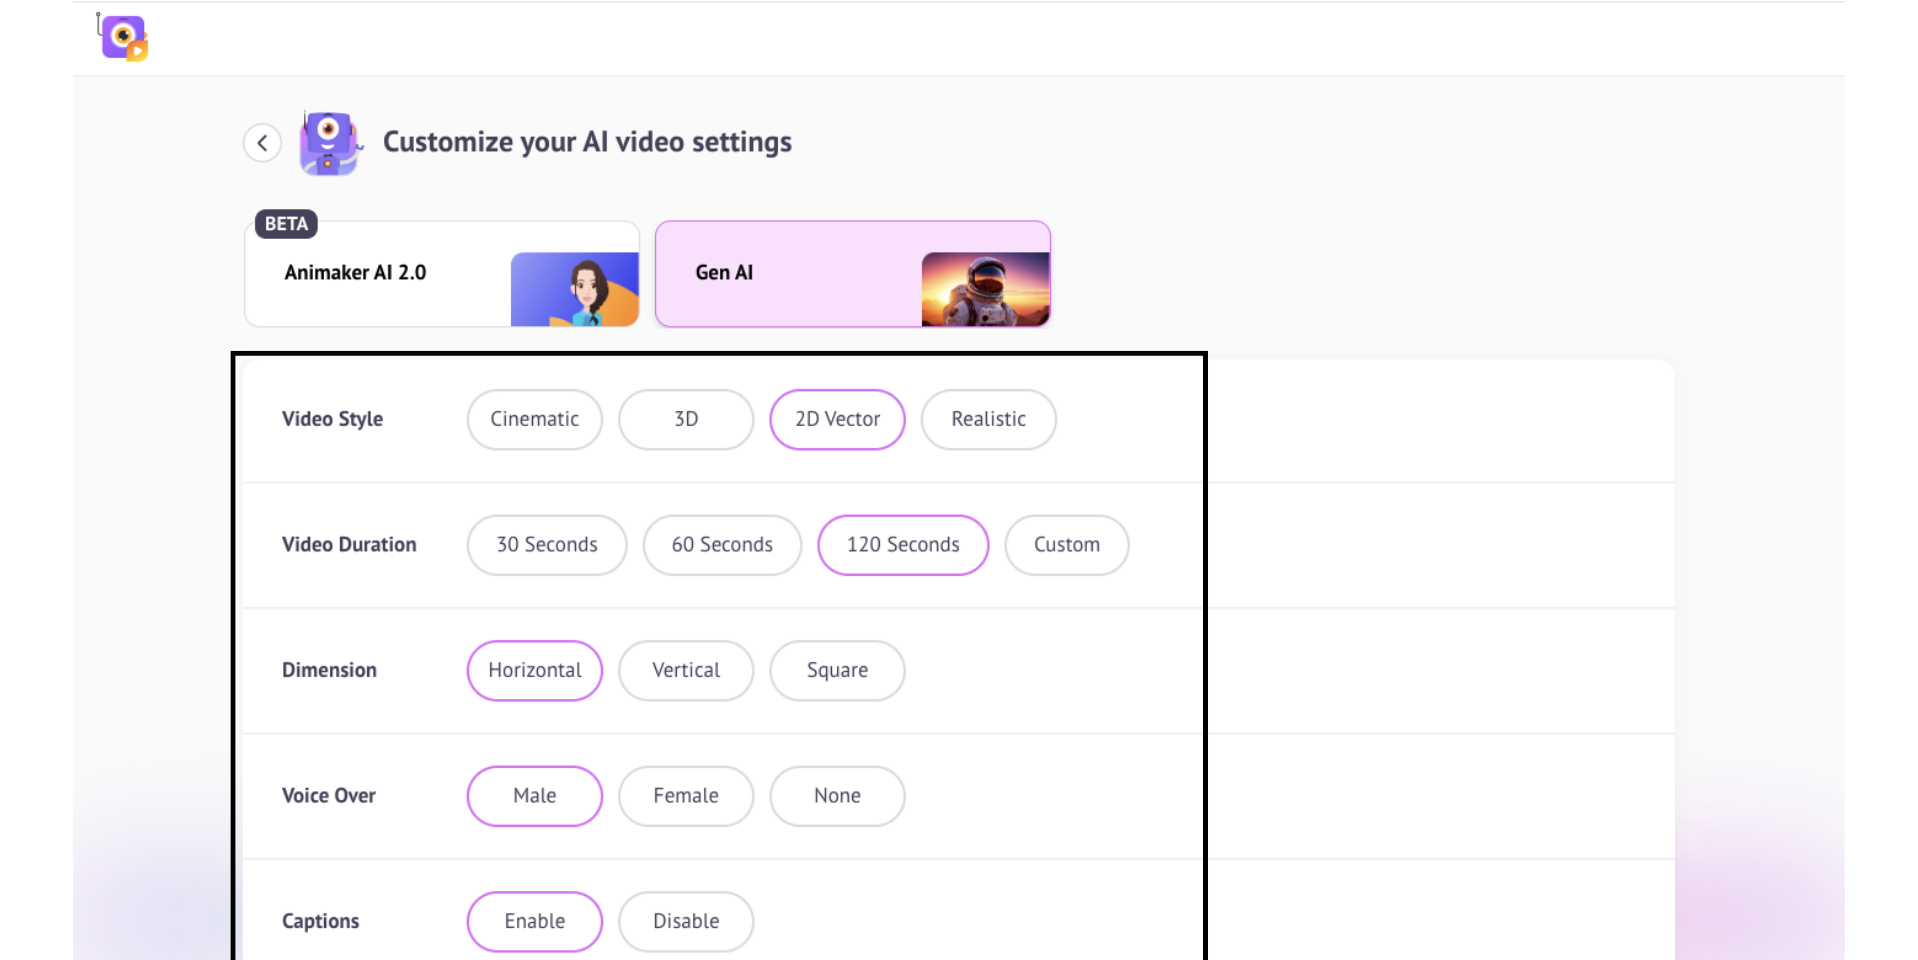
You can choose between two powerful AI styles: Animaker AI 2.0 and Gen AI.
Animaker 2.0 offers a 2D animated style with customization options such as voiceover, background music, and language.
Gen AI provides a generative style with extended controls including video style, duration, captions, language selection, and more.
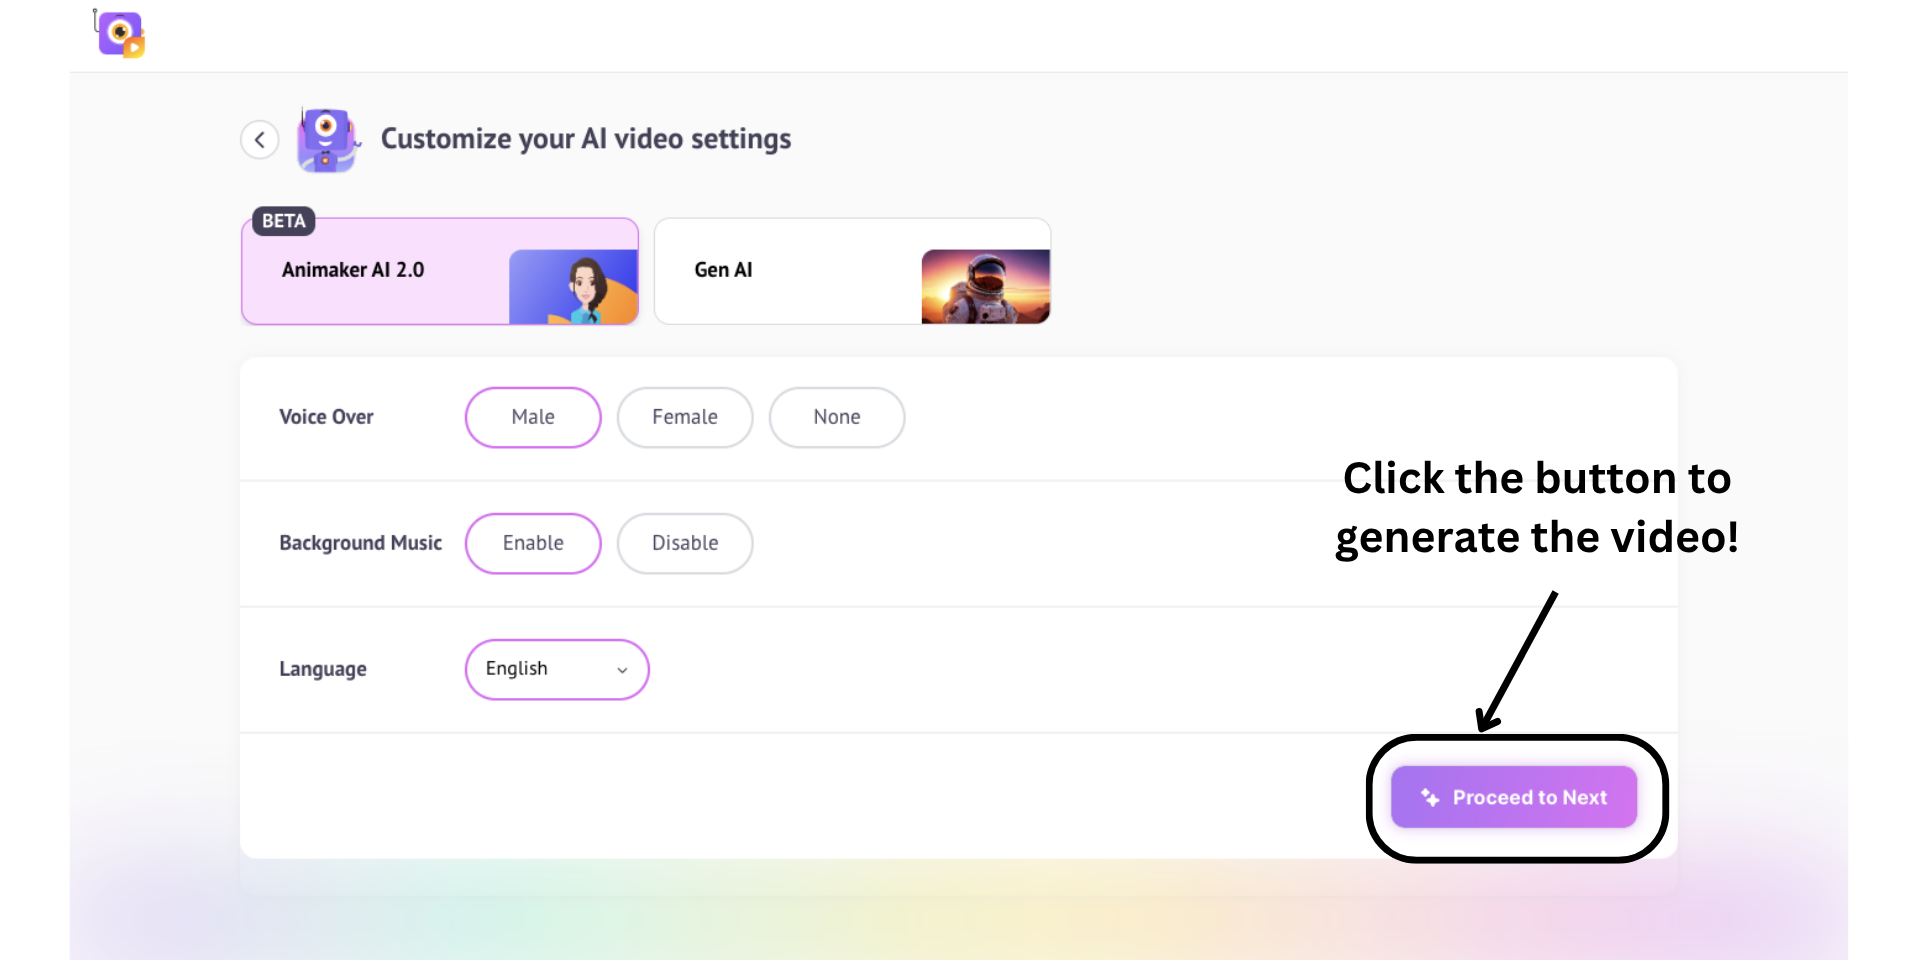
After choosing your style, adjust the settings to match your preferences and click Proceed to Next.
In some categories, you’ll be asked a few follow-up questions to help the AI better understand your video’s intent and refine the output accordingly.
If prompted, complete the questions and hit Proceed to Create to see your video come to life - tailored exactly to your needs.
Step 3: Generate & Edit
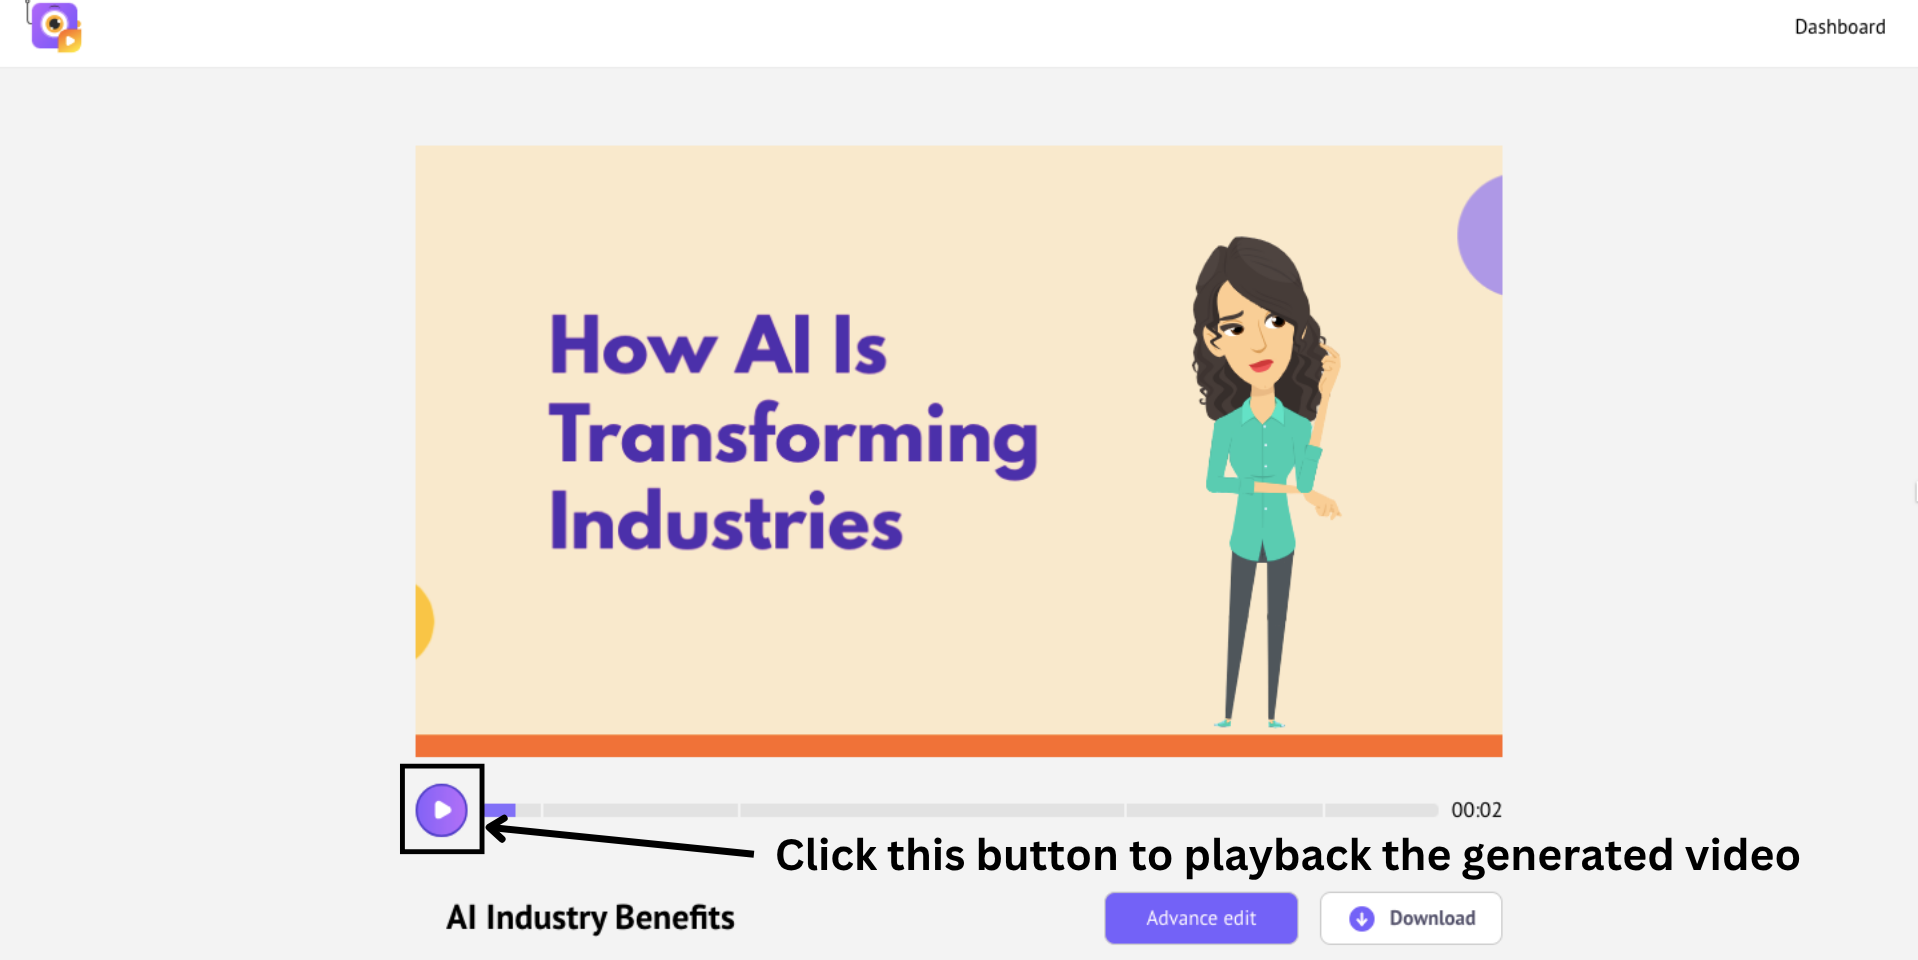
The AI will now take over. In just a minute, your fully polished video will be ready.
It includes everything - 2D characters, voiceovers, animated text, properties, and more, automatically crafted for you.
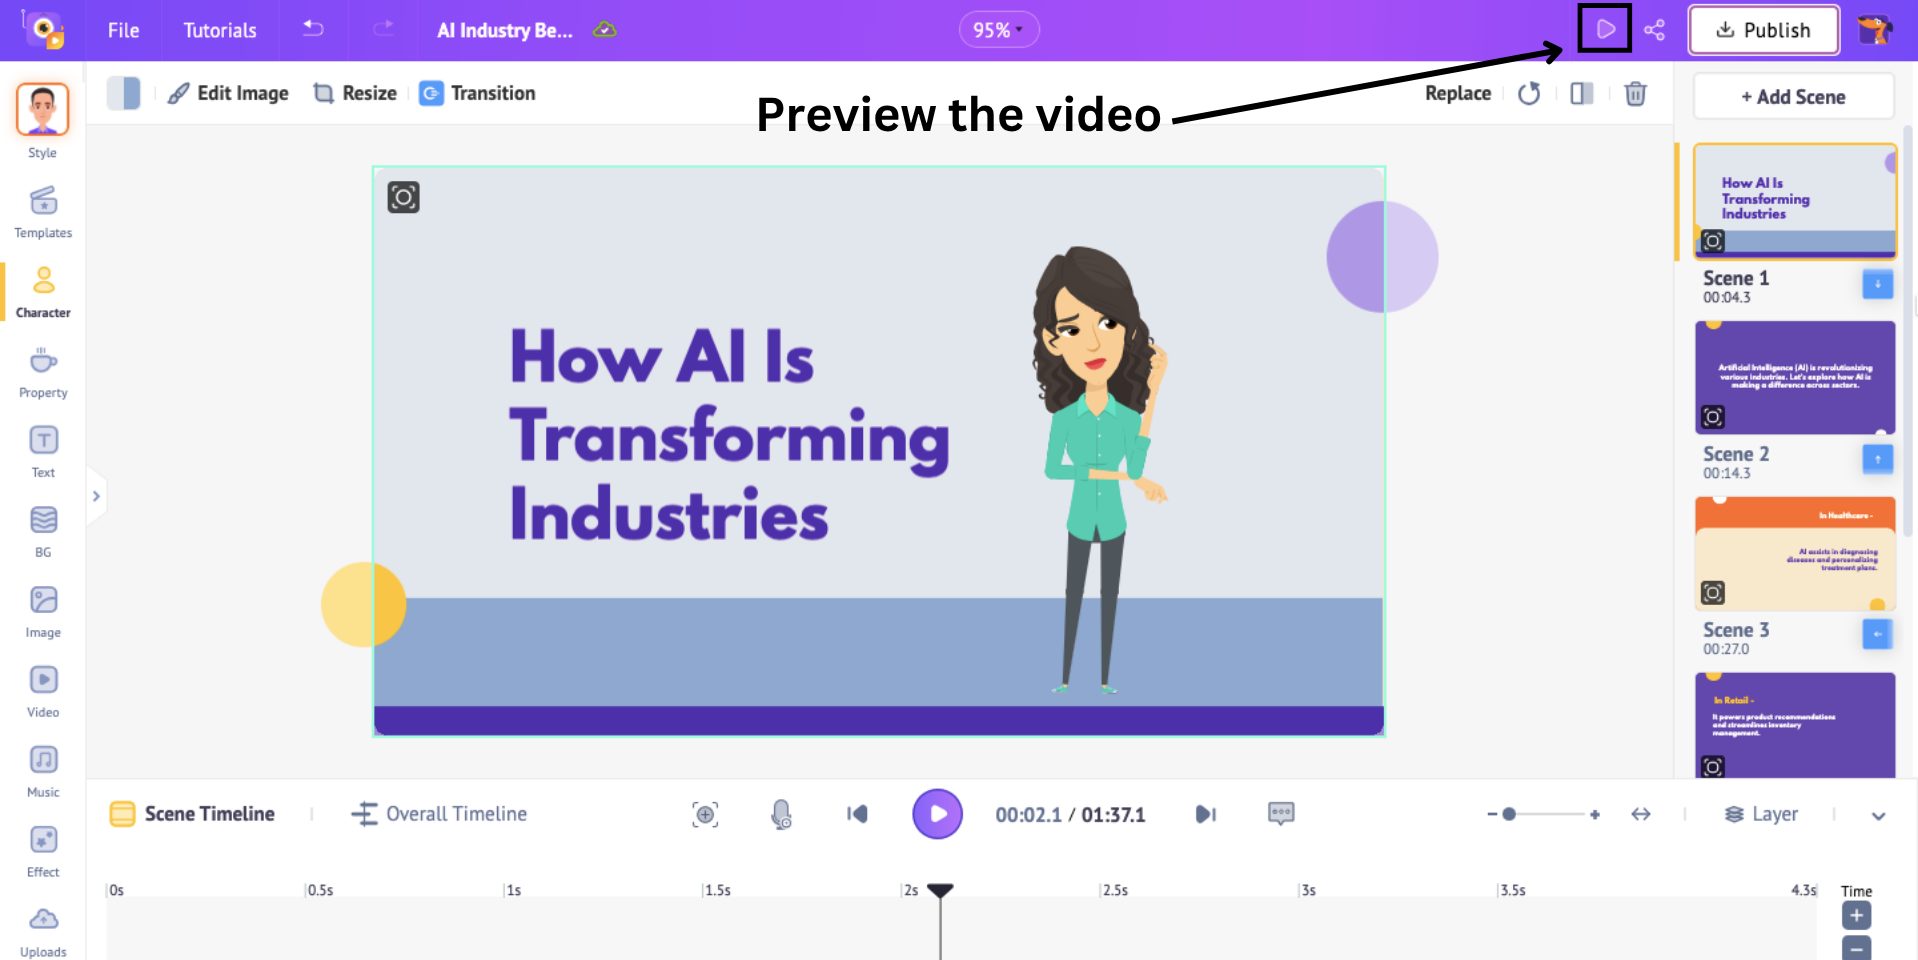
Click Play to preview the video.
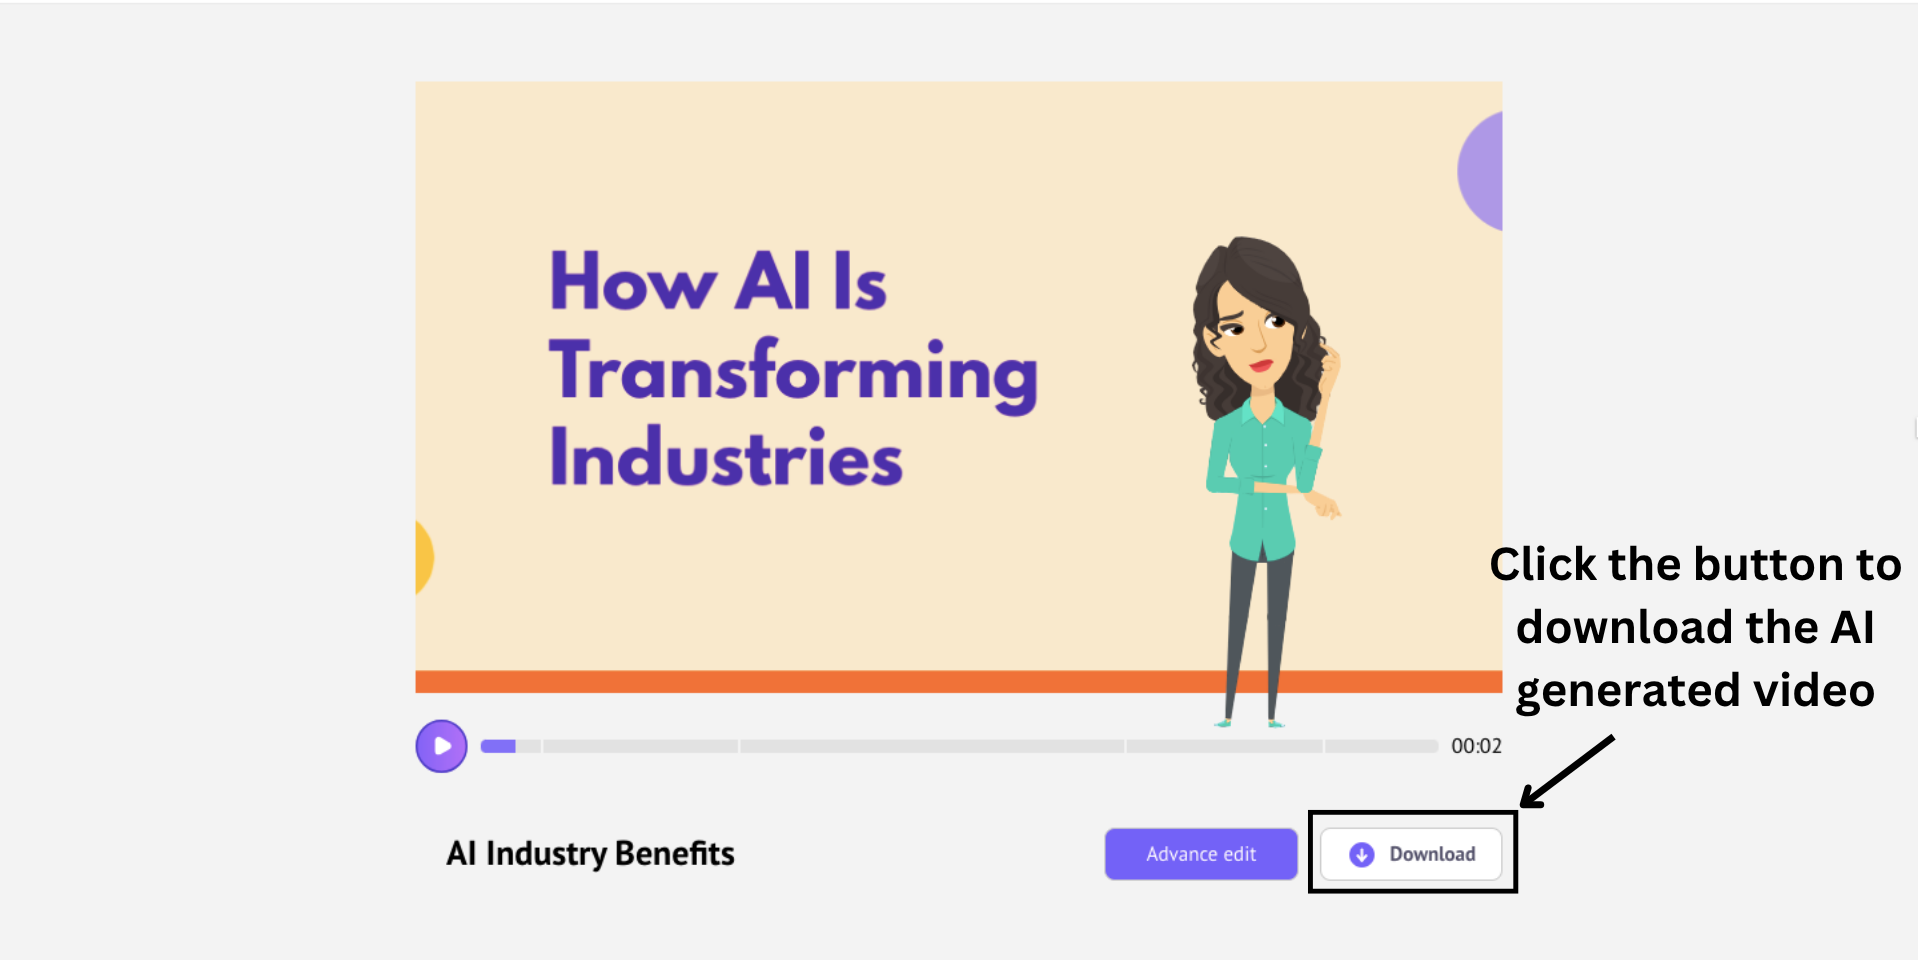
Once you're happy with the generated video, you can download it instantly. And just like that, you’ve learned how to make animated videos with AI.
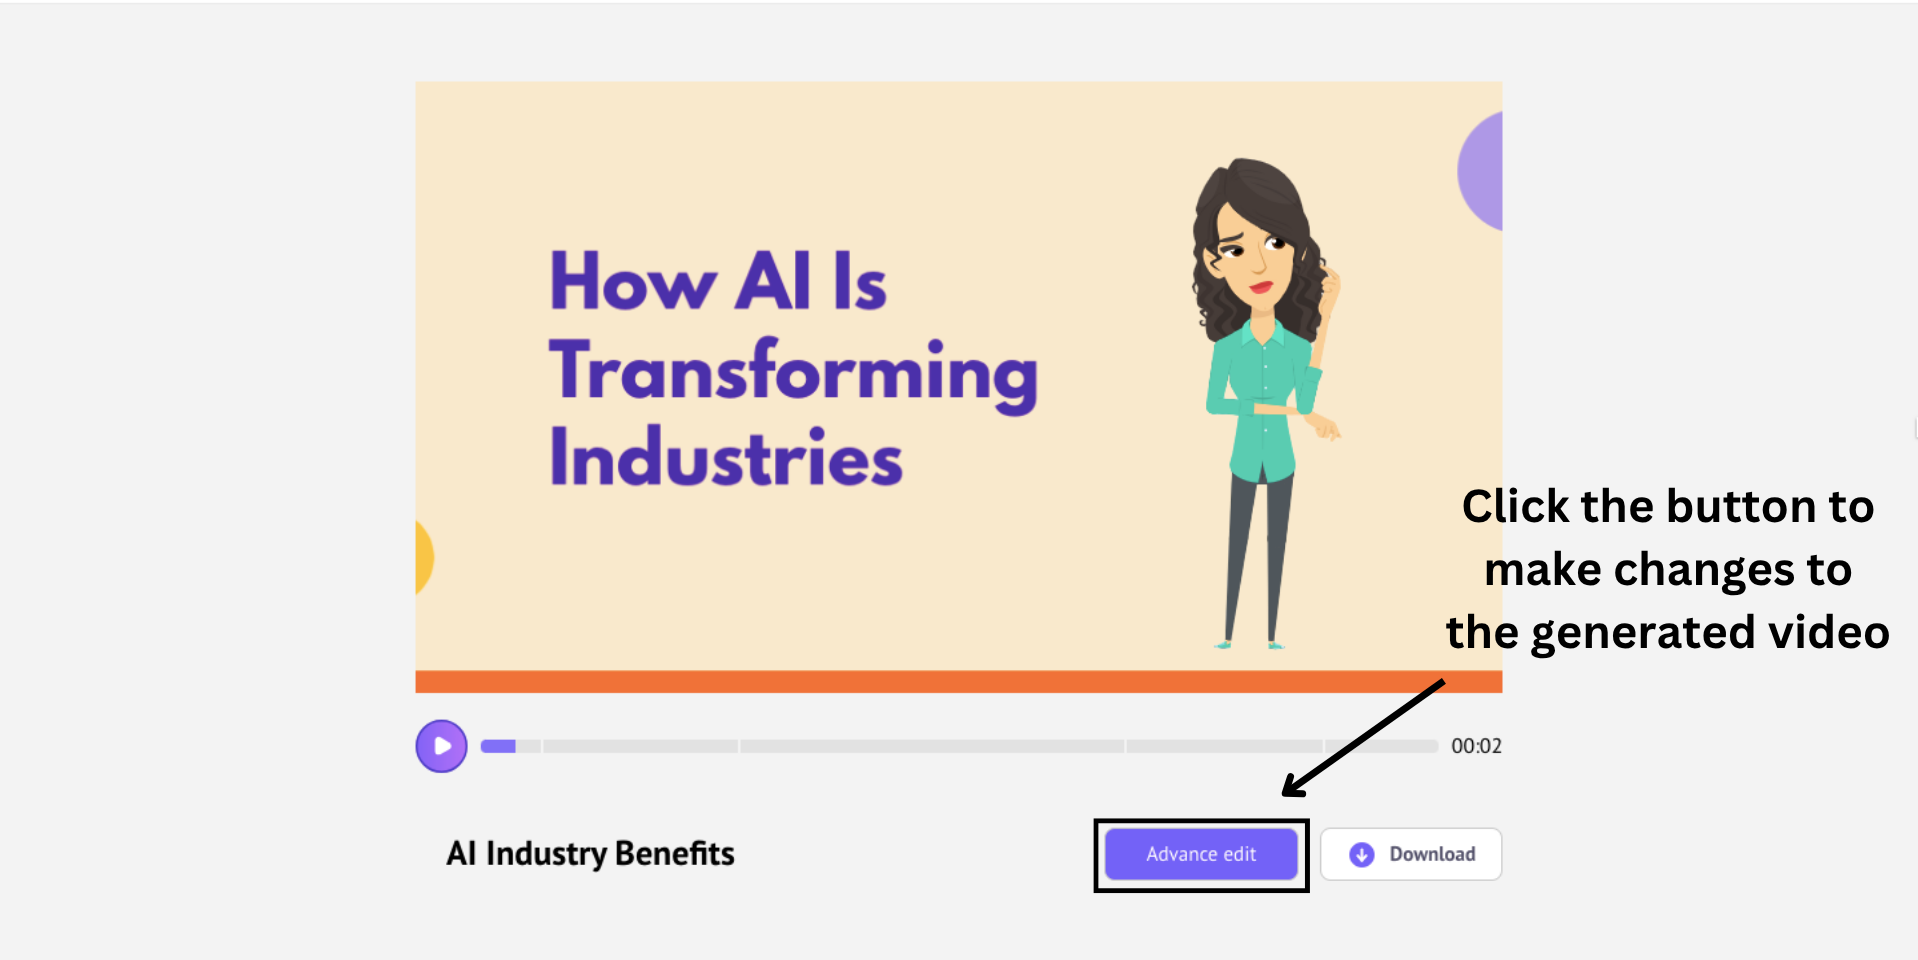
But, if you want to make changes or add more elements, just click Advanced Edit to customize every detail.
The generated video opens in a new project window with all editing tools available.
At the center is the workspace where your video plays. On the left is the library with characters, props, text, and more. On the right, you’ll find your scenes. The top menu offers extra tools, and the timeline below lets you fine-tune the timing of each element.
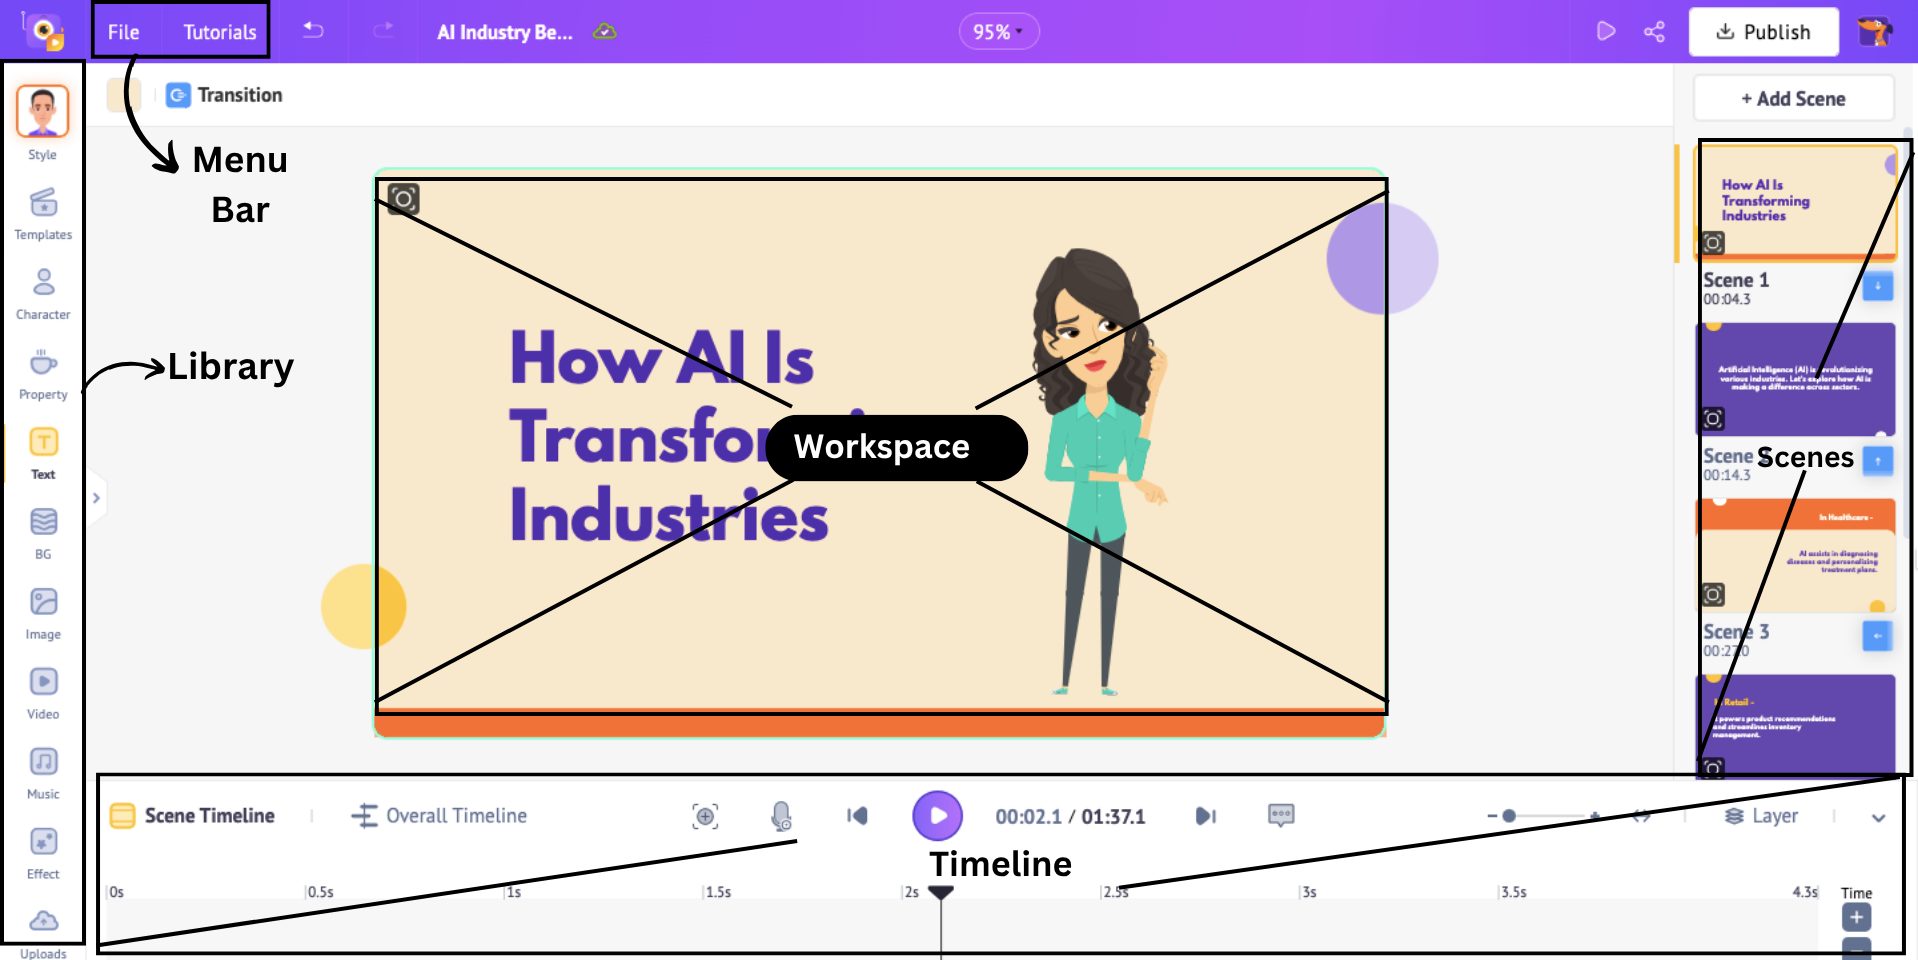
Now that you have a better understanding of the interface, let’s look at the various ways we can edit the generated video.
So, let’s see how to make these edits.
1. Add a character
There’s already a character in the first scene. But, I want to add a character in another scene.
To do so, click on the Character library on the left.
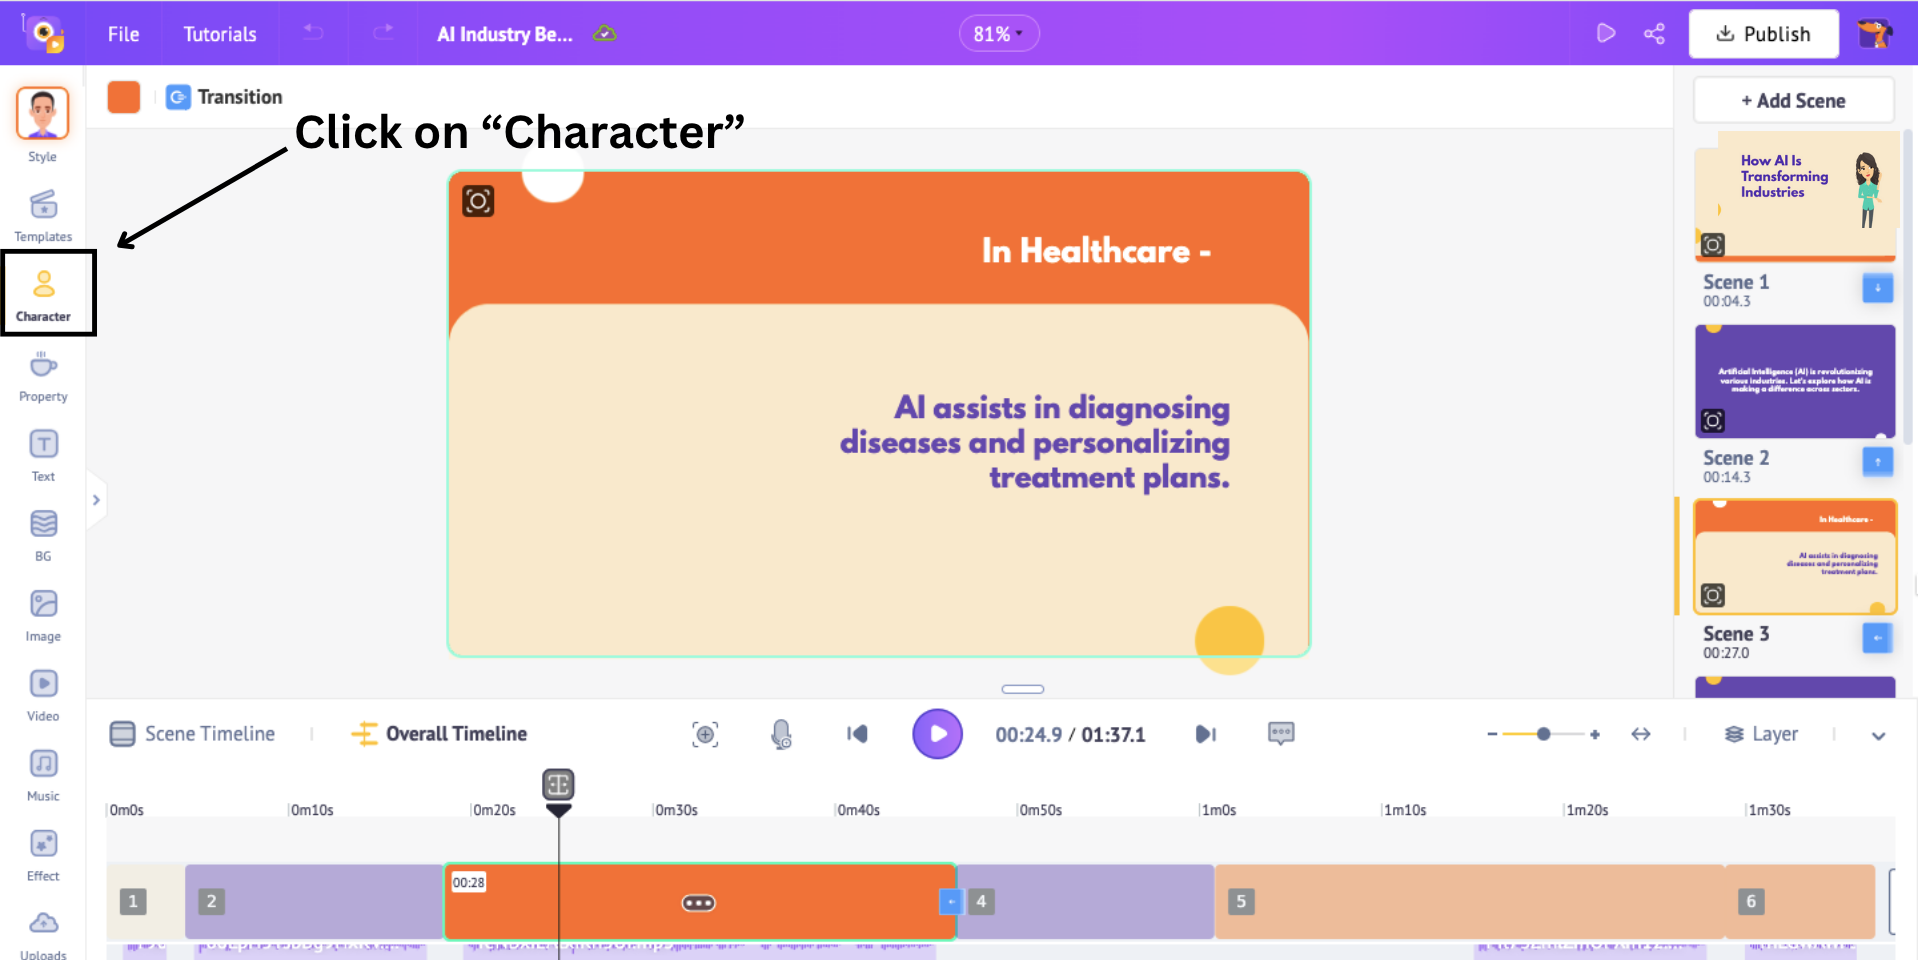
This will open a side panel with 1000+ characters of different sizes, ages, and professions, perfect for any video.
You can either choose a pre-built character from the variety of options or make one of your own!
If you want to learn how to create animated characters, check out the link provided.
For this slide, I’m choosing a doctor character to match the content. Click on a character to add to the scene. Once added, you can position it where you want and adjust its size.
The character is simply standing. I want to add some action to it.
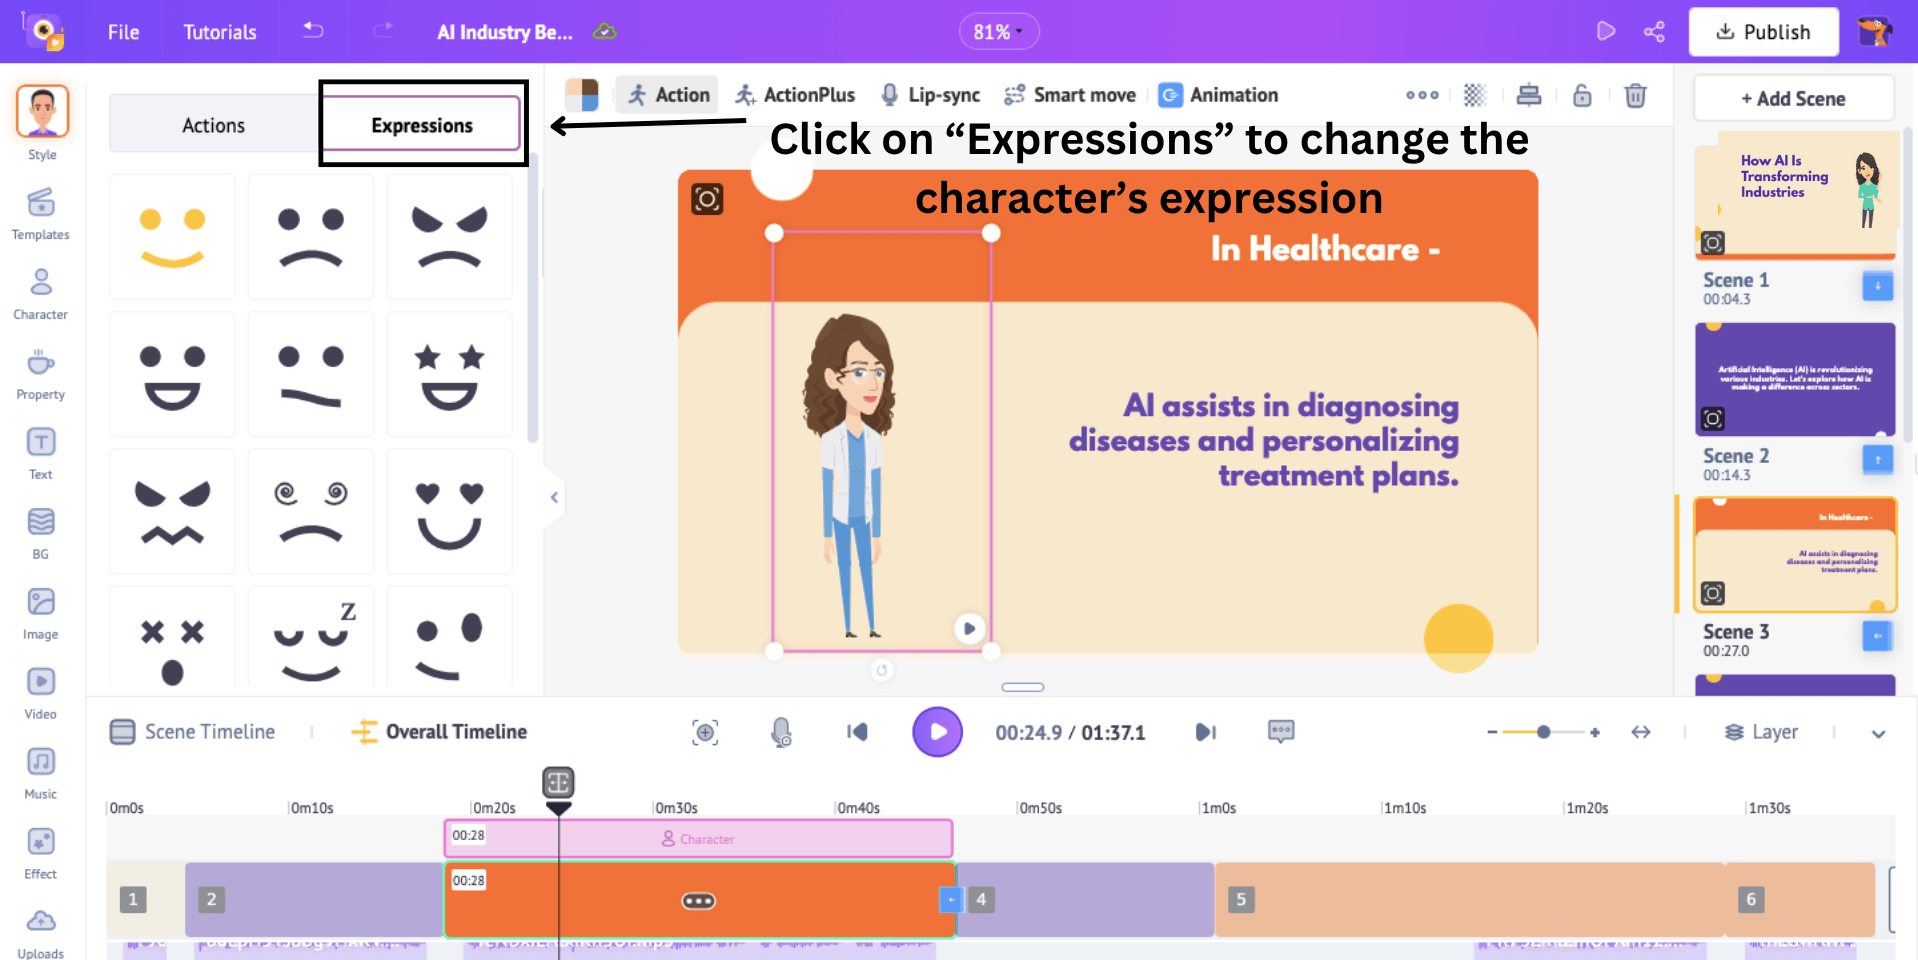
For that, click on the character. This will open the action panel. Here, you can browse through 1000s of actions or search for them in the search bar. Once you find something you like, click on the action.
You can even change the character's expressions by clicking on the Expressions tab next to the Actions option.
This is how you add a character to a scene.
Next, let’s see how to add a property to a scene.
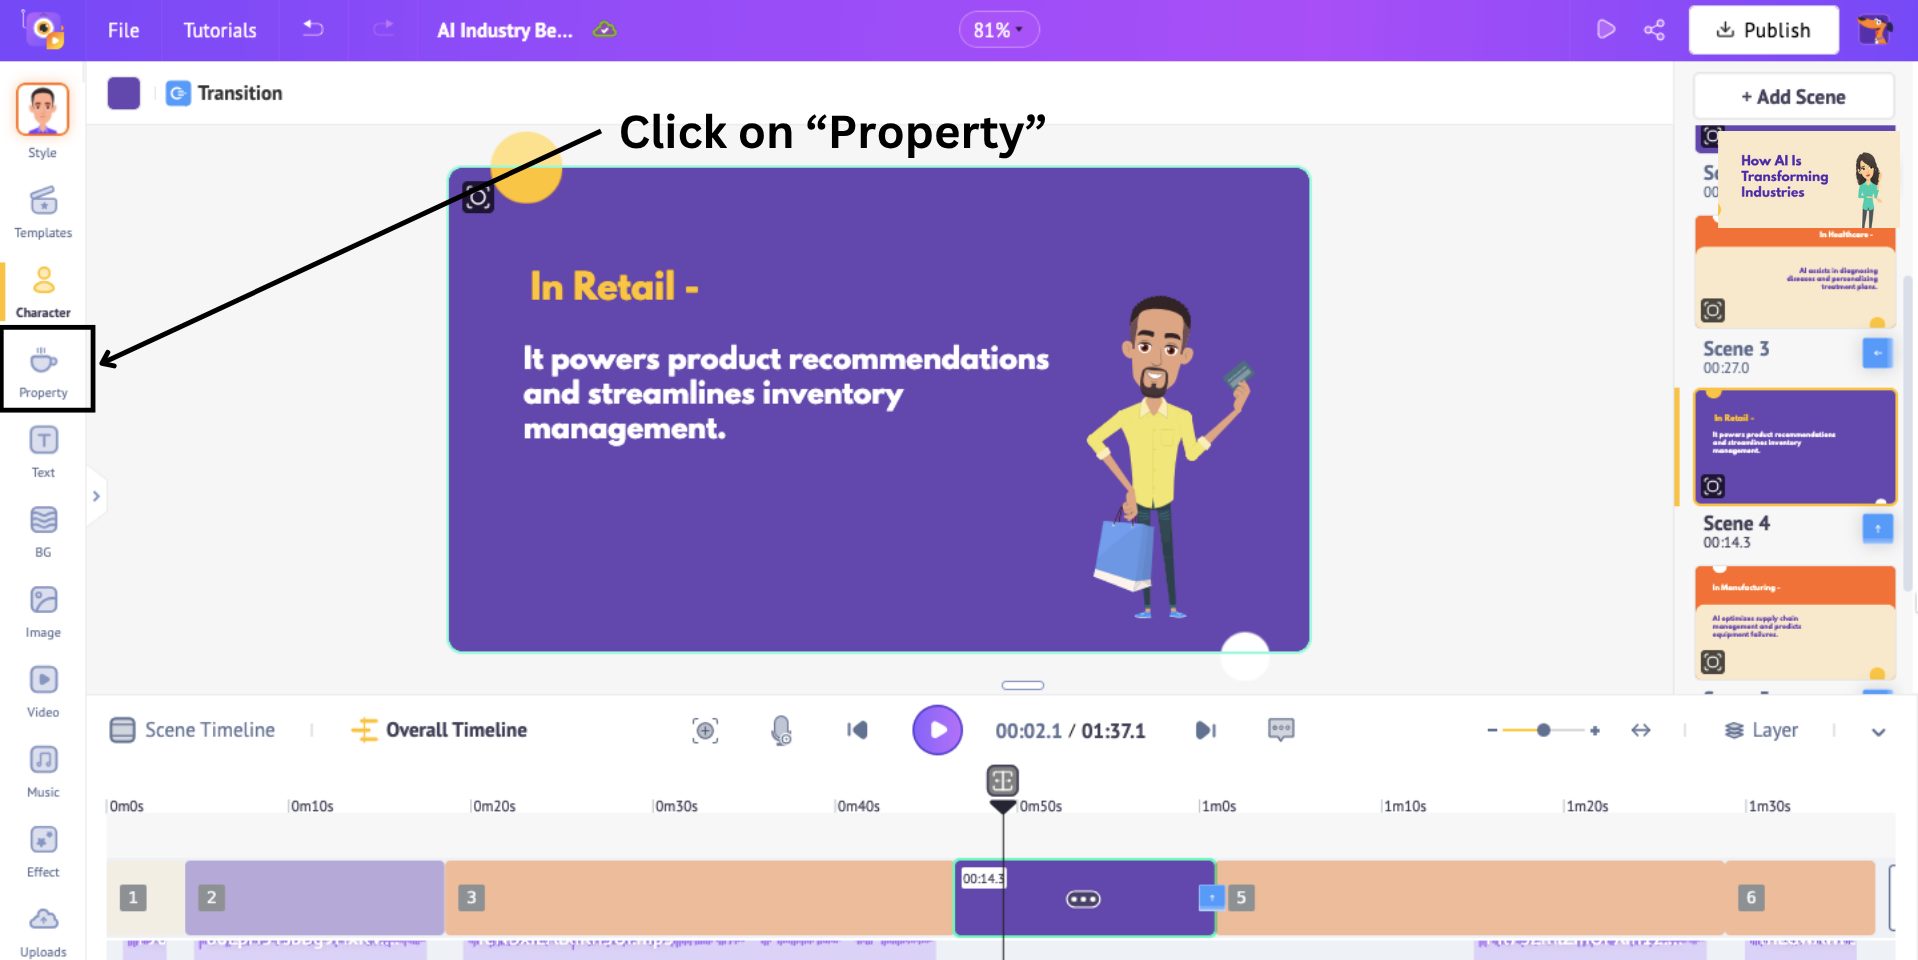
2. Add property
To add properties, click on the Property option in the library.
This opens a huge collection of 100M+ properties and icons that can be added to your video.

You can scroll through the collection or search for specific items using the search bar.
When you click on a property, it gets added to the scene. Position it where you want the property to be.
When a property is added, a blue section appears in the timeline. This indicates the duration of the property appearing in the scene.
To adjust the duration, hold and slide one end of the blue section over to a specific time.
You can even add an animation effect to the property to decide how it will appear in the scene. To do that, click on the property and click Animation.
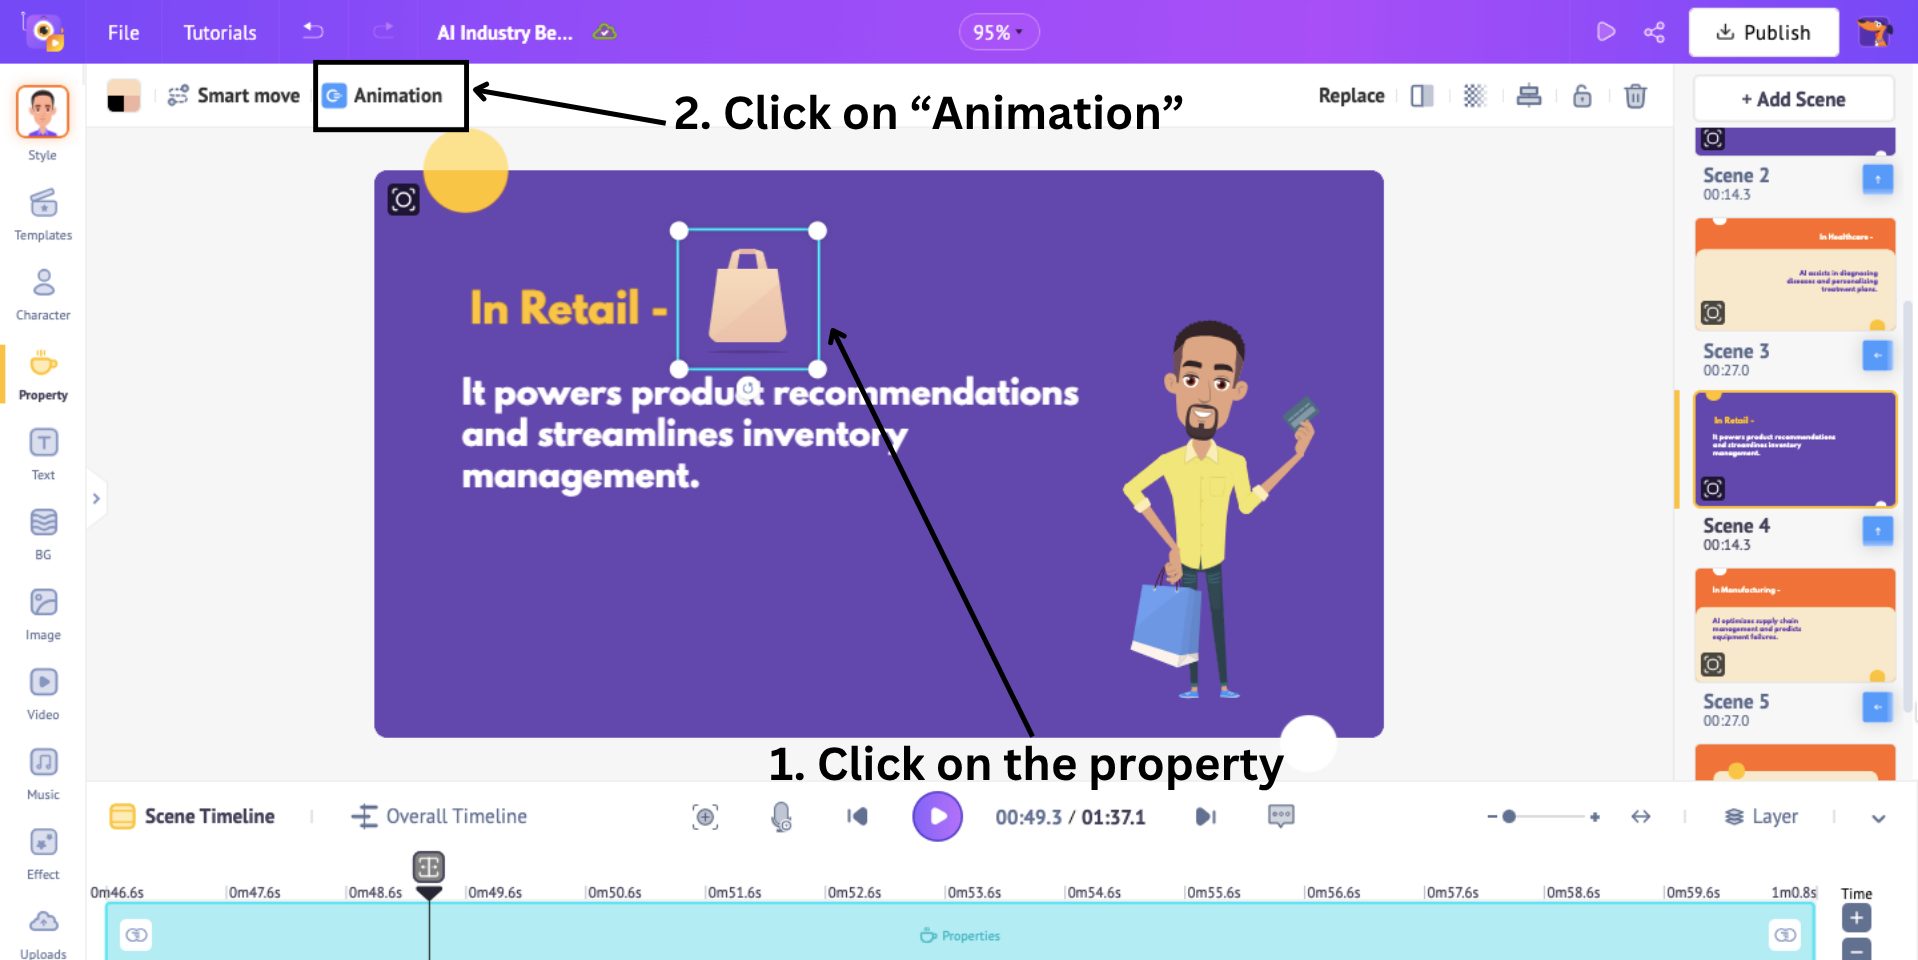
This will open 35+ animation effects for you to choose from.
Choose an entry and exit animation, and you will see a highlighted part added to the blue section.
This indicates the duration of the animation effect. To adjust the duration, if needed, drag the inner corners of the highlighted end across the blue section.
This is how you add a property and add animation effects to it.
Let us move on to adding text to a scene.
3. Add text
To add text, click on the Text option in the library.
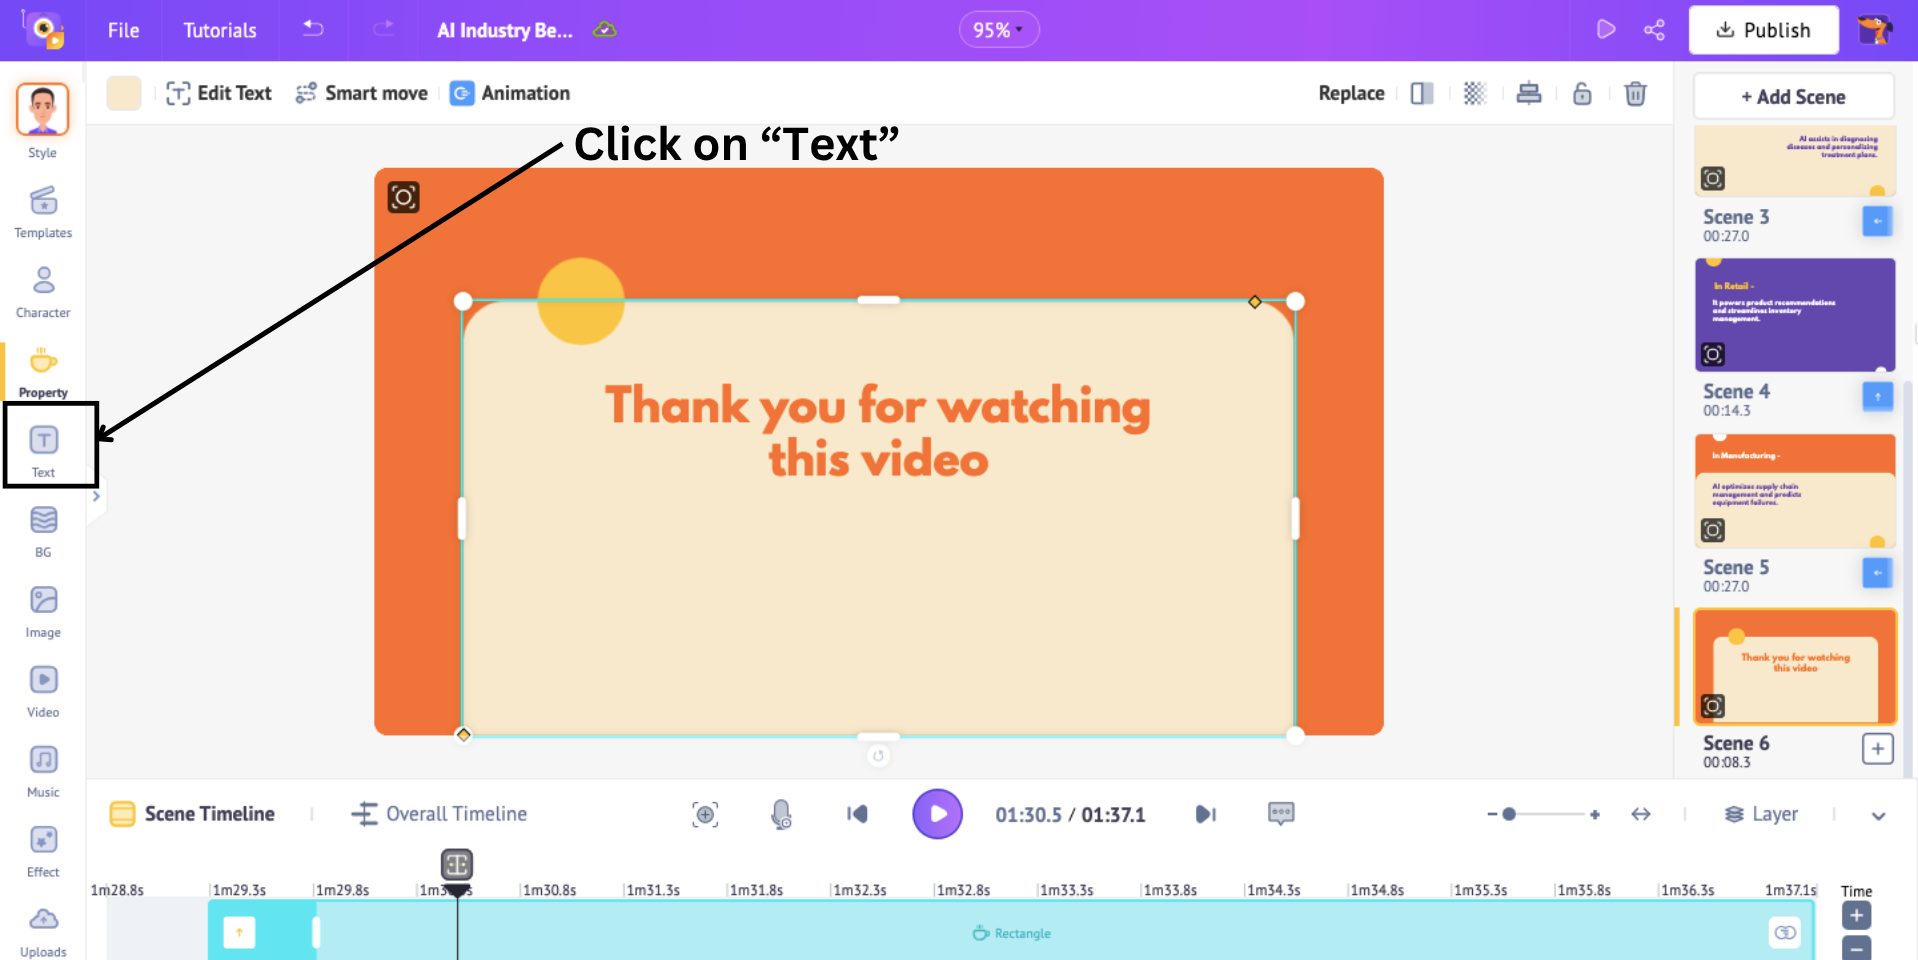
You will see a side panel with two text types - Plain and Pre-builds.
Plain text boxes require designing from scratch, while Pre-built text boxes come with design, font, and animation effects.
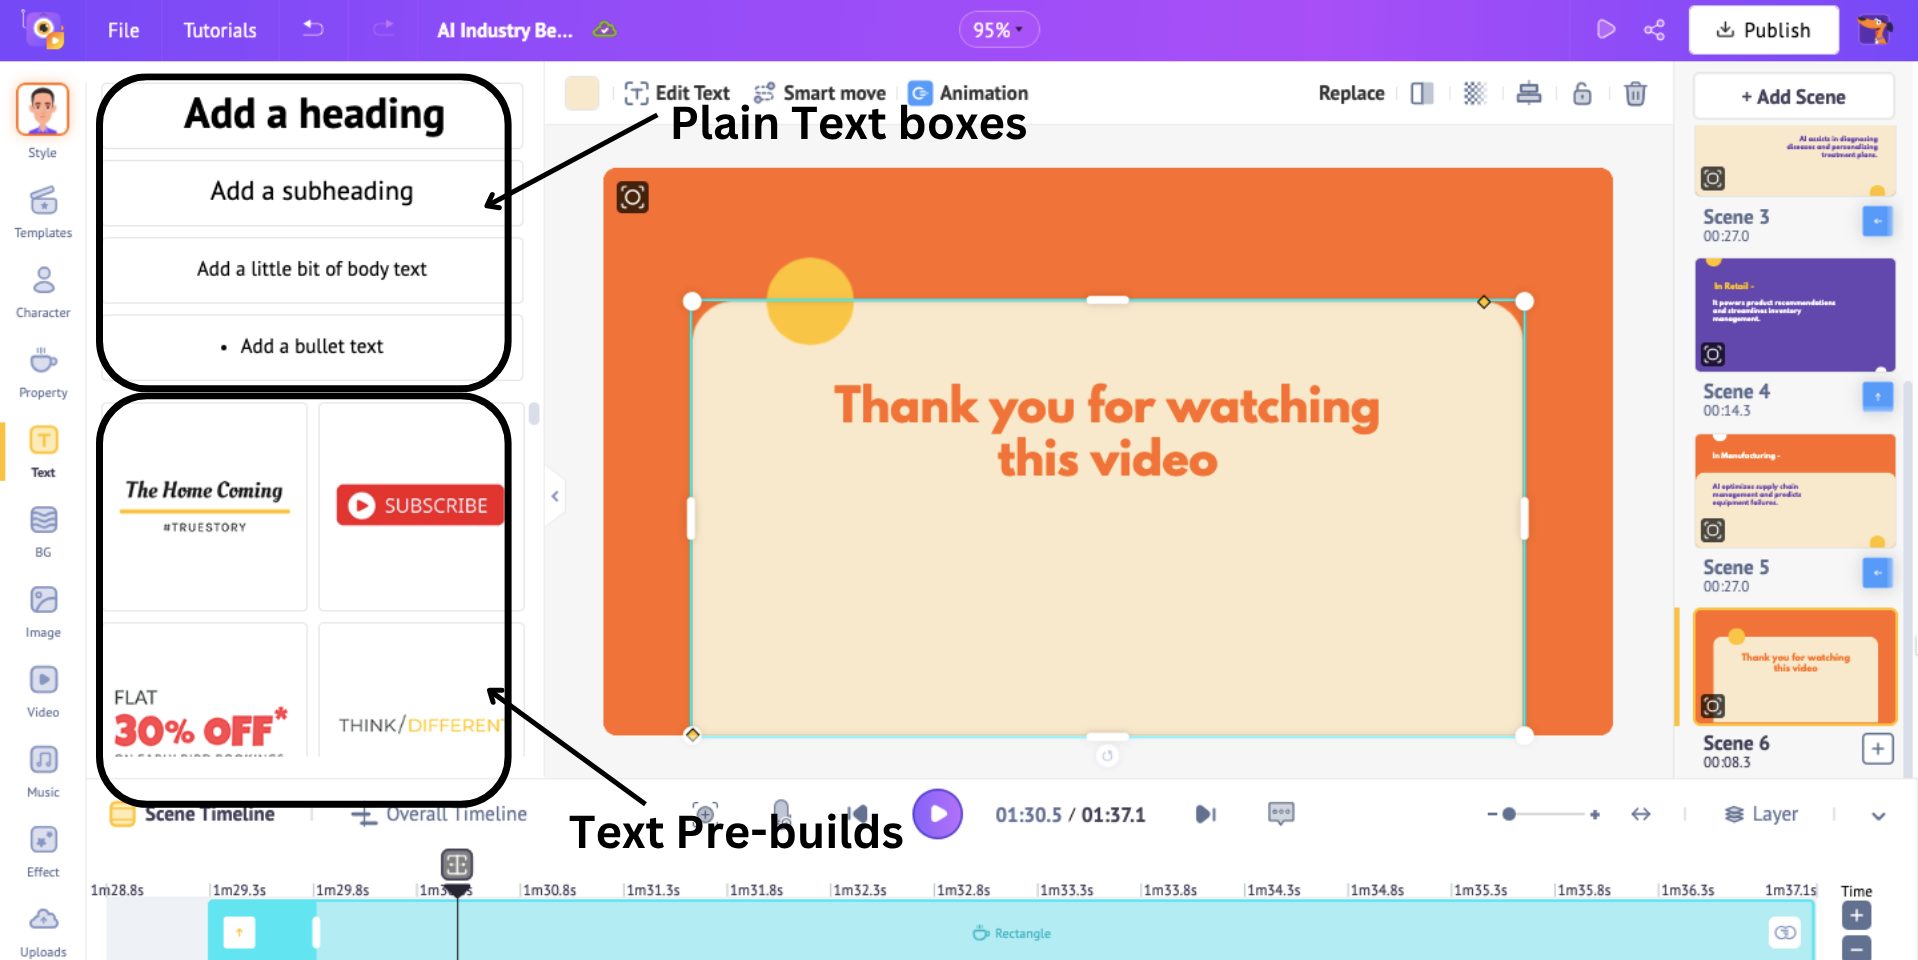
Choose a preferred text type and place it where you want it in the scene. I’m choosing a plain text box.
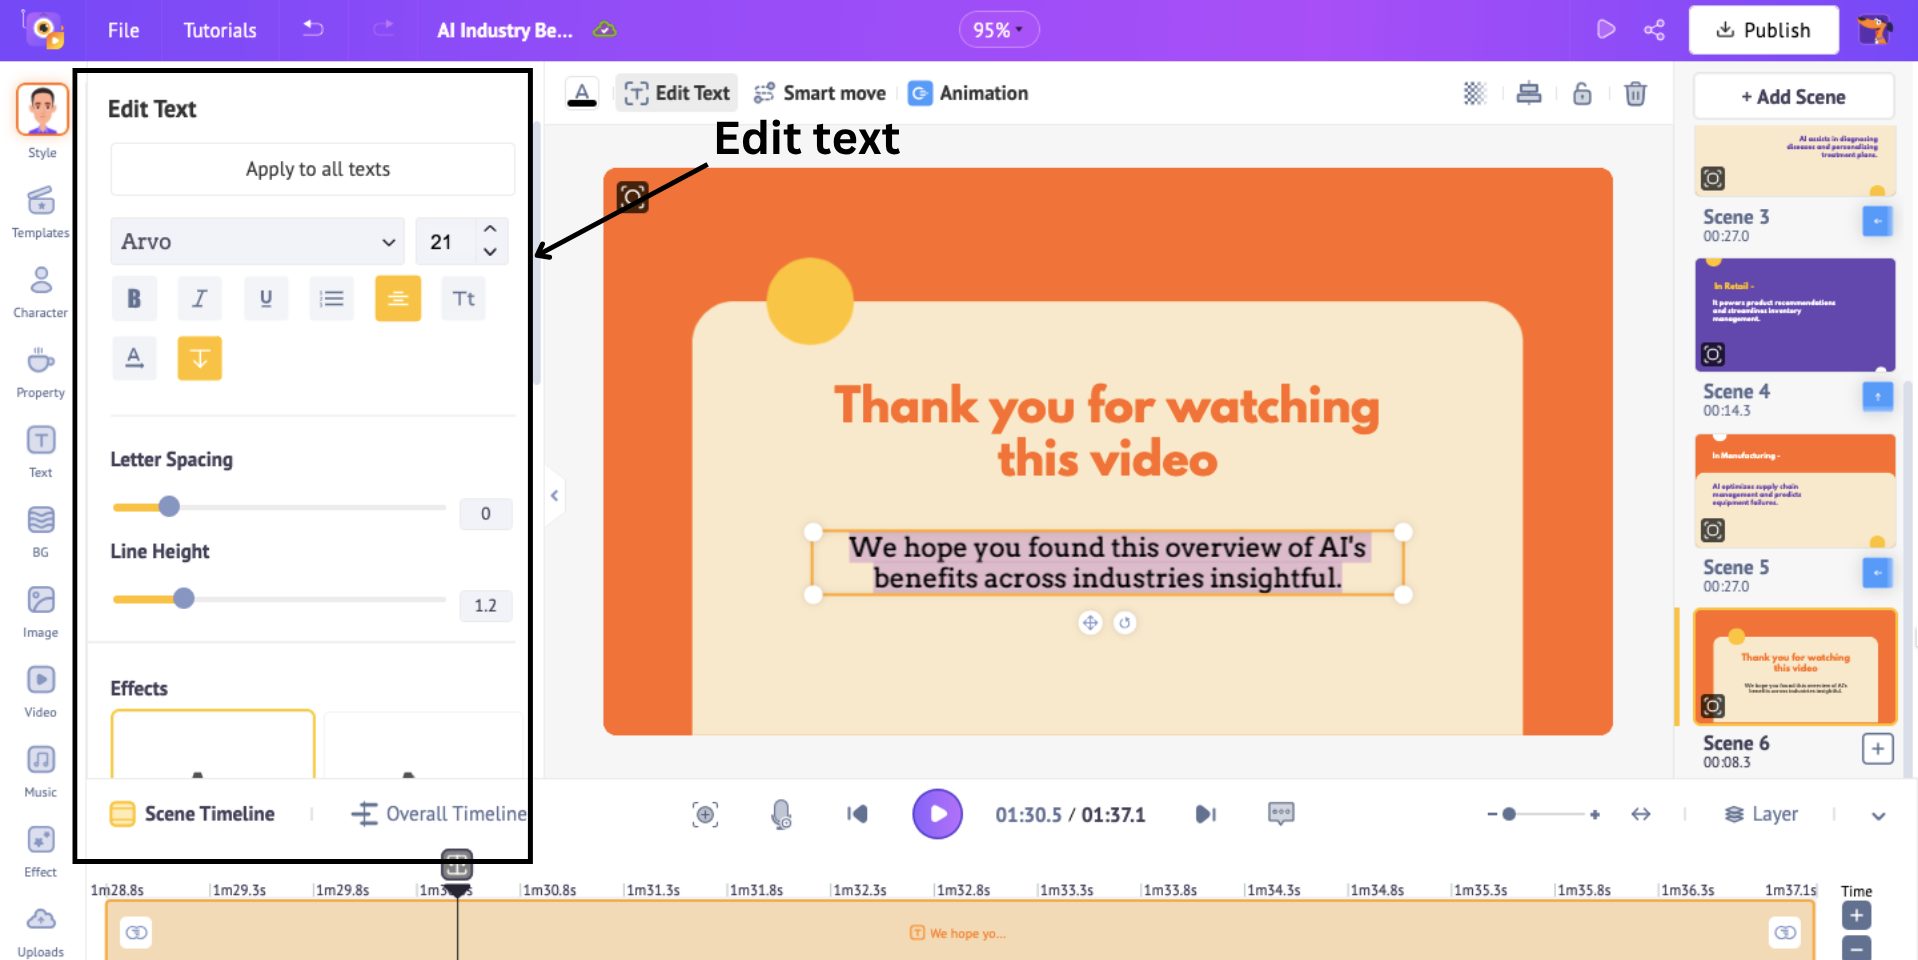
Type in your text, and you will notice that a side panel opens.

This is the Edit Text panel. Here, you can change the font, adjust the size, add effects, etc.
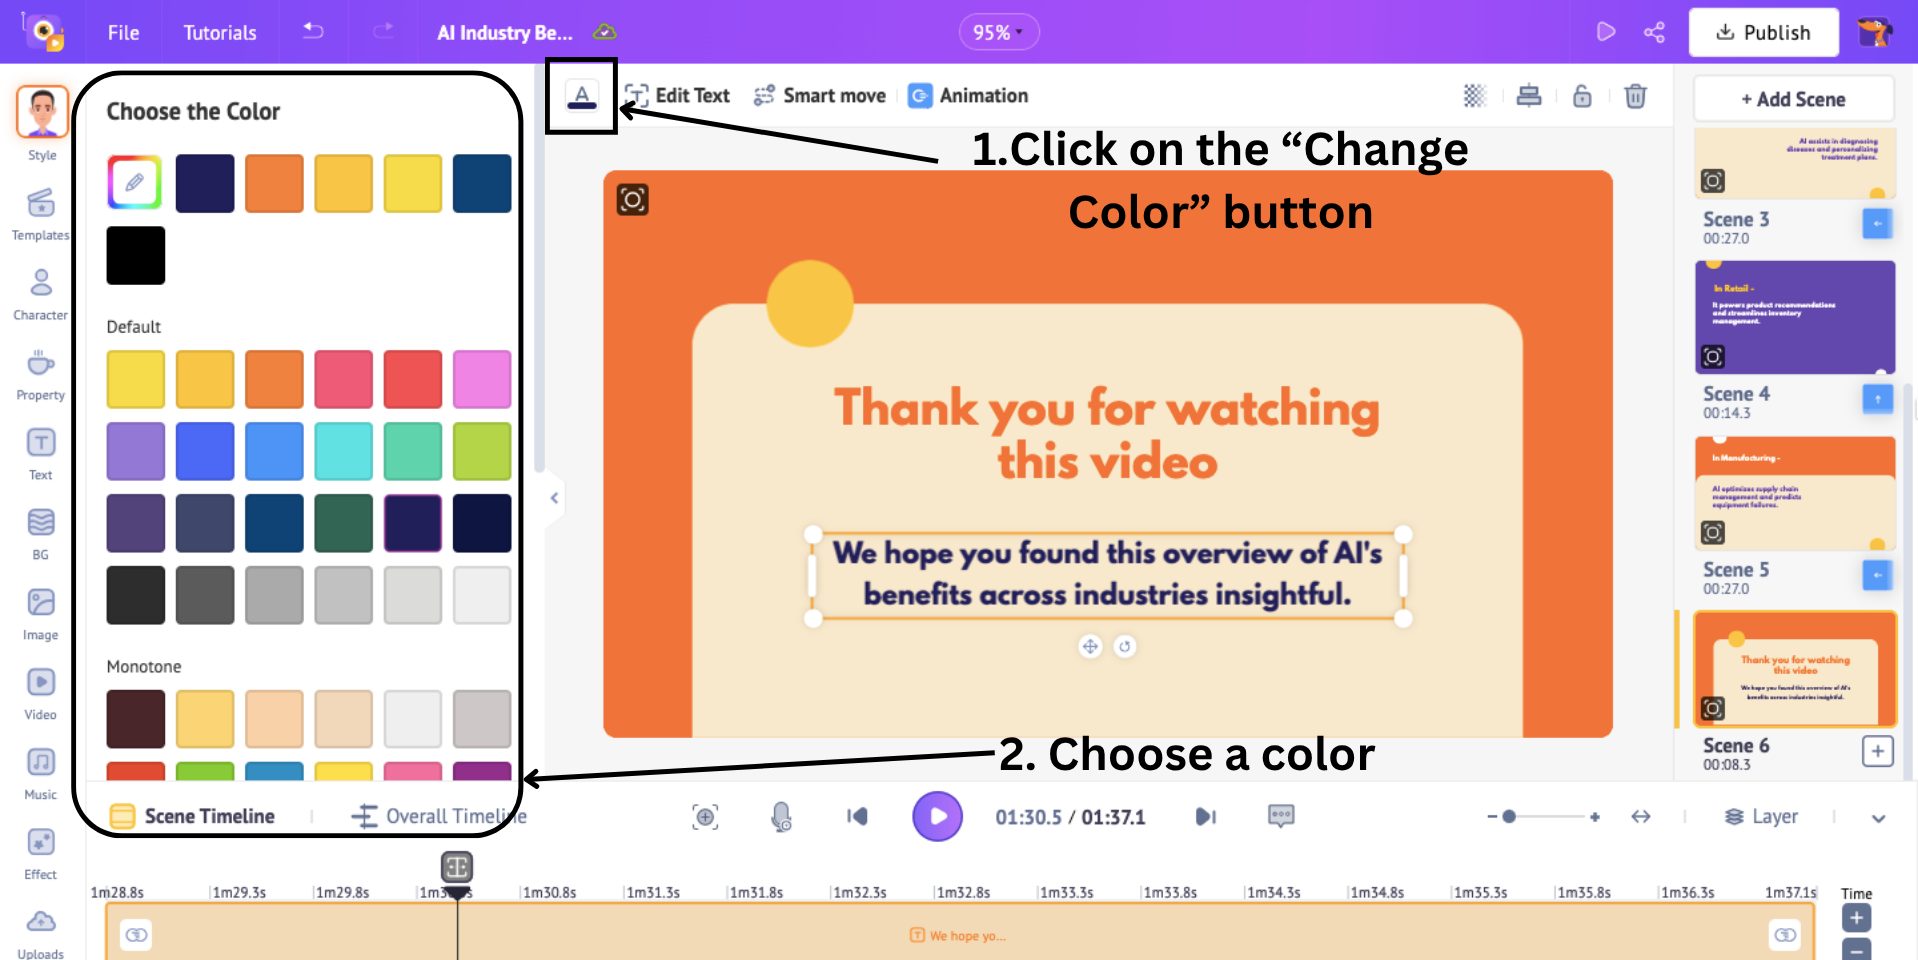
You can also change the font color by clicking on the Change Color button next to the editing panel.
When a new text is added, an orange section appears on the timeline, similar to when a new property is added.
This orange section indicates the duration of the newly added text in the scene. To adjust the duration, you can hold and move one of the ends of the section across the timeline.
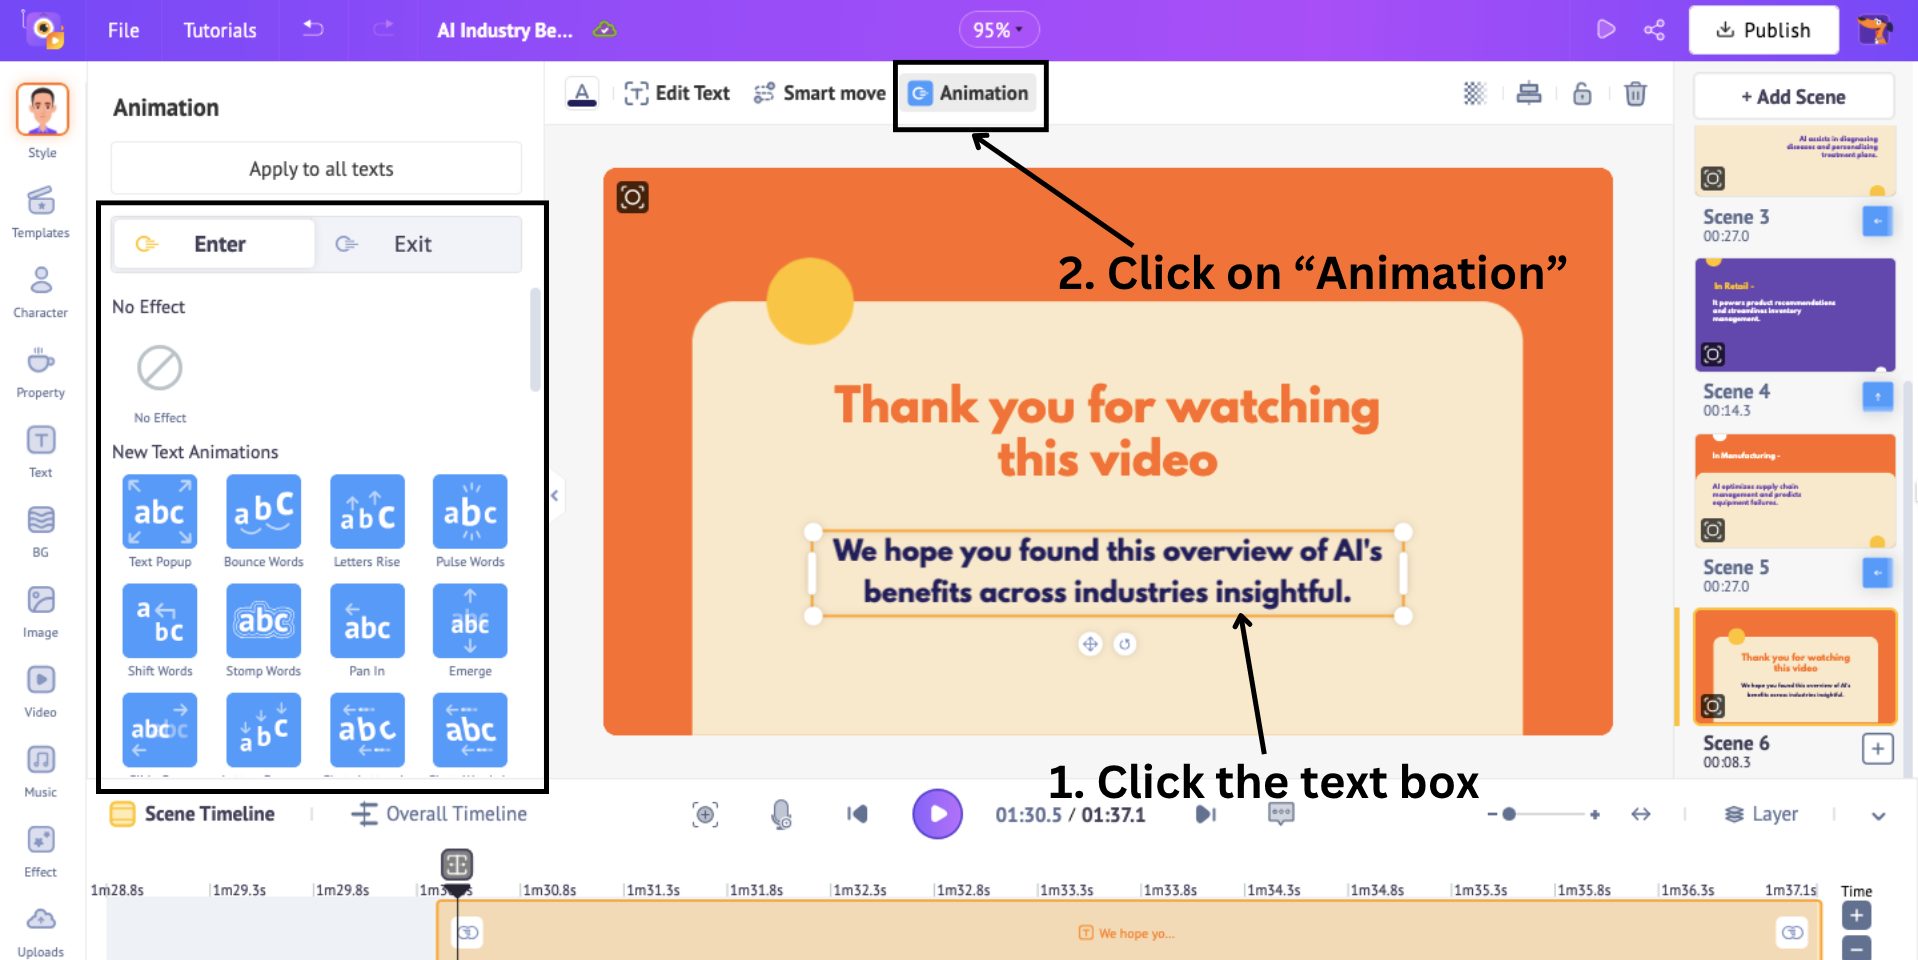
Similarly, you can even add animation effects to the text, just like how we did with property. Select the text box and click on Animation to add enter and exit effects.
4. Add Background & Images
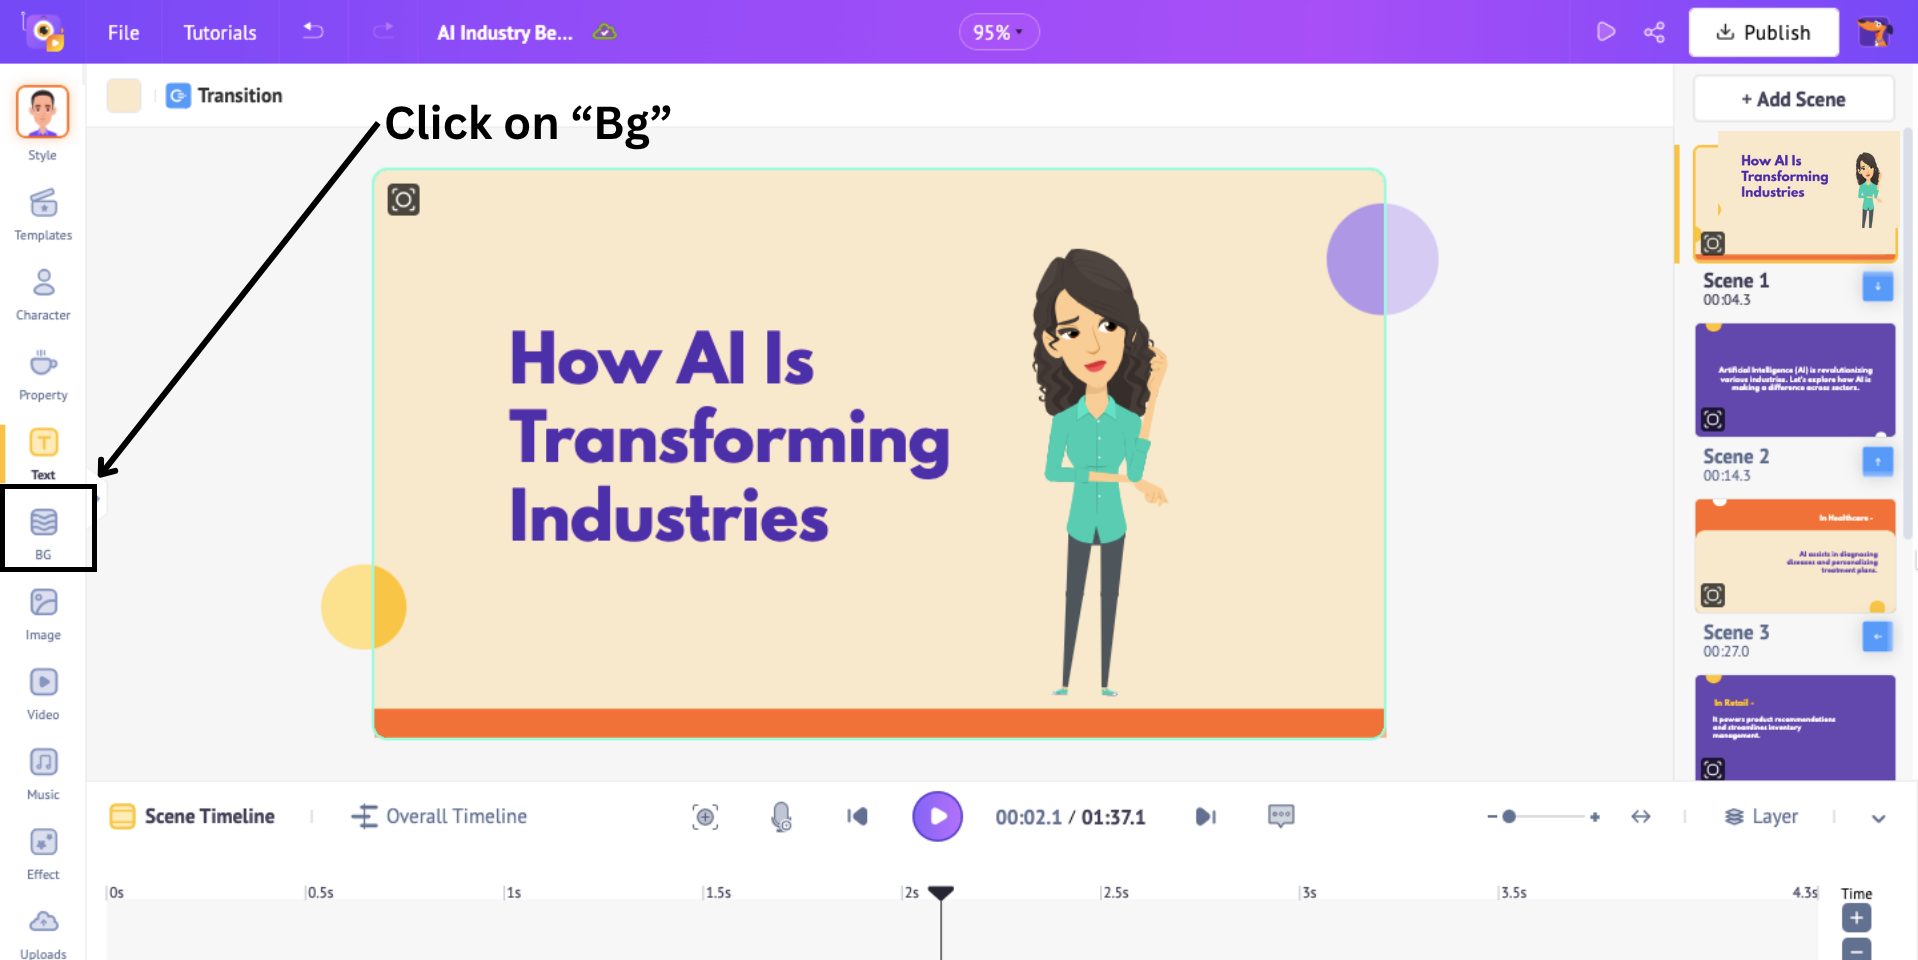
To add a background, select the Bg option.
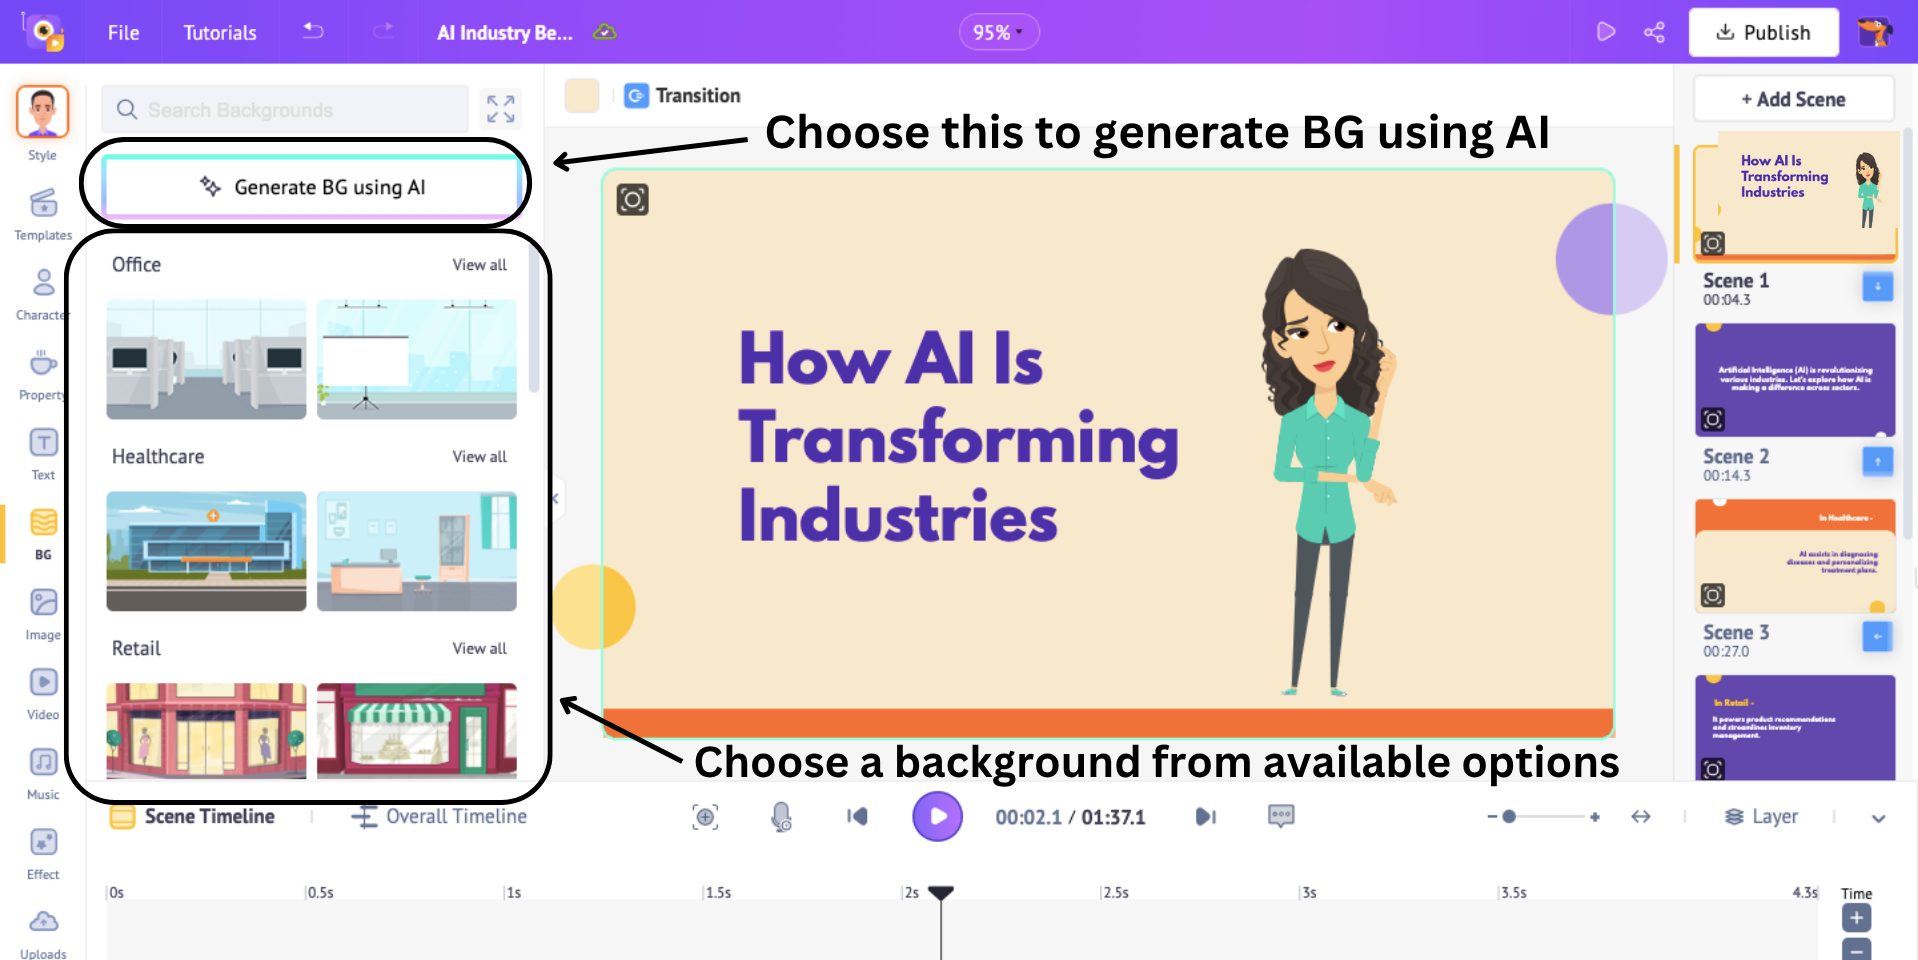
Here, you will see various background options. You can either choose from thousands of options or generate a background using AI.
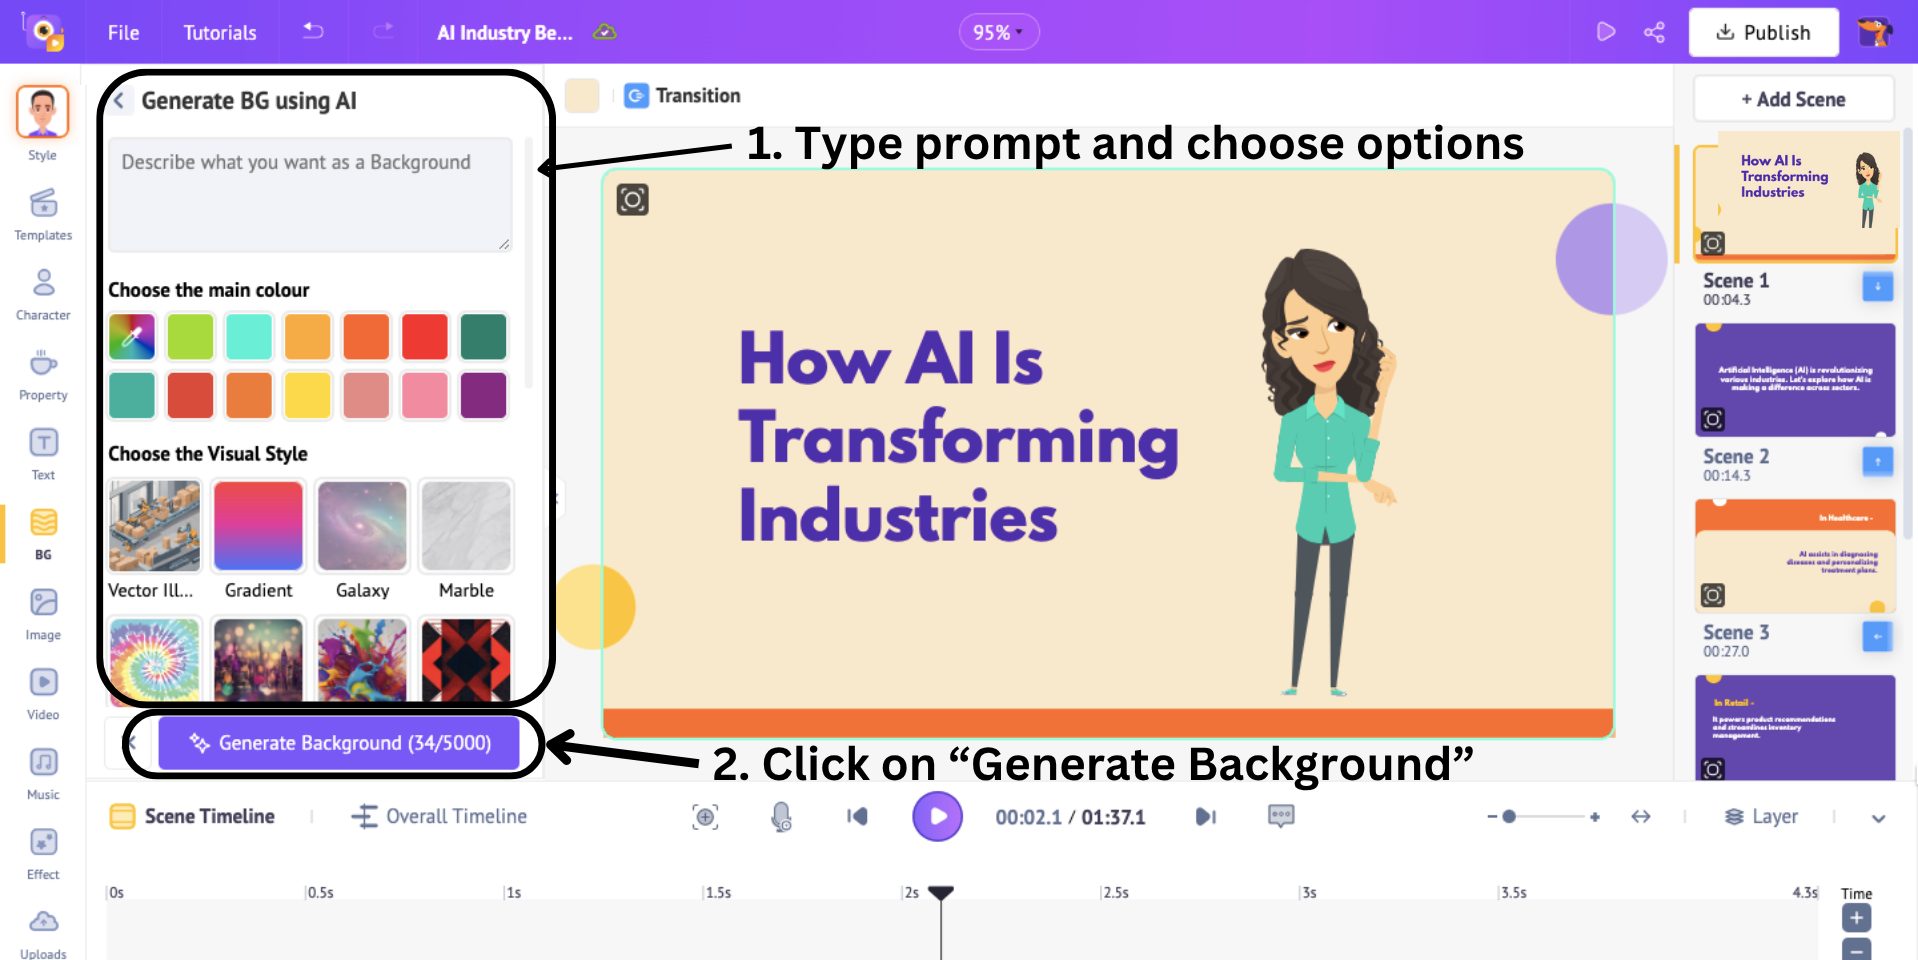
If you choose to get AI’s help, you will see this panel with many customizable options, such as prompt box, color, and visual style. Choose all the desired options and click on Generate Background.
I’m going to choose one from the Bg library. When you click on a background, it automatically gets added as the scene's background.
This is how you add background to a scene. Let’s see how to add images similarly.
To add images, click on the Image Library.
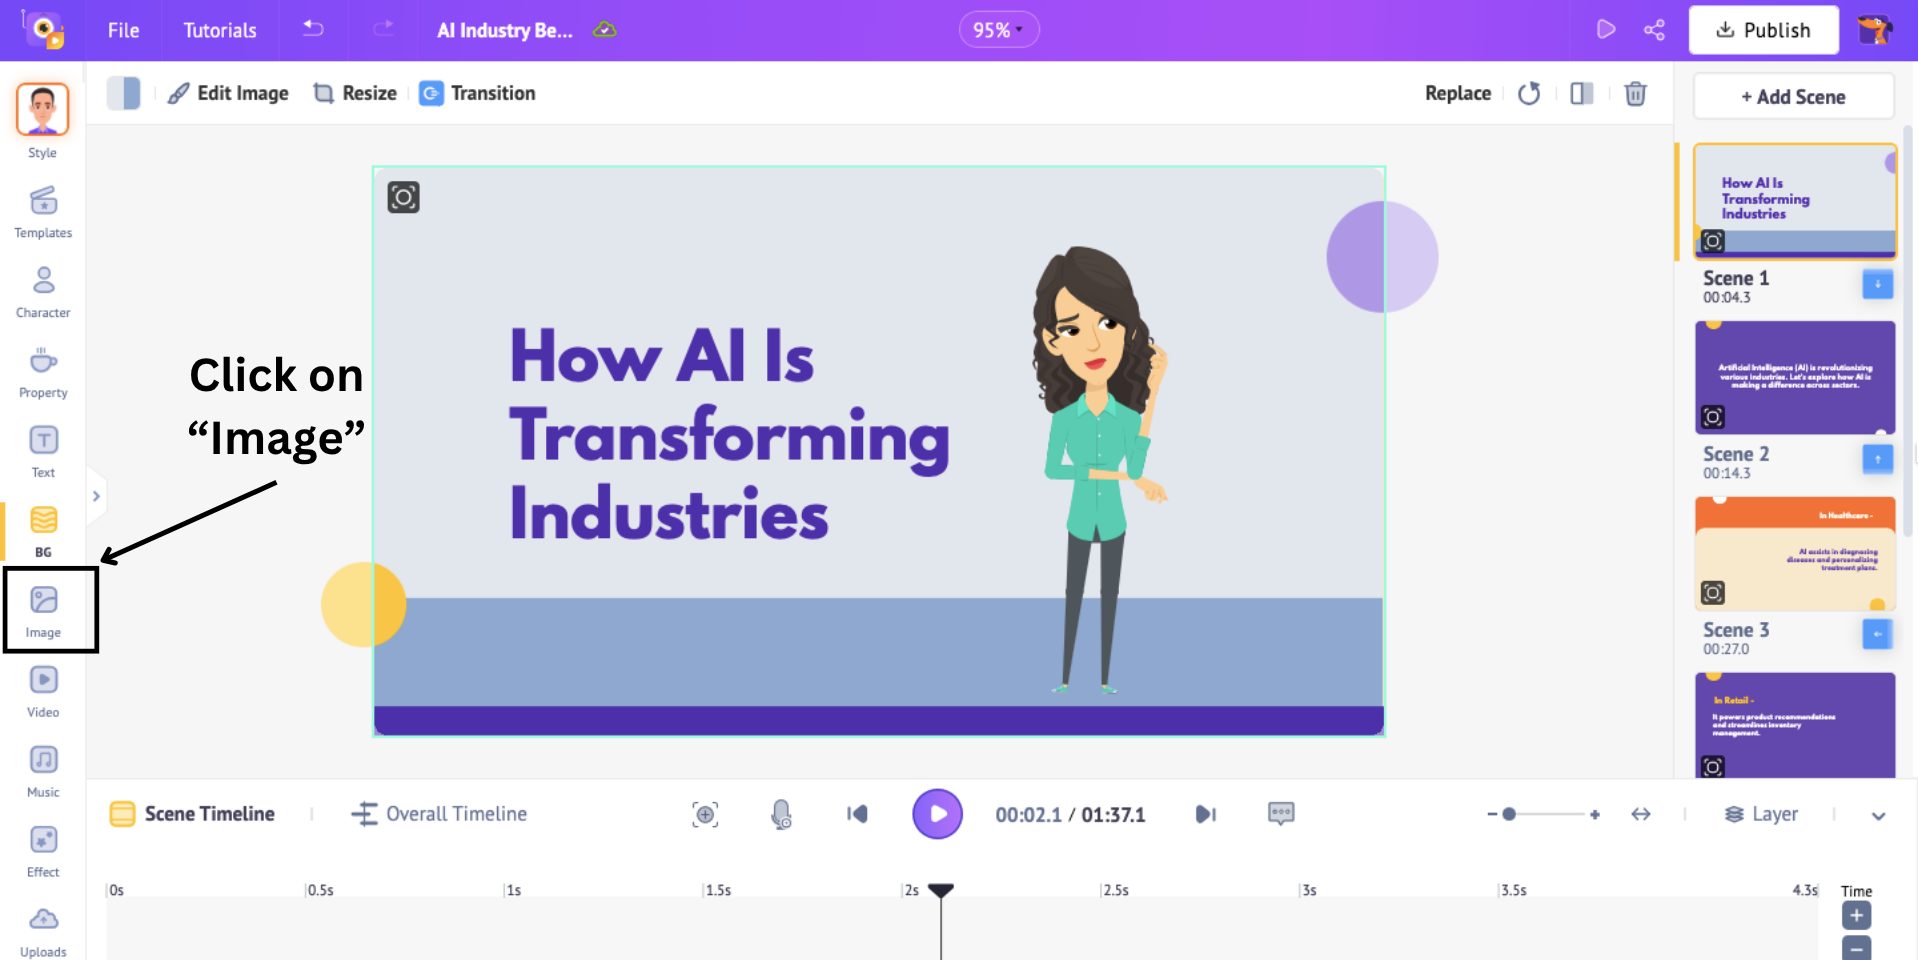
This opens a collection of millions of stock images. Select the image to add to the scene or generate images with AI. To do that, click on the Generate Images using the AI button.
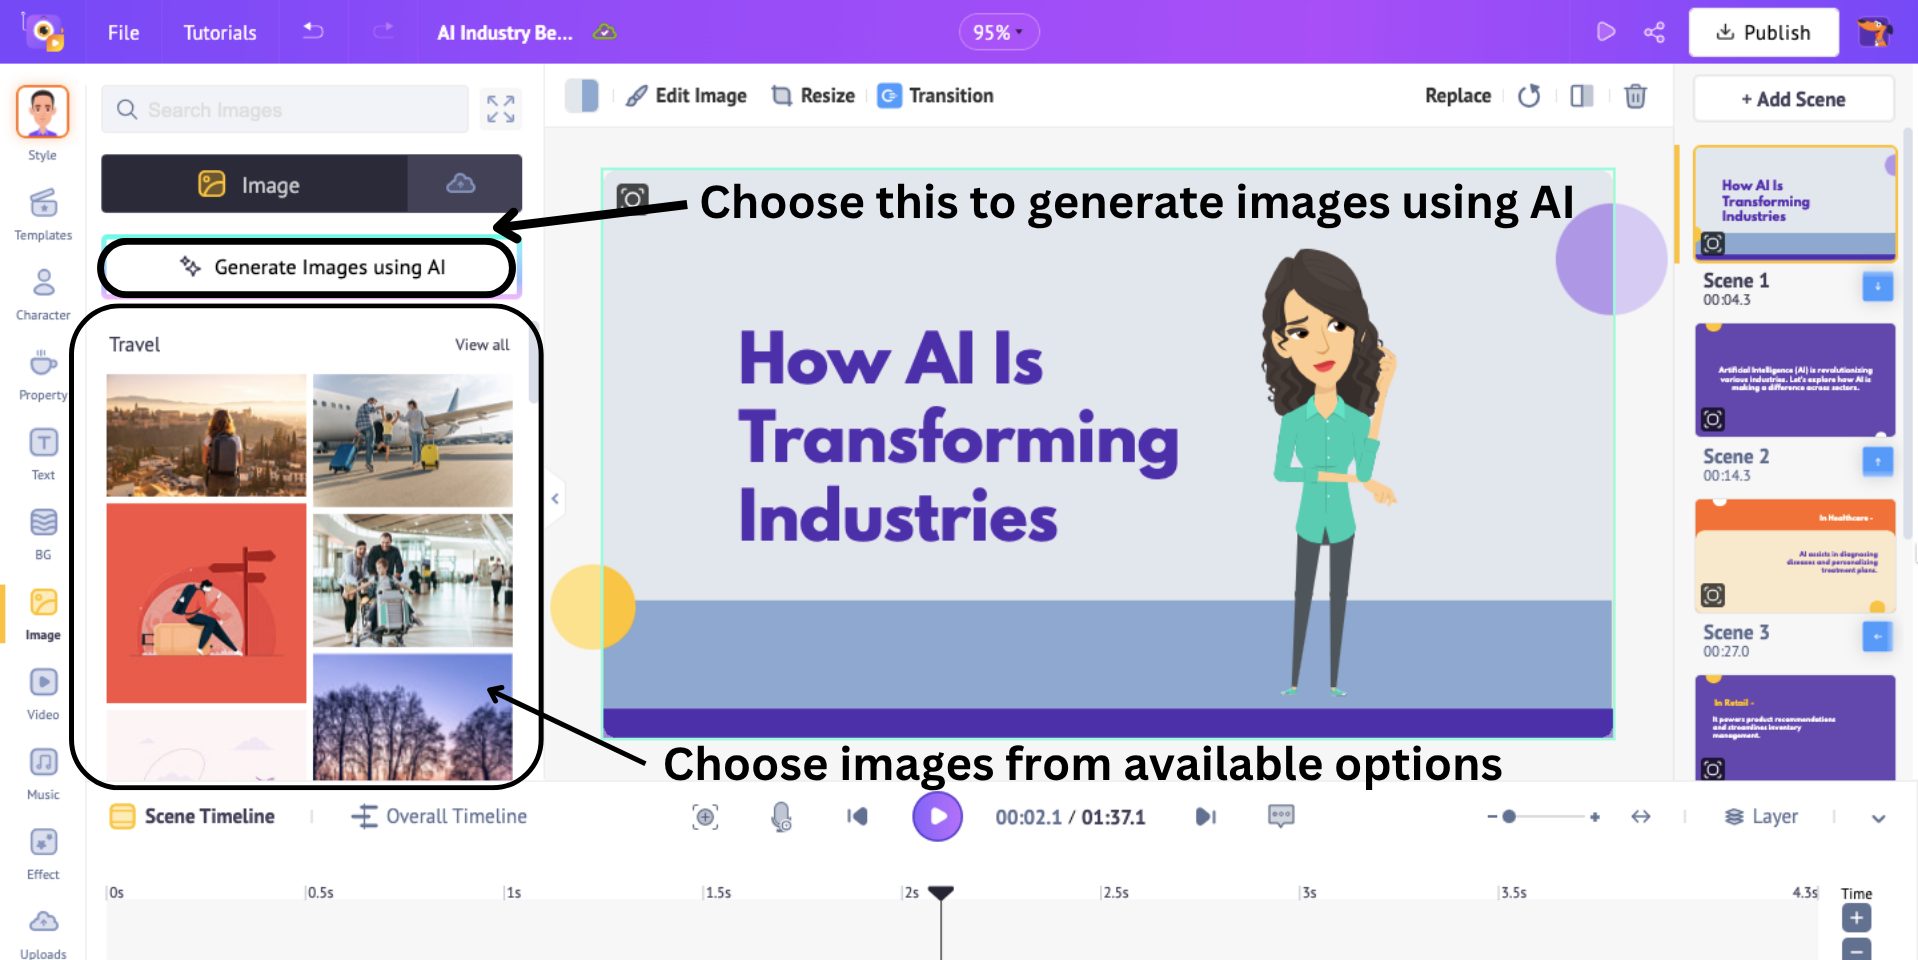
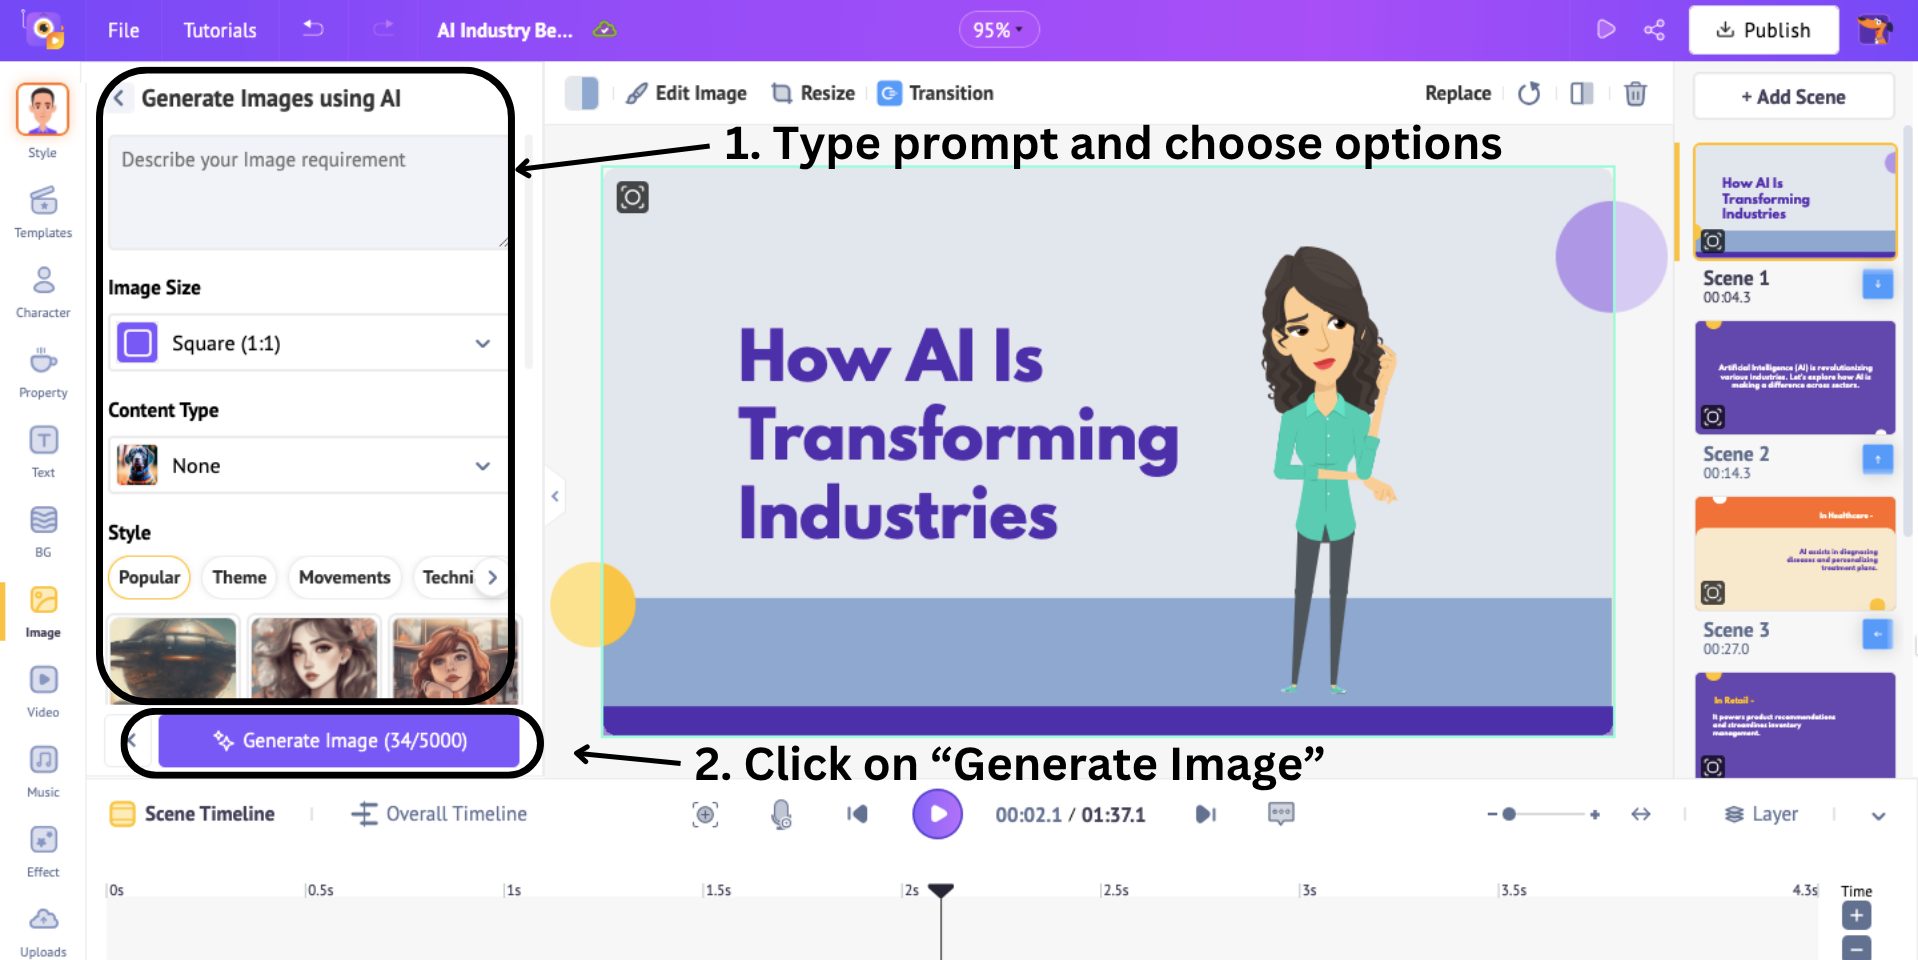
Here, type in a prompt and choose the image size, content type, and image style. Click on Generate Image to let AI do its work.
Now that we have seen how to add backgrounds and images, there is only one more edit left to do!
5. Add Voiceover
You might remember adding AI voiceover while generating the video in step 1. But since we added a text box, we need narration for it as well, right?
However, before adding a voiceover, the existing voiceover for the scene must be deleted to avoid audio overlap.
To delete a voiceover, click on the overall timeline and locate the relevant voiceover for each scene. Right-click on it and select Delete.
Okay, now let’s add a voiceover to the scene!
To do that, click on a character and select the Lip-sync option.
This will open the Lip-sync panel with three options - Record voice, Text to Speech, and Upload.
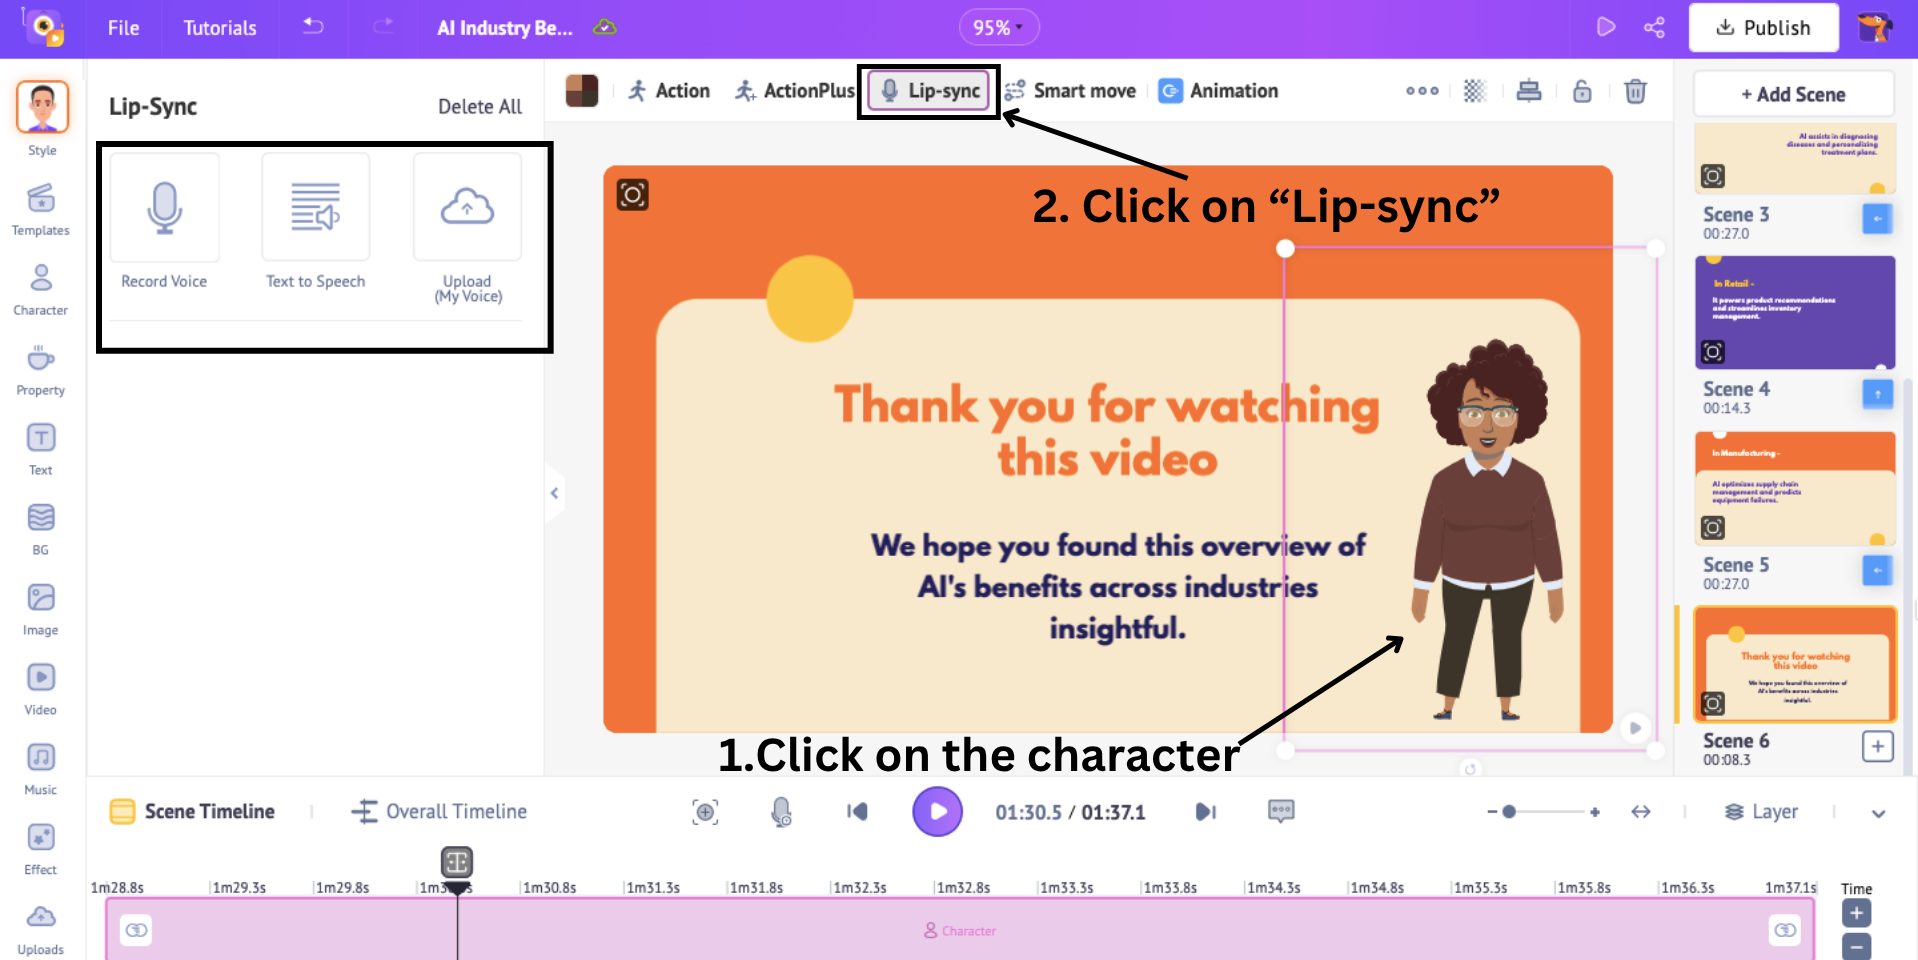
- Choose the Record Voice option if you want to record your voice and add it as a voiceover directly.
- Choose the Text to Speech option if you want to convert text into audio and add it as a voiceover.
- Choose the Upload option if you have an audio file that can be added as a voiceover.
Here, I’m going to use the Text to Speech option. Let me show you how to use this option.
When you click on this option, a pop-up window opens.
Type in your text and select the gender of the voice. Then, select the language from over 170+ options available. Next, select the voice from 2000+ options available.
After typing the content, click Generate Audio.
This will show you a preview of the AI voice. If you want to further tweak, click on Edit option or if you want to add it to the scene, click Add to Timeline.
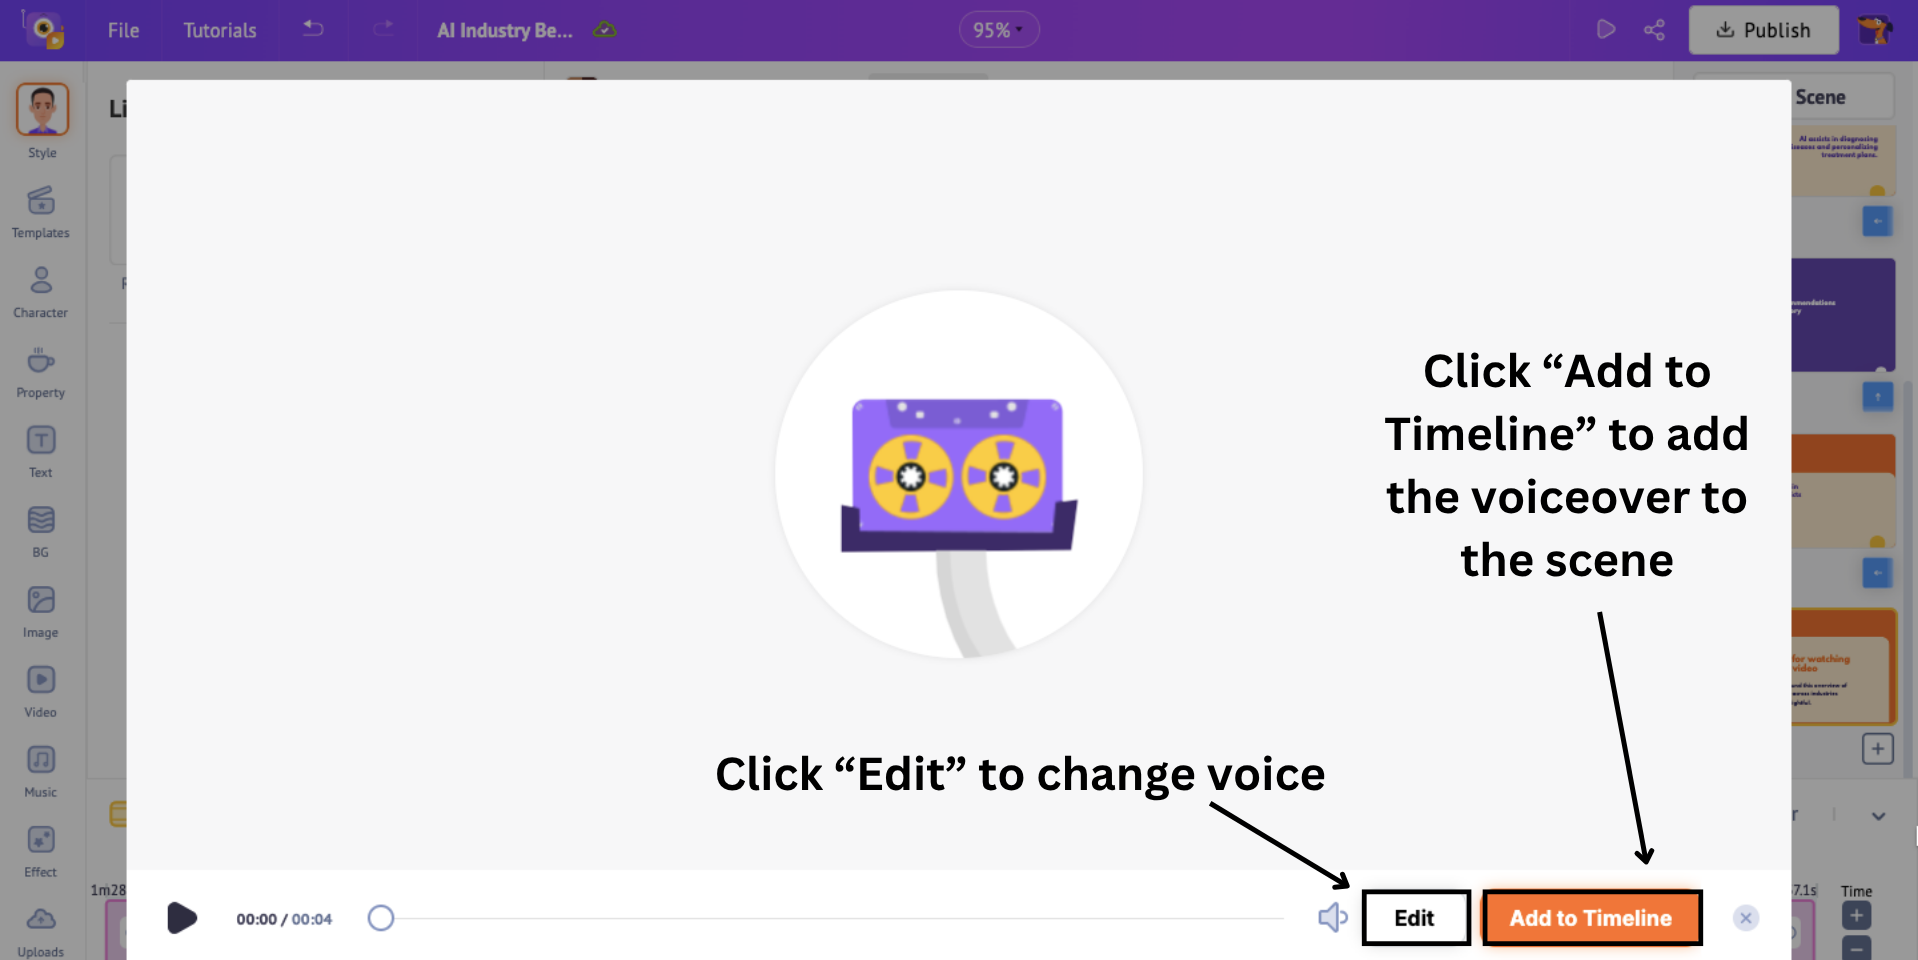
The voiceover will be added to the video seamlessly, with even the character lip-syncing to it!
Now that I have shown you different ways to edit the generated video, let’s take a look at the final and most important step!
Step 4: Download the video
Before downloading the edited video, click on Preview to see how the video looks after all the editing.
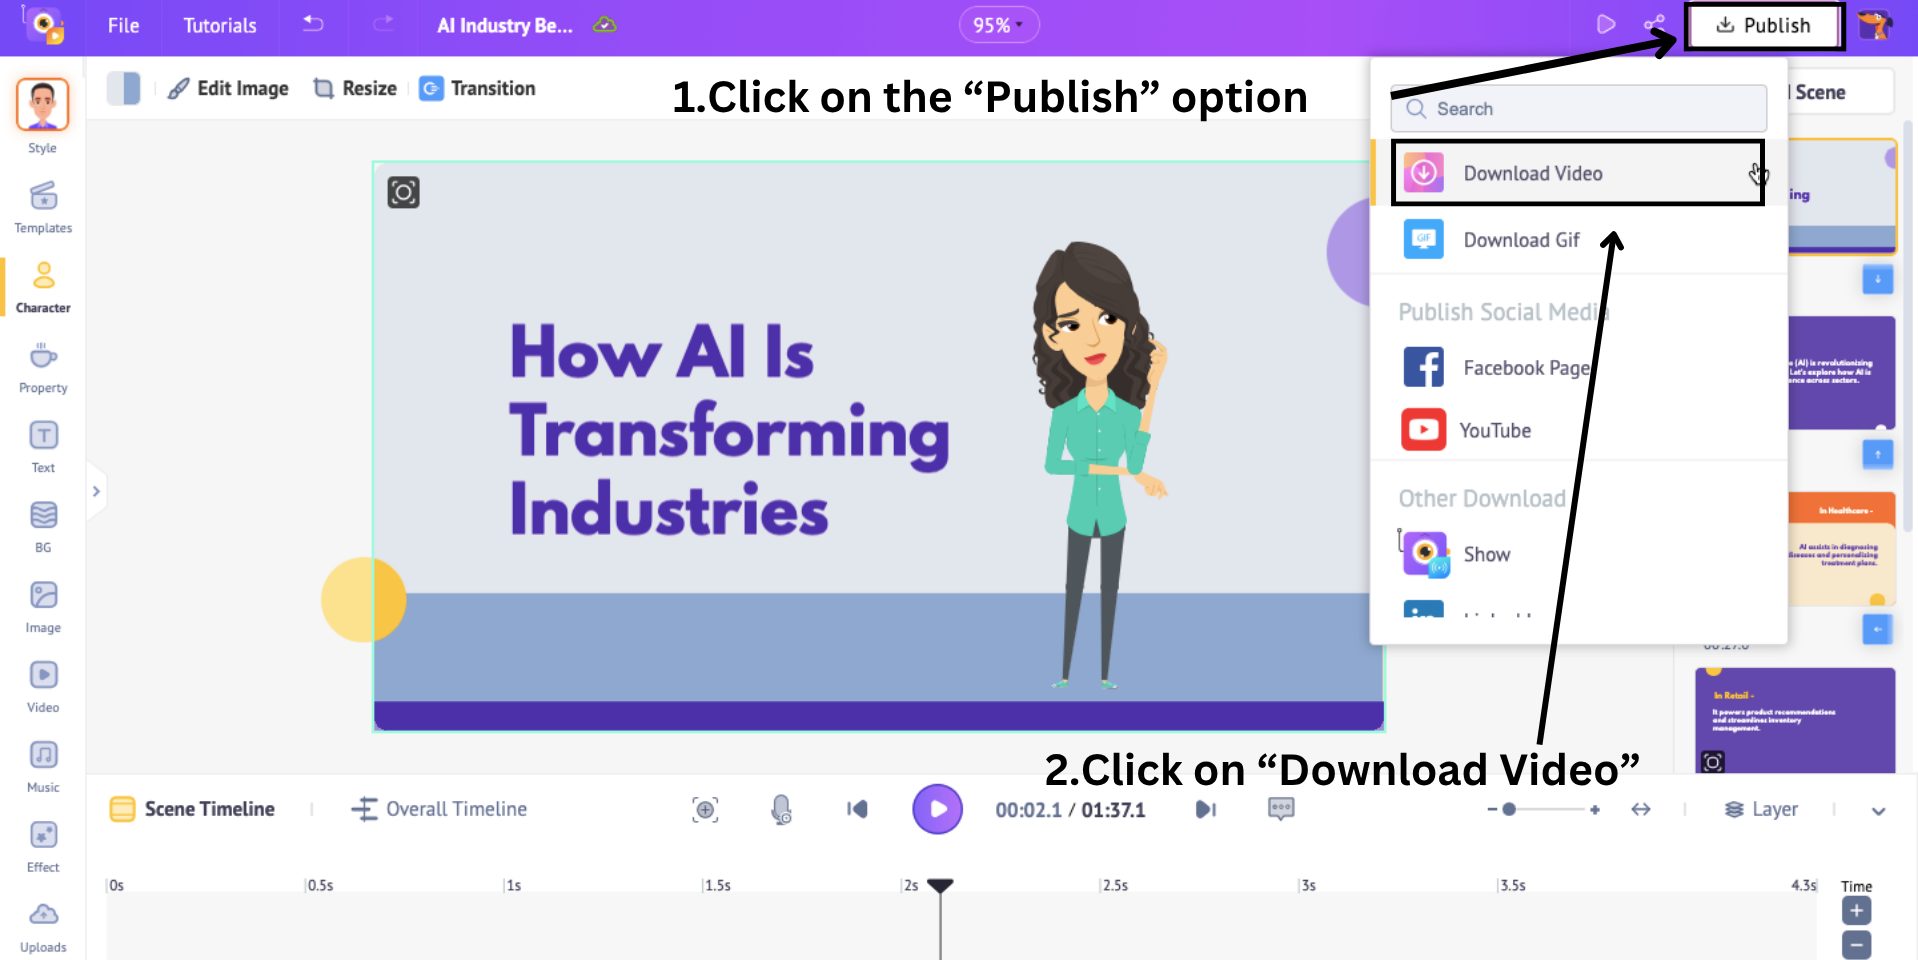
Now, to download the video, click on Publish > Download Video.
Then click on Download.
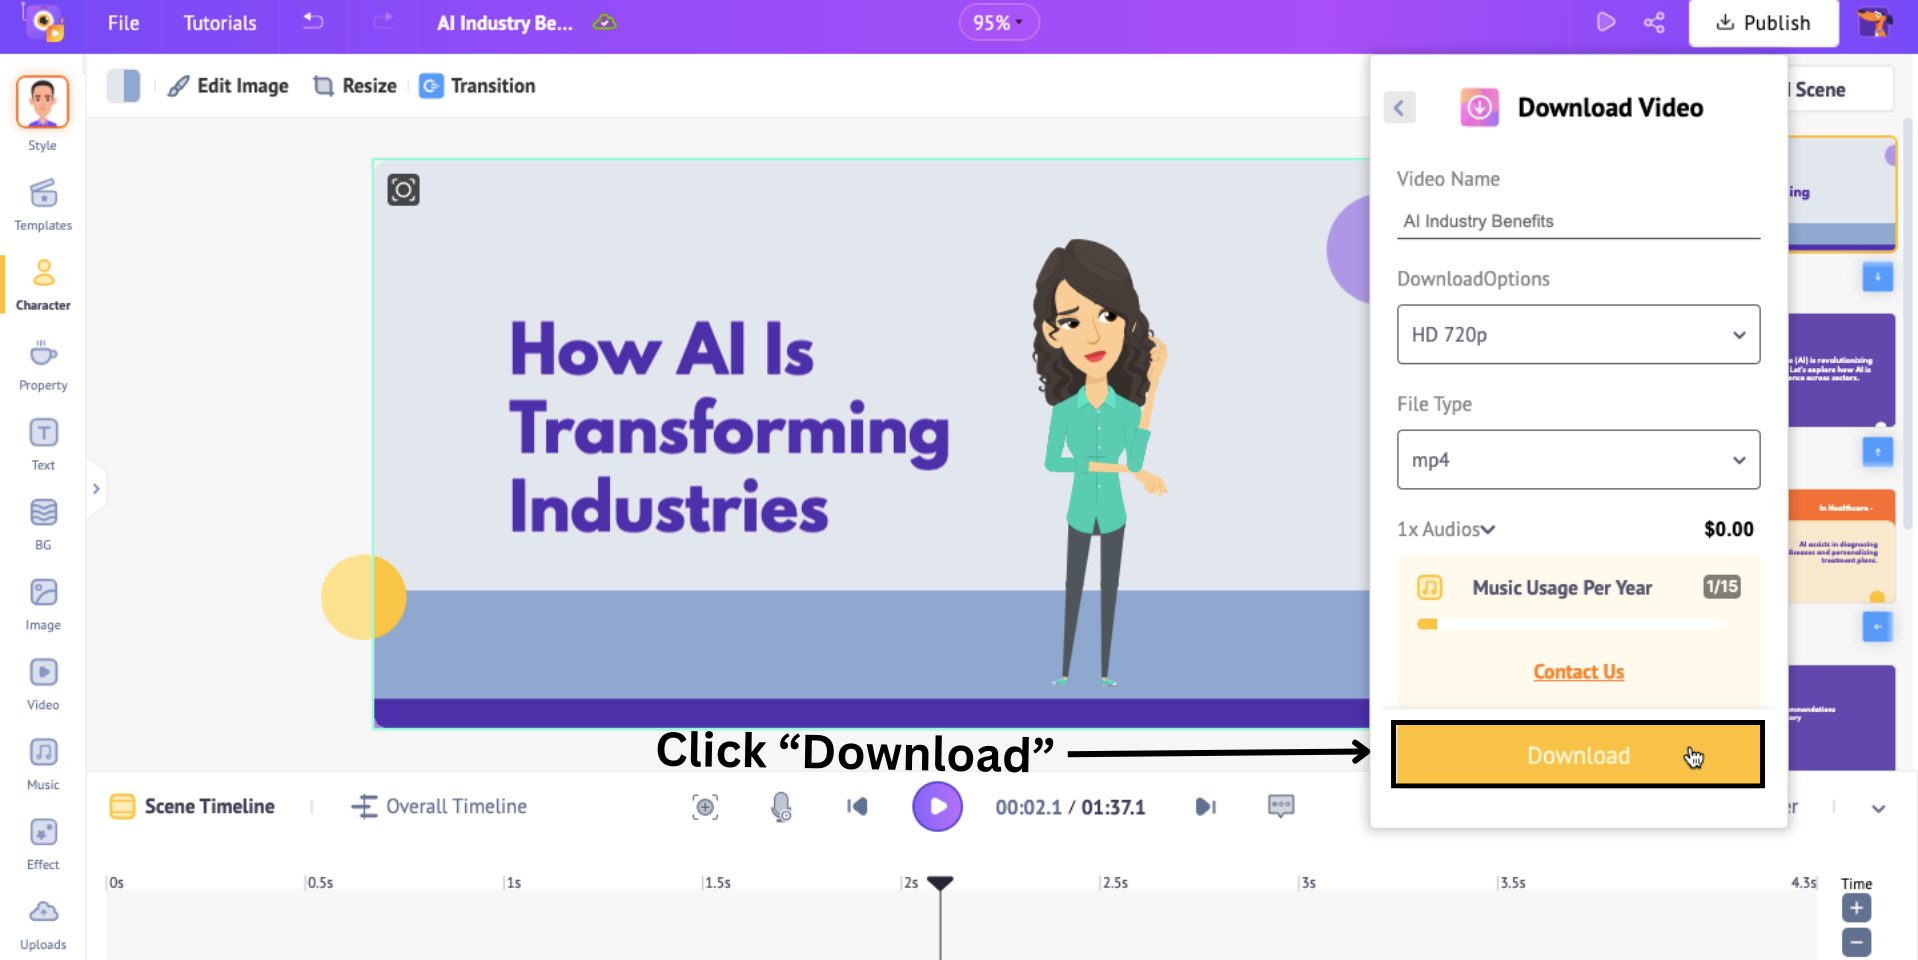
The video will start to download, and you can find it on the exports page.
***
I’m sure you found this guide on how to make animated videos with AI quick and simple!
By embracing the power of AI animation, you can create high-quality animated videos that resonate with your audience.
So, create your first animated video with Animaker AI!