How to edit an SRT File 101 [4 Different Ways]

Aksara NKR - June 7, 2023 - Leave your thoughts. 5 min read
SRT File, better known as a SubRip file, is a plain text subtitle format used to add subtitles to a video. These files contain the time code and the text for the subtitles.
Undoubtedly, SRT files are one of the most popular formats of subtitle files and are supported by most players across different devices.
The main highlight of the “SRT Subtitle” format is that it is open source, and anyone can create or edit it easily.
You can learn more about how to create subtitles here: How to create subtitles [The Easy Way]
Overall, SRT files are pretty simple and one of the most straightforward subtitle formats to be added to videos. These files are supported by most of the video players and can be created using any text editor, and are even easier to edit.
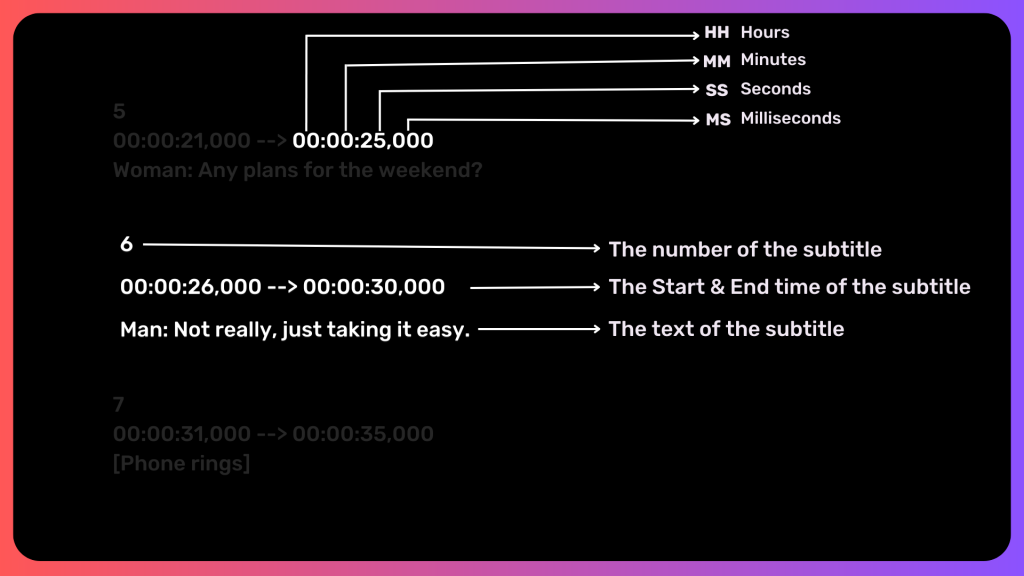
Before we dive into editing the SRT files, we have to ensure that the format of the SRT subtitle has to be maintained throughout the file. Here’s the proper format of the SRT subtitle file. In each line, an SRT file contains the following information -
In this article, we will be showing you how to edit an SRT file in four different ways -
- How to edit an SRT file using Animaker Subtitles
- How to edit an SRT file in Windows
- How to edit an SRT file on Mac
- How to edit an SRT file on YouTube
Without further delay, let’s jump to the easiest way to edit an SRT file!
1. How to edit an SRT file using Animaker Subtitles?
While all of these methods require manual work, be it manually opening the subtitles and making the changes or going to YouTube to customize your video’s subtitle, it all takes some effort.
But this step will take you to another level where you can save time and automatically edit & create beautiful subtitles for your videos. Wonder how? Follow the below steps!
1. Signup or log in for a free account on Animaker Subtitles, the world's fastest AI-Powered Subtitle Generator.

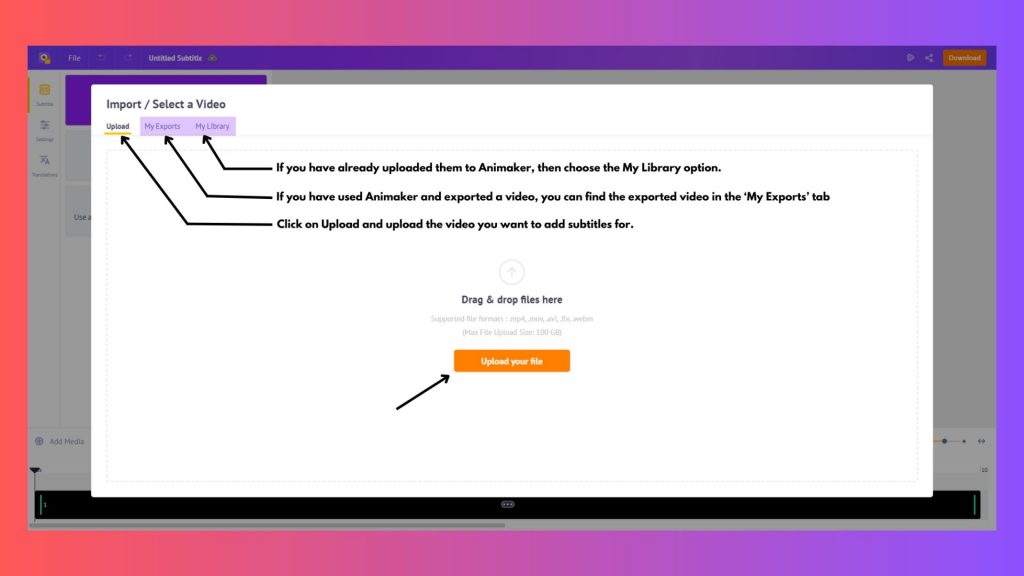
2. Upload the video you want to add/edit subtitles for.
3. If you want to add subtitles, click on the ‘Auto Subtitles’ option to add the subtitles automatically.
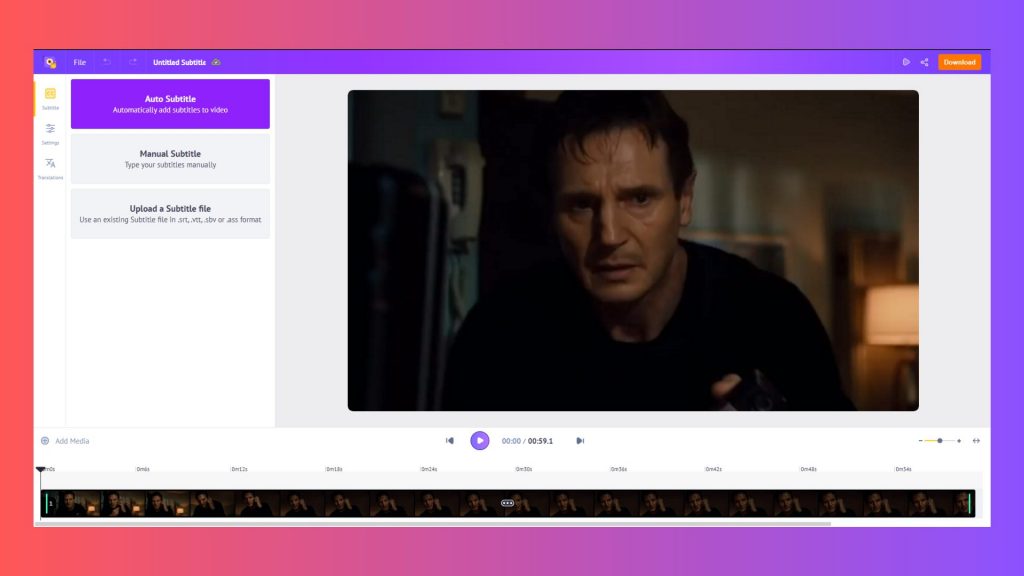
4. Alternatively, if you want to add the subtitles manually, use the option ‘Manual Subtitle’ to type the subtitles manually
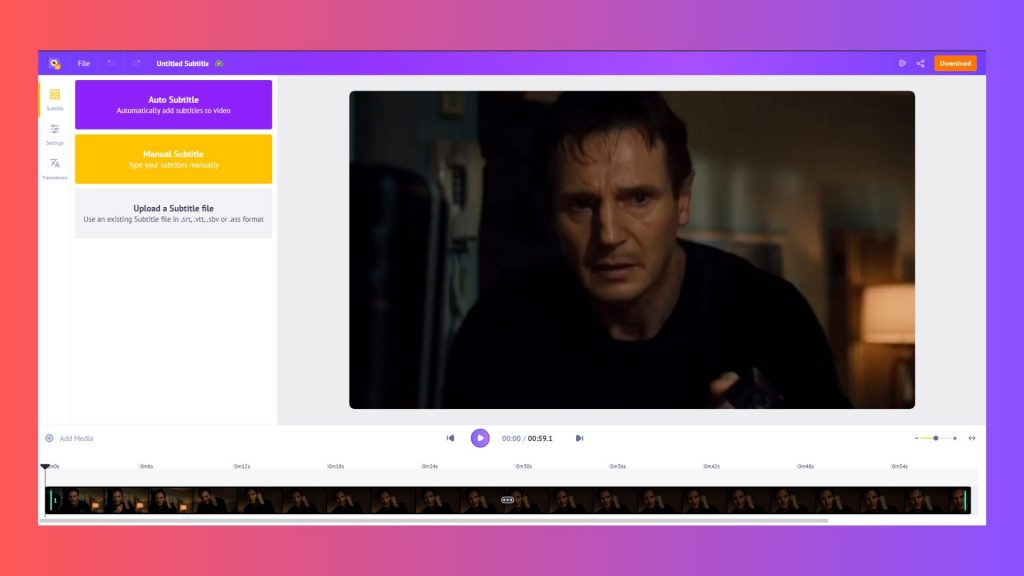
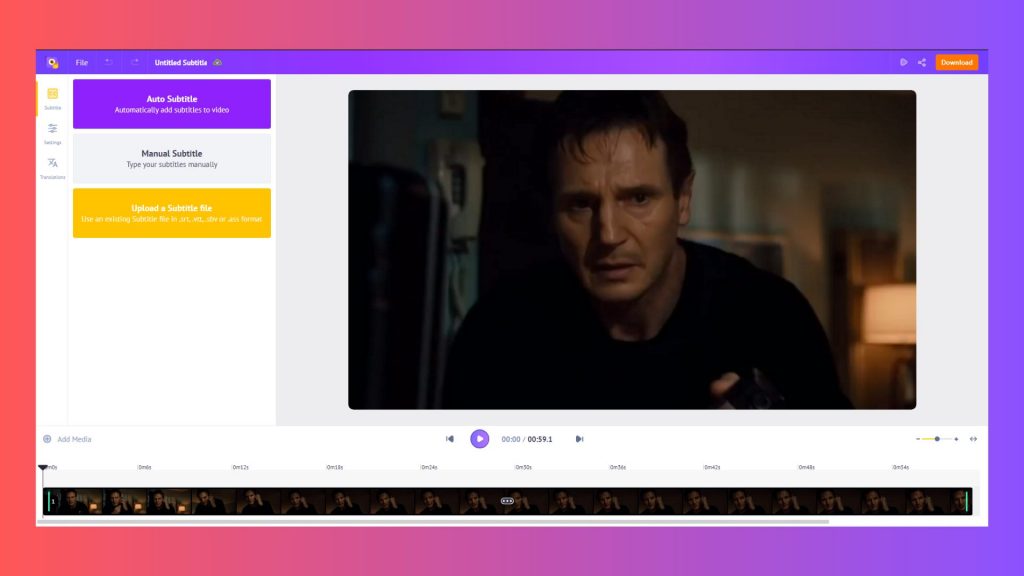
5. If you have an SRT file that you want to edit, then you can use the ‘Upload a subtitle file’ option and upload the subtitle file from your computer.
6. Once you have added the subtitles, you can go through and make necessary changes like editing the subtitles, merging the subtitles, changing the duration of the subtitles, and more.

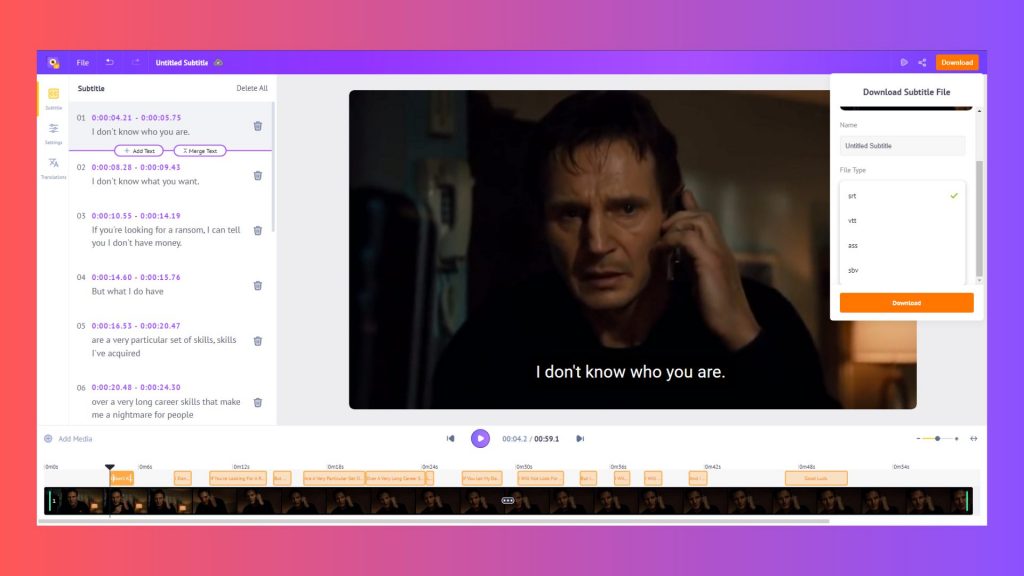
7. Once done, you can download the subtitles by clicking Download > Download Subtitle file.
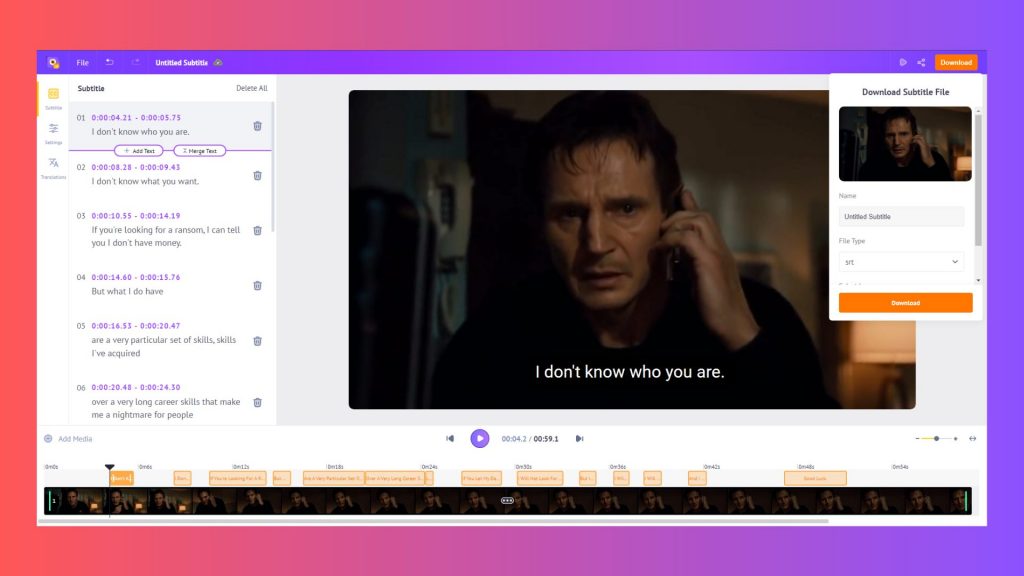
PS: Apart from downloading in.SRT format, Animaker subtitles allow you to download the subtitle file in different formats like - .ASS, .VTT, and . SBV.
Now, let’s see how to edit an SRT file in Windows.
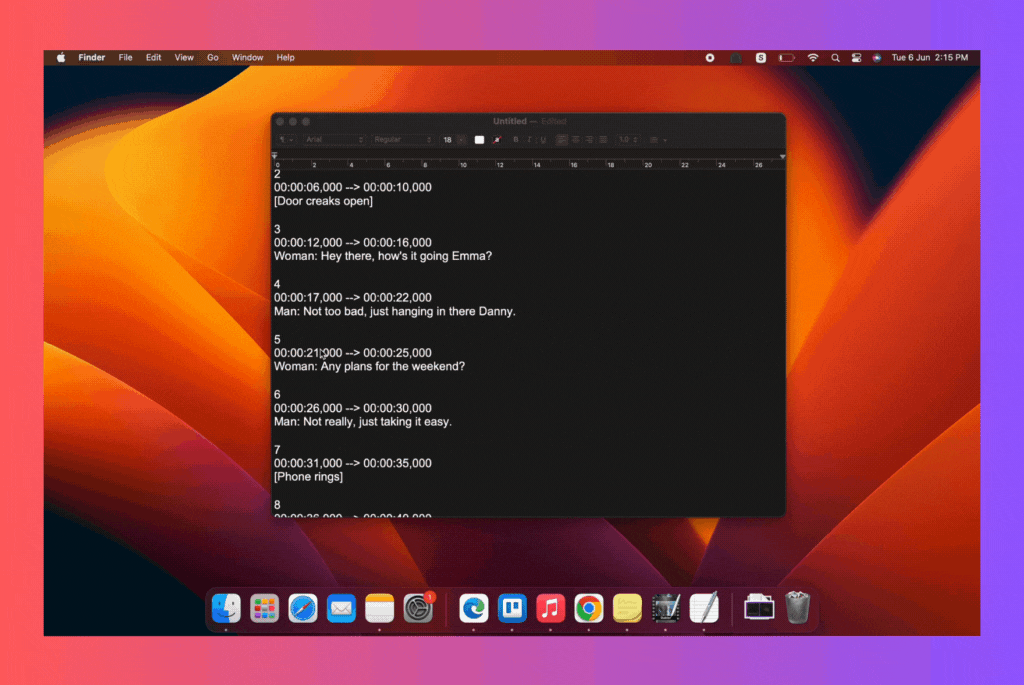
2. How to edit an SRT file in Windows?
If you use a Windows computer, the most straightforward pre-installed application, ‘Notepad,’ is enough to edit SRT files. To edit an SRT file in Notepad, follow the below steps -
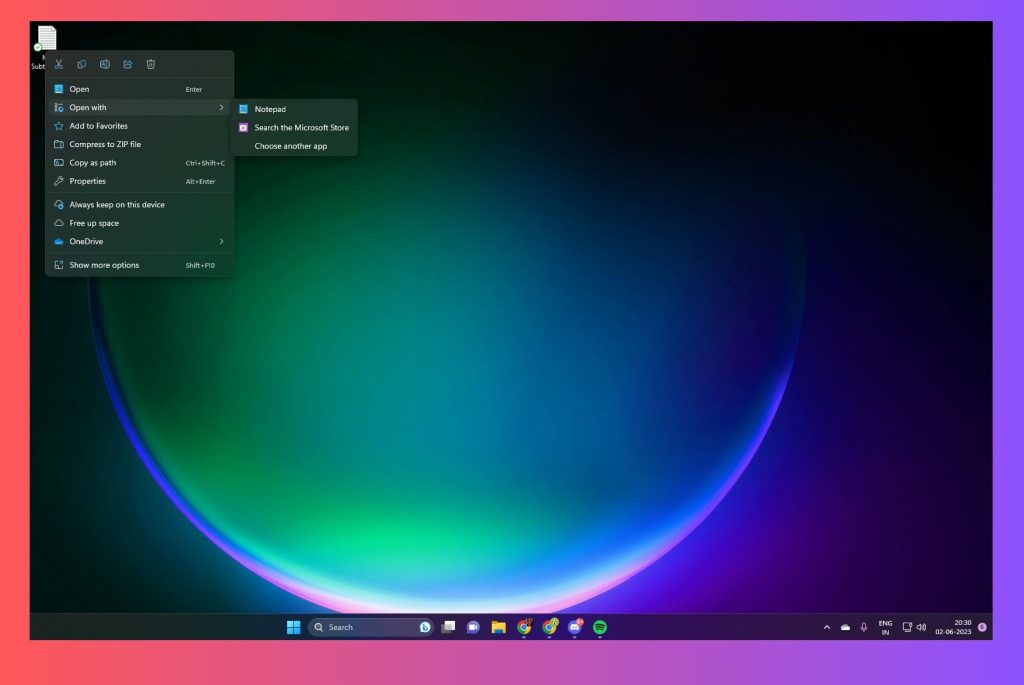
1. Right-click on your .SRT file and select “Open With,” and In the list of applications, select “Notepad.”
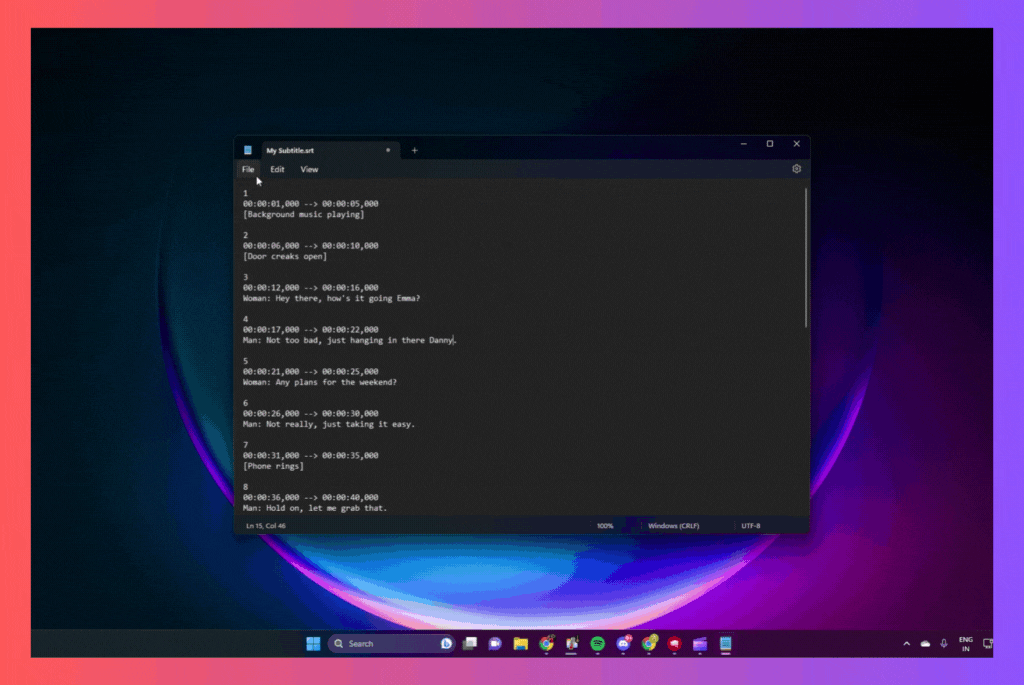
2. Make the desired changes and ensure the format isn’t changed.
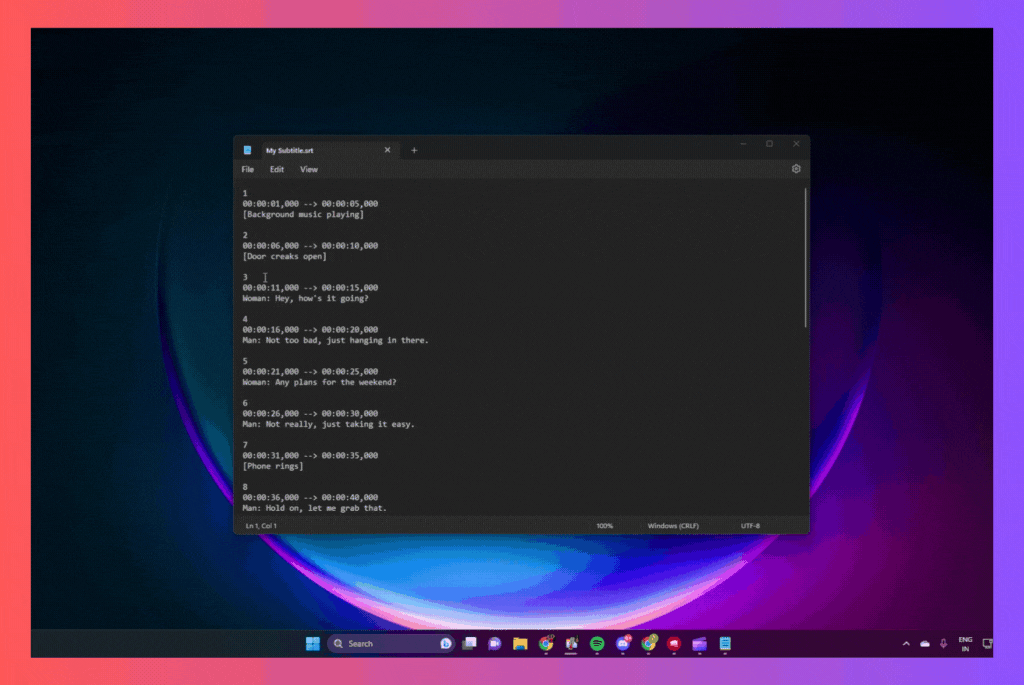
3. Save the changes by pressing Crtl + S or File > Save.
Next, let’s see how to edit an SRT file on Mac. The steps are pretty much the same, but here’s the step-by-step guide.
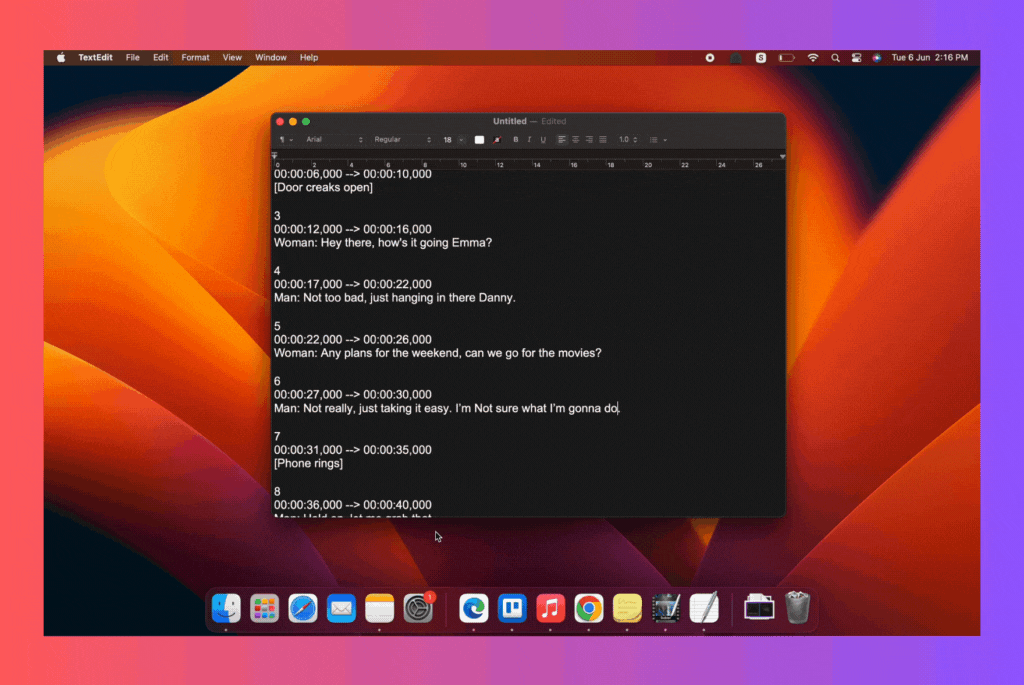
3. How to edit an SRT file on Mac?
Just like how you edited the subtitles in Windows, the pre-installed application “TextEdit” is sufficient to customize subtitles on Mac. Here are the steps:
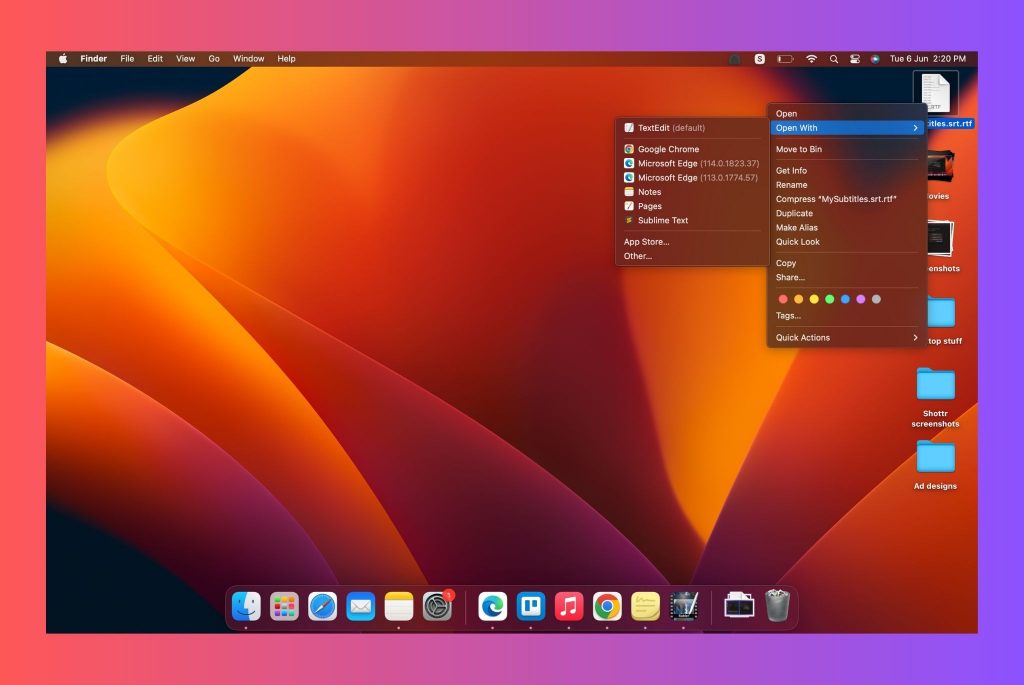
1. Right-click on the SRT Subtitle file and Open the .SRT file using “TextEdit.”
2. Make the desired changes to the SRT Subtitle file.
3. Save the SRT file.
Wasn’t that easy?
Now, if you already have the video uploaded on YouTube, you can add subtitles to it immediately without re-uploading it. Let’s see how to do it.
4. How to edit an SRT file on YouTube?
If you didn’t know, the CC or Subtitles you see on YouTube are mostly automatically generated and often have many errors. It’s best to edit the subtitles to give the best experience to your audience. Follow the below steps to edit SRT subtitles on YouTube -
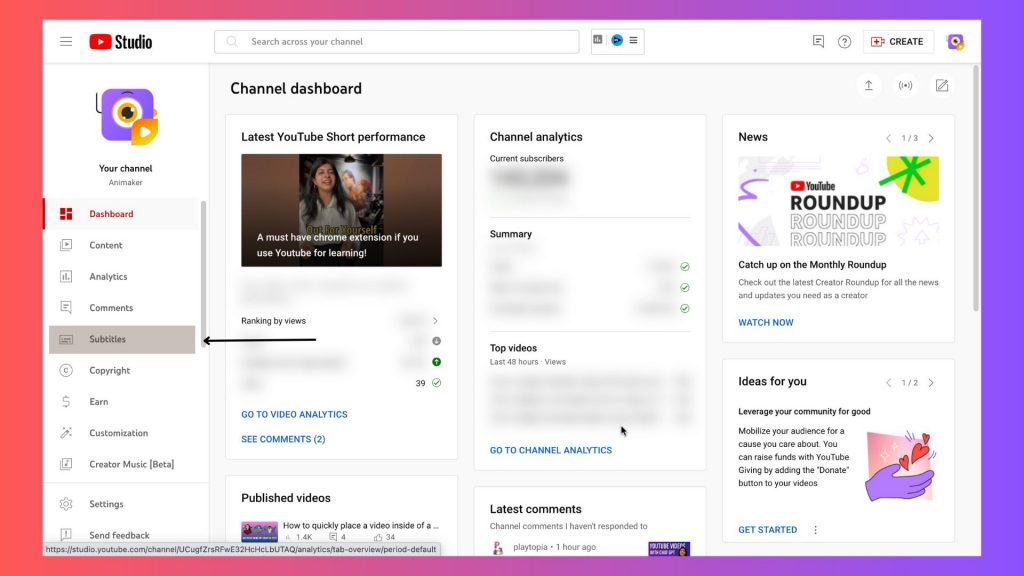
1. Sign in to YouTube and head over to YouTube Studio.
2. From the left menu, select Subtitles.
3. Select the video you want to edit the subtitles.
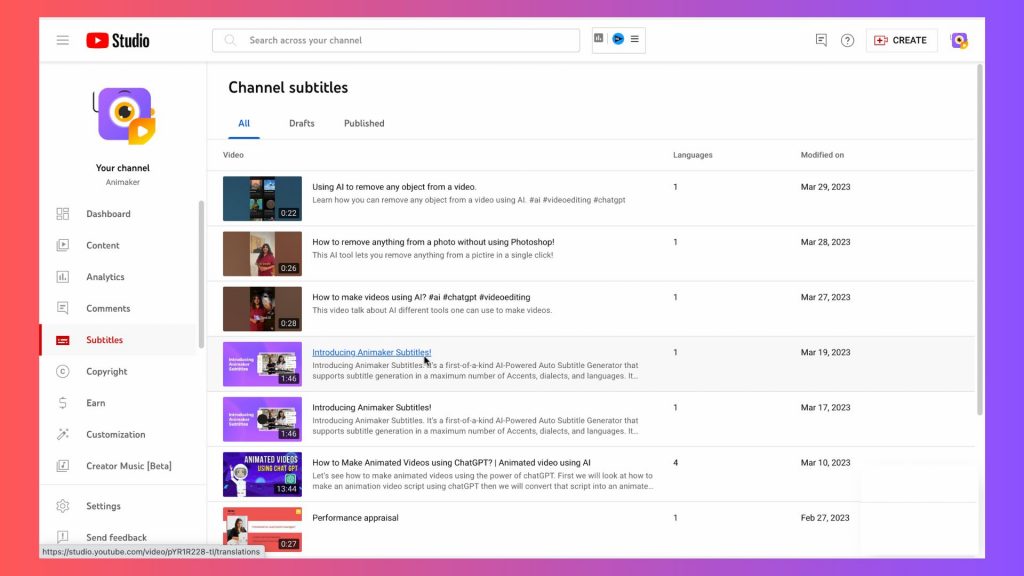
4. By default, there will be an automatically generated subtitle. Click on Duplicate and Edit to edit the automatically generated subtitles.
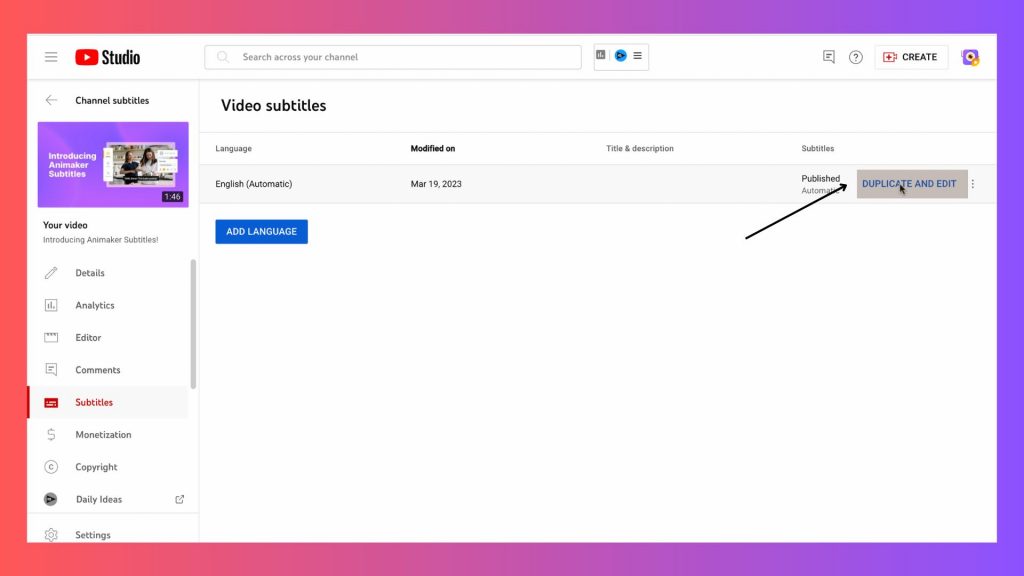
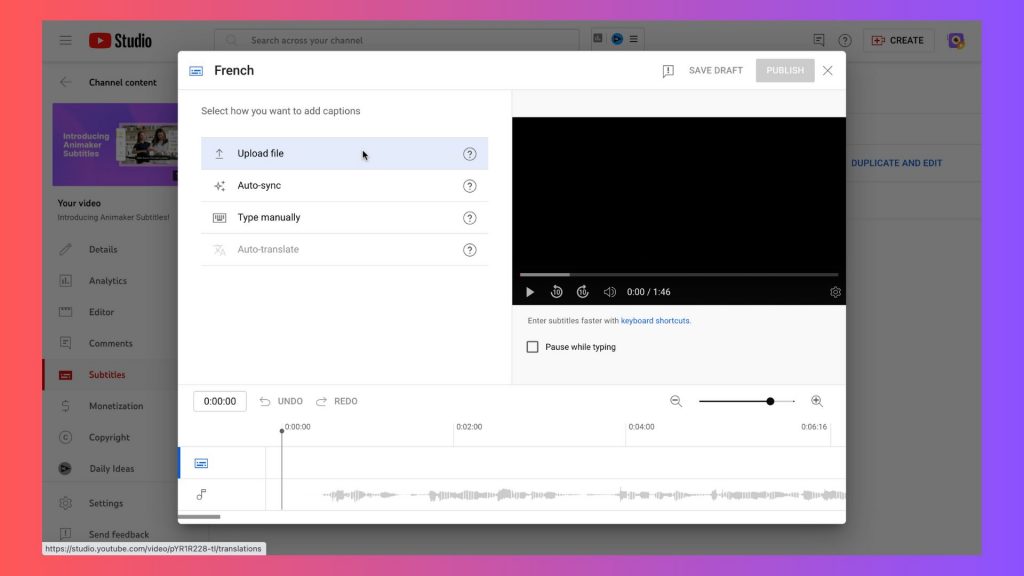
Otherwise, you can create a new subtitle file by clicking on “Add Language,” selecting the language, …
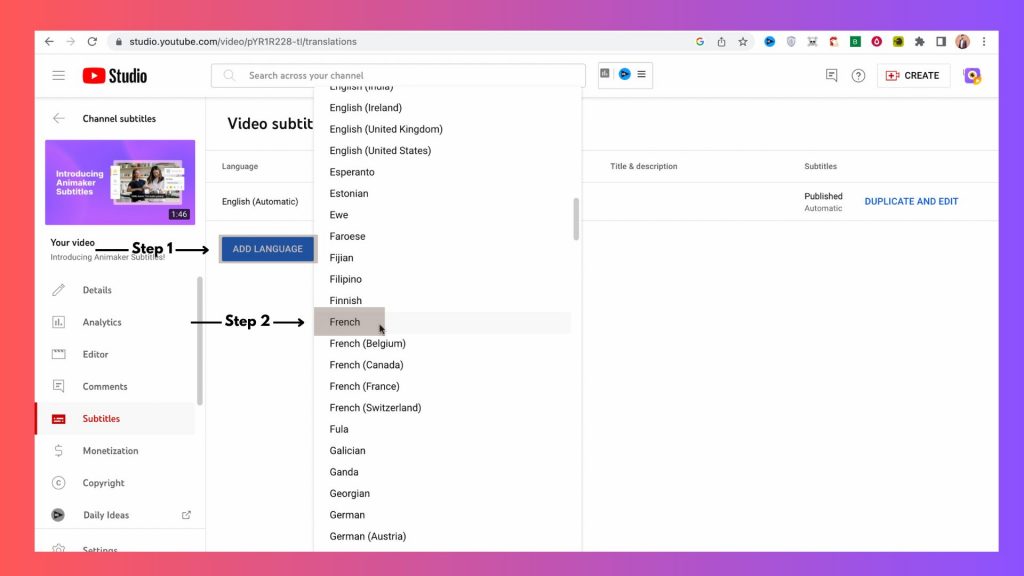
and manually typing the subtitles.
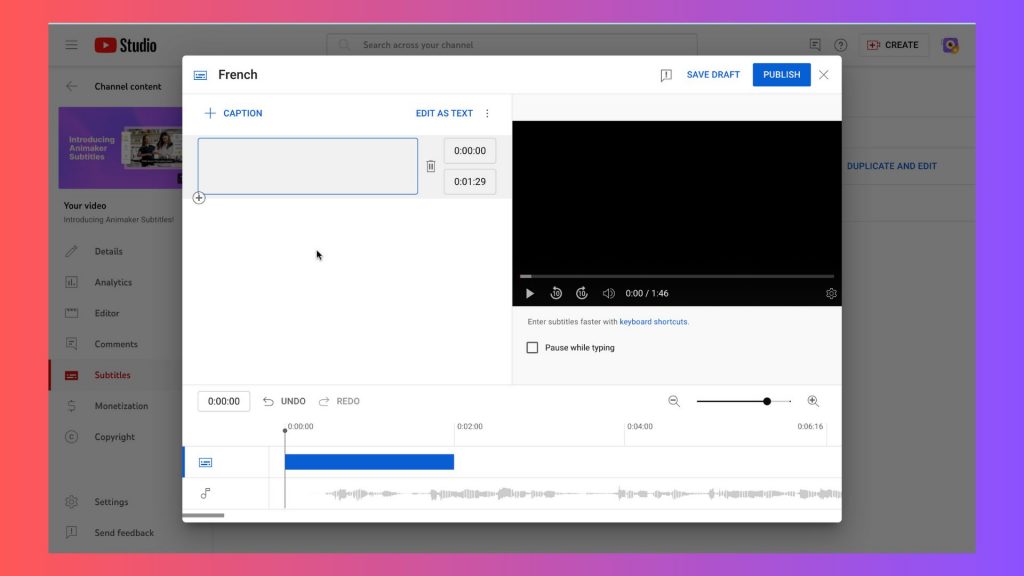
5. To edit an existing SRT file, use the Upload File feature. Upon uploading, you can easily edit the SRT subtitles file on YouTube.
Also read: How to Subtitle YouTube videos [Step-by-Step Guide]
As you can see from the above steps, editing SRT files are pretty straightforward. Moreover, If you want to learn more about creating, editing, and more, you can. In that case, check out other articles we published:
- How to create an SRT File [The Easy Way]
- How to add subtitles to MP4 Videos [Both Online and Offline!]
- Closed captions vs. Subtitles: Do you know the difference?
- 10 Best Fonts For Subtitles To Make Your Videos Stand Out
- How to make subtitles – The Ultimate Guide
- How to add Captions to Reels to Hook your audience!
We hope this article helped you to learn more about SRT Subtitles files and how to edit them quickly & effortlessly. If you have any questions about this article, please drop them down in the comments below.